

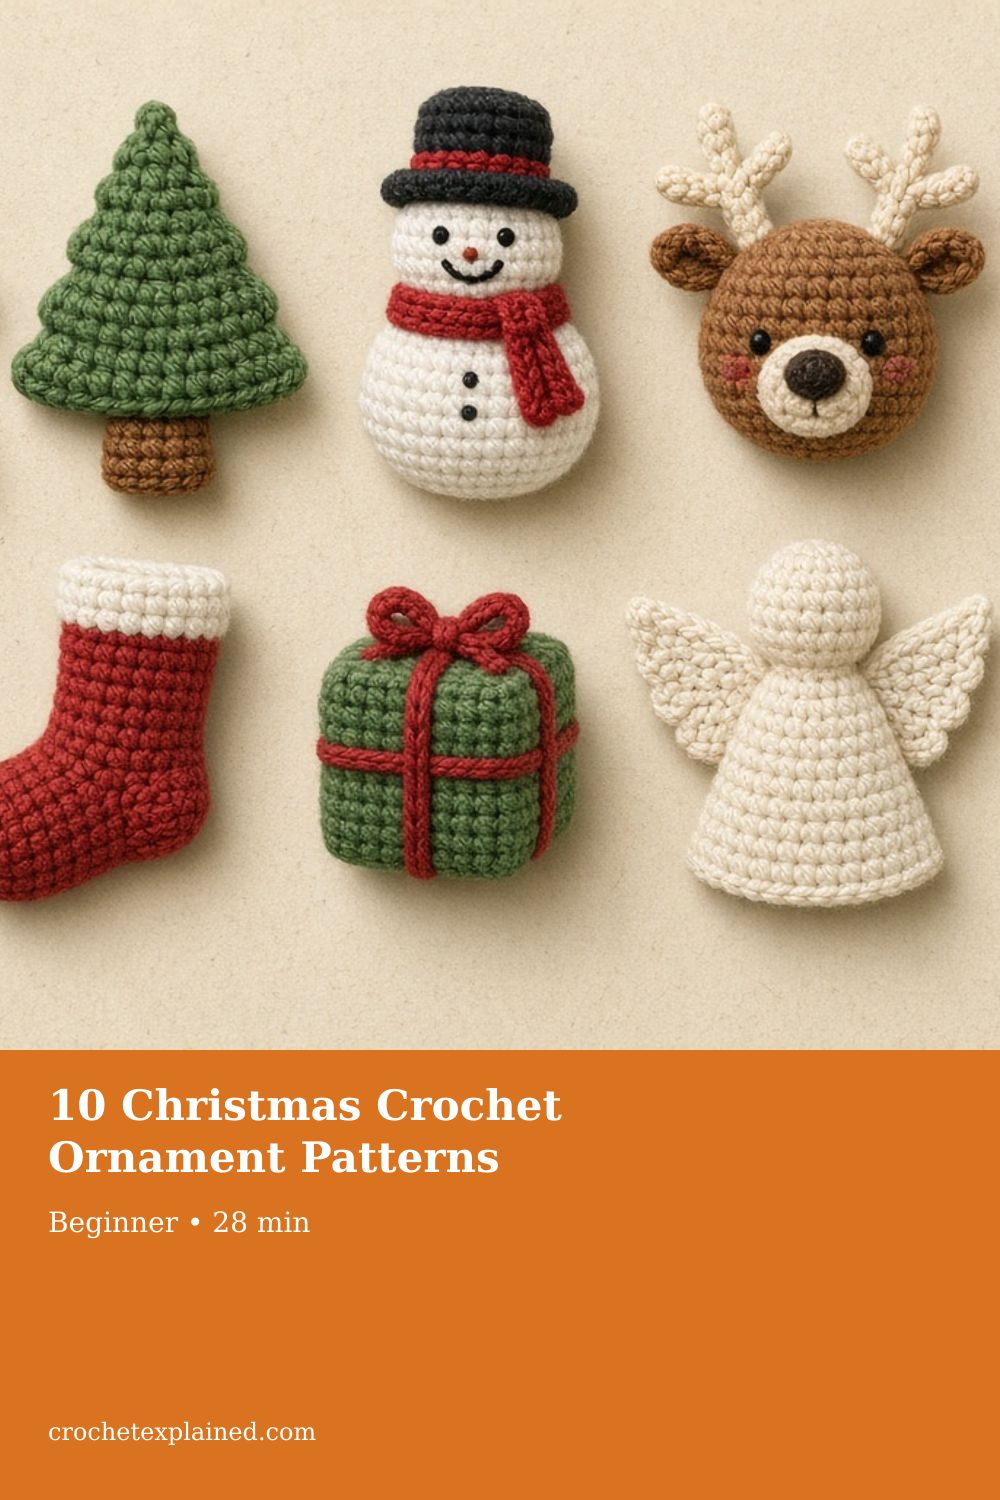
10 Christmas Crochet Ornament Patterns
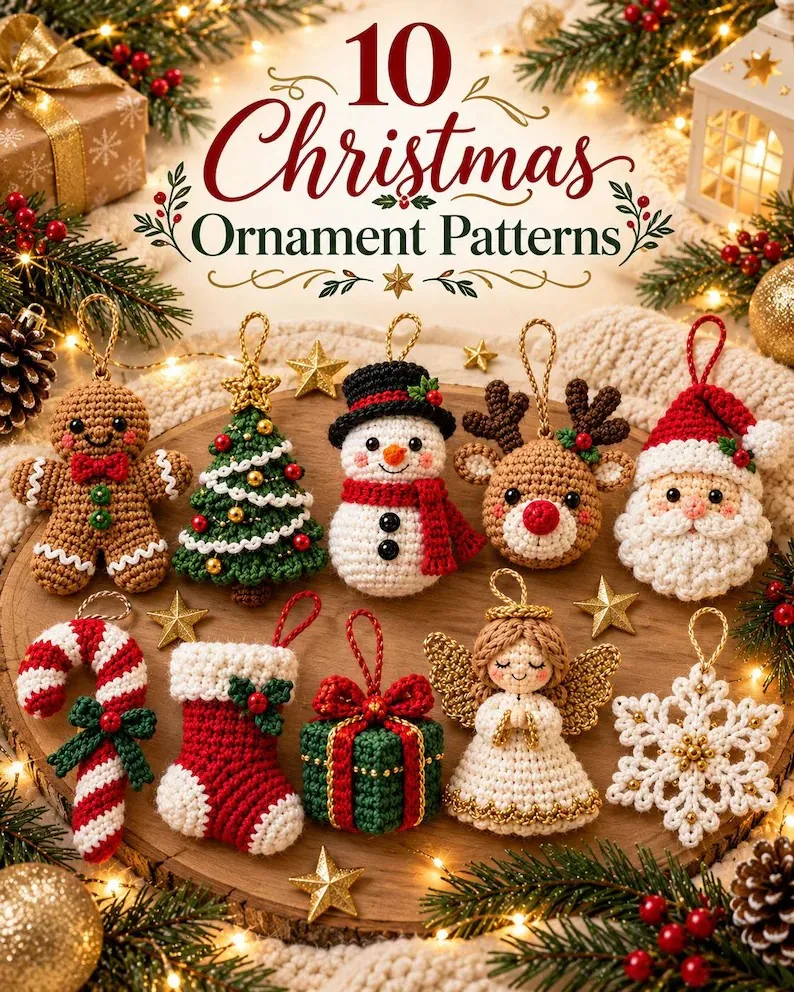
Ten small Christmas ornaments in US stitches: gingerbread, tree, snowman, reindeer, Santa, candy cane, stocking, gift, angel, and snowflake. Sizes depend on your yarn and hook.
Ten mini ornaments: gingerbread, tree, snowman, reindeer, Santa, candy cane, stocking, gift, angel, and snowflake.
At a glance
- Skill level
- beginner
- Time
- Several relaxed sessions for the full set
- Finished size
- About 5–12 cm, depending on the ornament and your gauge
- Yarn weight
- Sport or DK cotton or cotton blend, in a shared holiday palette
- Hook size
- 2.5–3.5 mm, for a firm fabric
- Yardage
- Estimated in the pattern
On this page
- At a glance
- Shared materials and tools
- 1. Sweet little gingerbread man
- 2. Little evergreen tree
- 3. Mini snowman
- 4. Little red-nosed reindeer
- 5. Jolly little Santa face
- 6. Candy cane
- 7. Tiny Christmas stocking
- 8. Mini present
- 9. Little angel
- 10. Winter snowflake
- One collection, one finish
- Common mistakes
- Decorating and gifting
- Frequently asked
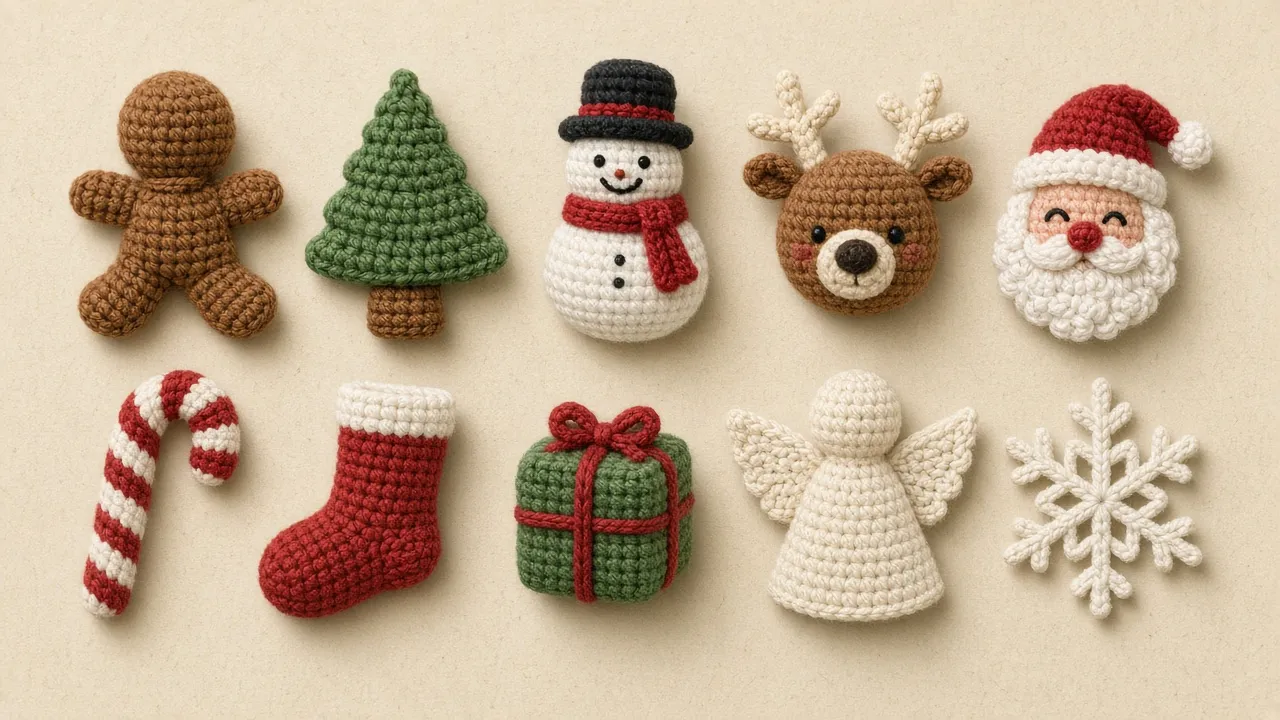
You will make a gingerbread man, Christmas tree, snowman, reindeer, Santa face, candy cane, mini stocking, wrapped present, angel, and snowflake. Hang them on a tree, tie one to a gift, or make a set.
What to expect: These are compact original mini-patterns, in US stitch terminology. Each ornament has materials, a construction method, the stitches, finishing, and a checkpoint. They are home projects, not copies of a photographed sample. Your result will vary with yarn, gauge, and how firmly you stuff or sew the pieces.
The sizes below are worked out from the stitch counts rather than from a finished sample, and the pictures are illustrations. Follow the written steps. A picture can show the colors and the silhouette. It cannot set your gauge.
This set is separate from the spiral Christmas tree, the cone on how to crochet a Christmas tree, and the flat motifs on easy Christmas ornaments. A different snowflake is how to crochet a snowflake. Gift lists that point at whole projects are on Christmas gift ideas. None of those counts build these ten ornaments.
At a glance
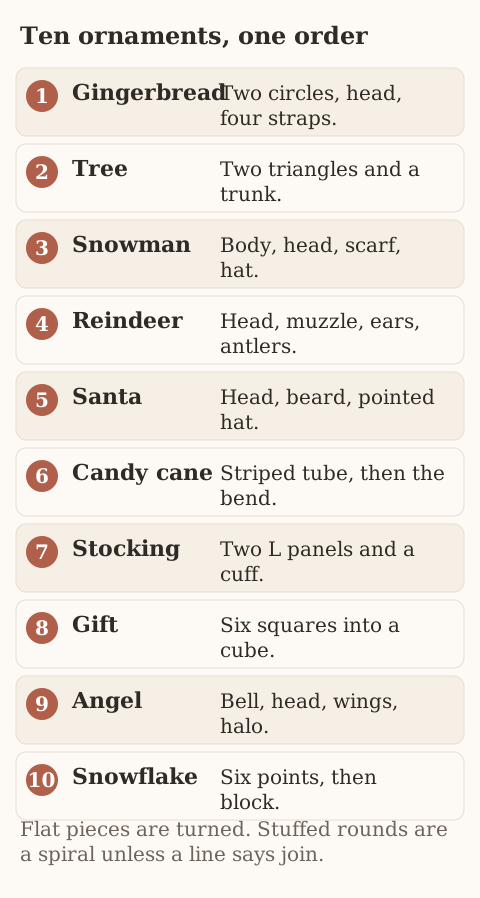
| Ornament | Skill focus | Approximate size* | Main colors |
|---|---|---|---|
| 1. Gingerbread man | Flat shapes and joining | 8–10 cm | Brown, white, red |
| 2. Mini tree | Triangular panels | 9–11 cm | Green, brown, gold |
| 3. Snowman | Small spheres | 9–11 cm | White, red, black |
| 4. Reindeer | Face, ears, and antlers | 8–10 cm | Brown, cream, red |
| 5. Santa | Round face and pointed hat | 9–11 cm | Peach, white, red |
| 6. Candy cane | Color changes and a bend | 9–12 cm | Red, white, green |
| 7. Stocking | Flat heel-shaped panels | 9–11 cm | Red, cream |
| 8. Gift box | Rectangles and clean edges | 5–7 cm | Green, red, gold |
| 9. Angel | Bell shape and wings | 9–11 cm | Cream, gold |
| 10. Snowflake | Chain spaces and a six-point repeat | 9–12 cm | White, cream |
Finished sizes are estimates, not measured samples. They depend on yarn thickness, gauge, and finishing.
Shared materials and tools
For a coordinated set, use cotton or a cotton blend in one weight. Sport or DK-weight yarn with a 2.5–3.5 mm hook makes small, distinct stitches. Change the hook until the fabric is firm and the gaps stay small. Medium-weight yarn will make larger ornaments. Yarn weight and hook sizes name those thicknesses. Yarn for Christmas covers fiber choice.
Gather forest green, cocoa brown, burgundy or Christmas red, white, cream, champagne gold, peach, orange, and black. You also need a yarn needle, stitch markers, scissors, a measuring tape, a little polyester fiberfill for the stuffed designs, and scraps for hanging loops. If young children will be near the tree, embroider eyes and dots. Do not rely on loose beads or small plastic safety eyes.
US crochet abbreviations. US single crochet is UK double crochet. The full table is on the abbreviations chart.
| Abbreviation | Meaning |
|---|---|
| MR | Magic ring |
| ch | Chain |
| sc | Single crochet |
| hdc | Half double crochet |
| dc | Double crochet |
| sl st | Slip stitch |
| inc | Two single crochet stitches into one stitch |
| dec | Single crochet two stitches together |
| BLO | Back loop only |
| FLO | Front loop only |
| FO | Fasten off |
| st(s) | Stitch(es) |
| [instructions] × 6 | Repeat the instructions six times |
How to read a round: R3: [sc, inc] × 6 (18) means one single crochet and then an increase, six times, for 18 stitches at the end. Unless a line says otherwise, stuffed rounds are a continuous spiral. Mark the first stitch of each round. Flat pieces are turned after each row. A turning chain does not count as a stitch unless the line says it does.
Make a short swatch in the yarn and hook you mean to use. If stuffing would show through, use a smaller hook. Do not yank the working yarn tight to close the gaps.
Three habits that keep miniature ornaments neat
Keep the tension even. A firm single-crochet fabric holds a tiny shape, especially after stuffing.
Leave sewing tails. For ears, stars, and bows, leave about 15–20 cm before you cut. The original tail is easier to sew with than a fresh strand.
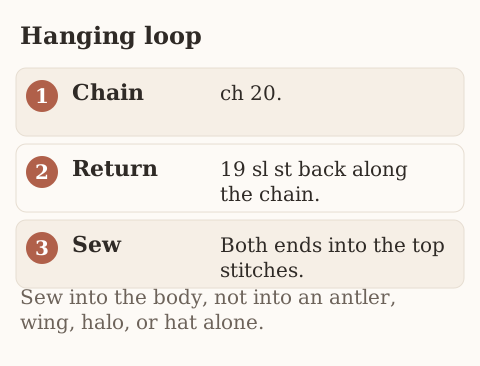
Add a hanger that will hold. ch 20, then sl st back along the chain (19 sl st). Fold it and sew both ends into several stitches at the top. Test it with a gentle pull before you hang the ornament. Sew into the body, not only into a hat, wing, antler, or halo.
1. Sweet little gingerbread man
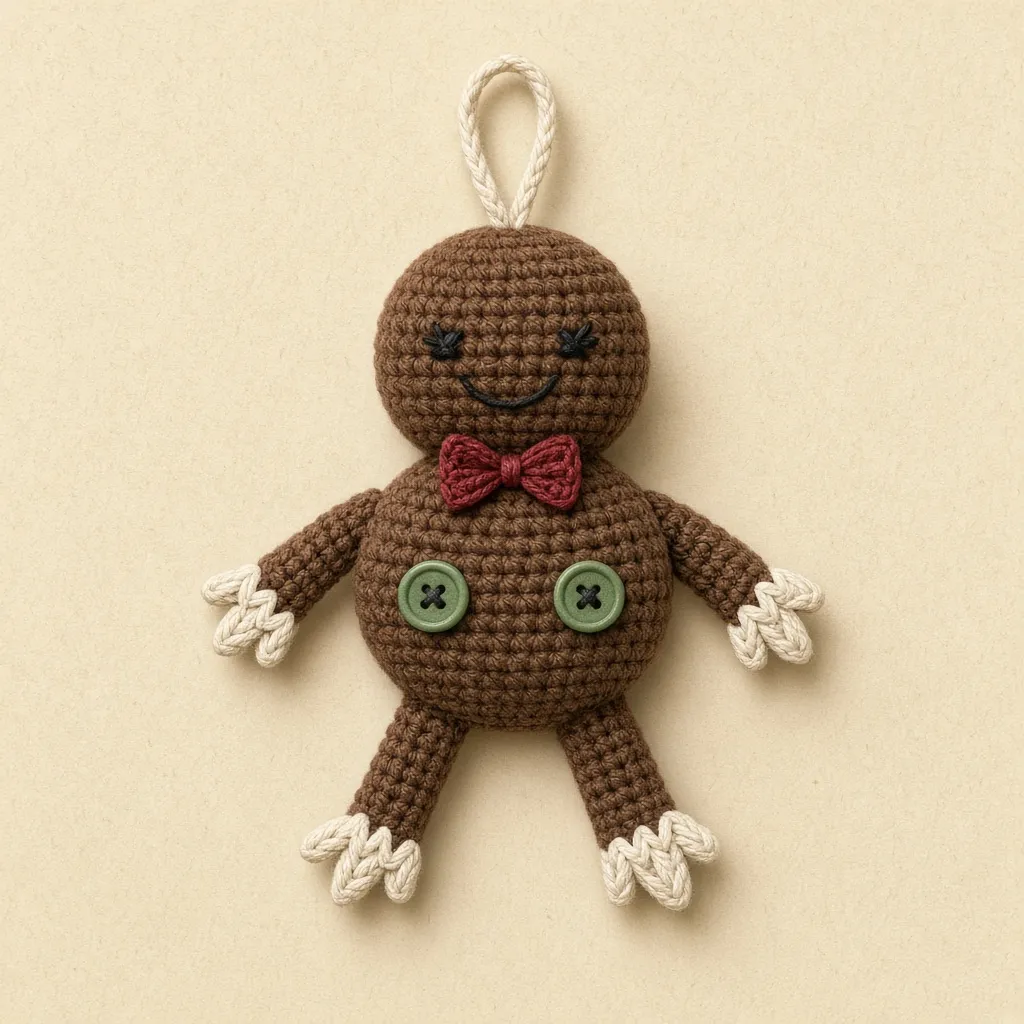
A gingerbread character is a good first piece. The cookie silhouette reads even in simple stitches. This version uses separate flat pieces sewn to a round center, then a little embroidered icing.
You will need: Cocoa-brown yarn, short lengths of white, burgundy, and green, a hook, a needle, an optional pinch of stuffing, and a hanging cord.
Crochet the body: make two circles
Work in continuous rounds, in brown.
- R1: 6 sc in MR (6).
- R2: inc in each stitch (12).
- R3: [sc, inc] × 6 (18).
- R4: [2 sc, inc] × 6 (24).
- R5: [3 sc, inc] × 6 (30). FO on the first circle. Make a second circle and leave the yarn attached.
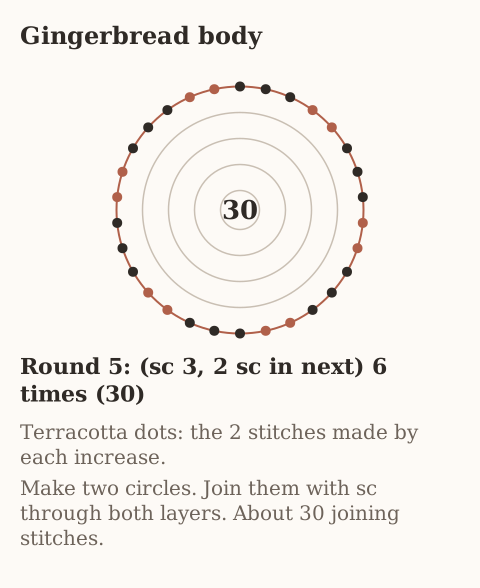
Place the circles wrong sides together and join them with sc through both layers. Add a little stuffing before the last few stitches, or skip the stuffing for a flatter cookie. Count about 30 joining stitches around the edge.
Crochet the head: make two smaller circles
- R1: 6 sc in MR (6).
- R2: inc × 6 (12).
- R3: [sc, inc] × 6 (18). FO on the first. Make the second with a long joining tail.
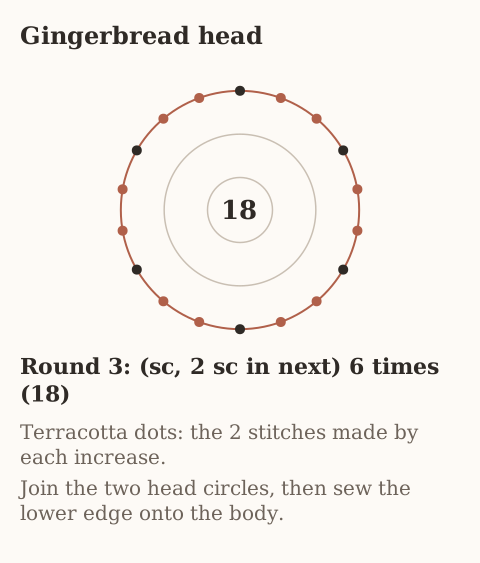
Join the two head circles with sc, stuffing lightly if you want. Sew the lower edge of the head onto the top of the body so they overlap a little.
Add two arms and two legs
For each arm, ch 9. Starting in the second chain, work 8 sc, ch 1, turn, and work 8 sc again. FO, leaving a tail. Make two arms.
For each leg, ch 10. Starting in the second chain, work 9 sc, ch 1, turn, and work 9 sc again. FO with a sewing tail. Make two legs.
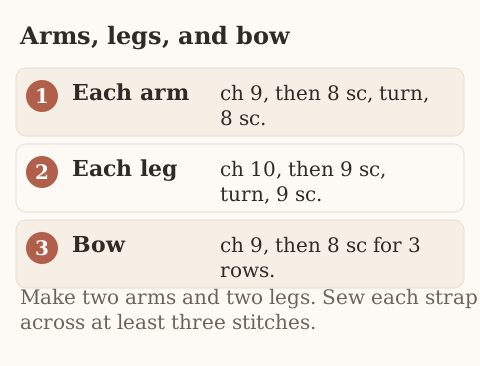
Sew the arms on the upper sides and the legs at the lower edge. Catch at least three stitches of each strap so the limbs do not swing. A few whip stitches can round an end. This is a flat gingerbread silhouette, not a stuffed doll.
Icing and a small red bow
With white yarn, embroider gentle zigzags on the outer ends of the arms and legs. Embroider two small black or dark-brown eyes, a curved smile, and two green buttons. For the bow: ch 9, work 8 sc, ch 1, turn, and repeat until you have three rows. FO, pinch the center, and wrap it with burgundy yarn. Sew the bow just under the face.
Checkpoint: Head, body, and all four limbs are secure. The embroidery does not pull the front out of shape. The loop is anchored at the top of the head.
2. Little evergreen tree
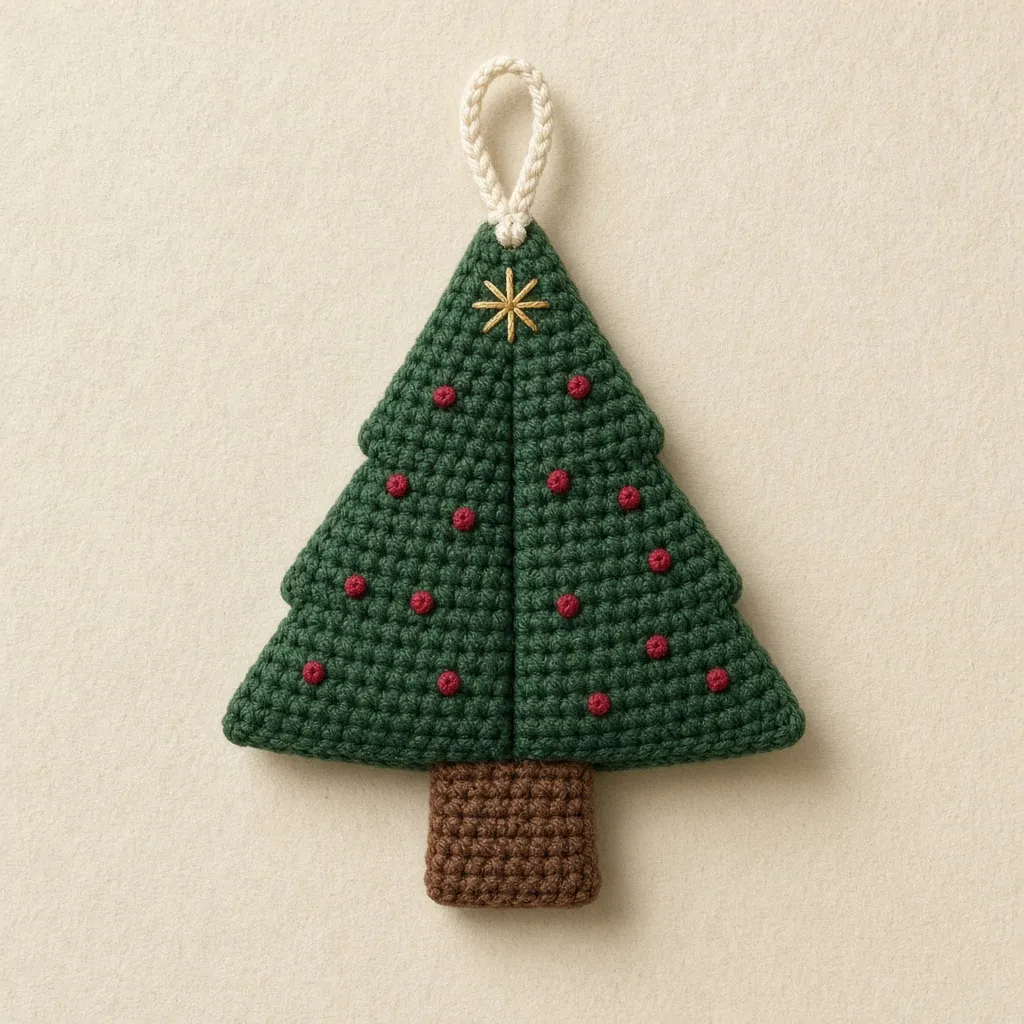
Two matching triangular panels, joined around the outside, with a small brown trunk. Stitched berries and a gold star stand in for beads.
You will need: Forest green, cocoa brown, champagne gold, and burgundy, a hook, a needle, optional thin stuffing, and a hanging loop.
Make two triangular green panels
Start at the tip. Turn after every row. Each row begins with ch 1, which is not a stitch.
- Row 1: ch 2, sc in the second chain from the hook (1).
- Row 2: inc in the single stitch (2).
- Row 3: inc in the first st, sc in the next st (3).
- Row 4: inc, sc in the next 2 sts (4).
- Row 5: inc, sc in the next 3 sts (5).
- Keep the same rule: one increase in the first stitch, then sc across.
- Row 6: 6 sc.
- Row 7: 7 sc.
- Row 8: 8 sc.
- Row 9: 9 sc.
- Row 10: 10 sc.
- Row 11: 11 sc.
- Row 12: 12 sc.
- Row 13: 13 sc.
- Row 14: 14 sc.
- Row 15: 15 sc.
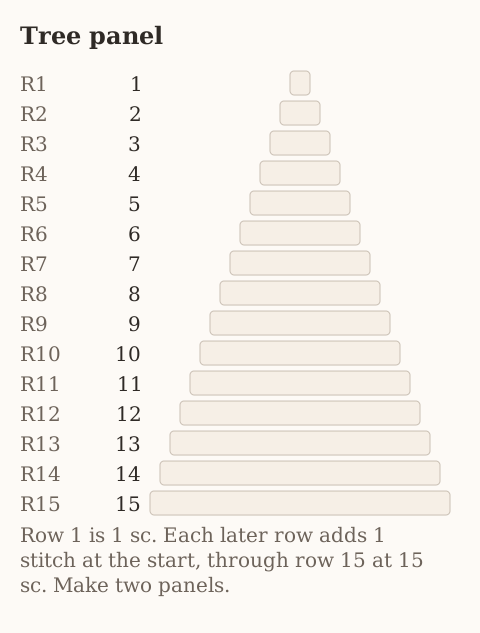
FO after the first panel. Make a second identical panel. Increases on one side leave a stepped edge. The joining round can soften it. For a more even triangle, alternate the increase from the start of one row to the end of the next, and keep the same final counts.
Make the small trunk
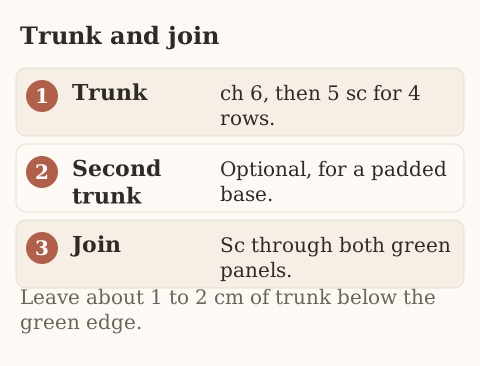
With brown, ch 6, sc across 5 chains. Ch 1, turn, and work 5 sc for four rows. FO with a long tail. Make a second trunk if you want a padded base.
Join the tree
Place the green panels wrong sides together. Set the trunk between the lower edges so about 1–2 cm hangs below the tree. Single crochet through both green layers, picking up the row ends evenly. Add a little stuffing before you close, or leave the tree flat. Sew the trunk to the lower edge.
Star and berries
With champagne gold, make five short embroidery stitches that meet at the tip. Or sew on a separate five-point star if you already have a star you trust. The spiral tree has one written star. Add small red embroidered dots, and a winding cream chain-stitch garland if you want one.
Checkpoint: The panels match, the edges close, and the trunk is centered. The loop is sewn through both layers at the top.
3. Mini snowman
Two stuffed spheres, a red scarf, and a small top hat. The two-sphere build is easy to count.
You will need: White, black, and red yarn, orange embroidery yarn, fiberfill, a hook, a marker, a needle, and hanger yarn.
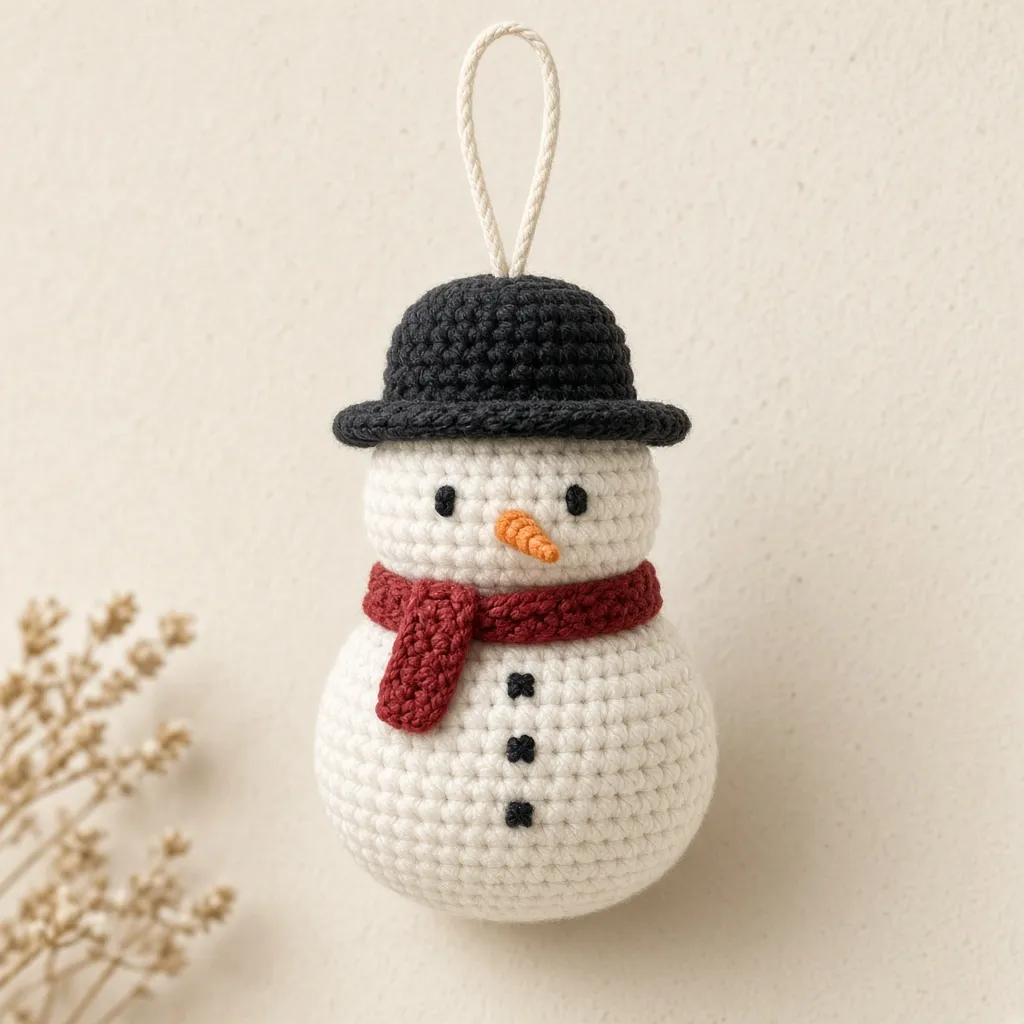
Make the body
White yarn, continuous rounds:
- R1: 6 sc in MR (6).
- R2: inc × 6 (12).
- R3: [sc, inc] × 6 (18).
- R4: [2 sc, inc] × 6 (24).
- R5–R8: 24 sc each round (24).
- R9: [2 sc, dec] × 6 (18).
- R10: [sc, dec] × 6 (12). Stuff firmly, not rigidly.
- R11: dec × 6 (6). FO, close the hole, and weave in the tail.
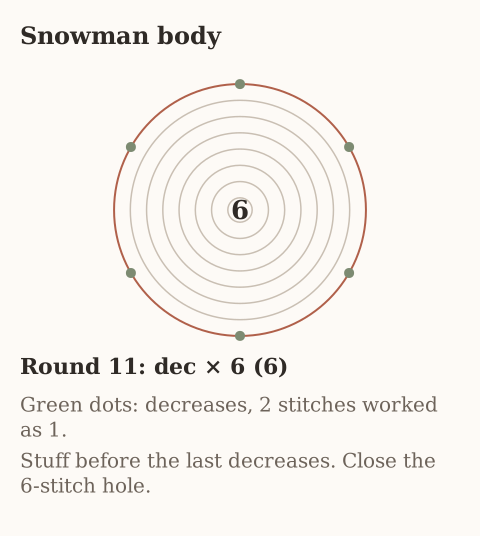
Make the head
- R1: 6 sc in MR (6).
- R2: inc × 6 (12).
- R3: [sc, inc] × 6 (18).
- R4–R7: 18 sc per round (18).
- R8: [sc, dec] × 6 (12).
- R9: dec × 6 (6). Stuff, FO, and close.
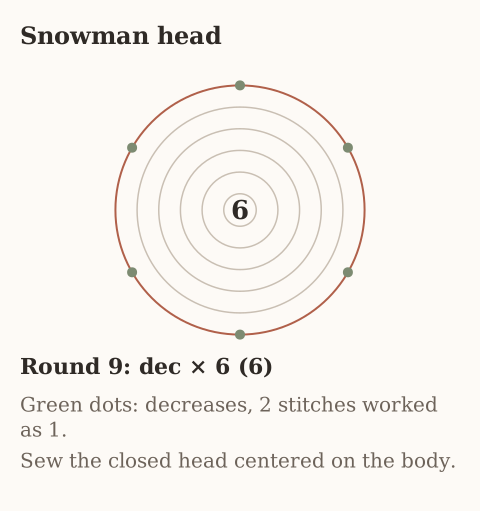
Sew the head on the upper body, passing the yarn through several body stitches. The head should sit upright.
Crochet a scarf
With red, ch 26. From the second chain, work 25 sc. Ch 1, turn, and work a second row of 25 sc. FO. Wrap the scarf over the seam between head and body and catch it with one or two stitches. Trim the tails to the size of the ornament.
Make a small black hat
- R1: 6 sc in MR (6).
- R2: inc × 6 (12).
- R3: 12 sc in BLO (12).
- R4–R5: 12 sc (12).
- R6: in FLO, inc in every stitch (24). FO.
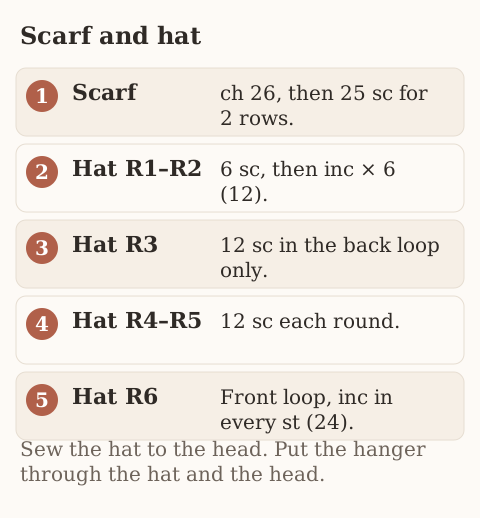
Set the hat on the head and sew around the inside of the lower crown. Embroider black eyes and buttons, a small orange carrot nose, and cheeks if you want them. Put the hanging loop through the hat and the head, not through the hat alone.
Checkpoint: The spheres are firmly joined, the hat is stitched on, and the scarf covers the neck. No loose plastic eyes.
4. Little red-nosed reindeer
A stuffed brown sphere, a cream muzzle, two ears, and simple crocheted antlers.
You will need: Medium brown, dark brown, cream, and red yarn, dark embroidery yarn, a hook, a marker, fiberfill, a needle, and a hanger strand.
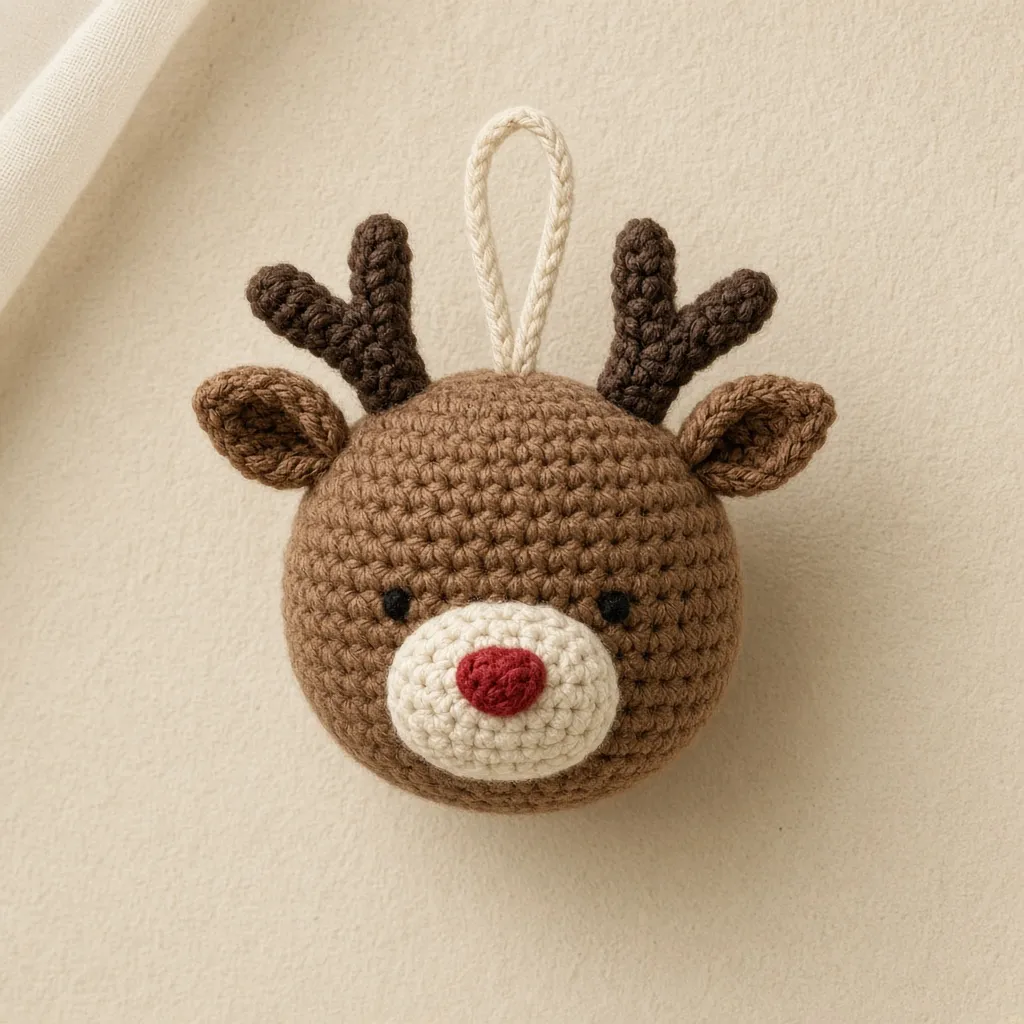
Crochet the head
- R1: 6 sc in MR (6).
- R2: inc × 6 (12).
- R3: [sc, inc] × 6 (18).
- R4: [2 sc, inc] × 6 (24).
- R5–R9: 24 sc (24).
- R10: [2 sc, dec] × 6 (18).
- R11: [sc, dec] × 6 (12). Stuff.
- R12: dec × 6 (6). FO and close.
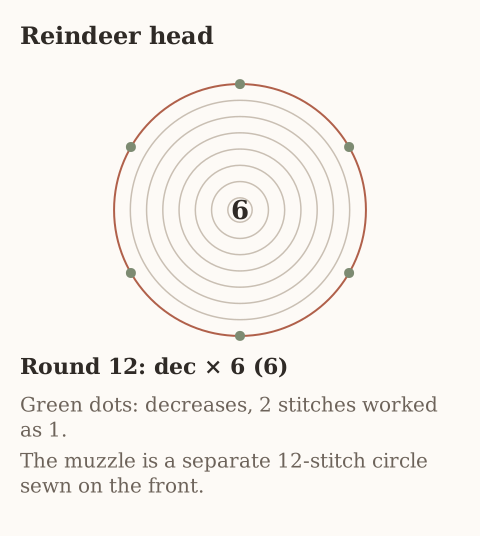
Make the cream muzzle
- R1: 6 sc in MR (6).
- R2: inc × 6 (12). FO with a long sewing tail.
Press the circle flat and sew it on the lower front of the head. With red, embroider a rounded nose in the center, building it with several satin stitches. Add two black embroidered eyes above it.
Make two ears
For each ear, ch 5. Starting in the second chain, work sc, hdc, hdc, sc (4). FO with a long tail. Stitch each ear at a slight angle on the upper sides.
Make two branching antlers
With dark brown, ch 10. Starting in the second chain, sl st into the next 3 chains. Then ch 4 and sl st back through 3 chains for a branch. Return to the main chain and sl st through the next 3 chains. ch 3, sl st back through 2 chains for the second branch, then slip stitch to the base. FO, leaving a tail.
Repeat for the second antler. Pin them, balance them, then sew through several stitches. The branches are flexible, so a little hand-blocking helps.
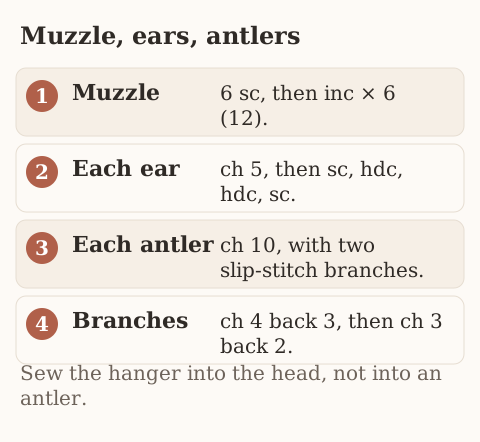
Checkpoint: Ears and antlers are firm and balanced. The hanger goes through the head stitches.
5. Jolly little Santa face
A peach head, a crocheted beard, and a pointed red hat.
You will need: Peach or light beige, white, red, dark embroidery yarn, fiberfill, a hook, a marker, a needle, and hanger yarn.
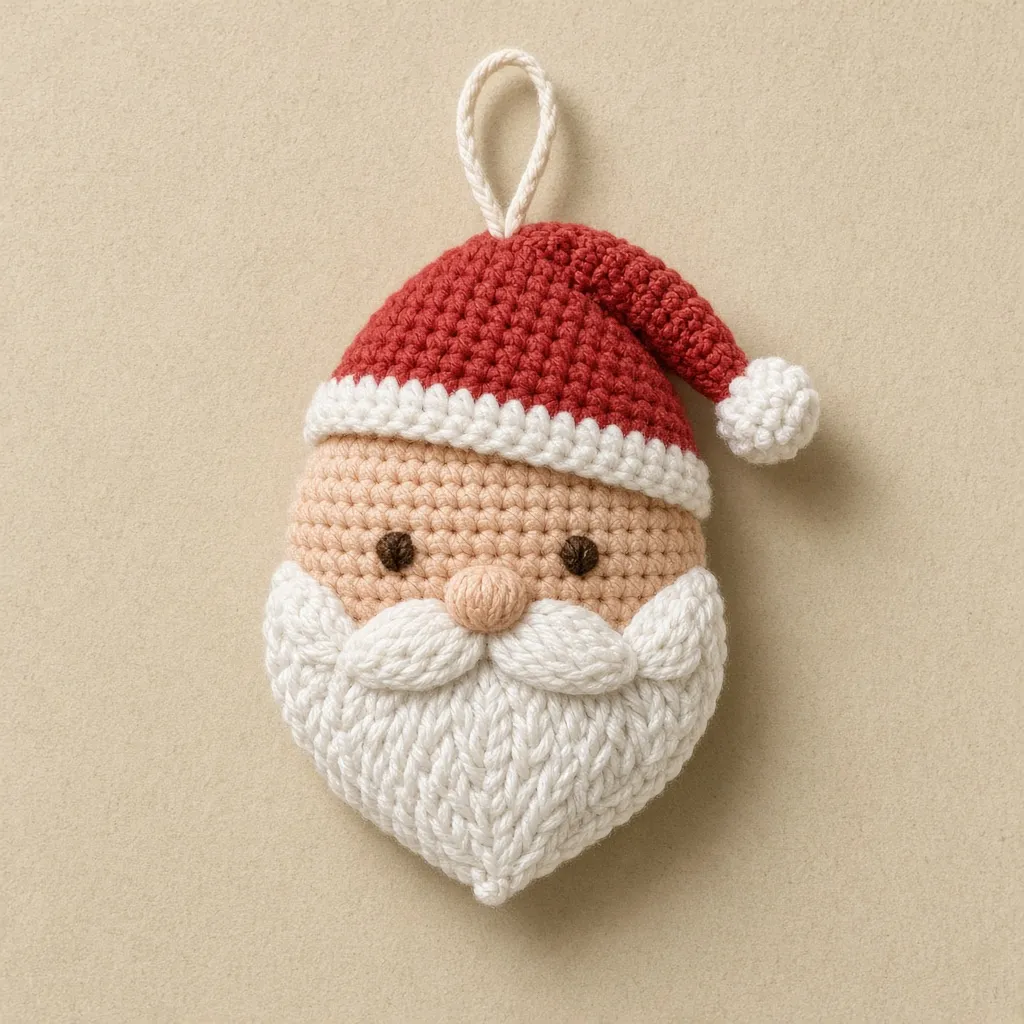
Crochet the head
- R1: 6 sc in MR (6).
- R2: inc × 6 (12).
- R3: [sc, inc] × 6 (18).
- R4: [2 sc, inc] × 6 (24).
- R5–R9: 24 sc (24).
- R10: [2 sc, dec] × 6 (18).
- R11: [sc, dec] × 6 (12). Stuff gently.
- R12: dec × 6 (6). FO and close.
The head uses the same counts as the reindeer head. Use the reindeer head diagram above if you want the rings in front of you, and work them in peach.
Crochet the beard
With white, ch 12. Starting in the second chain, work 11 sc. Ch 1, turn.
- Row 2: dec, 7 sc, dec (9).
- Row 3: ch 1, turn; dec, 5 sc, dec (7).
- Row 4: ch 1, turn; dec, 3 sc, dec (5).
- Row 5: ch 1, turn; dec, sc, dec (3).
- Row 6: ch 1, turn; sc3tog (1). FO with a long tail.
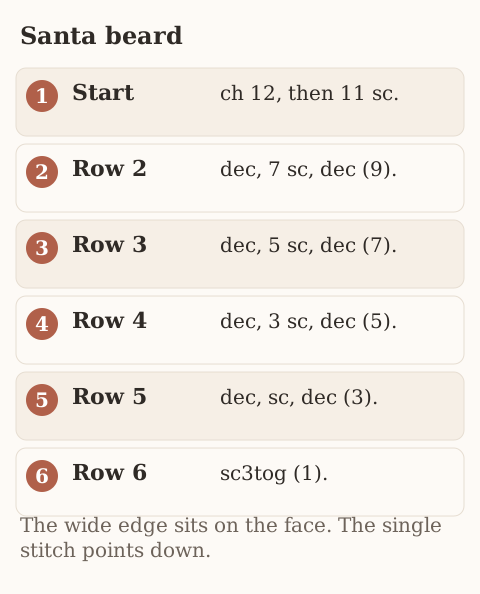
Sew the wide top of the beard across the lower half of the head. A few white stitches near the top of the beard can suggest a moustache. Embroider a nose and two eyes above the beard.
Crochet the red hat
Work from the tip toward the brim.
- R1: 4 sc in MR (4).
- R2: 4 sc (4).
- R3: [sc, inc] × 2 (6).
- R4: 6 sc (6).
- R5: [2 sc, inc] × 2 (8).
- R6: 8 sc (8).
- R7: [3 sc, inc] × 2 (10).
- R8: [4 sc, inc] × 2 (12).
- R9: [sc, inc] × 6 (18).
- R10: [2 sc, inc] × 6 (24).
- R11–R12: 24 sc (24). Change to white.
- R13–R14: 24 sc (24). FO.
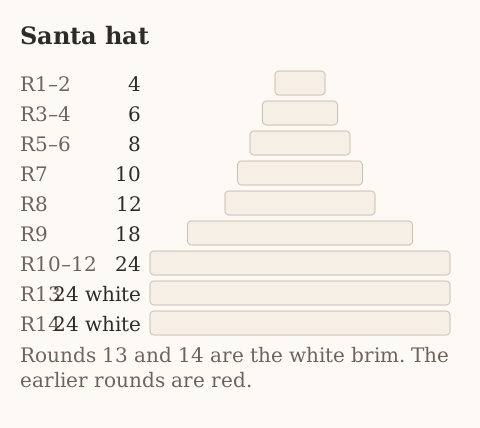
Try the hat on the head and sew it in place. For a pom-pom, use a tightly stitched white yarn bundle and sew it through the tip several times. Skip small loose pieces.
Checkpoint: The beard points down, the hat covers the head, and the loop is anchored in the head and hat seam.
6. Candy cane
A narrow tube with a soft upper bend. A little fiberfill helps the curve. Do not put a rigid or sharp wire inside an ornament that will hang in a family room.
You will need: White and red yarn, optional green for a bow, a hook, a marker, a needle, and a little fiberfill.
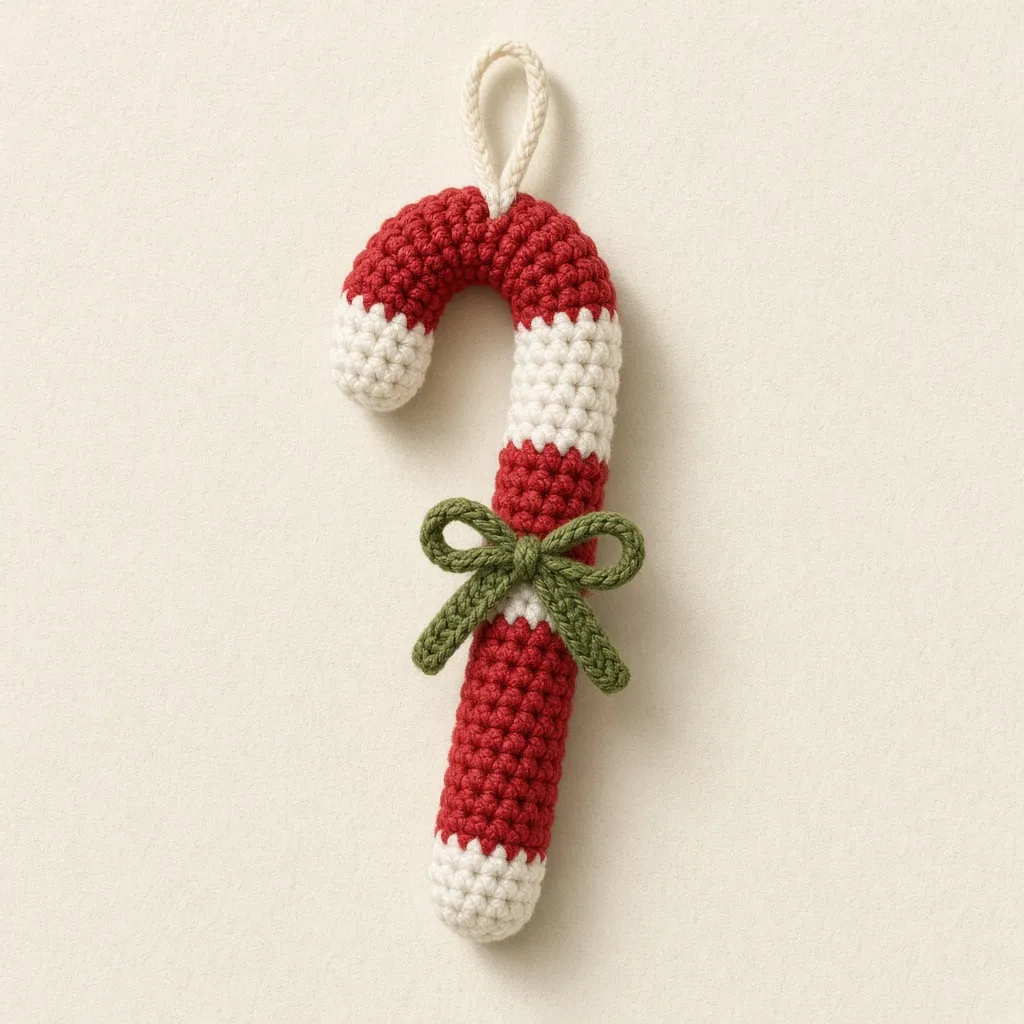
Crochet the striped tube
Continuous rounds. Mark the first stitch. Start with red.
- R1: 6 sc in MR (6).
- R2: [sc, inc] × 3 (9).
- R3–R5: 9 sc in red (9).
- R6–R8: 9 sc in white (9).
- R9–R11: 9 sc in red (9).
- R12–R14: 9 sc in white (9).
- R15–R17: 9 sc in red (9).
- R18–R20: 9 sc in white (9).
- R21–R23: 9 sc in red (9).
- R24–R26: 9 sc in white (9).
- R27–R29: 9 sc in red (9).
- R30–R32: 9 sc in white (9).
- R33–R35: 9 sc in red (9).
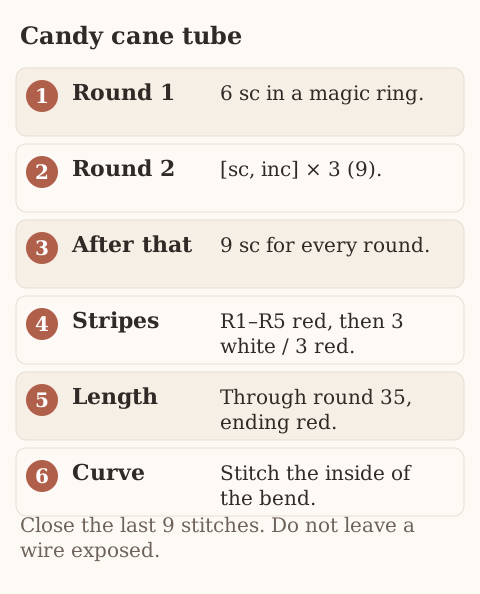
Rounds 1 through 5 stay red: the ring, the increase to 9, and three even rounds. From round 6 the color changes every three rounds, white then red, through round 35, which ends on red. The three-and-three bands do not include rounds 1 and 2.
The tube is long and thin. Stuff lightly as you go so the filling does not clump. Bend the last third gently. Run a few matching-yarn stitches along the inside of the bend, a little at a time. Do not pull so hard that the fabric puckers. FO, draw the last nine stitches together, and sew the opening closed.
Tiny bow, optional
With green, ch 9, sc across 8 chains. Ch 1, turn, and work two more rows of 8 sc. FO with a long tail, pinch the center, and wrap it. Sew the bow on the lower straight section.
Checkpoint: The stripes show, the curve holds without an exposed support, and the loop is at the highest point. If the cane relaxes later, restitch the inside of the curve.
7. Tiny Christmas stocking
Two flat panels instead of a turned heel, then a white cuff. The top stays open.
You will need: Red yarn, white yarn, a needle, a hook, scissors, optional light stuffing, and a hanging strand.
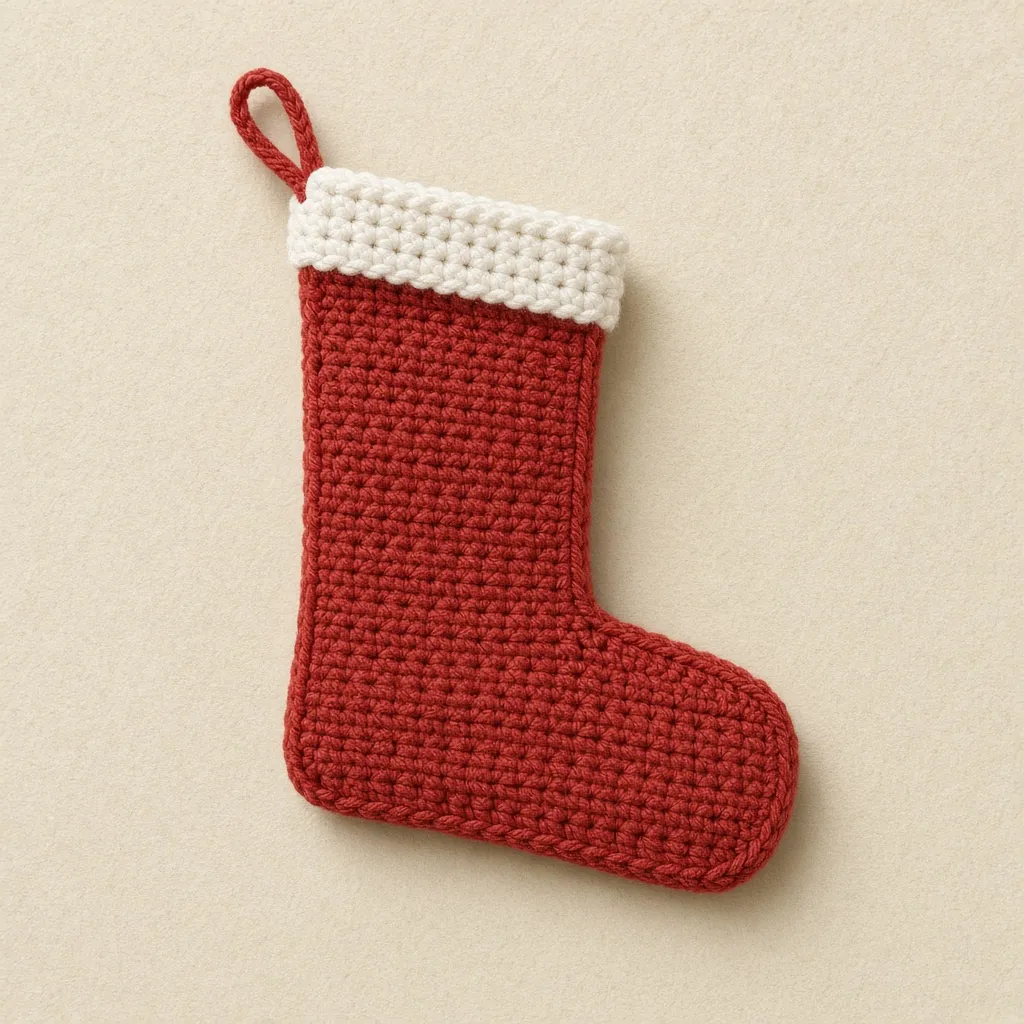
Crochet the first panel
Flat, in red. Turning chains do not count.
- Row 1: ch 11; from the second ch, work 10 sc (10).
- Rows 2–9: ch 1, turn; 10 sc (10).
That is the leg: nine rows of 10 single crochet. At the end of row 9, chain 7 for the toe. Do not work another row of 10 before that chain. Row 10 starts in the second of those new chains.
- Row 10: sc in the next 6 chains, then 10 sc back across the leg (16).
- Row 11: ch 1, turn; 16 sc (16).
- Row 12: ch 1, turn; 16 sc (16).
- Row 13: ch 1, turn; dec, 12 sc, dec (14).
- Row 14: ch 1, turn; dec, 10 sc, dec (12). FO.
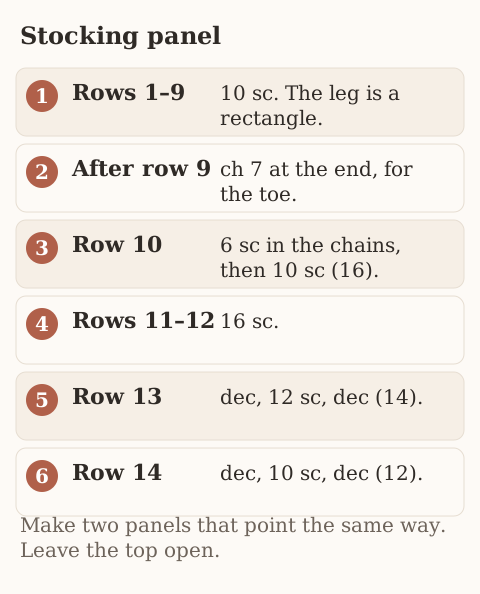
The foot grows from one side. Keep that direction on the second panel so the two pieces match when you put the wrong sides together.
Second panel, cuff, and join
Make a second identical panel. Align the corners and join around the outside with red sc through both layers. Leave the top of the leg open. A pinch of stuffing in the toe is optional.
With white, ch 11 and sc across 10 chains. Ch 1, turn, and work 10 sc for four rows. Make a second rectangle. Sew one cuff on the front top edge and one on the back, and join their ends at the sides. Or make one white strip that fits the opening after the panels are joined.
Sew a red or white loop at the upper outside corner.
Checkpoint: The foot points sideways, the toe is eased by the edging, and the top is still a stocking mouth. Check the panels before you sew.
8. Mini present
Six flat squares sewn into a soft cube, then a ribbon and a bow.
You will need: Forest green or burgundy for the box, red for the ribbon, gold for a small accent, fiberfill, a hook, a needle, and a hanger strand.
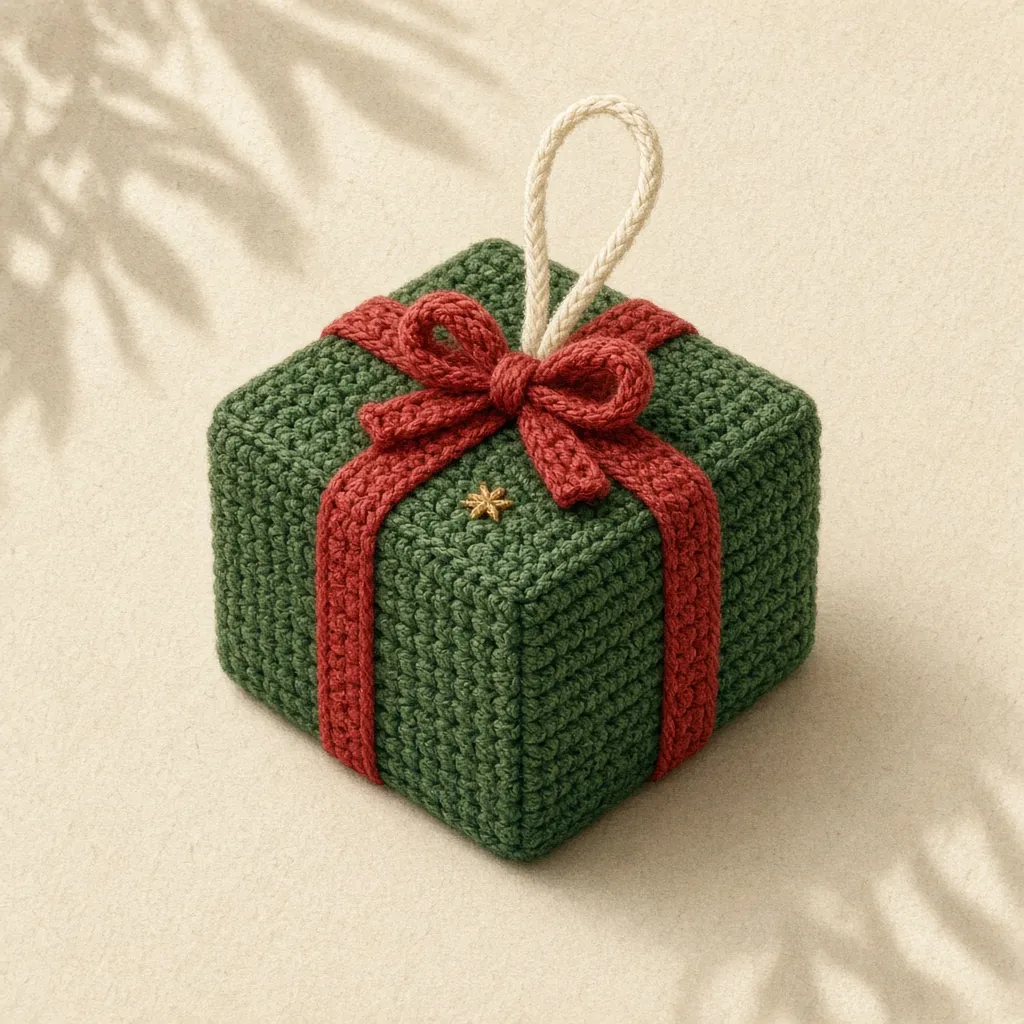
Crochet six square faces
For each face, in the box color:
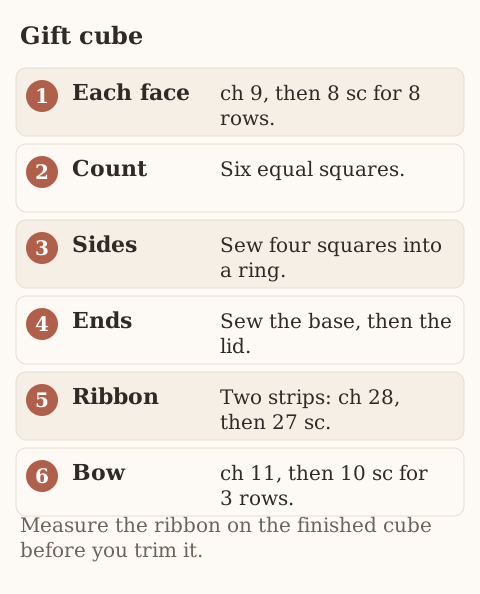
- Row 1: ch 9, sc in the second chain and in each remaining chain (8).
- Rows 2–8: ch 1, turn; 8 sc per row (8).
FO, and leave sewing tails on several panels. Make six equal squares. If the sides are not square, ease the tension or change the number of rows until the panels are about as tall as they are wide.
Assemble the cube
Sew four side panels edge to edge into a ring. Sew the base on one open end. Sew the lid on the other, leaving a short opening. Stuff lightly so the corners stay square, then close the last seam.
Ribbon and bow
With red, ch 28, then sc in 27 chains. Make two strips. Measure across the top and down two opposite sides before you trim and sew. Cross the strips on the top face and catch them over the edges.
For the bow, ch 11 and sc across 10. Work three rows. FO with a long tail, pinch the center, and wind the tail to form the bow. Stitch it where the ribbons cross. A short gold embroidered accent is optional.
Checkpoint: All six faces are attached. The stuffing has not turned the cube into a ball. The ribbon and the loop are sewn into the top face.
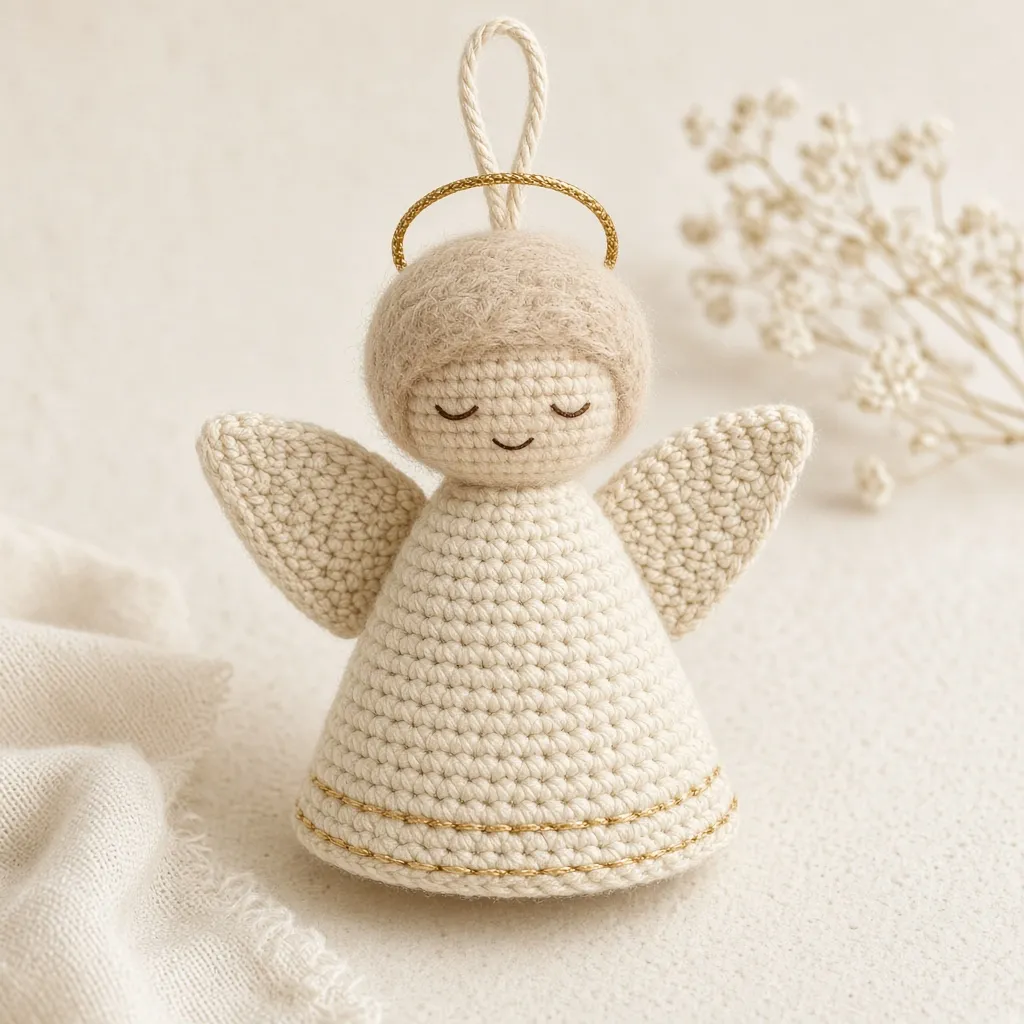
9. Little angel
A flared bell, a stuffed head, and two flat wings.
You will need: Cream yarn, pale beige for the face, gold yarn, fiberfill, a hook, a marker, a needle, and a hanging cord.
Crochet the bell-shaped dress
Start at the neck, in cream, in continuous rounds.
- R1: 6 sc in MR (6).
- R2: inc × 6 (12).
- R3: 12 sc (12).
- R4: [sc, inc] × 6 (18).
- R5: 18 sc (18).
- R6: [2 sc, inc] × 6 (24).
- R7–R9: 24 sc (24).
- R10: [3 sc, inc] × 6 (30).
- R11: 30 sc (30). FO.
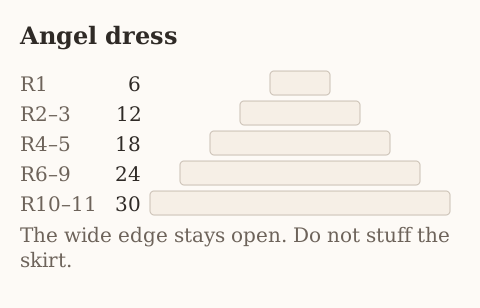
The bottom stays open. Stuff the head, not the skirt, so the dress keeps a bell shape.
Make the head
Pale beige:
- R1: 6 sc in MR (6).
- R2: inc × 6 (12).
- R3: [sc, inc] × 6 (18).
- R4–R6: 18 sc (18).
- R7: [sc, dec] × 6 (12).
- R8: dec × 6 (6). Stuff, FO, and close.
Sew the head on the narrow top of the dress, in the center.
Two wings, a halo, and a face
For each wing, in cream or pale gold:
- Row 1: ch 7, sc in the second ch and the next 5 chains (6).
- Row 2: ch 1, turn; inc, 4 sc, inc (8).
- Row 3: ch 1, turn; inc, 6 sc, inc (10).
- Row 4: ch 1, turn; 10 sc (10). FO.
Sew one short end of each wing to the back of the dress, with the wide ends angled out. With gold, work a running stitch around the hem and along the wing edges.
For the halo, ch 15 and join with a sl st. Sew the ring just above and behind the head with several gold stitches. Embroider closed eyes and a small smile. Attach the loop at the head and dress, not on the halo alone.
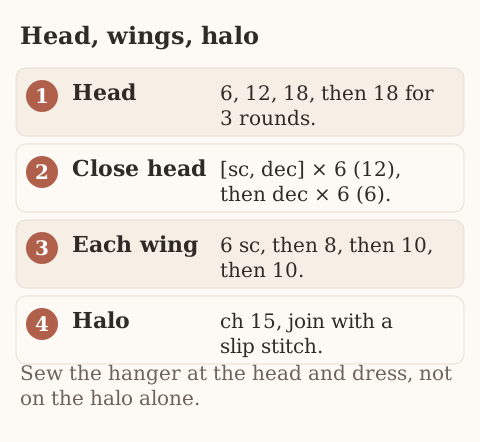
Checkpoint: The wings match, the halo is secure, and the hem is open and even.
10. Winter snowflake
The pattern is four joined rounds and six points. The diagram under the rounds is that pattern. The photograph at the top of this article shows the whole set. It is not an extra stitch chart for this flake. Smooth cotton keeps the chain spaces clear.
You will need: White or cream cotton, optional gold, a hook that suits the yarn, a yarn needle, scissors, blocking pins, and a blocking mat.
A six-sided center
Joined rounds. The slip stitch joins the round. The chain that starts a round is not a stitch unless the line says it is.
- Round 1: MR. Work
[sc, ch 2] × 6into the ring. Tighten gently and join with sl st into the first sc. You have 6 sc and 6 chain-2 spaces. - Round 2: Sl st into the first chain-2 space. Work
[sc, ch 3, sc]in that space, then ch 1. Repeat in each of the other five chain-2 spaces, with ch 1 between groups. Join into the first sc. You have 6 pointed clusters and 6 chain-1 spaces.
Six large points
- Round 3: Sl st into the first chain-3 space. Work
[sc, ch 5, sc]in that space, then ch 2 to the next point. Repeat in each of the other five chain-3 spaces. Join to the first sc. You have 6 chain-5 point loops and 6 chain-2 bridges. - Round 4: Into each chain-5 loop work
sc, hdc, dc, ch 3, sl st into the first of those 3 chains, dc, hdc, sc. In each chain-2 bridge worksl st. Continue around all six points, join, and FO. That is six pointed branches.
Cream, white, or a very pale gold all work. Keep the same sequence on every repeat.
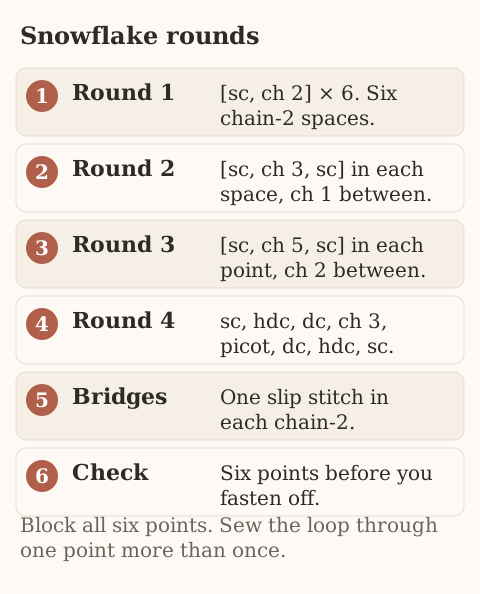
Block the snowflake
If the yarn can be dampened, dampen it lightly and pin all six points on a blocking mat. Keep the center round. Let it dry before you remove the pins. A tiny gold center is optional. Sew the hanging loop through one point more than once.
Checkpoint: Six evenly spaced branches. The points lie fairly flat. The chain-3 picots match.
One collection, one finish
Pick the palette before you start. Cocoa brown for the gingerbread and the reindeer, forest green for the tree and the gift, cream for the angel and the snowflake, burgundy as the accent. The pieces do not need to be the same height.
Use one hanger style for the set, such as a cream cord or a short green chain. Sew it through the body. If you use ribbon, sew it. Do not tie a loose knot around one edge stitch.
For households with babies or pets, keep small pieces and hanging cords out of reach. These are decorations, not toys, unless a piece has been designed and checked as a toy.
Common mistakes
The sphere looks stretched or shows gaps. Use a smaller hook and add stuffing a little at a time. Overstuffing a tiny piece pulls it out of shape.
The panels do not match. Count every row and line the pieces up before you sew. A gentle block can even a wobbly edge.
The ornament will not hang straight. Move the loop toward the center of the weight and sew through more stitches. A small extra piece can shift the balance.
The embroidered face is uneven. Place guide pins first. Make one eye, compare the second with it, and tighten gently so you do not pull the fabric in.
The candy cane loses its curve. Add a few more stitches along the inside of the bend. Do not stuff the tube hard, and do not leave a wire exposed.
The snowflake curls. The tension may be tight. Block it, and keep the six points equally spaced.
Decorating and gifting
Use the gingerbread, Santa, and stocking on a short garland. Use the angel, snowflake, and tree for a quieter cream-and-green branch. Tie the gift-box ornament into the ribbon on a wrapped present, or make several snowflakes for a winter table.
A few ornaments in a small box, with a note that says who made them and the year, is a complete gift. More holiday projects are on Christmas gift ideas and the gift card holder.
Frequently asked
Can I use leftover yarn?
Yes. Keep one yarn weight inside each ornament so the pieces fit. Mix colors, and keep the contrasts that matter, such as Santa’s white beard against the face.
Are all ten beginner projects?
The tree panels, gingerbread pieces, and gift squares are mostly single crochet. The spheres add increases, decreases, and sewing. The snowflake adds chain spaces, double crochet, and picots. If you are new to this, start with the flat tree or the stocking, then try the snowman and Santa.
Can I sell ornaments I make from this page?
Finished ornaments you make yourself are yours to sell, within the rules of your market. Safety and labeling still apply if you sell to households with children. Do not republish this text or these drawings as your own pattern file.
Will mine look exactly like the pictures?
The pictures are illustrations of the silhouettes. The written patterns use flat panels and simple spheres. Yarn, gauge, embroidery, and sewing change the result. Follow the counts on the page.
How long does the whole set take?
A flat piece can be one sitting. A stuffed character takes longer. Plan on several sessions rather than one rush through all ten.
- christmas
- ornaments
- mini
- holiday
Read this next
- Elegant Twist Crochet Ear Warmer A ribbed half double crochet band with a folded front twist. Adult Small, Medium, and Large from gauge. US terms.
- Snowman Wink Crochet Hat A purple snowman beanie from a flat rectangle: white face band, one wink, a carrot nose, and a pompom. US terms.
- Navy Lace Fingerless Gloves: A Detailed Crochet Tutorial Learn to crochet elegant navy fingerless gloves with ribbed cuffs, an openwork shell-lace hand, a practical thumb slit, and a decorative scalloped edge.