

Crochet Spiral Christmas Tree Ornament
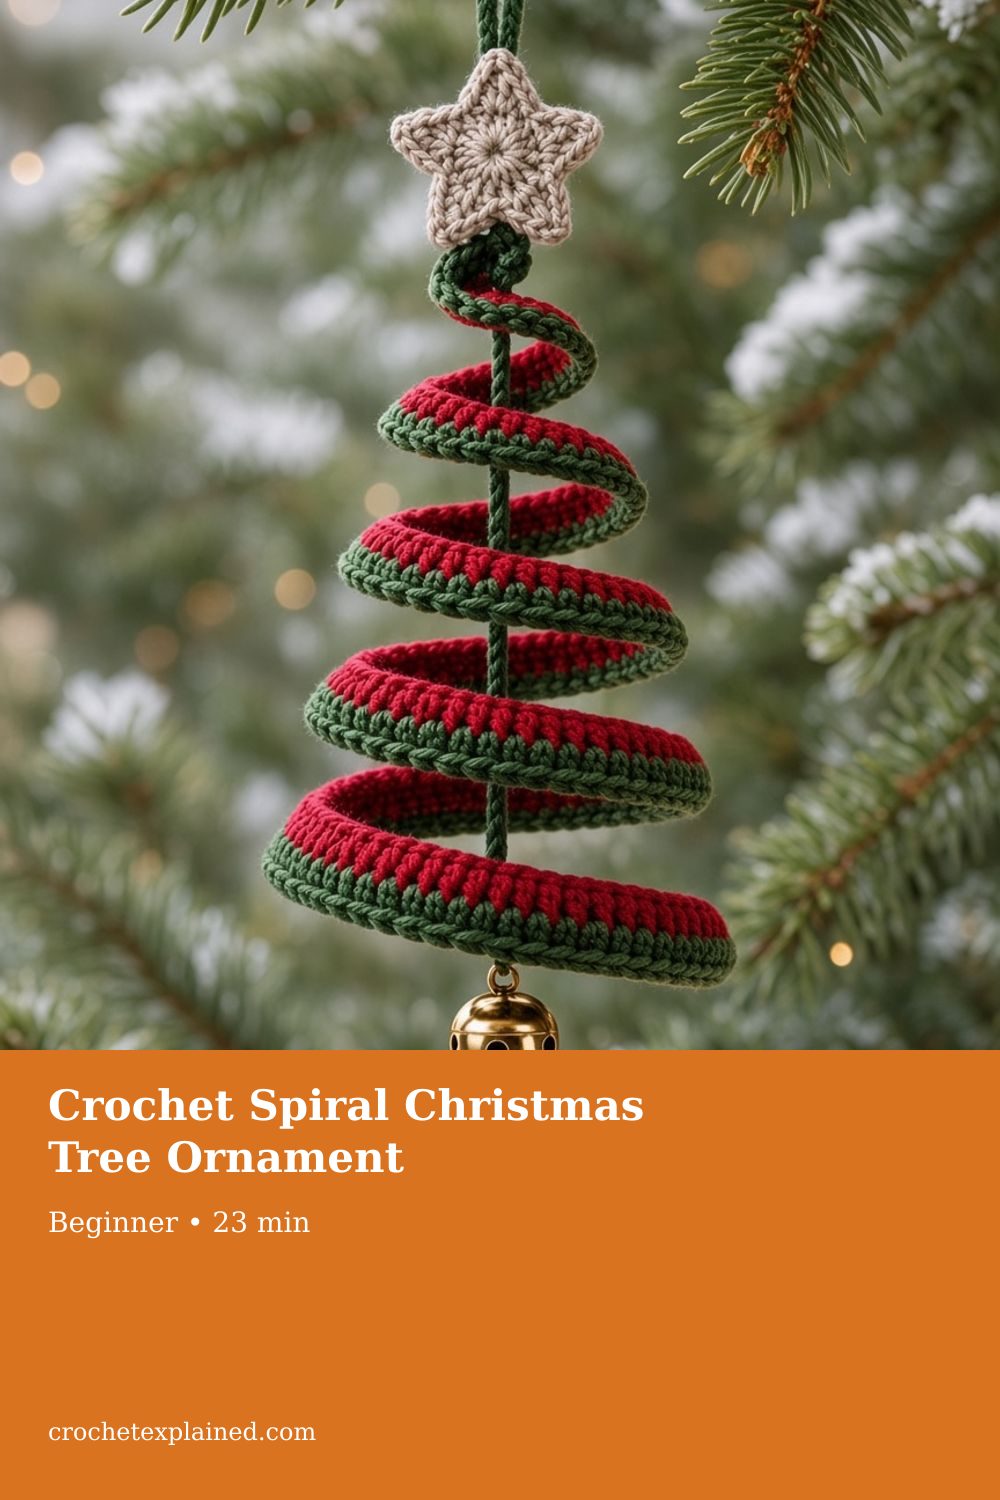
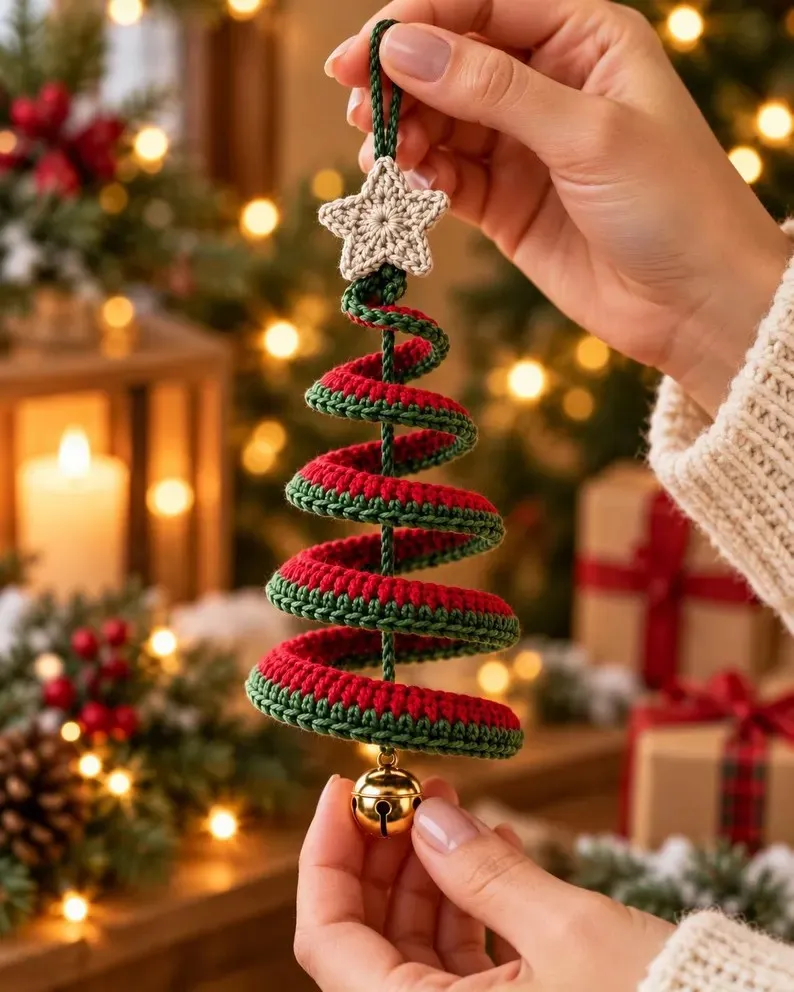
One red strip edged in green, wound smaller toward the top on a center cord, plus a five-point star and a small bell.
A hanging spiral tree: red strip, green edge, five-point star, and a small bell. Counts, shaping, and assembly in US terms.
At a glance
- Skill level
- beginner
- Time
- About 1.5–3 hours to make
- Finished size
- Spiral about 12–15 cm tall, star about 5–6 cm
- Yarn weight
- Worsted cotton or acrylic in red, green, and ivory
- Hook size
- 2.5–3.5 mm, chosen for a firm strip
- Yardage
- About 20–35 g red, 10–20 g green, 5–10 g ivory
On this page
- 1. What you will make
- 2. Materials and tools
- 3. Abbreviations and a fabric test
- 4. Pattern: the red ribbon
- 5. Add the green border
- 6. Make the center cord
- 7. Shape the spiral
- 8. Crochet the five-point star
- 9. Attach the star and the loop
- 10. Add the bell
- 11. Finish and check
- 12. Measurements
- 13. Troubleshooting
- 14. Other colorways
- 15. Care
- Frequently asked
Track your progress
- Go 1. What you will make
- Go 4. Pattern: the red ribbon
- Go Step 1 — Foundation chain
- Go Step 2 — Keep the edges straight
- Go Step 3 — Fasten off
- Go 5. Add the green border
- Go Step 4 — Join the green yarn
- Go Step 5 — Check the edge
- Go 6. Make the center cord
- Go Step 6 — Chain the cord
- Go Step 7 — Mark the trunk
- Go 7. Shape the spiral
- Go Step 8 — Practice before you sew
- Go Step 9 — Set the base
- Go Step 10 — Raise the next turns
- Go Step 11 — Narrow the top
- Go Step 12 — Sew the turns
- Go 8. Crochet the five-point star
- Go Step 13 — Form the center
- Go Step 14 — Work the five points
- Go Step 15 — Shape the star
- Go 9. Attach the star and the loop
- Go Step 16 — Center the star
- Go Step 17 — Make the loop
- Go 10. Add the bell
- Go Step 18 — Place the bell
- Go Step 19 — Sew it so it stays
- Go 11. Finish and check
- Go Step 20 — Look from every side
- Go Step 21 — Weave every tail
- Go Step 22 — Set the shape
- Go 12. Measurements
- Go 14. Other colorways
Ticks are saved on this device only. Counting rows? Keep the stitch counter open in another tab.
US crochet terms throughout. Sizes here are worked out from gauge rather than from a finished sample, so swatch and measure as you go, and the pictures of finished pieces are illustrations. Made one? Send a photo through the contact page.
A hanging ornament made from one long strip, wound into an open spiral, with a five-point star and a small bell on a center cord.
By Crochet Explained
Pattern design note: A photograph can show the silhouette and the colors. It cannot show the stitch, the row count, or the yarn. This tutorial is an independently written pattern for that look: a red strip, a green edge, an open spiral, an ivory star, and a bell. It is not a transcription of an unseen original. Make a short swatch before you commit to the full length.
The sizes below are worked out from gauge rather than from a finished sample, and the pictures are illustrations.
1. What you will make
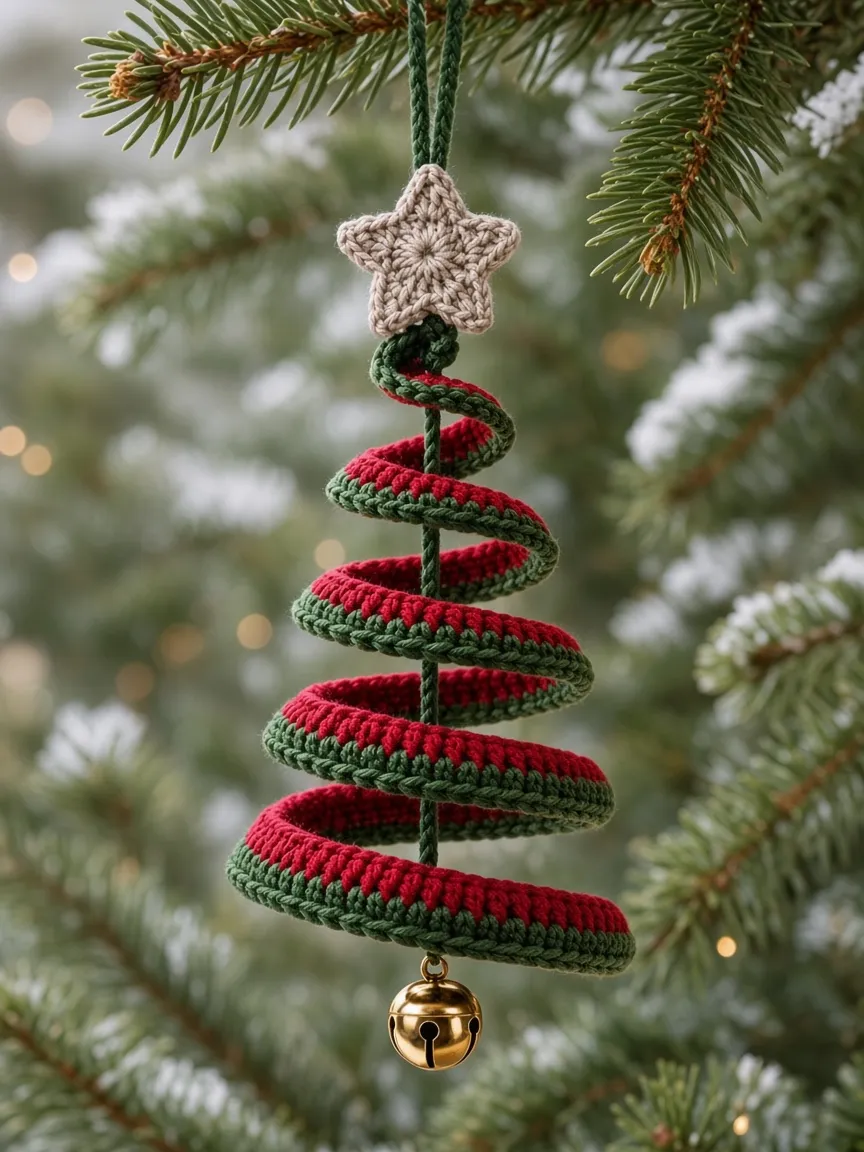
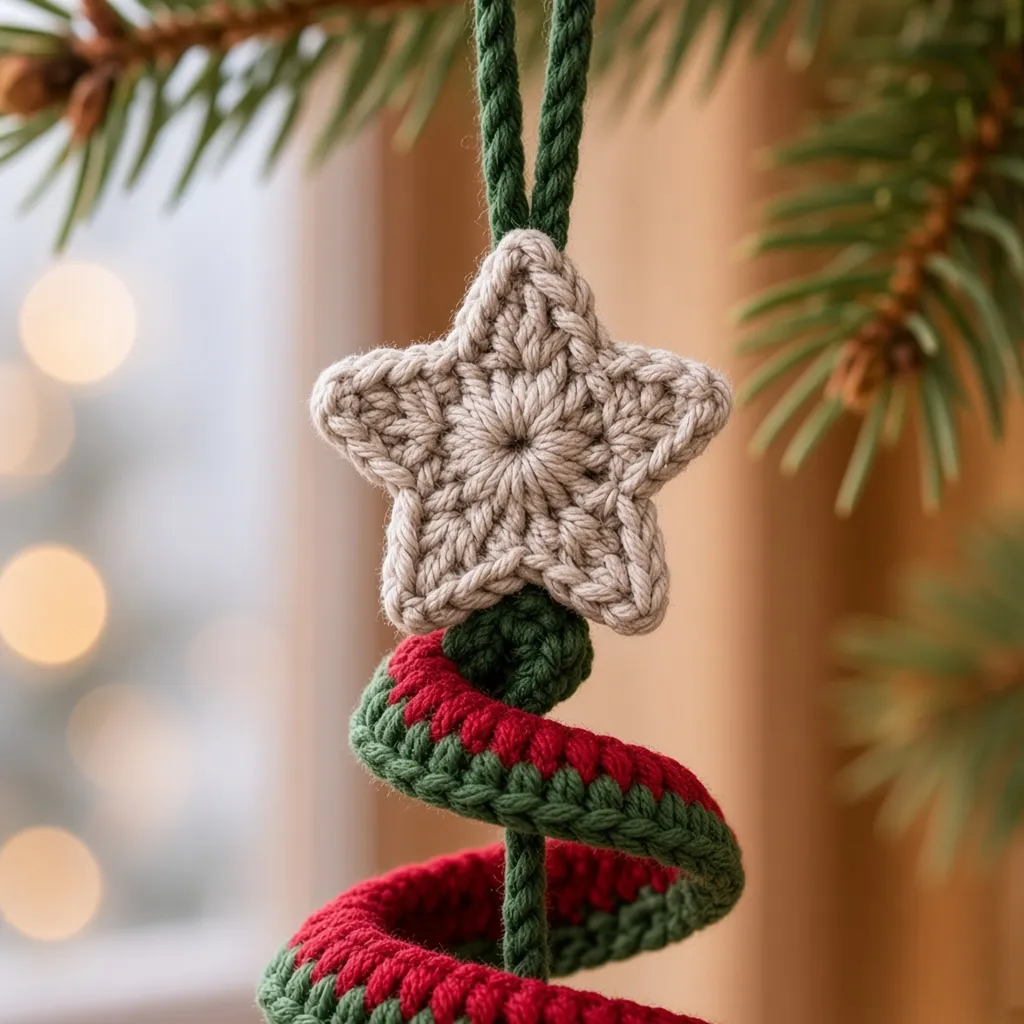
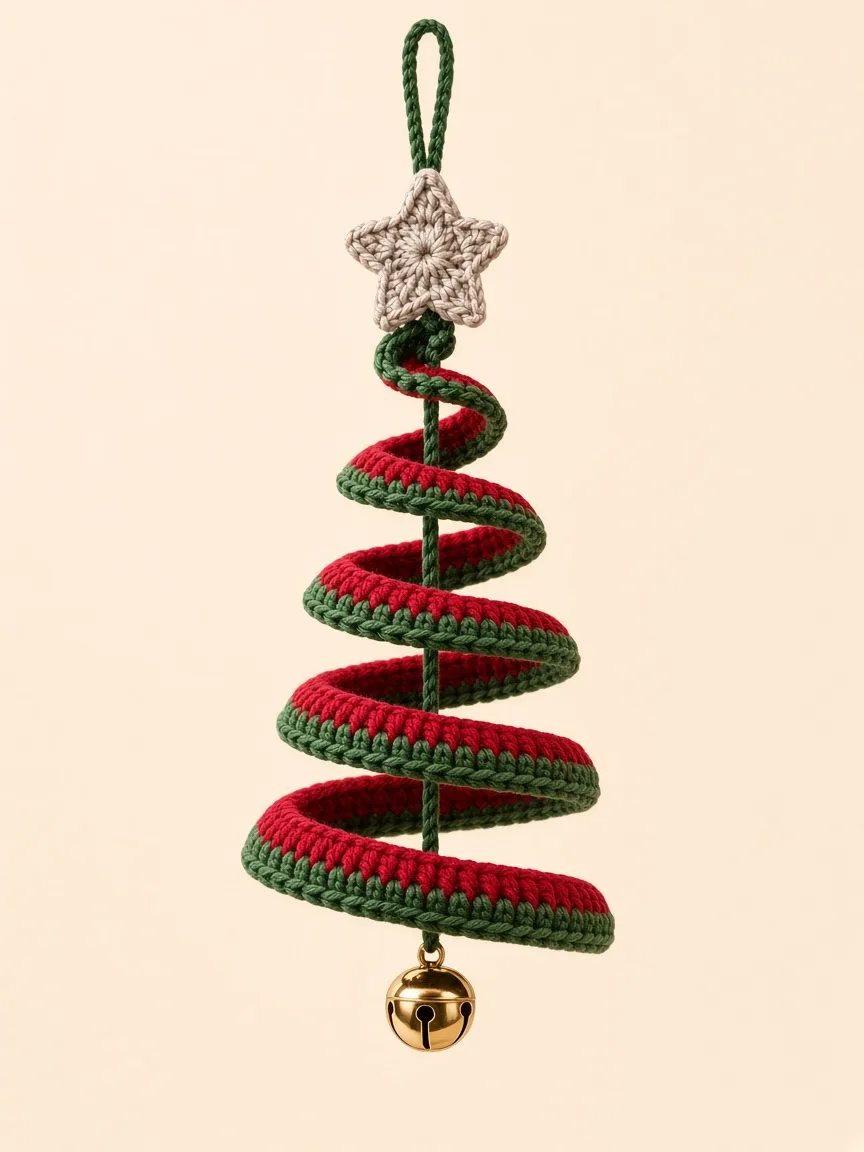
The tree is not stuffed, and it is not a flat triangle. You crochet one red strip, edge it in green, and wind it around a green cord so the coils get smaller toward the top. A five-point ivory star sits over the narrow end. A small gold bell hangs under the widest coil. You can see through the middle.
The strip is the easy part if you can chain, single crochet, and half double crochet. The star and the pinning take more patience than the ribbon. A different flat star, with picots, is already written on the Christmas ornaments page. The cone-shaped tree on how to crochet a Christmas tree is a separate project.
| Feature | Starting recommendation |
|---|---|
| Item | Hanging spiral ornament, not a stuffed toy |
| Skill | Confident beginner. The star and the pinning take longer than the strip |
| Terms | US throughout. US sc is UK double crochet |
| Yarn | Worsted cotton or acrylic. Planning amounts, not a weighed sample |
| Hook | 2.5–3.5 mm, smaller than a usual worsted hook, so the strip stays firm |
| Strip | About 70–80 cm long before shaping. Start at 75 cm |
| Width | About 1.5–2.5 cm once the green edge is on |
| Spiral | About 12–15 cm tall, wide at the bottom |
| Star | About 5–6 cm across |
| Bell | About 2–2.5 cm |
| Loop | About 5–8 cm of hanging length |
| Time | About 1.5–3 hours for many makers |
These are shaping targets, not sizes a fixed row count will guarantee. Stop the strip when it measures 70–80 cm on your table. A photograph cannot set your gauge.
Hang it on a tree, a wreath, or a gift. It is indoor decor. The bell, and any wire you choose to add, make it unsuitable as a toy.
2. Materials and tools
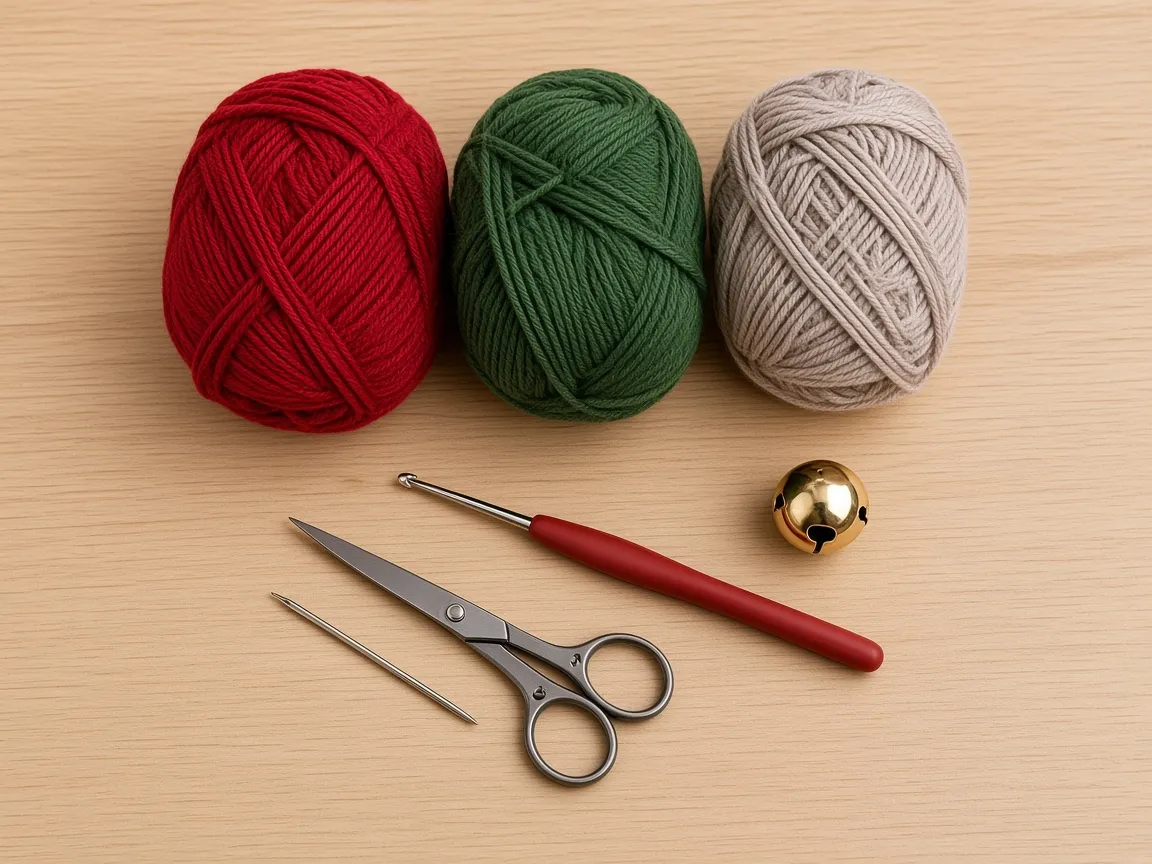
Lay the colors out before you start so the bell looks the right size next to the yarn.
| Material | Suggested amount | Use |
|---|---|---|
| Worsted cotton or acrylic, red | About 20–35 g | Main strip |
| Worsted cotton or acrylic, forest green | About 10–20 g | Edge and center cord |
| Cotton or acrylic, ivory | About 5–10 g | Star |
| Hook | 2.5–3.5 mm | Strip, edge, and star |
| Yarn needle | One blunt needle | Tails and sewing |
| Scissors | One pair | Cutting yarn |
| Gold jingle bell | 2–2.5 cm | Bottom |
| Stitch markers or safety pins | 5–8 | Holding coils while you sew |
| Tape measure | One | Width, length, and height |
| Sewing thread | A short length, optional | Extra hidden stitches |
| Thin craft wire | Optional | Only if the spiral will not hold |
Firm cotton holds an open spiral better than a soft, stretchy acrylic. Acrylic still works. Plan on more sewing if the strip feels limp. Skip bulky yarn at these stitch counts, and skip a slippery or silky yarn that will not keep a curve. Yarn weight names this thickness medium, or CYC 4. A usual worsted hook is larger than 3.5 mm. The smaller hook is deliberate. Hook sizes and yarn for Christmas cover the rest of the fiber choice, including why a metallic strand is a poor choice for the first strip.
Classic red with a deep green edge is the sample. Burgundy with sage, cream with gold, or one color throughout are the same construction. Keep the edge a different value from the strip if you want the coils to read from across the room.
This is decor, not a toy. A loose bell is a choking hazard. If you sew wire into the back of the ribbon, cover both cut ends and keep the ornament away from children and pets. For a small indoor piece, firm yarn and stitches into the center cord are enough. Do not add wire unless the spiral sags after those stitches.
3. Abbreviations and a fabric test
US terms. Abbreviations. US single crochet is UK double crochet. US half double is UK half treble. US double crochet is UK treble. US treble is UK double treble.
| Abbreviation | Meaning |
|---|---|
| ch | Chain |
| sc | Single crochet |
| hdc | Half double crochet |
| dc | Double crochet |
| tr | Treble crochet |
| sl st | Slip stitch |
| st / sts | Stitch / stitches |
| RS / WS | Right side / wrong side |
| FO | Fasten off |
| rep | Repeat |
A turning chain does not count as a stitch unless the line says it does. A number in parentheses, such as (6 sc), is the count at the end of that row or round.
Single crochet: insert, yarn over, pull up a loop, yarn over, pull through both loops.
Half double crochet: yarn over, insert, yarn over, pull up a loop, yarn over, pull through all three loops.
Slip stitch: insert, yarn over, and pull the yarn through the stitch and through the loop on the hook.
Treble: yarn over twice, insert, pull up a loop, then yarn over and pull through two loops three times.
Make a strip about 10 cm long in the yarn and hook you mean to use. Hold it by one end. If it folds and feels limp, drop the hook by 0.5 mm or change to a firmer yarn. If the hook will not go into the stitches, go up slightly. You want a narrow band that can curve without bunching into a kink. That test is about stiffness, not a garment gauge.
4. Pattern: the red ribbon
Short rows let you stop when the length is right. Do not stretch the strip while you measure.
Step 1 — Foundation chain
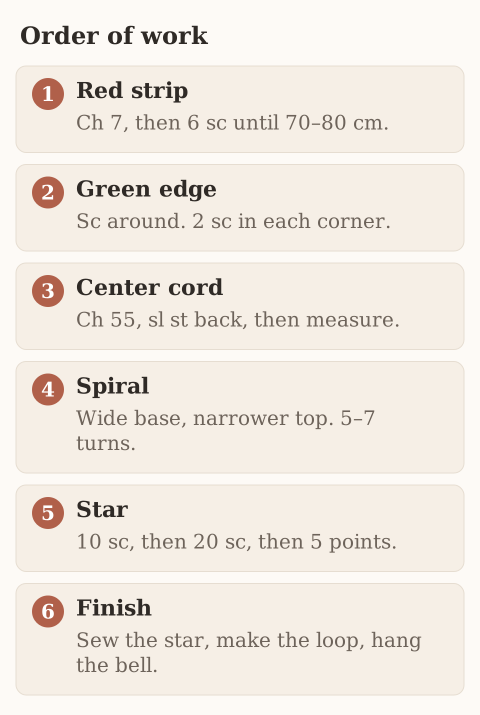
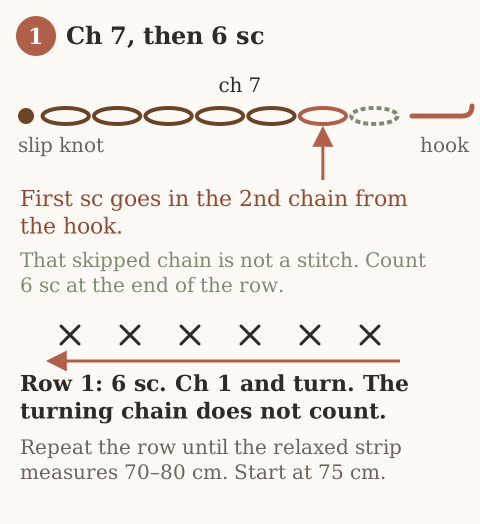
With red yarn, ch 7.
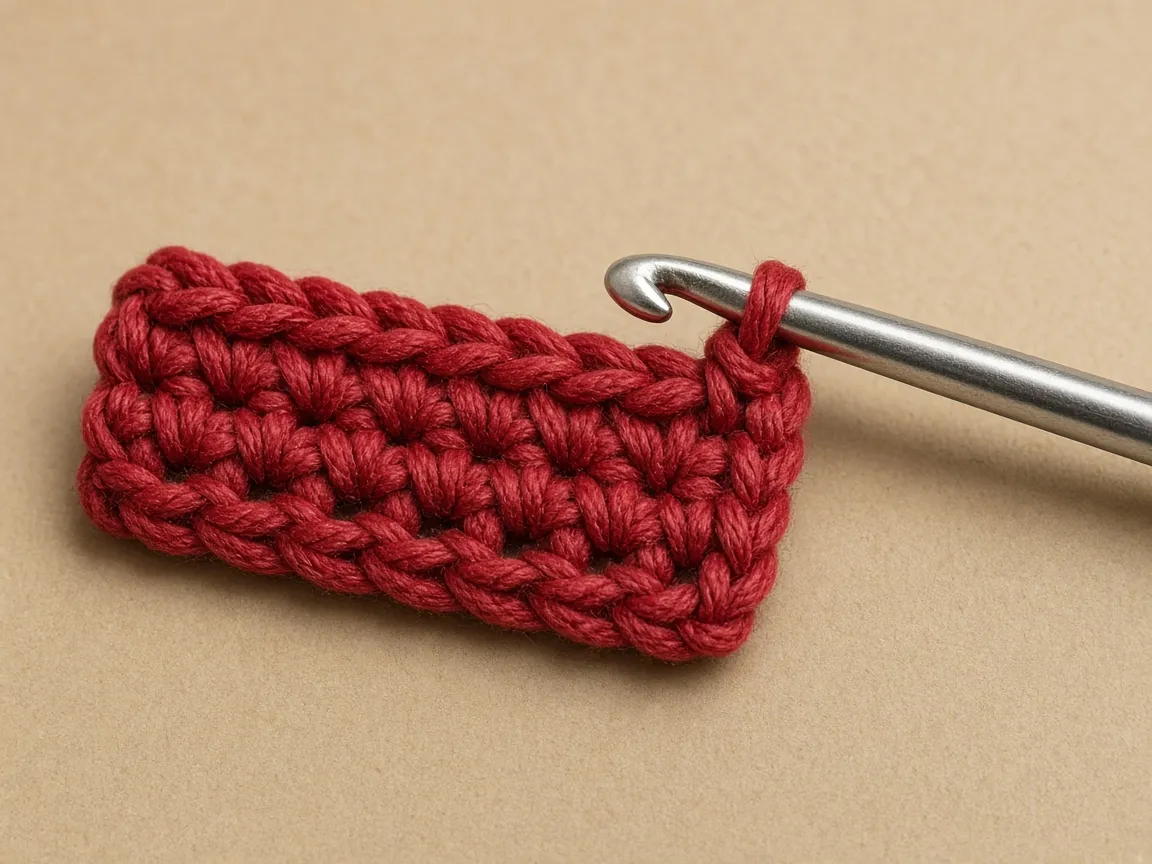
Row 1: Sc in the second chain from the hook and in each chain across. (6 sc). Ch 1, turn.
Row 2: Sc in each of the 6 stitches. (6 sc). Ch 1, turn.
Rows 3 on: Repeat Row 2 until the strip measures about 70–80 cm, relaxed and flat. Start at 75 cm. A shorter strip makes fewer coils or a smaller base. A longer strip makes more turns. You can take a little off before the green edge if the spiral looks crowded. Do not add stitches along the row to make the strip longer. Length comes from more rows.
Count 6 stitches at the end of every row. Dropping one stitch every few rows makes a ribbon that tapers before you ever wind it.
Step 2 — Keep the edges straight
If the first stitch is hard to see, mark it. Every few rows, lay the strip flat and check that the long edges stay about parallel. A tight turning chain pulls one edge in and the band ripples. Loose first and last stitches make floppy corners. Do not yank the turning chain, and do not leave those end stitches sloppy.
Step 3 — Fasten off
When the strip is long enough, fasten off. Leave a 20 cm tail at one end in case you need it while sewing. Weave the other tail through a few stitches on the wrong side, then turn and weave back once.
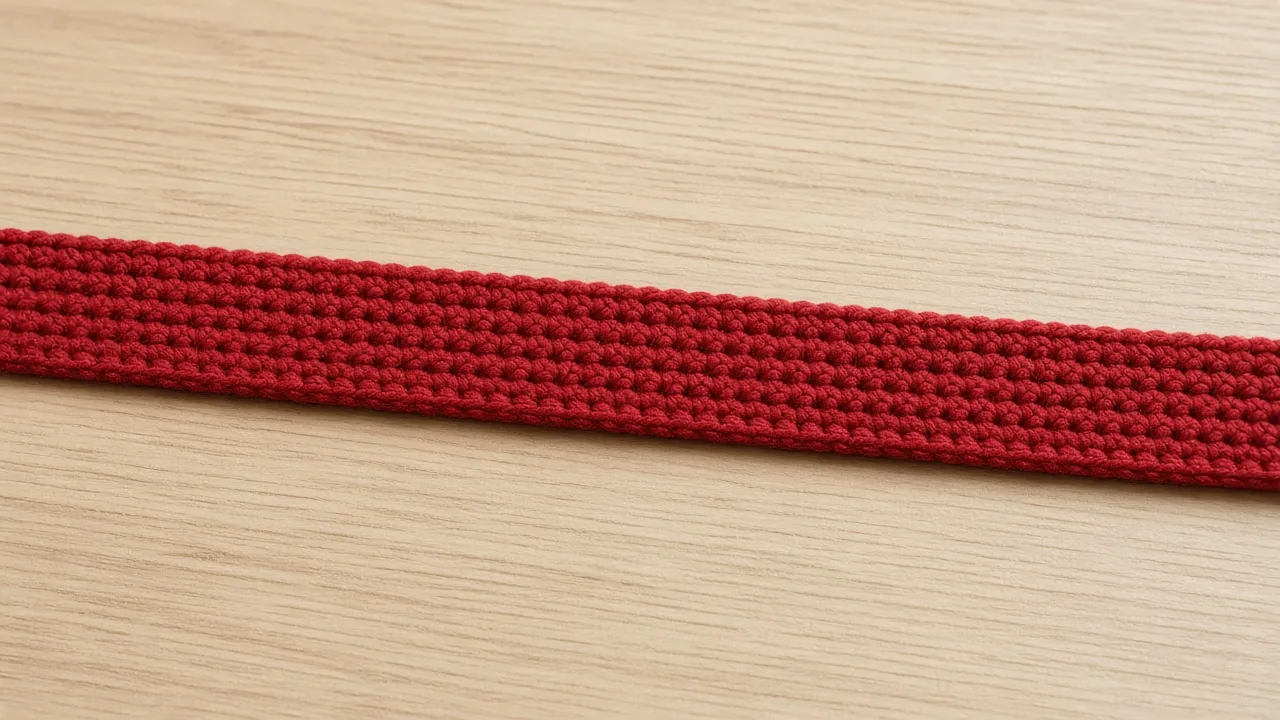
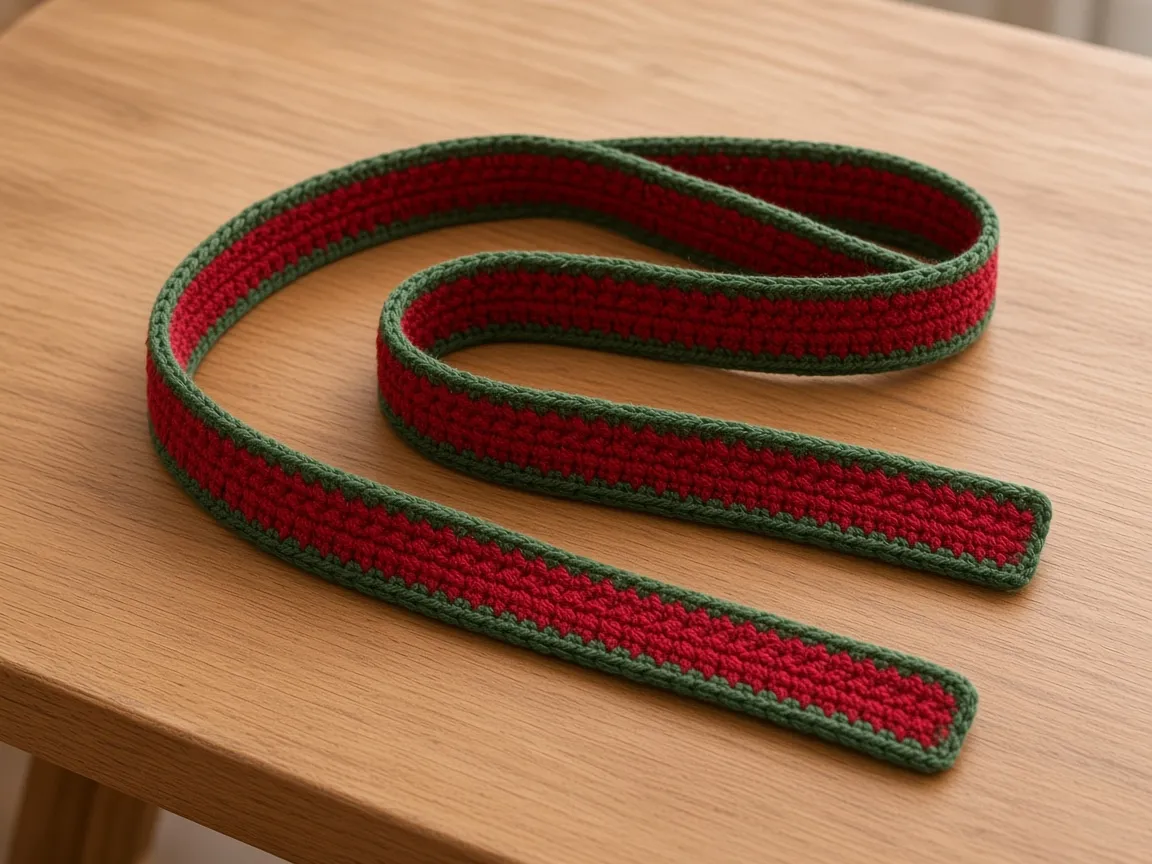
Checkpoint: a straight red band, about 70–80 cm long and about 1.5–2 cm wide before the edge. It should bend around a finger without feeling fragile.
5. Add the green border
The green line is what makes each coil readable. Work both long edges, and keep the short ends tidy.
Step 4 — Join the green yarn
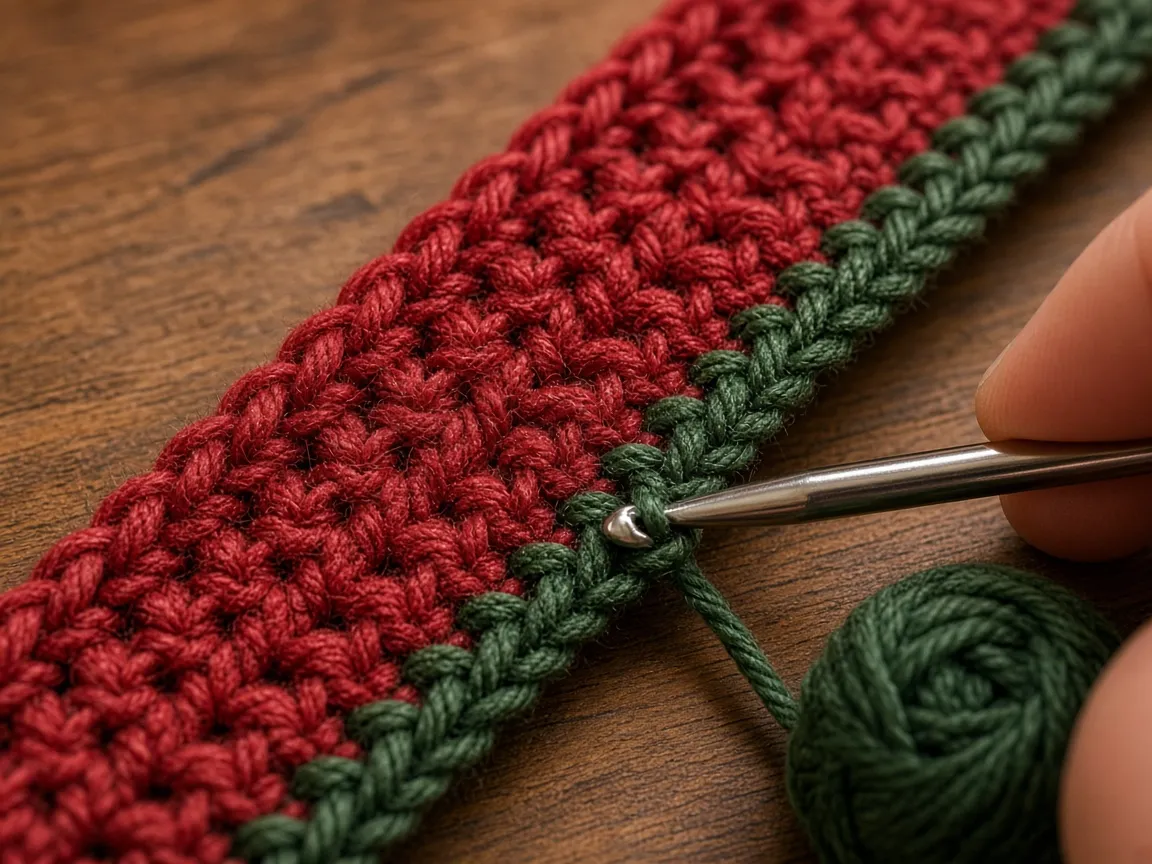
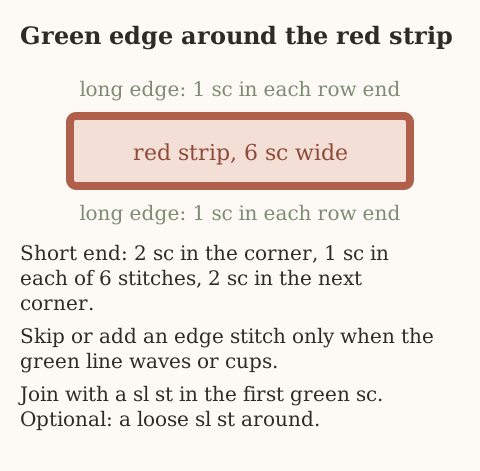
Right side facing you, join green with a slip stitch at one corner. Work 1 sc into each row end along the first long edge. Row ends are not always the same height. Skip a space or add an extra sc when the edge starts to wave or cup. Follow the fabric. Do not force a perfect one-stitch-per-row if the strip will not lie flat.
At the first short end: 2 sc in the corner, 1 sc in each of the 6 stitches across, then 2 sc in the next corner.
Work back along the second long edge the same way. On the last short end, add corner stitches only where the fabric wants to curl. Join with a sl st in the first green sc and fasten off.
Step 5 — Check the edge
Lay the strip flat. The green line should follow the red band. Waves mean too many green stitches. A crescent means too few. Undo the bad stretch and redo it. Do not block a wavy edge into submission.
A second round of loose slip stitches around the outside makes a stronger outline, especially on cotton. Do not pull that round tight. Tight slip stitches take the bend out of the ribbon.
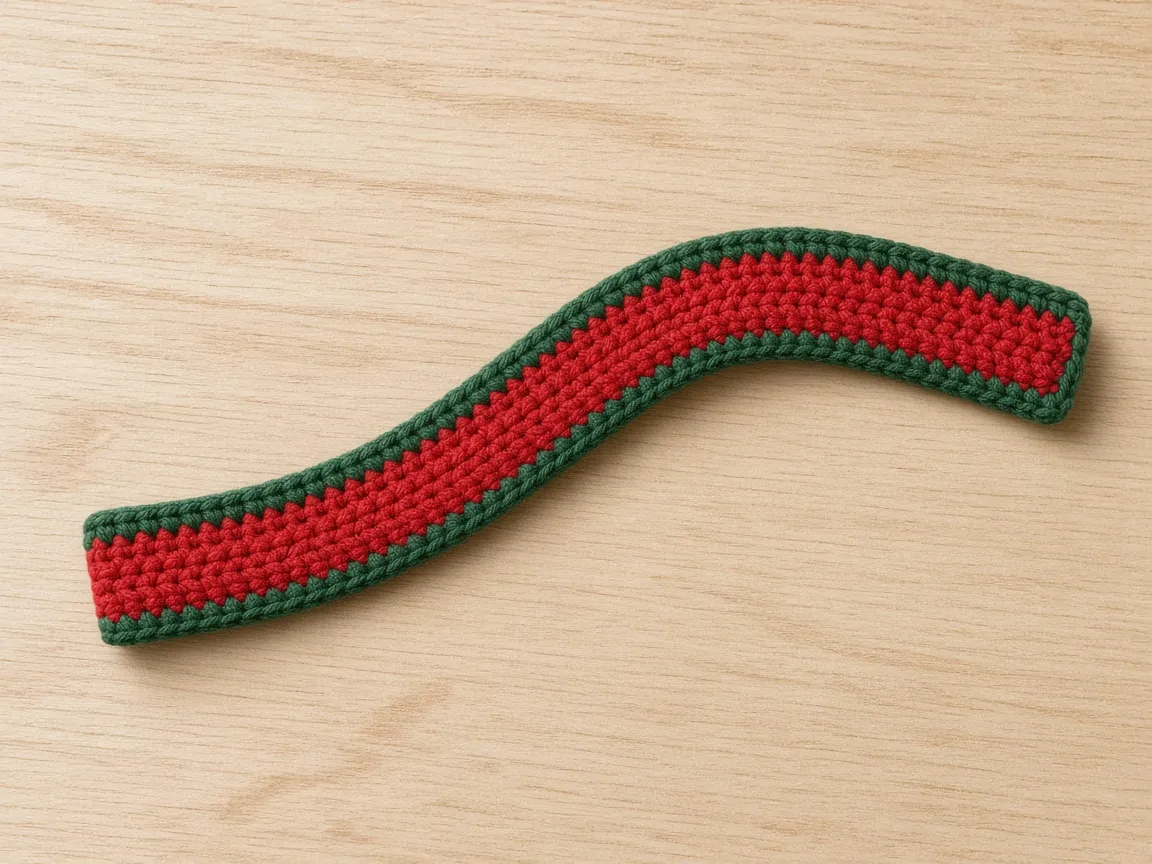
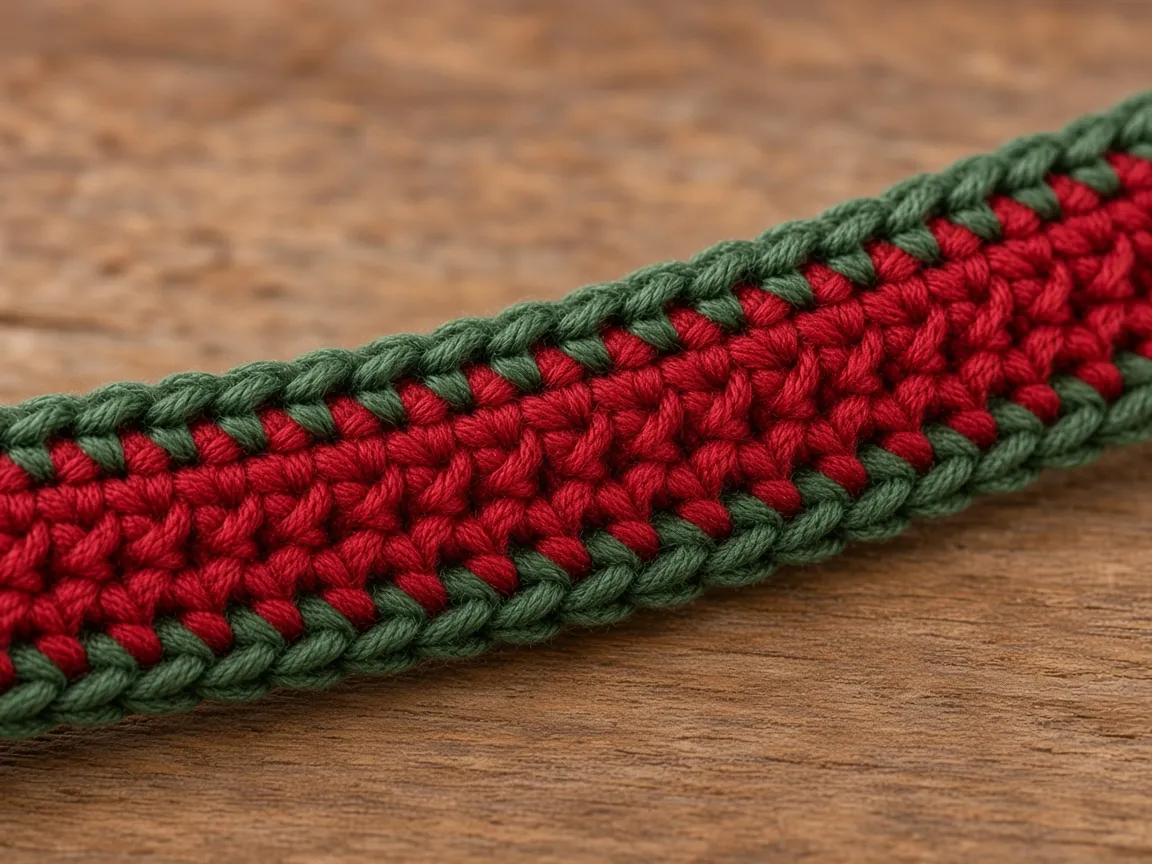
Checkpoint: both long edges are green, the short ends are neat, and the strip still bends.
6. Make the center cord
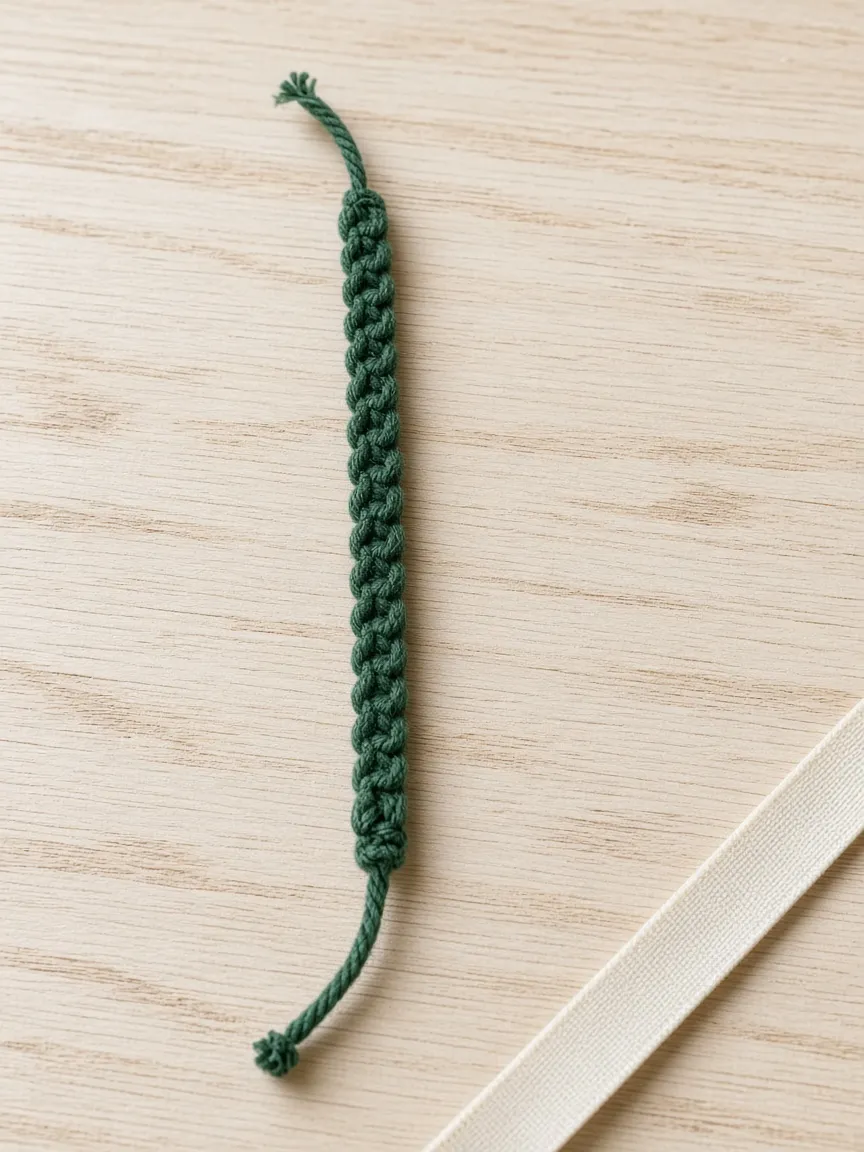
The cord is the trunk and the hanging loop. A spiral that is only pinned to itself will spring open.
Step 6 — Chain the cord
With green, ch 55. On a 2.5–3.5 mm hook that chain may land around 22–30 cm, but measure yours. Tension changes the length more than the chain count does. Slip stitch back along the chain for a firmer cord, or use a plain chain if this one feels thick. A narrow crocheted cord is fine too. Leave 15–20 cm tails at both ends.
After a test hang, aim for about:
- 12–15 cm of cord inside the spiral
- 5–8 cm of loop above the star
- a little extra below the widest coil for the bell
Step 7 — Mark the trunk
Lay the cord straight. Mark where the bottom coil will sit and where the star will sit. That span is the 12–15 cm body. The loop and the bell sit outside it. Do not attach the bell yet. You want both ends free while you test the coils.
7. Shape the spiral
The strip has to read as a tree: wide at the bottom, narrow at the top. Equal circles read as a spring.
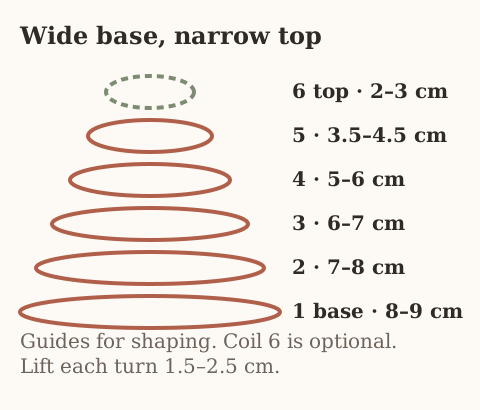
| Coil from the bottom | Approximate diameter |
|---|---|
| 1 | 8–9 cm |
| 2 | 7–8 cm |
| 3 | 6–7 cm |
| 4 | 5–6 cm |
| 5 | 3.5–4.5 cm |
| 6, optional | 2–3 cm |
Step 8 — Practice before you sew
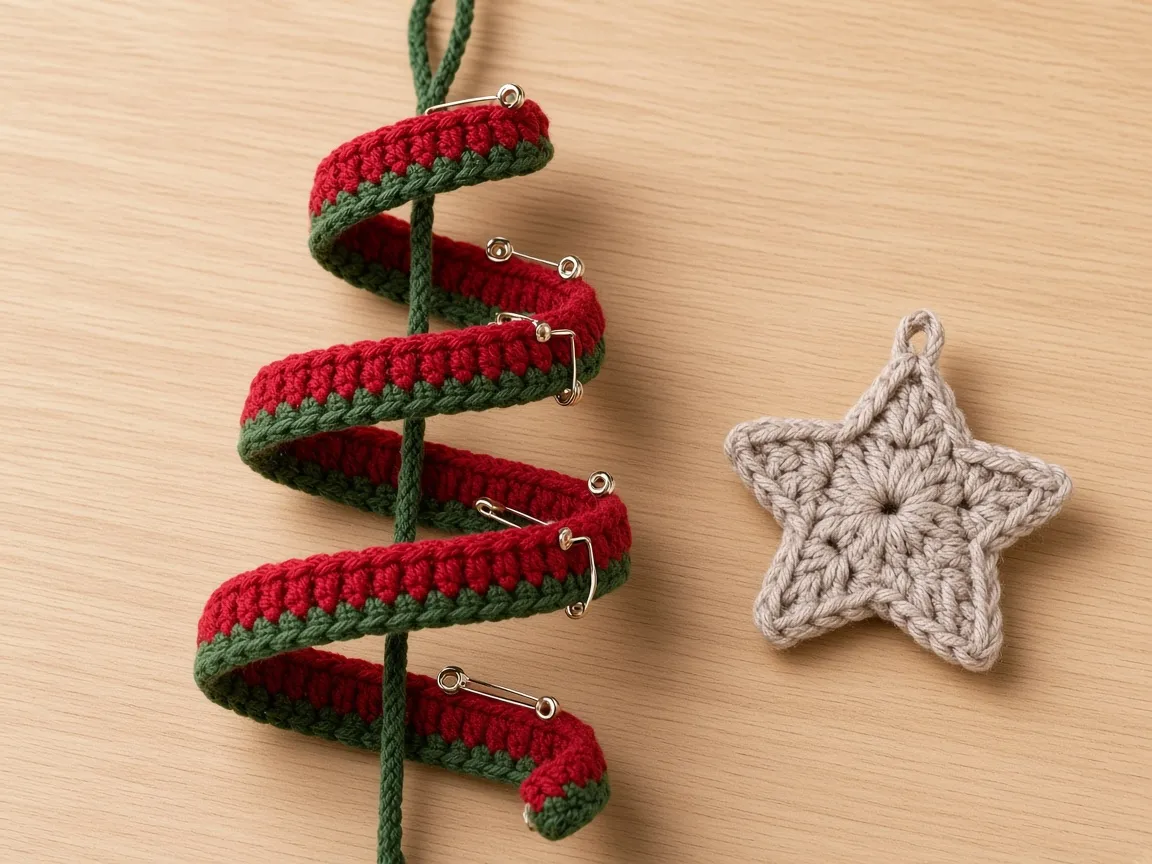
On a flat surface, curve one end into the wide bottom coil. Keep the red face out and the green edge visible. Do not twist the strip into a kink. Wind upward in smaller loops. Aim for about 5–7 turns. The number of turns is a choice, not a stitch count.
Step 9 — Set the base
Put the largest loop at the bottom mark on the cord. Pin the inner edge where it meets the cord. The base should read as a coil, not as a flat hoop pressed against the table. Check it from the front and from the side.
Step 10 — Raise the next turns
Wrap upward. Lift each turn about 1.5–2.5 cm above the one under it, and make each turn smaller. Pin wherever the ribbon crosses the cord. If a section flips and hides the red face, rotate that section. Do not force every centimeter to face the same way if that puts a hard kink in the yarn.
Step 11 — Narrow the top
The last turn is much smaller than the base. Guide the final 3–5 cm of ribbon up toward the star. Tuck the raw end under the place the star will cover. Step back. If it looks like a stack of equal rings, widen the bottom and tighten the turns as they rise.
Step 12 — Sew the turns
With a yarn needle and green yarn, or a strong matching thread, take a few small stitches through the back edge of the strip and the cord at each coil. Firm, not cinched into a knot. On a softer strip, add one hidden stitch between neighboring coils, on the back. Use as few anchors as will hold the shape.
Before you cut tails, hang the tree by the top cord for about 30 seconds. If the middle drops, the lower coils twist, or the cord pulls sideways, put it down and sew the weak spot again.
Wire is optional and usually unnecessary at this size. If you use it, sew a thin coated wire along the back, bury both ends, and treat the ornament as decor. Firm cotton and the center stitches are the first fix for a sag.
8. Crochet the five-point star
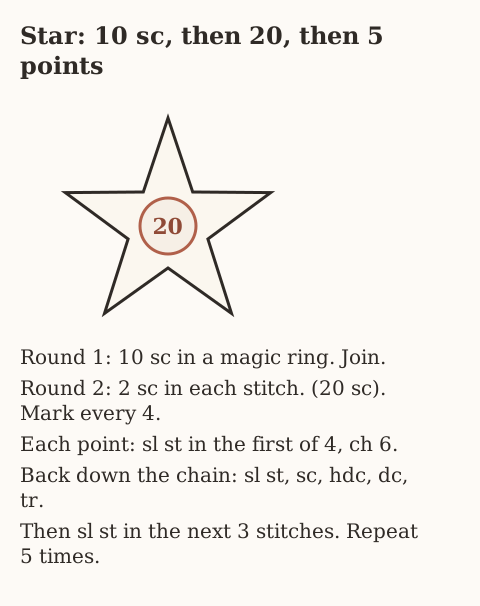
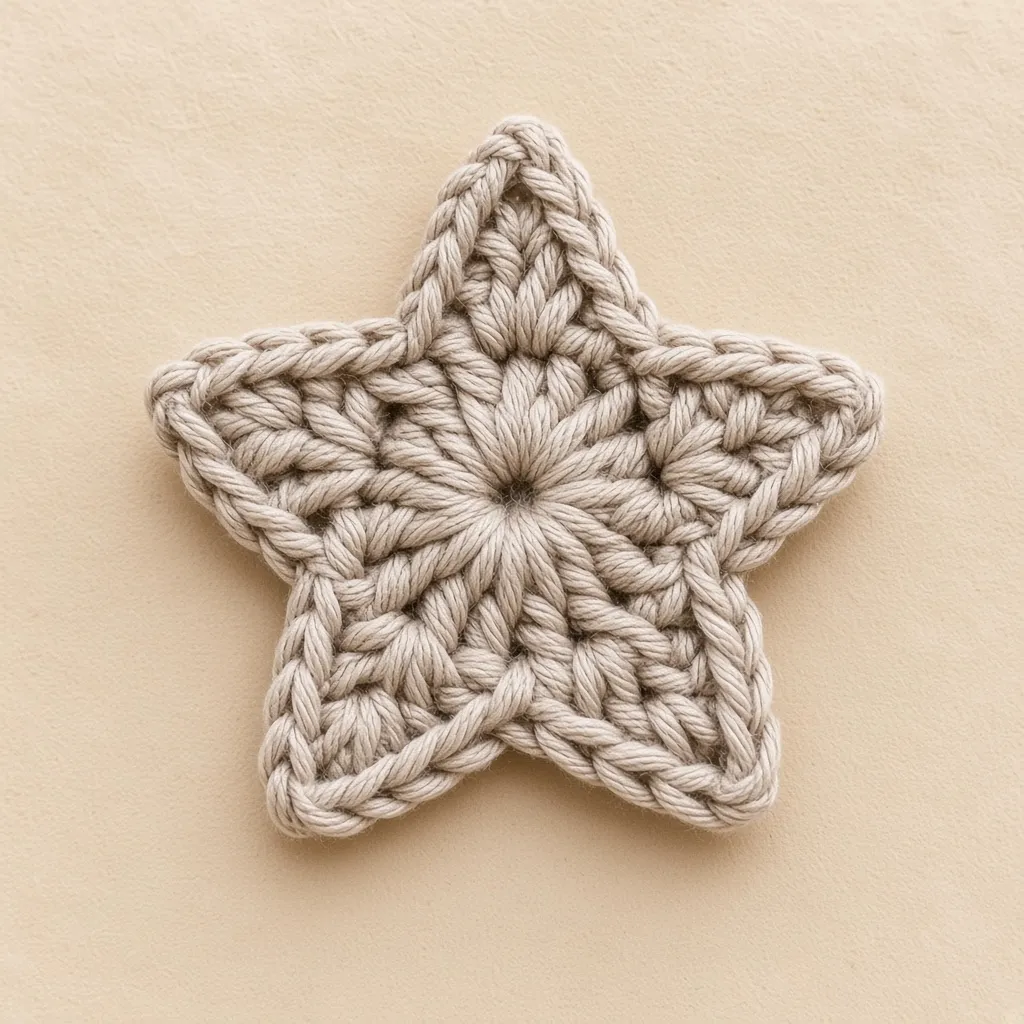
This star is five points on a 20-stitch round. It is not the picot star on the ornaments page, and it is not a chart copied from a photograph.
Step 13 — Form the center
With ivory, make a magic ring.
Round 1: Ch 1 (does not count), 10 sc into the ring. Pull the ring closed. Join with a sl st to the first sc. (10 sc).
Round 2: Ch 1, 2 sc in each stitch around. Join with a sl st to the first sc. (20 sc).
Place a marker after every 4 stitches. That is 5 groups.
Step 14 — Work the five points
Each point uses one group of 4. Repeat this five times:
- Sl st in the first stitch of the next group.
- Ch 6.
- Starting in the second chain from the hook, work sl st, sc, hdc, dc, tr, one stitch in each of the five chains.
- Sl st in each of the next 3 stitches of Round 2.
After the fifth point, join or fasten off. You should have five points around the circle. A slight curl can be shaped later.
Count check: the first base stitch holds the opening slip stitch, and the next three hold the closing slip stitches. Five points times four base stitches is all 20 stitches of Round 2. If a point lands on the wrong stitch, the last point will not have four stitches left.
Step 15 — Shape the star
Flatten each point with your fingers. For cotton, a light mist and pins, then a full dry, will set the points. Do not press acrylic with a hot iron.
If the star is much larger than the top coil, use a finer yarn for the star only. To make a small star larger, use a thicker ivory yarn or a larger hook, then shape it. A second unstuffed star, wrong sides together and sewn around the edge, shows a neat back. You can tuck the cord end inside before you close the last stitches.
9. Attach the star and the loop
Step 16 — Center the star
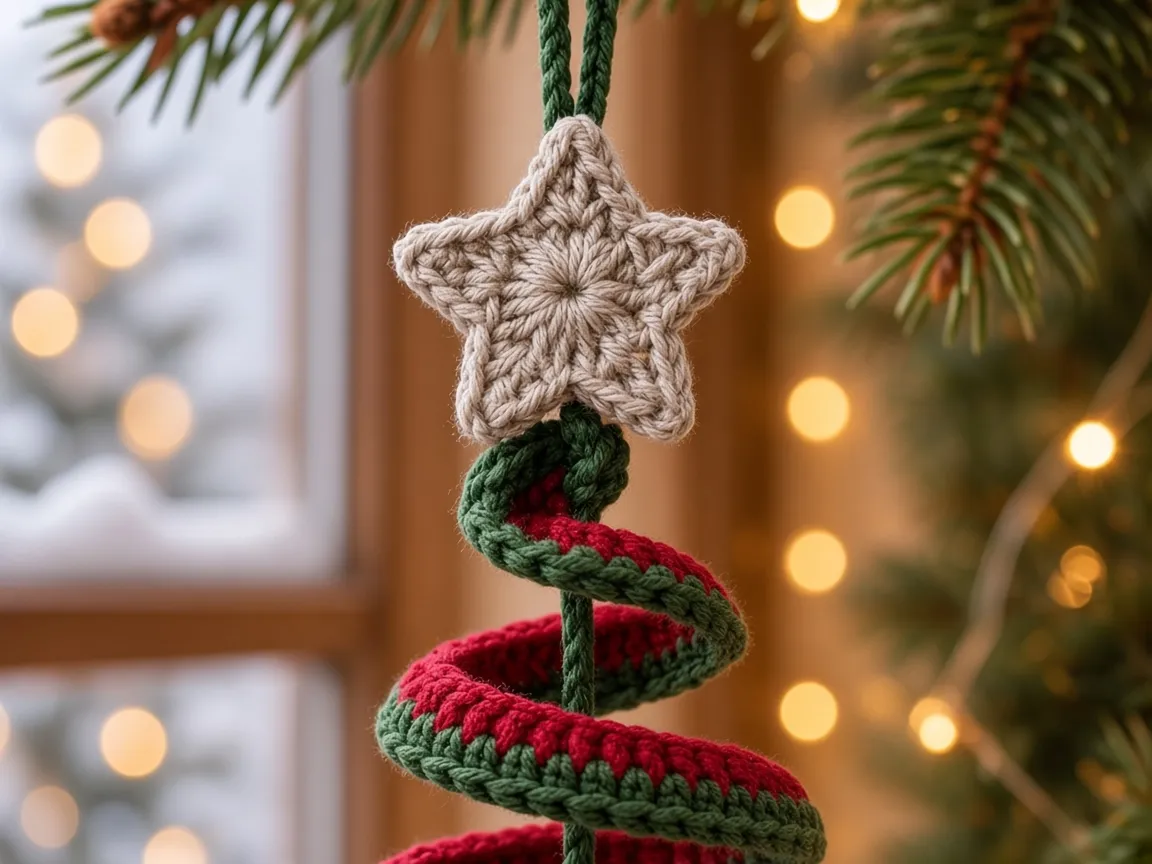
Hold the tree by the cord. The star sits just above the smallest coil, over the cord, not floating on a long bare strand. Sew through the back of the star’s center with small stitches. If you made two layers, sew through both so they cannot slide.
Step 17 — Make the loop
Fold the extra cord into a loop about 5–8 cm long. Sew the returning end into the back of the star and down into the top of the spiral. Several passes, not one knot. Hang it. If the star tips, move the loop toward the balance point and sew it there before you weave the ends.
10. Add the bell
Step 18 — Place the bell
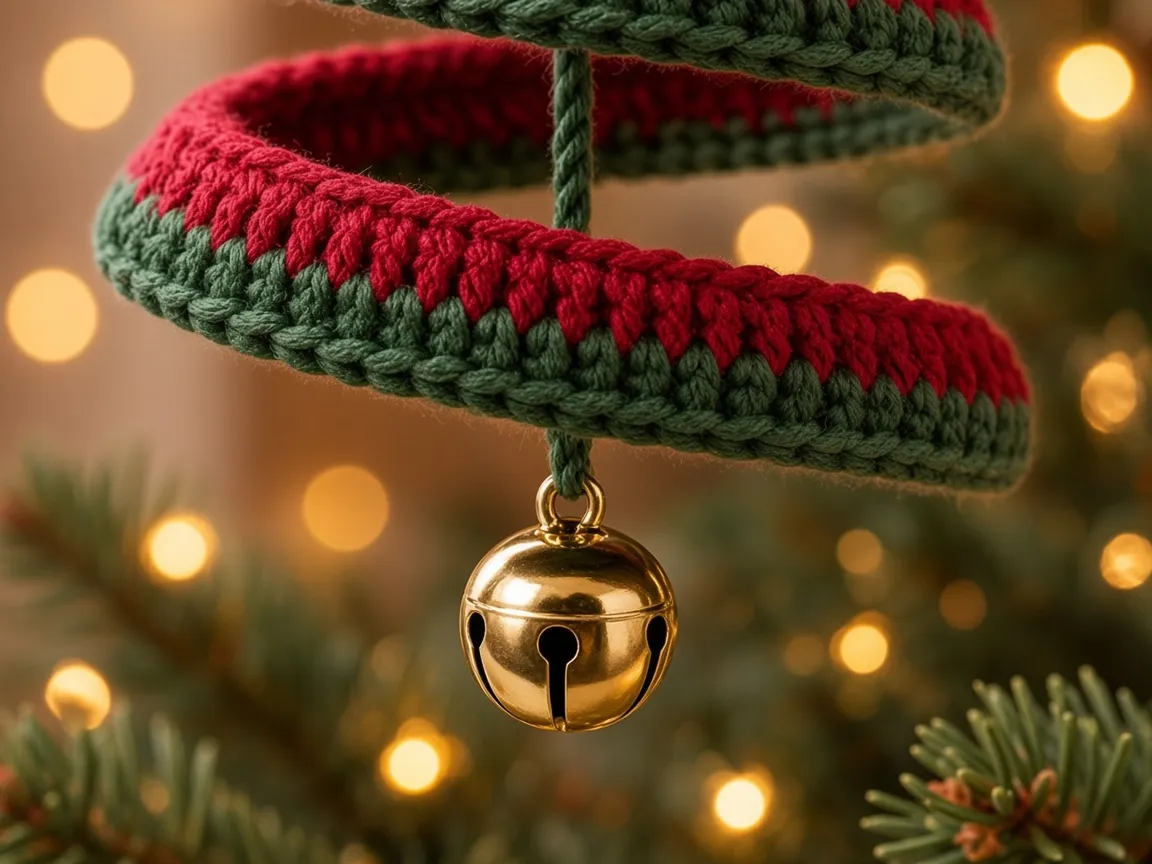
Use a gold jingle bell about 2–2.5 cm across. Run green yarn or strong thread through its loop and sew it to the bottom of the center cord, just under the widest coil. Leave enough room that the bell can move without catching in the crochet. It should sit close to the base coil and still be obvious.
Step 19 — Sew it so it stays
Pass the yarn through the bell loop several times, then stitch it into the cord. No bow. Weave the end back into the cord and trim it.
A bell that pulls free is a choking hazard. This ornament is not a toy. Hang it where children and pets cannot reach it.
11. Finish and check
Step 20 — Look from every side
Hold it at eye level and turn it.
- The bottom is wider than every coil above it.
- Red fabric and green edge both show on most turns.
- Loop, star, cord, and bell sit on about the same vertical line.
If the bell swings hard to one side, the cord is twisted or the bottom coil is sewn off center. Undo that anchor, move it, and sew it again.
Step 21 — Weave every tail
Hide red, green, and ivory ends on the wrong side. Weave, turn, and weave back. Do not cut a tail flush against a knot at the bell or the loop.
Step 22 — Set the shape
Lay the tree on its side and ease the coils. A light mist helps cotton settle. Let it dry in the shape you want. Do not soak the bell, and do not steam acrylic hard.
Before it is a gift, check this list:
- The red strip is the same width all the way along, with 6 sc in the sample width.
- The green edge does not ripple.
- The bottom coil is the widest.
- The top narrows into the star.
- Each turn is sewn to the cord at least once.
- The star has five points and sits in the center.
- The loop holds the whole ornament.
- The bell is sewn to the cord and can still move.
- Tails are woven in.
- A short hang does not collapse the spiral.
12. Measurements
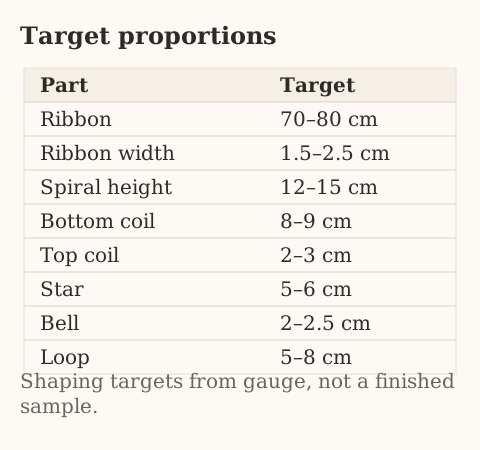
| Part | Target | How to change it |
|---|---|---|
| Ribbon length | 70–80 cm | More rows, or fewer |
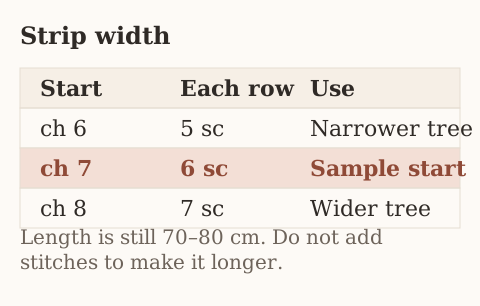
| Ribbon width | 1.5–2.5 cm | 5, 6, or 7 sc per row |
| Spiral height | 12–15 cm | Space between coils |
| Bottom coil | 8–9 cm | The first loop, before sewing |
| Top coil | 2–3 cm | The last turn |
| Star | 5–6 cm across | Yarn and hook for the star only |
| Bell | 2–2.5 cm | Choose the hardware |
| Loop | 5–8 cm | Fold more or less cord |
For a smaller ornament, work a shorter and narrower ribbon and use a smaller bell. Crushing the same strip into a tiny spiral makes a knot, not a small tree. A gift-topper version can start from a ribbon about 40–50 cm long, with thinner yarn and a smaller star.
13. Troubleshooting
The spiral droops after it hangs
The ribbon is too soft, or too few stitches join it to the cord. Add anchors behind the middle coils. If it still sags, remake the strip on a smaller hook in firmer cotton. Stiffness matters more than extra decoration.
It looks like a spring
The coils are almost the same size. Unpin the upper turns and make them smaller. The top has to be obviously narrower than the base.
The strip bunches on the tight turns
The ribbon is too wide for the smallest coil, or it is being twisted. Use 5 sc per row, loosen the top turns, or let the band sit at a gentle angle. Do not jam a wide strip into a tiny ring.
The green edge waves
Too many stitches on the long edge, or the green tension does not match the red. Undo that section and use fewer stitches. Check the strip often while the edge is still short enough to rip back.
The star will not lie flat
The chain points are tight, the yarn is bulky, or a point used the wrong four stitches. Count the 20 stitches again. Each point owns four of them. Cotton can be pinned damp. A slightly larger hook makes the points less stiff. Do not iron acrylic.
The bell pulls the bottom down
The bell is heavy, or it is sewn only to the ribbon edge. Use a lighter bell and sew it to the center cord. Reinforce the lower cord.
The tree leans on the loop
The loop is off center, or one side of the ribbon is heavier. Move the loop a few millimeters, hang it again, and sew it where it balances.
14. Other colorways
The construction does not change.
Traditional: red body, dark green edge, ivory star, gold bell.
Quieter: burgundy, sage, cream star.
One color: cream or forest green for the strip and the edge. A different stitch on the edge still shows a line.
Winter: pale blue edged in white, a silver-tone bell, a white star. Still indoor.
A set: same hook and same yarn line, different colors. Several trees at different heights read as a garland more clearly than one perfect ornament.
15. Care
After the season, check the loop, the star, the cord stitches, and the bell before you put it away.
Spot-clean cotton with cool water and a little mild detergent, and keep the bell dry. For acrylic, follow the ball band. Skip hot water. Blot. Do not wring.
Store it on its side in a shallow box. Tissue inside a very soft spiral keeps the coils from flattening. Keep heavier ornaments off it. Next year, ease the coils with your fingers and pull gently on the loop and the bell before you hang it.
Frequently asked
Is this a first project?
The strip is, if single crochet is already comfortable. The star and the sewing are the parts that take a second look. Make the star once on its own before you sew it to a finished spiral.
Can I leave the bell off?
Yes. Weave the lower cord into the bottom coil. A tassel changes the look. The pattern as written includes the bell.
Can I use one color?
Yes. The edge can be the same yarn. The spiral still needs the cord and the taper.
How much yarn is enough?
The gram amounts are planning estimates for a medium strip, not a weighed sample. Width and length change the total. This is a reasonable scrap project if the cotton is firm enough to hold a curve.
Why not crochet the spiral in the round?
A separate strip can be measured, shortened, and rewound before any sewing. You do not have to rewrite an increase formula to change the size.
Can it hang outside?
Keep it indoors. Rain, damp, and sun change the yarn and the bell. An outdoor piece needs different materials than this pattern.
What if the star is only 4 cm?
Keep it if it still suits the top coil. For a larger star, change the ivory yarn or the hook, then shape the points. Do not add a random extra round and hope the five points survive.
Do I need the wire?
No. Start without it. Firm yarn, a compact hook, and stitches into the cord are the pattern. Wire is a last resort, with the ends buried.
A calm order if you want it in one sitting: swatch first, then the red strip, then the green edge, then the cord and the star, then pin, sew, and hang. Extra time on the taper does more than extra stitches.
© Crochet Explained. Original pattern. Finished size changes with yarn, gauge, and how firmly the coils are sewn. The pictures are illustrations of the intended look.
- christmas
- ornament
- spiral tree
- star
Read this next
- Elegant Twist Crochet Ear Warmer A ribbed half double crochet band with a folded front twist. Adult Small, Medium, and Large from gauge. US terms.
- 10 Christmas Crochet Ornament Patterns Ten mini ornaments: gingerbread, tree, snowman, reindeer, Santa, candy cane, stocking, gift, angel, and snowflake.
- Snowman Wink Crochet Hat A purple snowman beanie from a flat rectangle: white face band, one wink, a carrot nose, and a pompom. US terms.