

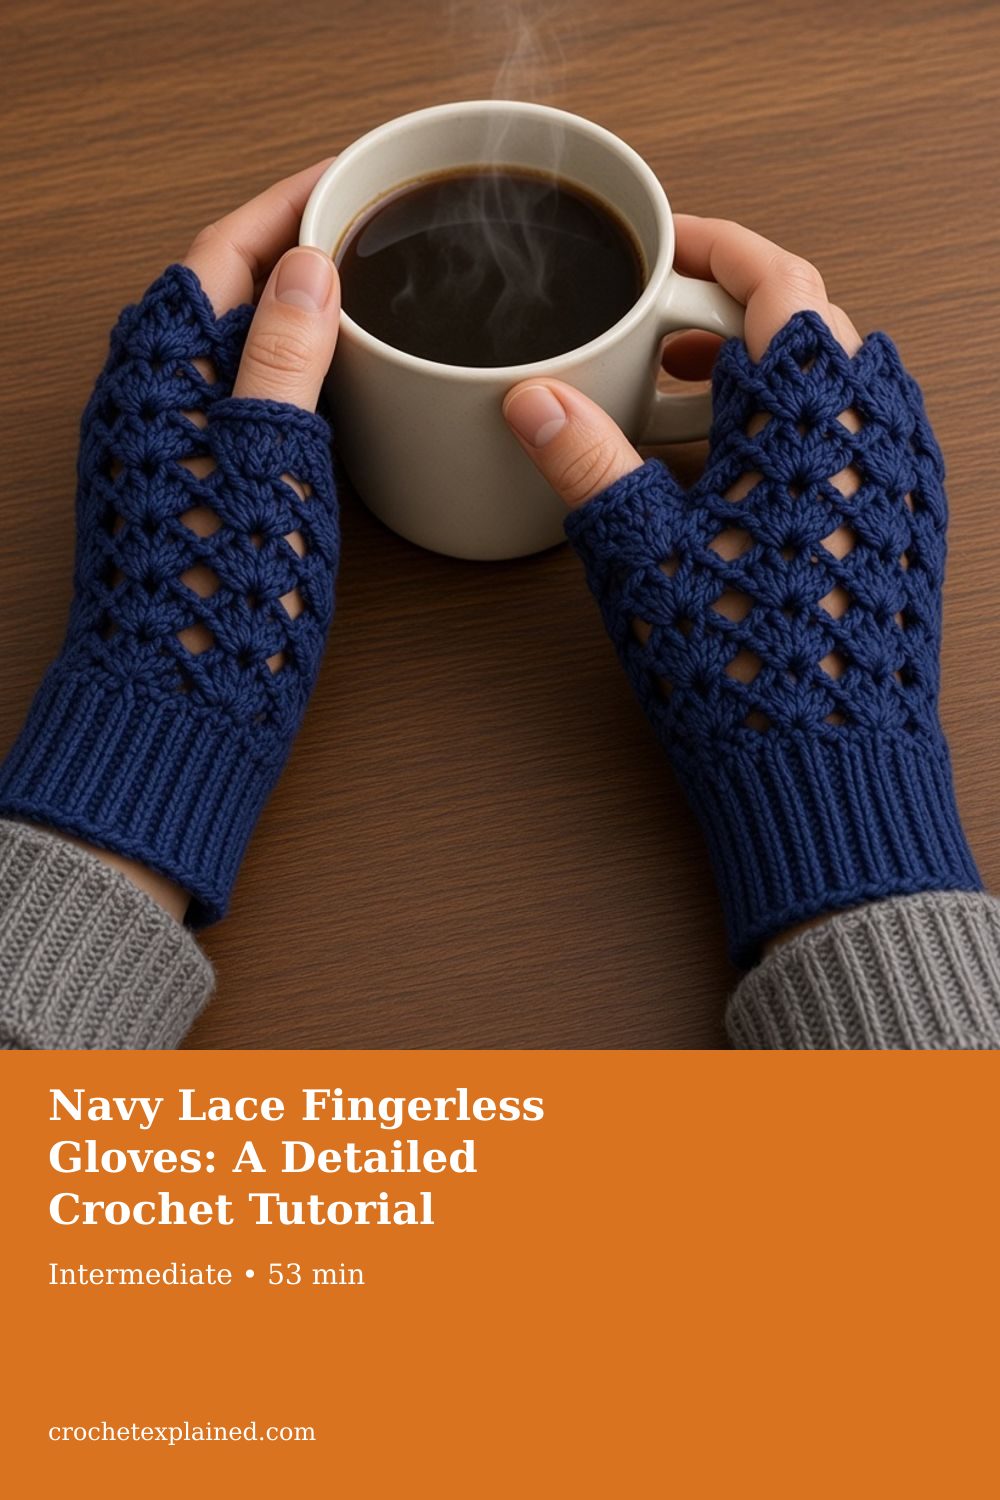
Navy Lace Fingerless Gloves: A Detailed Crochet Tutorial
A ribbed cuff, twelve shell repeats, a three-row thumb slit, and a picot edge. The counts start from your own measurements.
Learn to crochet elegant navy fingerless gloves with ribbed cuffs, an openwork shell-lace hand, a practical thumb slit, and a decorative scalloped edge.
At a glance
- Skill level
- intermediate
- Time
- See the pattern
- Finished size
- Adult medium, adjustable from measurement and repeat count
- Yarn weight
- DK or light worsted, about 180–240 m for both gloves
- Hook size
- 4.0 mm (G/6) for the lace; 3.5 mm (E/4) for the cuff
- Yardage
- 180–240 m, plus swatches and longer cuffs
On this page
- What you will make
- Quick project overview
- 1. Study the design before crocheting
- 2. Materials and tools
- 3. Measure the hand and plan the size
- 4. Stitch dictionary: learn every stitch used
- 5. Understanding the repeats before you begin
- 6. Crochet the ribbed cuff — first glove
- 7. Foundation round: convert ribbing to lace
- 8. Main openwork motif: round-by-round instructions
- 9. Form the thumb opening with a neat vertical slit
- 10. Rejoin the hand section above the thumb
- 11. Crochet the pointed scalloped upper edge
- 12. Make the second glove: create a true pair
- 13. Finish the thumb slit safely and comfortably
- 14. Weave in the ends without distorting the lace
- 15. Wash and block the finished gloves
- 16. Fine-tune the fit for your actual hands
- 17. A size-planning method that scales beyond medium
- 18. How to recognize and correct common mistakes
- 19. Tips for working confidently with dark navy yarn
- 20. Optional variations for a personalized pair
- 21. Construction checkpoints: inspect as you go
- 22. Troubleshooting fit through real movement
- 23. Care, storage, and long-term wear
- Frequently asked
- 26. Complete condensed pattern for experienced crocheters
- 27. Final checklist before wearing or gifting
Track your progress
- Go 1. Study the design before crocheting
- Go 3. Measure the hand and plan the size
- Go 4. Stitch dictionary: learn every stitch used
- Go 5. Understanding the repeats before you begin
- Go 6. Crochet the ribbed cuff — first glove
- Go Step 1: Chain the cuff depth
- Go Step 2: Row 2 establishes the ridges
- Go Step 3: Repeat the ribbing
- Go Step 4: Test stretch, not only flat length
- Go Step 5: Join the two short ends
- Go Step 6: Decide which end is the top
- Go 7. Foundation round: convert ribbing to lace
- Go 8. Main openwork motif: round-by-round instructions
- Go 9. Form the thumb opening with a neat vertical slit
- Go Step 1: position the thumb-side seam
- Go Step 2: Slit Row A
- Go Step 3: Slit Row B
- Go Step 4: Slit Row C
- Go Step 5: Check the slit edges
- Go 10. Rejoin the hand section above the thumb
- Go 11. Crochet the pointed scalloped upper edge
- Go 12. Make the second glove: create a true pair
- Go 13. Finish the thumb slit safely and comfortably
- Go 14. Weave in the ends without distorting the lace
- Go 15. Wash and block the finished gloves
- Go 16. Fine-tune the fit for your actual hands
- Go 17. A size-planning method that scales beyond medium
- Go 19. Tips for working confidently with dark navy yarn
- Go 20. Optional variations for a personalized pair
- Go A subtle textured cuff finish
- Go 21. Construction checkpoints: inspect as you go
- Go 26. Complete condensed pattern for experienced crocheters
- Go 27. Final checklist before wearing or gifting
Ticks are saved on this device only. Counting rows? Keep the stitch counter open in another tab.
US crochet terms throughout. Sizes here are worked out from gauge rather than from a finished sample, so swatch and measure as you go, and the pictures of finished pieces are illustrations. Made one? Send a photo through the contact page.
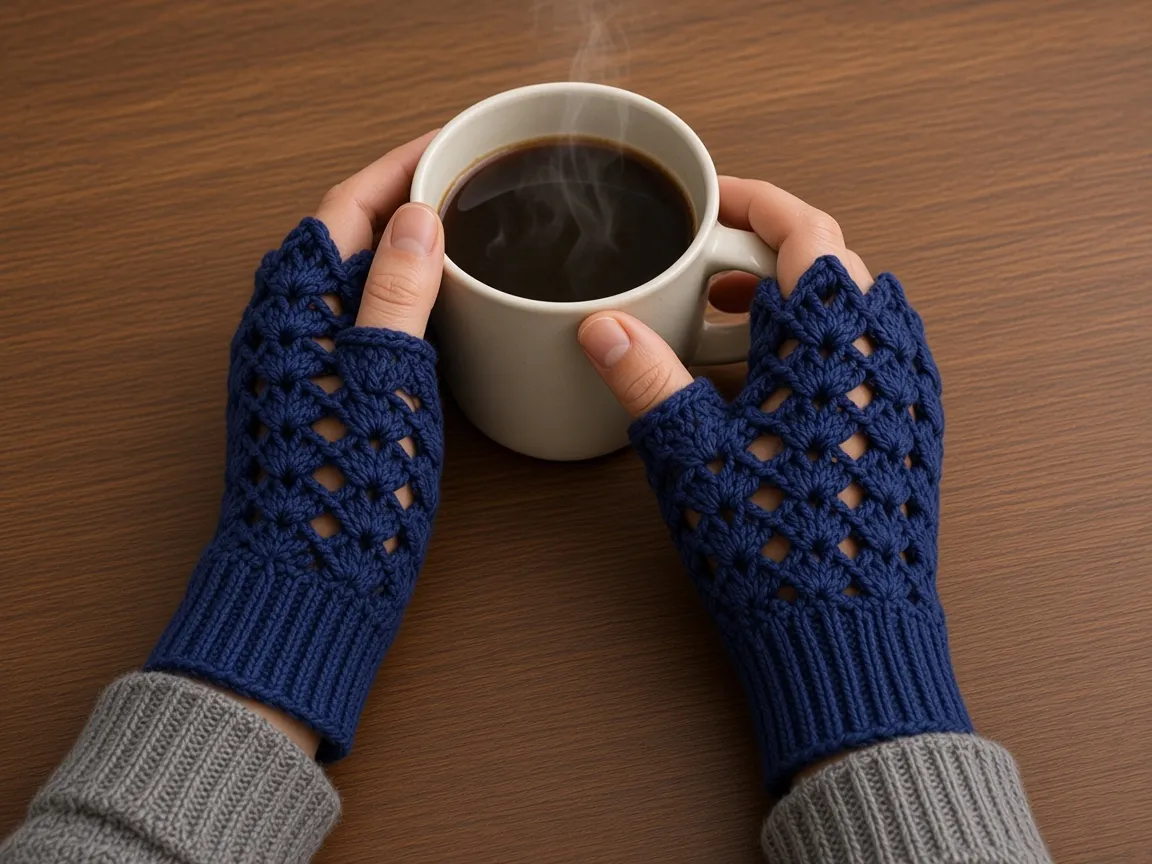
A detailed, measurement-led pattern inspired by the reference photograph, with a stretchy vertical-rib cuff, an airy shell-lace hand, a thumb opening, and a softly pointed decorative top edge.
By Crochet Explained
Pattern design note: The reference photo shows deep-navy openwork mitts with pronounced vertical-rib cuffs and peaked, floral-looking lace. The exact maker’s stitch pattern and stitch counts cannot be determined reliably from a photograph. This tutorial is an independently constructed similar-look crochet version, not a transcription of an unseen original pattern. Make and measure a swatch before starting. The sample stitch counts below are a practical starting size; individual hands and yarn behave differently.
The sizes below are worked out from gauge rather than from a finished sample, and the pictures are illustrations.
What you will make
Imagine a chilly morning, a hot cup in your hands, and a small accessory that keeps your wrists and the backs of your hands comfortable without covering your fingertips. These navy lace fingerless gloves combine two very different crochet textures. The cuffs use compact single-crochet stitches worked through the back loop only, creating tidy ribs that stretch sideways around the wrist. Above them, raised shell motifs form a repeated pattern of little fans, openings, and points. A short split in the lace accommodates the thumb, while the top edge finishes with neat scallops.
Unlike a regular closed mitten, a fingerless glove should not try to fit every knuckle. It needs to hug the wrist gently, settle over the lower palm, remain secure when you grip a mug, and leave the fingertips free. Each of those jobs is controlled by a different part of the design. Ribbing gives recovery at the wrist. The foundation round provides a stable connection between the cuff and hand. Repeated shell motifs provide decorative coverage while allowing air to pass through. The thumb opening lets the hand move without pulling the entire glove sideways. Finally, the upper border prevents the lace from stretching out of shape.
The instructions take you from measuring your hands to completing a matching pair. You will learn how to select a substitute yarn, test the lace repeat, count the shells, identify a proper thumb position, avoid an oversized opening, hide yarn tails, and wash the finished gloves without flattening the texture. There are also alternative lengths, fit adjustments, and guidance for constructing a second glove to match the first.
Quick project overview
| Feature | Starting recommendation |
|---|---|
| Item | Pair of adult fingerless gloves / wrist warmers |
| Style | Deep navy, openwork shell lace, long ribbed cuffs, scalloped upper edge |
| Skill level | Confident beginner / intermediate |
| Crochet language | US terms throughout |
| Yarn | DK/light-worsted smooth yarn, approximately 180–240 m for both gloves; allow extra for swatches and longer cuffs |
| Main hook | 4.0 mm (G/6) to start; change for gauge |
| Cuff hook | 3.5 mm (E/4) to start, or main hook if the cuff is too tight |
| Approximate cuff depth | 6.5–8 cm / 2.5–3.1 in |
| Approximate hand-lace height | 9–11 cm / 3.5–4.3 in |
| Approximate finished length | 16–19 cm / 6.3–7.5 in |
| Construction | Flat sideways cuff joined into a ring; lace rounds; three turned slit rows; joined lace rounds; final border |
| Intended fit | Adult medium, adjustable using measurement and repeat-count instructions |
These are target measurements, not guaranteed dimensions from a fixed number of stitches. Change the cuff row count and the number of lace repeats until the measurements fit your hands. A photograph cannot establish gauge, yarn fiber, or the exact stitch count.
1. Study the design before crocheting
The reference provides a useful visual target. The color is a dark, almost midnight navy that makes the stitch relief appear rich and dimensional. The cuff extends several centimeters down the wrist, with narrow vertical ridges. The back of the hand features repeating, slightly raised fan shapes. Small openings between motifs keep the fabric light. The finger edge looks pointed and uneven in a deliberate decorative way; it is not a straight row of dense stitches. The thumb is free, and the glove covers the sides and much of the back of the hand while leaving the fingers uncovered.
To approach that look, we divide the project into a cuff and a hand. The cuff is crocheted sideways in rows, so the back-loop ridges run in the same direction as the wrist and forearm when worn. This matters: ribbing made in horizontal rounds would not reproduce the strong vertical lines. After sewing or slip-stitching the short ends together, rotate the cuff so that its upper edge faces you. Work evenly around that edge to create an anchoring ring. The hand section is then crocheted upward from the ring using a shell repeat.
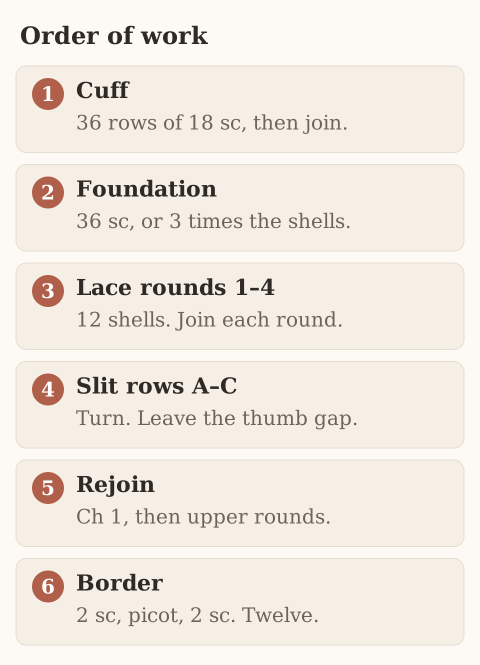
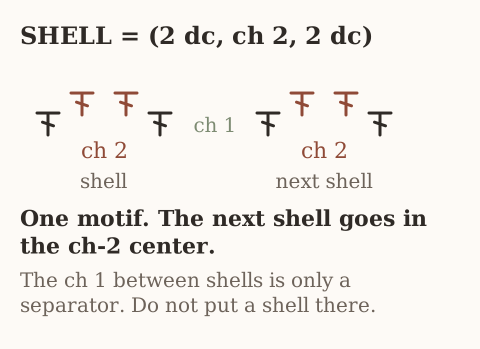
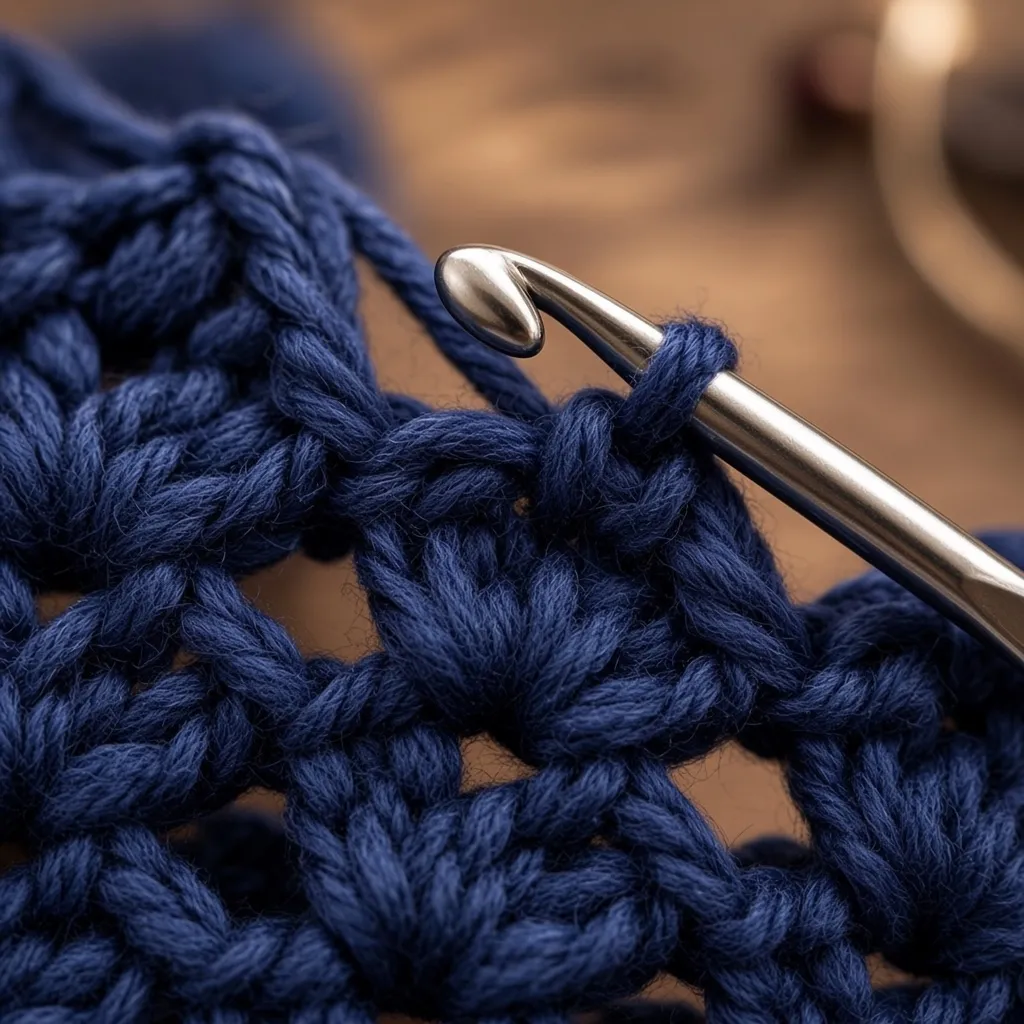
Our shell is made with two double crochets, two chains, and two double crochets in one chain space. Written in shorthand, this is (2 dc, ch 2, 2 dc). Each shell creates a compact V-shaped fan with a small center window. A chain between adjacent shells gives the repeat room to breathe. Stacking shells into the chain-2 spaces from the row below makes recognizable columns of petal-like fans, similar in spirit to the reference. The last round may use a pointed picot edge for more dramatic peaks.
The photographed motifs appear more complex than a simple stacked shell. It may use different clusters, front-post stitches, or a separate motif chart. Rather than claim a pixel-perfect duplicate, we use clear stitches that produce a plausible, attractive, wearable result. If the precise photographic design is essential, the original maker’s diagram or an authentic written pattern would be required.
2. Materials and tools
Yarn
Choose a smooth DK or light-worsted yarn with reasonably good stitch definition. Dark navy is striking but can be difficult for beginners to count; if this is your first lace glove, consider making one small light-colored swatch before crocheting the navy pair. Acrylic-wool blends, smooth merino blends, and high-quality washable acrylic can all work. Look for a yarn with some spring. Extremely slippery bamboo, heavy cotton, fuzzy mohair, or very stiff cord may need significant pattern adjustments.
Allow roughly 180–240 meters for a pair with cuffs of the suggested length, plus a comfortable safety margin. Yardage varies with hand size, hook, yarn thickness, and how many rounds you add. You may use less than this for compact gloves and more for longer ones. Using a single dye lot helps keep the pair identical under daylight.
Your chosen yarn should feel pleasant against the skin because the cuff touches the wrist continuously. Rub a short length against your inner wrist before committing. If the yarn is scratchy or sheds heavily, it may be lovely for a basket but frustrating for handwear. Also check the washing instructions on its ball band. A recipient who needs machine washable gloves will appreciate durable yarn more than delicate yarn that requires special care.
Tools
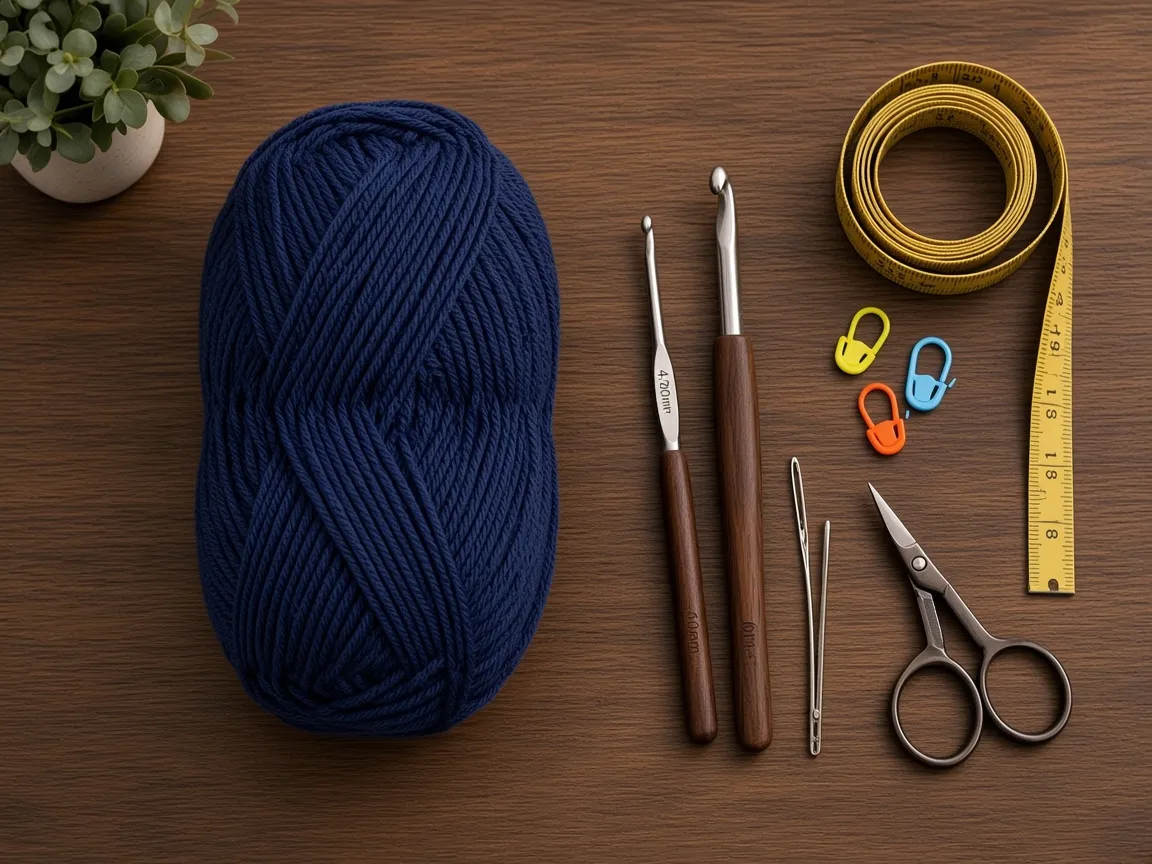
- 3.5 mm crochet hook for cuffs, or a hook appropriate to your yarn and desired stretch.
- 4.0 mm crochet hook for lace, or a hook chosen after swatching.
- Flexible tape measure, preferably showing both centimeters and inches.
- Two to four removable stitch markers or safety-pin-style markers.
- Yarn needle with an eye large enough for the yarn.
- Small sharp scissors.
- Notebook, row counter, or a simple checklist to record matching glove counts.
- Optional: blocking mat, rustproof pins, and a small steamer used at a safe distance if the fiber tolerates it.
Avoid cutting your yarn to match someone else’s yardage estimate. Keeping the ball intact as you work makes it easier to add a lace round or lengthen the second cuff. For beginners, a smooth, slightly pointed hook head and a comfortable grip usually help when inserting the hook into crowded shell centers.
3. Measure the hand and plan the size
Measure the wearer before making the first chain. A glove that looks elegant flat on a table can feel tight when the wearer bends a thumb or spreads the palm. Take measurements with the tape snug but not compressing the skin. Write all values down and use the same unit throughout.
Measurement A: wrist circumference. Wrap the tape around the narrowest comfortable place where the cuff will sit. Most cuffs look neater with mild negative ease, meaning their resting circumference is slightly smaller than the wrist. For a flexible yarn, a starting target is about 0.5–1.5 cm smaller than the actual wrist; very firm fibers may require no negative ease.
Measurement B: palm circumference. Measure around the knuckles across the widest part of the palm, excluding the thumb. The openwork section should generally be near this size, with little or no negative ease if the shells are relatively firm. You should be able to slide the glove on without pulling hard on the lace.
Measurement C: wrist-to-knuckle height. Measure from the intended top of the cuff to the base of the fingers. This is the length you want the decorative hand portion to cover. For the pictured fingerless look, stop below the first finger joints rather than making full finger tubes.
Measurement D: thumb-base position. Measure from the top of the cuff to the place where the thumb emerges from the side of the palm. This determines when you start the slit. It often differs slightly between hands; check both if accuracy matters.
Measurement E: desired cuff depth. Decide how far down the wrist to extend the cuff. The reference has substantial cuffs, so 7 cm is a good visual target. Long cuffs can be especially attractive beneath a sweater sleeve but use more yarn.
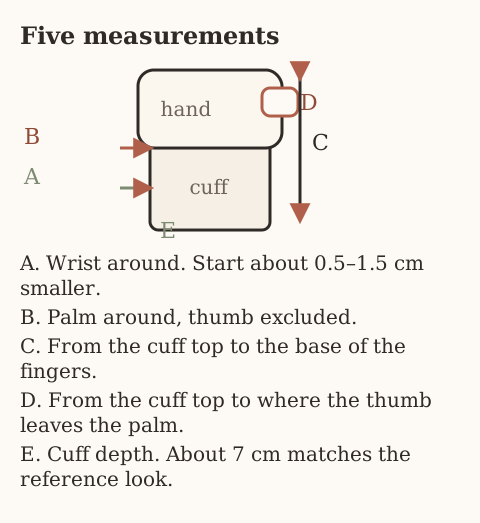
Sample planning worksheet
| Measurement | Example only |
|---|---|
| Wrist around | 17 cm |
| Palm around, thumb excluded | 19 cm |
| Desired relaxed cuff around | About 16–16.5 cm |
| Cuff depth | 7 cm |
| Height above cuff | 10 cm |
| Thumb opening height | About 2.5–3.5 cm |
These figures describe one possible adult-medium wearer, not universal medium measurements. If your hands are larger, do not simply increase the hook size until holes become huge. First choose the number of shell repeats and the ribbing circumference that correspond to your measurements.
4. Stitch dictionary: learn every stitch used
The pattern uses US crochet terms. This is important because a US double crochet corresponds to a UK treble crochet. Reading UK terminology with US meanings would make your lace noticeably taller and looser than intended.
Chain (ch). Make a slip knot and place it on the hook. Yarn over and draw the yarn through the existing loop. Repeat for the required number of chains. Chains provide turning height, gaps between shells, and occasionally the center of an ornamental point. Avoid tightening each chain so much that the next row cannot be worked into it.
Slip stitch (sl st). Insert hook into the indicated stitch or space, yarn over, and draw the yarn through both the work and the loop already on the hook in one movement. Slip stitches join rounds and may close the cuff seam. Make them loose enough that the top of the stitch remains accessible.
Single crochet (sc). Insert the hook into a stitch, yarn over, draw up a loop (two loops on the hook), yarn over, and draw through both loops. These compact stitches are used for the cuff, stabilizing round, and optional edging. They are shorter and firmer than double crochets.
Back-loop-only single crochet (sc BLO). Look at the V on top of a stitch. The loop farther from you is the back loop. Insert the hook through that loop alone, then complete a single crochet. Working each cuff row BLO leaves the untouched front loops as visible, elastic-looking ridges. Pay special attention to the last stitch of every row so the cuff does not accidentally narrow.
Double crochet (dc). Yarn over, insert the hook into the specified location, yarn over and pull up a loop (three loops on hook); yarn over and draw through two loops; yarn over and draw through the final two loops. A dc is taller than an sc and makes the shell motif more open.
Chain-2 space (ch-2 sp). This is the hole under an arch of two chains, not either of the individual chain stitches. To work a shell into a ch-2 space, insert the hook under the arch and make the stitches around the chain, rather than splitting the strands of a chain.
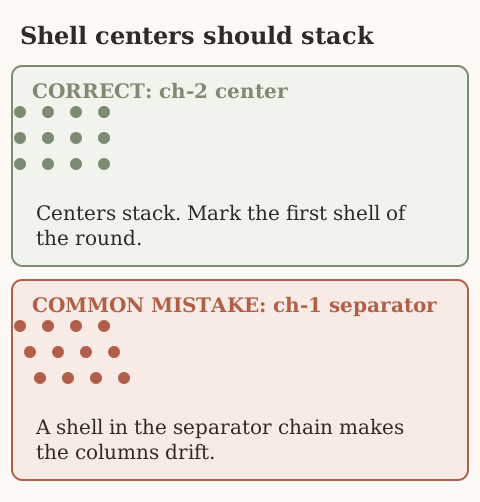
Shell. Work (2 dc, ch 2, 2 dc) in a specified stitch or ch-2 space. Count the whole group as one motif. The center ch-2 arch is where the shell in the next row will be placed. Unless the pattern explicitly says otherwise, the chain-1 between shells is a separator and should not receive a shell.
Count shell centers, not every double crochet. One shell is (2 dc, ch 2, 2 dc). The next shell goes in that ch-2 center. The ch 1 between shells is only a separator.
Turning chain. Some rows begin with ch 3, which counts as the first double crochet when explicitly stated. In our turned slit rows, we use a special beginning described in detail so the edge remains consistent. If starting a row with a standing dc feels awkward, use a chain-3 as that first dc; the important point is to maintain two dc on each side of the center arch.
Picot. Chain three, then slip stitch into the first chain of that group. A small pointed bump appears. You may work the final edging picot at the center of every shell. It creates the visual suggestion of peaked lace seen in the photograph.
Whipstitch. With a yarn needle, sew through corresponding edge loops from one side of a seam to the other. Keep tension even. This is an alternative to slip-stitching the cuff short ends together.
Fasten off. Cut the yarn leaving a 12–15 cm tail. Pull the tail completely through the loop on the hook and tighten gently. Weave the tail invisibly through several neighboring stitches, change direction once, then trim after laundering or blocking.
5. Understanding the repeats before you begin
There are two independent counting systems: cuff rows and shell stations. The cuff runs sideways; its number of rows determines the circumference. The hand lace runs upward; its number of shell motifs determines the width. Mixing these two counts causes most avoidable fitting mistakes.
Our default construction uses 36 cuff rows and 12 lace shells around the hand. After joining the cuff, the foundation round places 36 single crochets into the 36 row ends along its upper edge. The first lace round divides those stitches into twelve three-stitch groups. Within each group, the middle stitch holds one shell and the outside two are skipped. This establishes twelve shell centers at regular intervals.
In formula form, if you want N shells, a straightforward foundation count is 3 × N single crochets. Ten shells therefore need 30 foundation stitches; eleven need 33; twelve need 36; thirteen need 39; fourteen need 42. Do not confuse the number of foundation stitches with a required cuff-row count. You can work more than one foundation sc into some row ends or occasionally skip a row end to obtain the count after fitting the cuff.
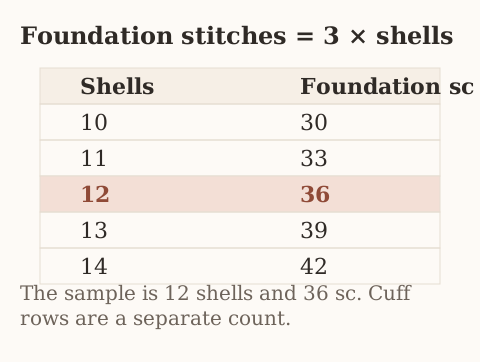
The practical issue is physical width. Twelve shells worked from very thick yarn may create a loose tube. The same twelve shells in fine yarn may create a narrow one. Your swatch, not the theoretical count, determines whether twelve repeats are suitable.
Make a mini lace swatch
To practice the stitch and estimate shell width, make a small rectangular swatch before working the actual mitt. Chain 20. In the fourth chain from hook, make (2 dc, ch 2, 2 dc); skip two chains, make another shell in the next chain, and continue placing shells approximately three chains apart until you have five shells. Do not worry about the final edge on this practice piece. Work at least four rows by crocheting one shell into each previous shell’s ch-2 center with a ch 1 between shells, turning at the end of each row.
Lay the swatch flat without stretching. Measure between the centers of the first and last shell. Divide by the number of intervals between shell centers—four intervals in a five-shell swatch—to estimate width per shell. Then multiply by the planned total shell count. This is only an approximation because a circular tube can behave differently from a flat swatch, but it is far better than guessing blindly.
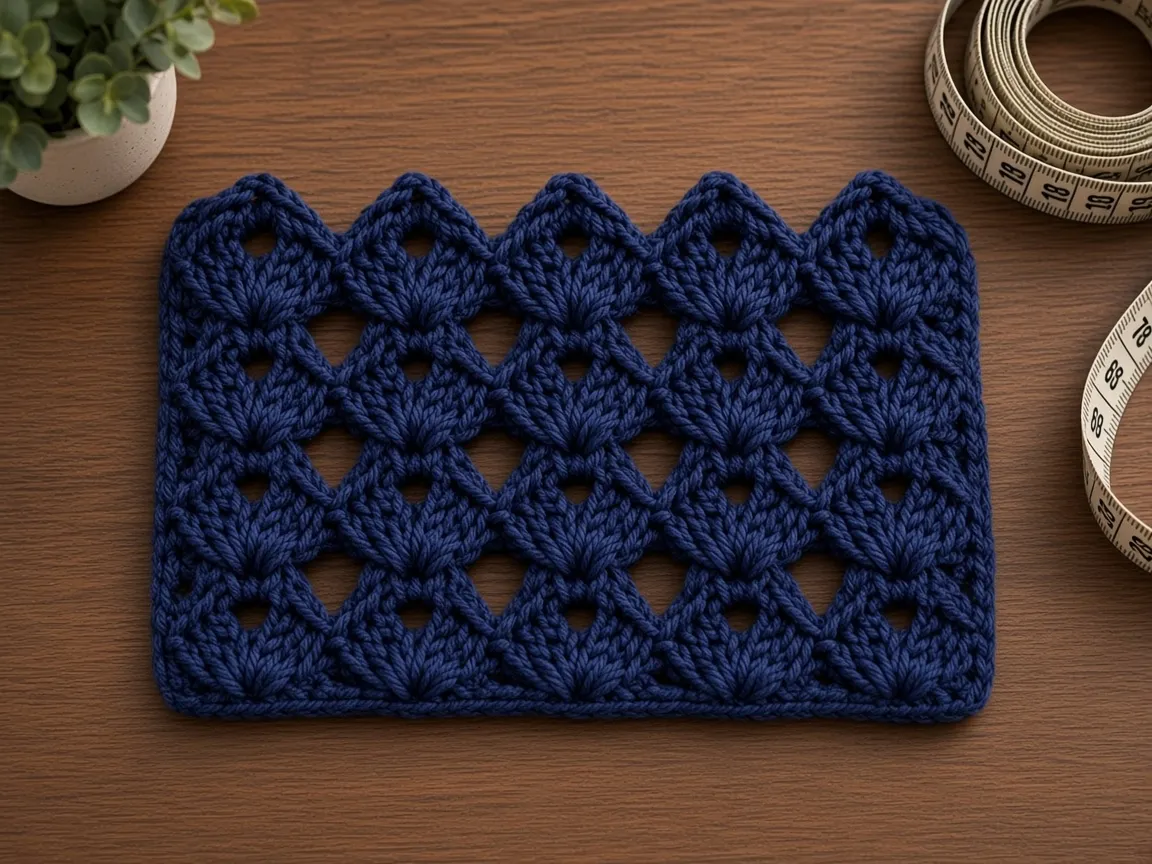
If your calculated hand circumference is more than roughly 1–2 cm from the target, change the hook or repeat count. Changing by one repeat alters circumference more predictably than making every stitch dramatically looser. A round swatch is best: crochet a temporary small tube with the actual repeat count, try it over the hand, and unravel if you need a new count.
6. Crochet the ribbed cuff — first glove
The cuff is worked flat, back and forth, and then joined into a ring. Read all instructions before starting because cuff orientation is essential to the polished final effect.
Step 1: Chain the cuff depth
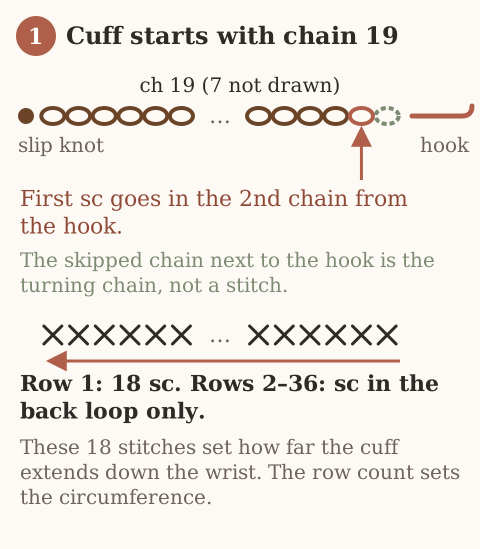
With the smaller hook, chain 19. Make an sc in the second chain from the hook and in every remaining chain. You should have 18 sc. This creates a strip approximately 6.5–8 cm wide in many DK yarn and hook combinations, but measure yours. If your strip is too short for the intended cuff depth, restart with more foundation chains. If it is too long, start with fewer. The exact number of stitches in each cuff row does not control wrist circumference; it controls how far down the wrist the finished cuff extends.
Step 2: Row 2 establishes the ridges
Chain 1 and turn. Work 1 sc BLO into each of the 18 stitches across. Check the first and last stitches carefully. You should still have 18 stitches. On the reverse face of the strip, you will see a thin raised line emerging where the unused front loops remain exposed.
Step 3: Repeat the ribbing
For Rows 3–36, repeat Row 2: ch 1, turn, sc BLO across (18 sc). Mark every sixth row or record the count after every few rows. When you finish 36 rows, relax the strip on the table and measure its length across the ridges. This length will become the circumference of the cuff when its short ends are joined.
The default 36-row number is only appropriate if that ribbed length reaches your planned relaxed wrist measurement. For the example wrist of 17 cm, a relaxed circumference near 16–16.5 cm can work with springy yarn. If your ribbed strip measures only 14 cm and cannot stretch comfortably around the wrist, add rows. If it measures 20 cm and falls down the hand, undo rows. Keep the total count in your notes because you will repeat it for the second cuff.
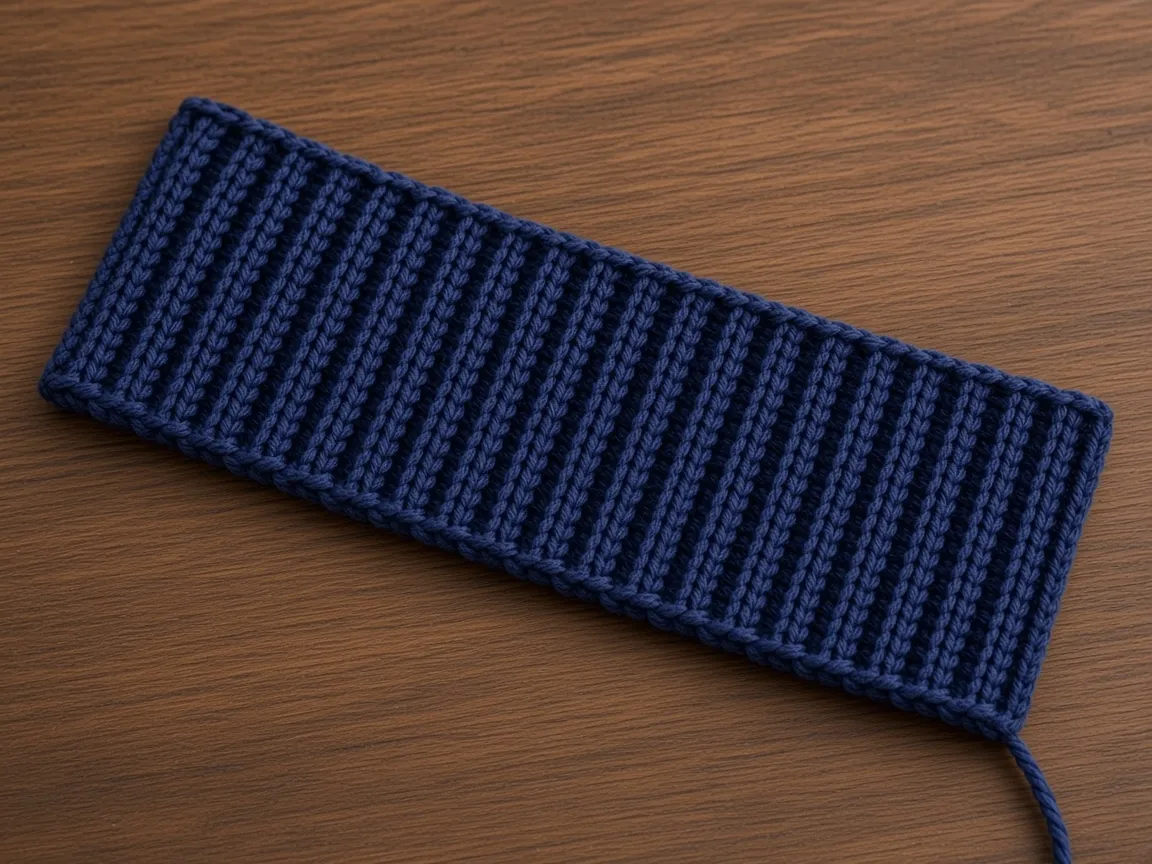
Step 4: Test stretch, not only flat length
Hold the strip around the actual wrist without joining it. The ridges should stand vertically and open slightly. You should be able to slide two fingers between the cuff and wrist without excessive pressure; the fabric should not flop around loosely. A crocheted BLO strip can feel stiffer than knitted ribbing. If it is too rigid, use a slightly larger hook or a more flexible yarn rather than relying on painful tightness for a secure fit.
Step 5: Join the two short ends
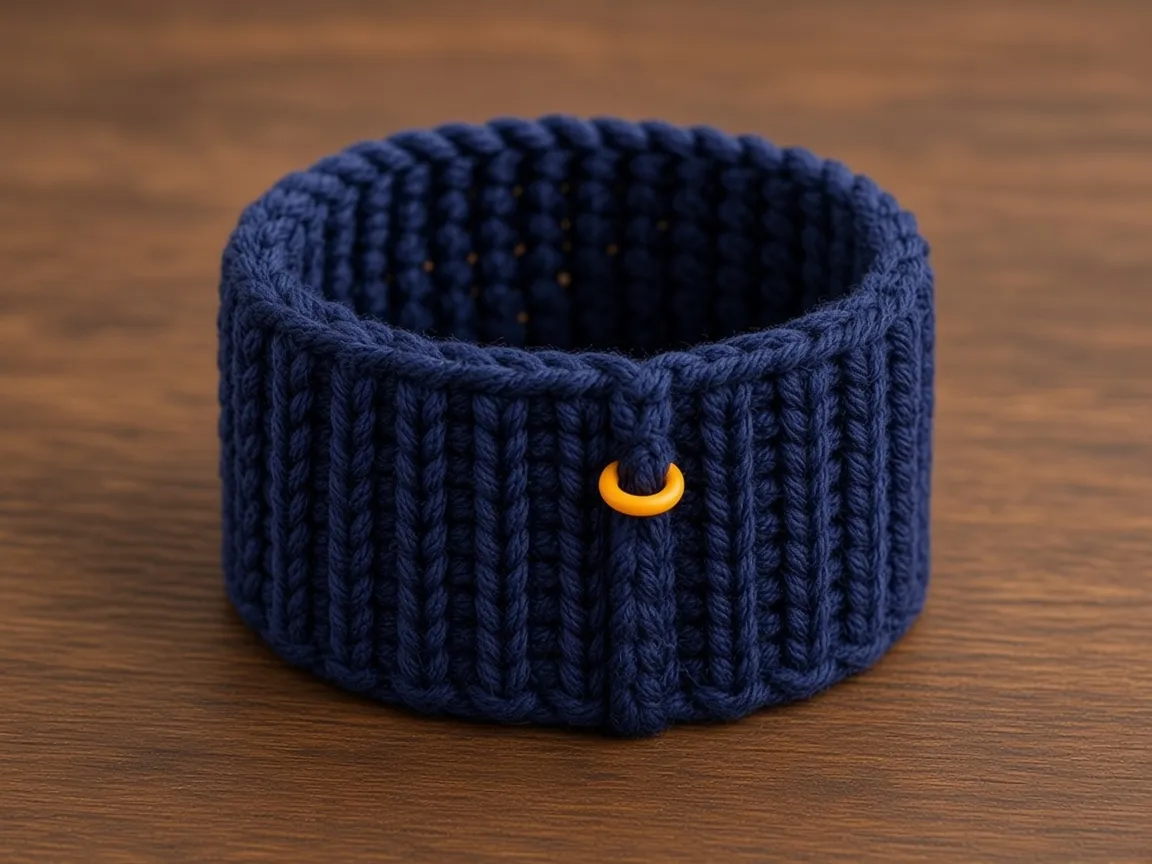
Fold the ribbed strip so its short ends meet, with the neat outer face arranged on the outside. Slip stitch through corresponding loops along the short edges, working from one long edge to the other. Alternatively, thread the tail onto a yarn needle and whipstitch the ends. Avoid making a bulky ridge where the seam will touch skin. Once the strip forms a ring, rotate it to check that it is not twisted.
The seam will later serve as your reference point for the thumb opening. It does not have to be invisible, but it should be tidy. Use a removable marker to mark it. Place the cuff on your wrist to confirm the rib direction and circumference. Adjust now, while the cuff is still easy to remake.
Step 6: Decide which end is the top
Both long edges are similar, but choose the neater edge as the top, where the hand lace will attach. The bottom edge rests farther down the arm. With the right side facing out, keep the cuff upright like a small cylinder. Do not start stitching from the vertical seam across the side; you need to crochet around the entire upper circular edge.
7. Foundation round: convert ribbing to lace
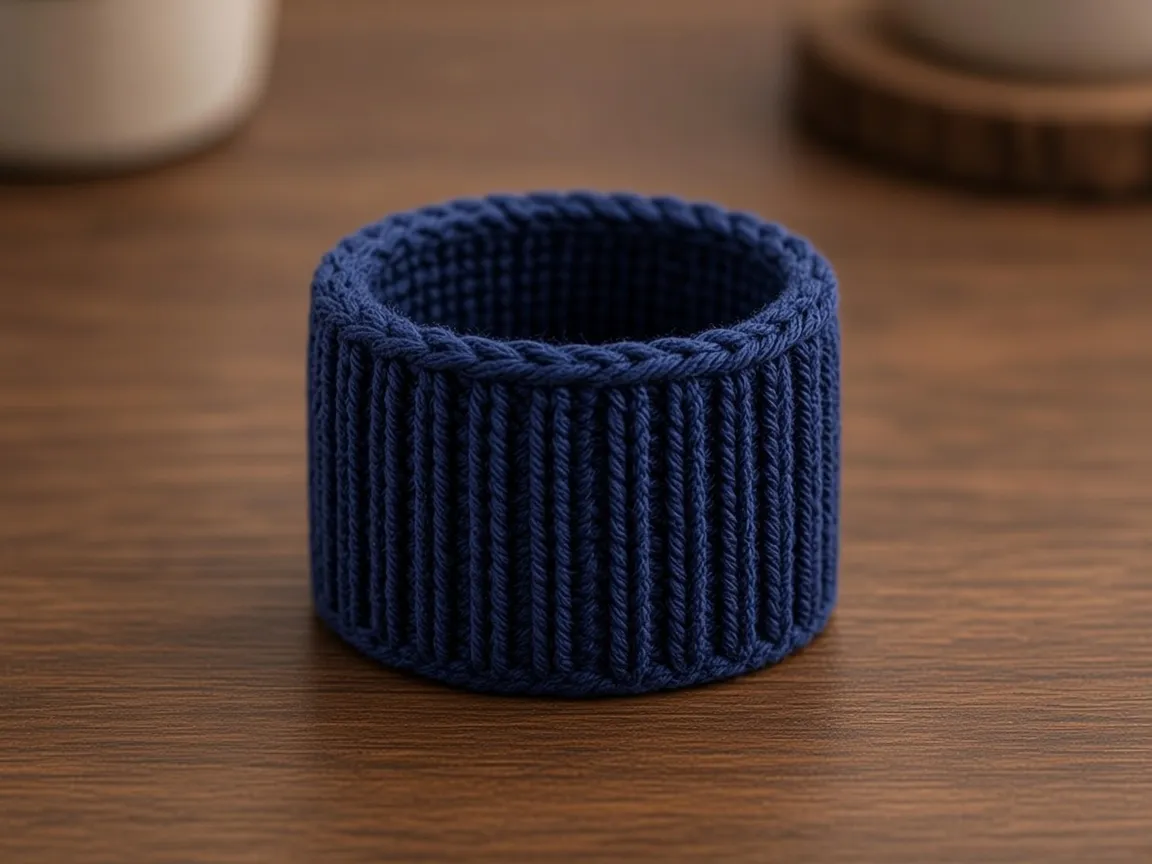
Switch to the larger hook. Join the yarn at the upper edge of the cuff near the seam. Work one single crochet into each of the 36 cuff-row ends around, for a total of 36 sc. Join with a slip stitch to the first sc. If you changed the cuff row count during fitting, distribute 36 sc evenly around the top edge instead. For example, a 40-row cuff can still support 36 foundation stitches: omit one attachment point after approximately every ten rows, spacing omissions evenly. A 32-row cuff can support 36 sc by adding an extra sc in four evenly spaced row ends.
Do not force the fabric to ripple or gather. If your actual cuff circumference is significantly different from the default and your chosen shell count requires a different foundation count, use the formula 3 × desired shell count instead. You are creating an attachment edge that supports the lace without noticeably changing the width of the cuff.
After joining the foundation round, count every sc. Place markers after the 9th, 18th, 27th, and 36th stitch if you find it helpful. For twelve shells, these markers divide the round into four equal sections, each containing three shells. If the count is off, correct it now; a missing stitch causes the shell repeats to drift and may leave an awkward gap above the seam.
Compare the diameter of the foundation ring with your palm. A slight outward flare above the wrist is normal. Excessive ruffling means there are too many stitches or the lace hook is too large. Visible puckering means the anchoring round is too tight. Correct tension here, because the subsequent openwork makes distortions much more noticeable.
8. Main openwork motif: round-by-round instructions
In this section, SHELL always means (2 dc, ch 2, 2 dc) worked in the indicated stitch or space. Unless stated otherwise, ch 1 between shells. The shell itself has a chain-2 center; the between-shell chain-1 is only a connector. After each completed full round there should be twelve clearly identifiable chain-2 shell centers.
Lace Round 1: establish twelve shell centers
With 36 sc in the foundation ring, work as follows: skip the first sc, make a SHELL in the next sc, skip the next sc, ch 1. Repeat this three-stitch foundation sequence around the cuff until you have made 12 shells. On the final repeat, join with a slip stitch into the top of the first double crochet of the first shell. The ending ch 1 functions as the connector between the last and first shell. Do not add an extra shell into the slip stitch.
Pause to inspect the ring. Each shell should sit directly above three foundation stitches. Its center chain-2 space should be visible. The stitch groups may look compressed until you spread the lace gently. That is expected. Count shell centers, not individual double crochets; twelve correctly placed centers are easier to verify than forty-eight separate double crochets.
Lace Round 2: stack the fans
Slip stitch across the remaining stitches of the first shell until the hook reaches its center ch-2 space. A clean alternative is to fasten off at the end of Round 1 and rejoin in that center, but that makes more yarn tails. Work the first SHELL in the center ch-2 space. Ch 1, then work a SHELL in the next shell center. Continue around all previous shells, maintaining one chain between adjacent new shells. After working the twelfth shell, ch 1 and join to the first shell as before.
This round should look more architectural than Round 1. Each new shell grows inside the open center of the shell below it. The double-crochet pairs lean outward and resemble four small petals bordering a central window. To preserve the shape, insert the hook beneath the entire chain-2 arch instead of piercing a chain strand. If you accidentally work into the between-shell chain-1, an extra motif appears and the pattern becomes uneven.
Lace Round 3: continue the pattern
Move to the center of the first shell. Repeat Round 2 exactly: one SHELL into each shell’s ch-2 center, with ch 1 between shells. Complete twelve shells and join. By the end of this round you will have a clear three-dimensional openwork section above the ribbed cuff.
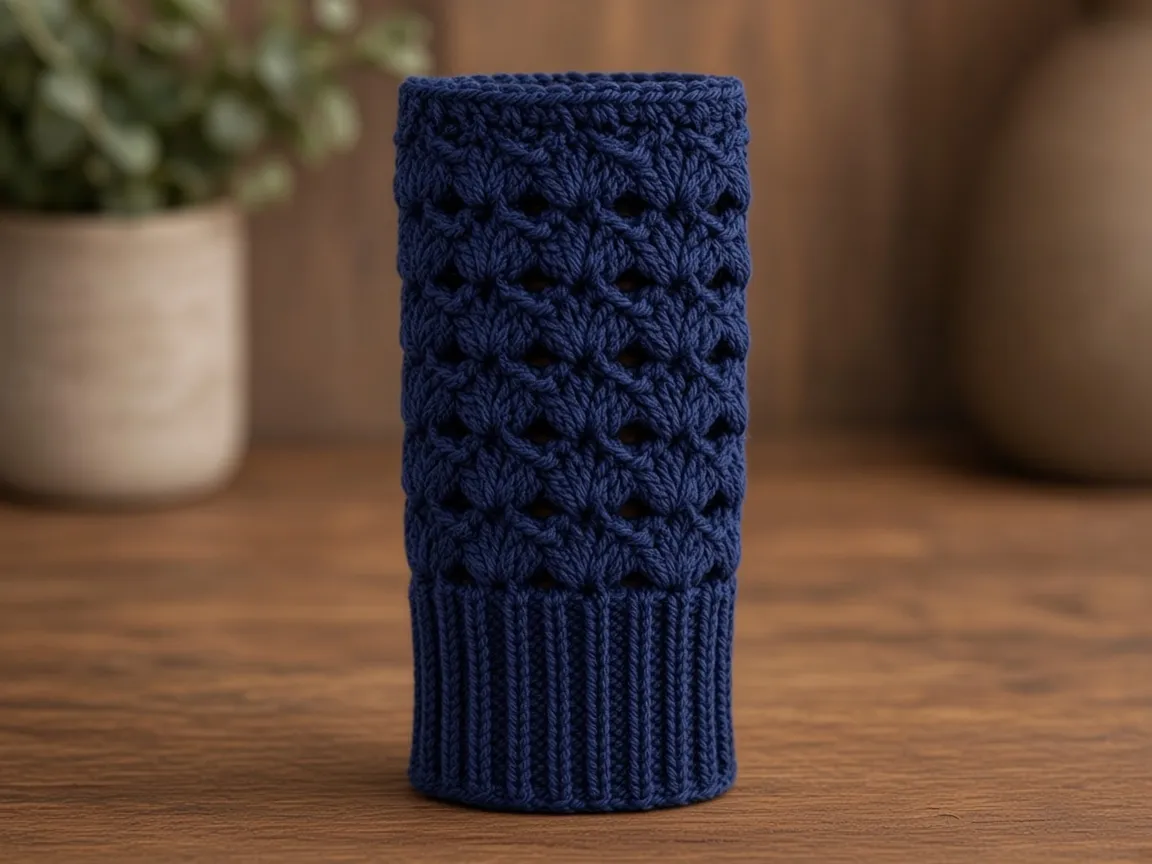
Try the glove on by sliding the tube over your hand without forcing the thumb through a gap. The lace section should pass over the widest part of the palm without uncomfortable tension. This early fitting test can save a large amount of reworking later. If the fabric is tight, increase shell count before going farther. If it is extremely loose, decrease repeats or adjust hook size.
Lace Round 4: last full round before thumb shaping
Repeat Round 2 once more. You now have four completed full lace rounds. Measure from the top of the ribbing to the current live edge. Depending on your yarn, these rounds may reach approximately 3–4 cm, but the actual ruler measurement is what matters. The thumb slit should begin near the point where your thumb branches away from the palm when the cuff is worn at its intended height.
If the opening needs to begin lower, undo this round and start shaping sooner. If it needs to begin higher, add a full lace round. Record exactly how many full rounds you made before the opening and mirror that count for the second glove.
9. Form the thumb opening with a neat vertical slit
A practical thumb slit is created by temporarily changing from joined rounds to turned rows. Rather than trying to crochet a separate thumb tube, leave the seam at the side open for several lace rows. This technique works well for fingerless mitts because the thumb needs room to pass through but does not need full coverage.
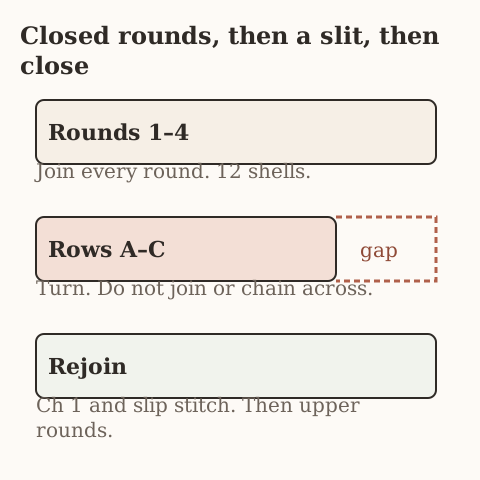
The thumb slit is three turned rows that are not joined. Do not chain across the gap. There is no thumb tube.
Step 1: position the thumb-side seam
Put the work on, with the seam aligned along the thumb-side edge of your hand. Make sure the back of the hand is covered by uninterrupted shells. The seam and row-turn position should sit near the gap where the thumb meets the palm. This placement is critical: a slit in the middle of the back of the hand would be uncomfortable and visually distracting.
At the end of Lace Round 4, the round ends at the shell near the cuff seam. From this point onward, do not join the next three rows into a closed tube. Instead, work from one side of the opening to the other and turn at the end, leaving a narrow vertical gap at the seam. Place a different-colored marker at each side of this prospective slit so you can identify the opening even when turning the work.
Step 2: Slit Row A
Move the hook to the center of the first shell. Work a SHELL into that ch-2 space, ch 1, and continue with a SHELL into each successive shell center across all twelve motifs, with a ch 1 between neighboring motifs. After the twelfth shell, stop without making the final connector chain across the gap and without joining to the first shell. Turn the work. You have produced a continuous open row with a gap between its two ends.
This first open row is the foundation of the thumb slit. A small V-shaped opening may appear where the fabric separates, even before additional rows are added. The free ends are intentionally not connected. Do not chain across the gap; a chain bridge would reduce or close the thumb opening. Also do not skip an entire shell column: the goal is a vertical slit along the join boundary, not a large missing section of fabric.
Step 3: Slit Row B
After turning, work the first SHELL into the last shell center from the previous row. If necessary, slip stitch gently to position the hook at the correct center; do not count positioning slip stitches as a motif. Work ch 1, SHELL in next shell center across the twelve existing shell centers in the opposite direction. Stop after the twelfth shell. Do not work the closing ch 1 across the opening. Turn.
Because you are working back across the fabric, the shell faces may appear slightly different on this row. That is normal in turned crochet and can contribute to the textured appearance. Your main priority is to keep twelve shell centers in each row and keep both open edges aligned. If the opening is beginning to flare at the top or bottom, reduce slack in the edge stitches without tightening the whole row.
Step 4: Slit Row C
Repeat the turned-row instruction once more: one SHELL in each of the twelve previous center spaces, ch 1 between adjacent shells, no connecting chain over the slit, and stop at the end. You should now have three open rows, creating an opening potentially around 2.5–3.5 cm high, depending on your gauge. Before closing the top, slide your thumb through the slit while the rest of the glove sits correctly over the hand.
Your thumb must pass through without painful pulling, and the back-of-hand lace must remain in place. If the slit is too short, add a fourth open row. If it is too long and the glove shifts, unravel one open row. The correct length depends on thumb thickness, row height, stretch, and how low you placed the slit.
Step 5: Check the slit edges
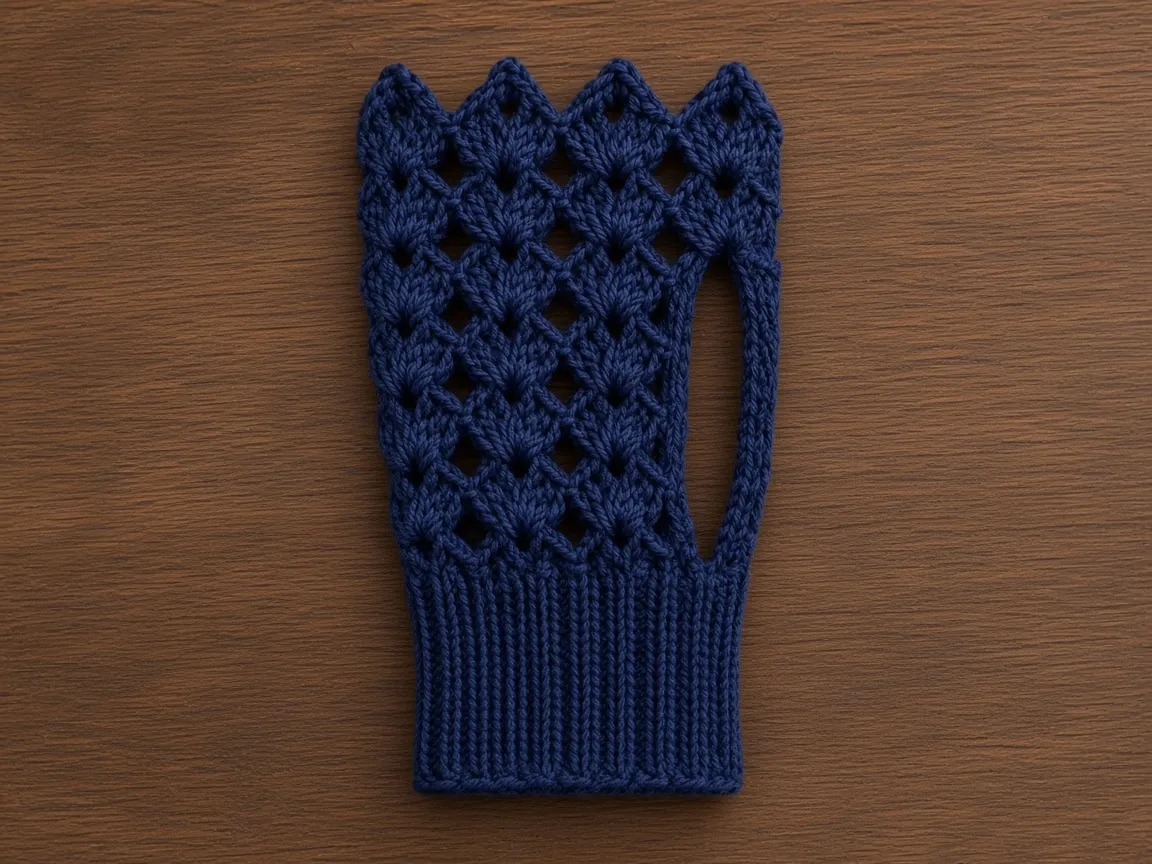
Both sides of the slit should be soft rather than hard or knotted. Loose yarn floats across the opening are not acceptable; remove any accidental bridges. You do not need to crochet a separate thumb sleeve for the design shown. The reference appears to have an exposed thumb with a short side opening, and an unobtrusive slit is a reasonable way to achieve that wearing style.
If you prefer a more defined opening, wait until the lace is finished, then work a restrained border of single crochets along the two slit edges. Do this only if the gap is roomy enough; an additional border reduces the clear space available for the thumb. A smooth opening that does not snag is more important than making the border visually heavy.
10. Rejoin the hand section above the thumb
The open edges must now reconnect so the hand lace continues around the upper palm as a tube. You will return to joined rounds while preserving the same twelve shell centers.
Rejoining Round 1
From the end of Slit Row C, turn so you can work across the last row in the normal direction. Move to the center of the first available shell, work a SHELL, and repeat across all twelve shell centers with ch 1 between neighbors. This time, after the twelfth shell, make ch 1 and slip stitch to the first shell to close the round. The small connector spans only the top of the vertical thumb opening. It should not be stretched into a long chain arch.
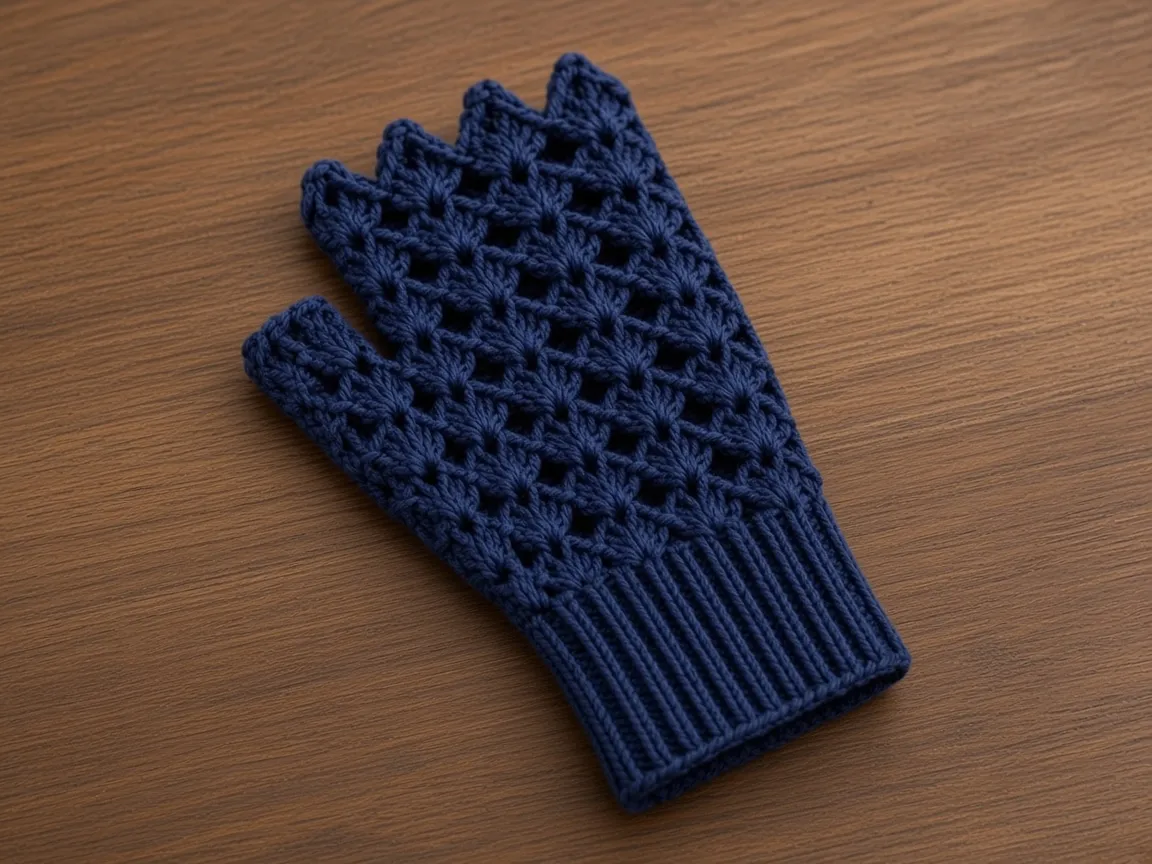
Try the glove on immediately. The thumb passes through the gap left by the three open rows, while the newly joined round holds the fabric above the thumb. If the bridge pulls tightly across the thumb web, the opening begins too low, ends too low, or is too short. Unpick this rejoining round and add one more open row before reconnecting. If the bridge is above the thumb and rests on the side of the index-palm area, the placement is generally sound.
Upper Round 2
Slip stitch to the first shell’s center and work one SHELL in each of the twelve centers, with ch 1 between shells. Close with a slip stitch. Lay the mitt flat and inspect the top. The pattern should be even and the glove should not twist when worn. If a shell disappears near the thumb join, check that you did not work into a connector chain instead of the actual shell center.
Upper Round 3, if needed
Repeat Upper Round 2 only if the glove still needs more coverage before the scalloped finishing edge. The pictured version covers much of the fingers’ base but leaves the fingers themselves free. Measure the lace from cuff to top edge and stop at the point that looks and feels right. For many adult hands, four full pre-slit rounds + three slit rows + two or three post-slit rounds will be in the right general range, but measurements take precedence over round counts.
Count check for one default glove
| Section | Default count |
|---|---|
| Cuff rows | 36 |
| Cuff sc per row | 18 |
| Foundation sc around cuff | 36 |
| Shells in each complete lace round | 12 |
| Full lace rounds before slit | 4 |
| Open slit rows | 3 |
| Joined rounds after slit | 2, plus optional third |
| Pointed trim | 1 border round |
Record deviations before starting your second glove. A matching pair looks deliberate when cuff length, shell count, slit height, and edging match. Minor tension changes are acceptable, but large differences in height or width will be apparent when the gloves sit beside each other.
11. Crochet the pointed scalloped upper edge
The upper edge is where you can add a visual connection to the photographed pointed petals. The body shells already create a soft wave, but the final border gives each repeat a distinct little peak. Use the same navy yarn and hook, or switch to a hook 0.5 mm smaller if your border tends to flare.
Border Round: Move the hook to the ch-2 center of the next shell. Work (2 sc, ch 3, sl st into first of those 3 chains, 2 sc) in the shell center. This makes one compact picot-crowned scallop. Slip stitch loosely into the ch-1 separator between shells, then repeat the picot-crowned scallop in the next shell center. Continue around all twelve shell centers, finishing with a slip stitch into the beginning of the border. Fasten off, leaving a tail to weave in.
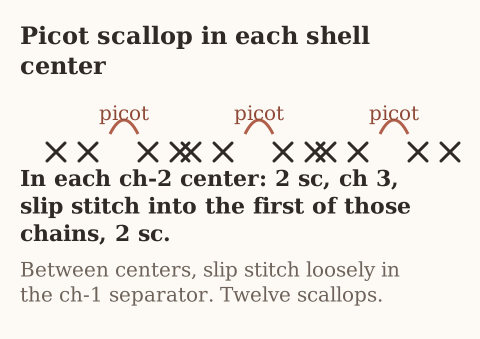
For a slightly taller, more lacy crown, replace the two sc on each side of the picot with one dc on each side, but test first. Tall borders can curl upward and catch on jewelry. For an understated finish, omit the picots and simply work three to five sc into each shell’s center, with a loose slip stitch in the separator. The best choice is the one that feels comfortable when your fingers bend.
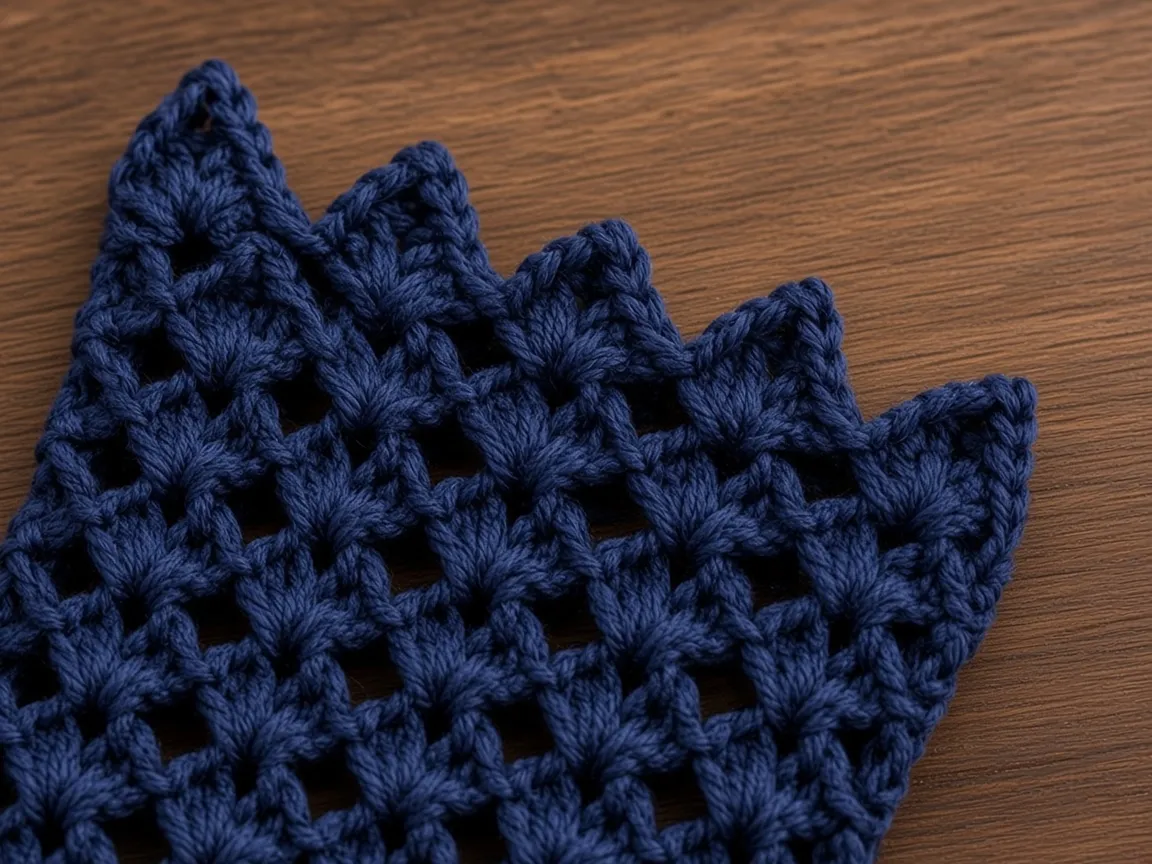
The top edge should gently follow the contour of the base of the fingers. It does not have to form separate finger openings. The reference shows a series of decorative peaks rather than a fitted glove with individual finger tubes. Avoid accidentally adding a long chain that constricts the pinkie side. Slip the glove on again after edging and confirm that the fingers still move freely.
12. Make the second glove: create a true pair
Repeat the entire cuff and lace process with the same yarn, hooks, starting chain, cuff-row count, foundation-stitch count, number of shell repeats, and height adjustments. Before starting, place the first glove on the table and write down the actual numbers used, not just the default instructions. If you added two cuff rows, one extra slit row, or omitted the third upper round, the second glove should receive the same adjustments unless your two hands genuinely require different sizes.
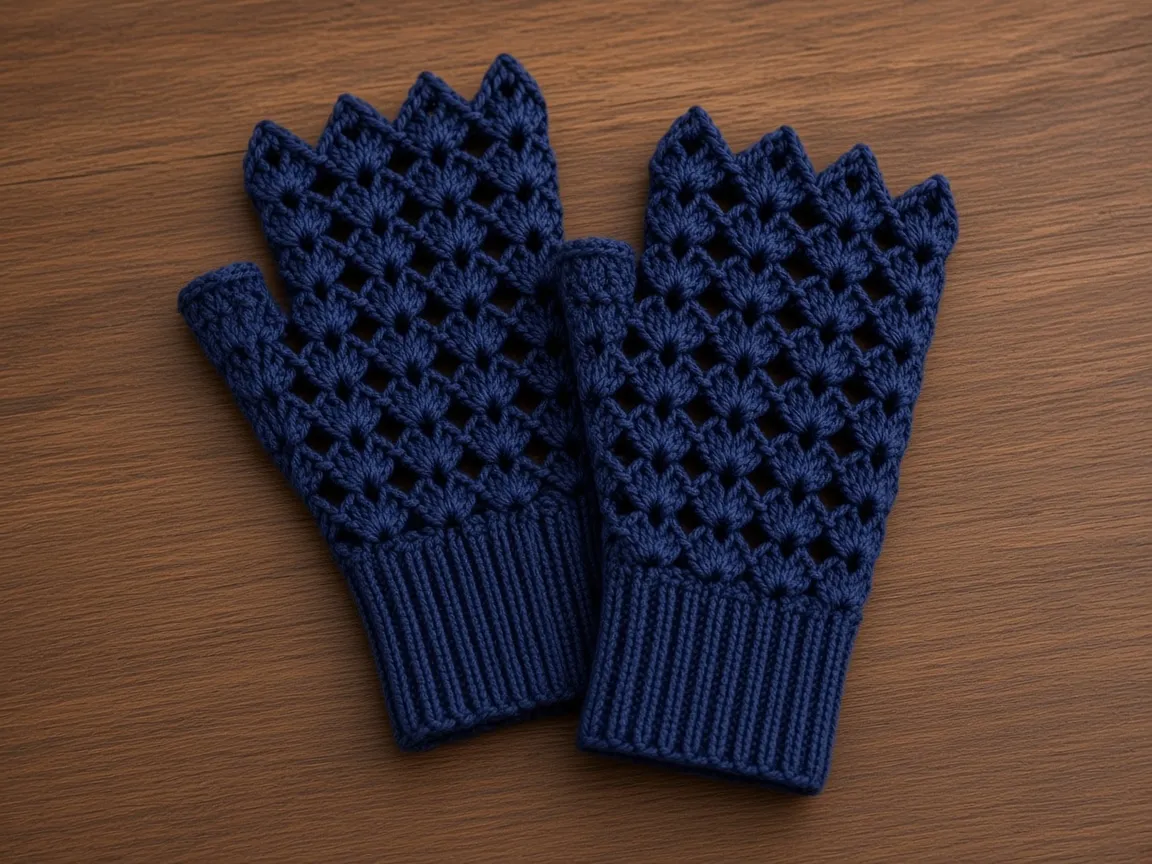
The two gloves need to be mirror worn, even if the crochet tubes are worked in the same stitch sequence. An easy approach is to make two matching tubes with thumb slits positioned along the seam, then place them on opposite hands so the slit of each naturally faces its thumb. Examine the seam placement before weaving in the ends. If a decorative seam is intended to be less visible, turn or orient the glove accordingly, keeping the texture you prefer facing outward. On an asymmetrical stitch pattern, you may need to reverse the slit placement or work the second glove in a reversed direction to obtain a perfect visual mirror; our repeated shell columns are sufficiently symmetrical for orientation to do most of the work.
Try both on together. Align your wrists and bring your hands side by side. The cuff bottoms should reach the same point, the thumb openings should sit at equal heights, and the scalloped tops should create similar outlines. If one glove is longer because the tension relaxed during crocheting, a light wash and careful laying-flat reshape may help. If the discrepancy is an entire shell row, rework the longer glove instead of trying to block away a substantial construction difference.
13. Finish the thumb slit safely and comfortably
You can leave the slit edges as worked if they look tidy and feel soft. If the edges appear ragged, attach yarn at the lower edge of the opening and crochet a modest border. Work one sc into each accessible side of the row-end stitches up the first slit edge, one small sc at the top corner if needed, and work back down the opposite edge with one sc into each row-end position. Join discreetly near the bottom and weave in the yarn. The objective is stabilization, not closing the gap.
For thick hands, skip this border because it will make the opening smaller. For narrow thumbs, a single-crochet border may improve control. Never pull the edging so tightly that the slit puckers. It is better to use a larger hook for this short border than to create a restrictive seam. After edging, bend and straighten the thumb five or six times; the stitches should remain comfortable near the sensitive webbing.
If you notice a tiny hole just beneath the slit, use the tail from the nearby join to make two or three small, discreet reinforcing stitches with a yarn needle. Do not sew across the opening. Reinforce only the lower corner where the turned rows begin, then weave the tail in a different direction. A well-secured corner helps prevent the lace from stretching under repeated use.
14. Weave in the ends without distorting the lace
Yarn tails are easier to hide in ribbing and dense shell bases than in large open holes. Thread a yarn needle and guide each tail under the backs of several nearby stitches of the same color. Avoid pulling the needle through visible chain-2 openings because it would create an obvious straight line. After traveling 4–5 cm through dense stitches, change direction, weave through a second path, and trim the end only when secure.
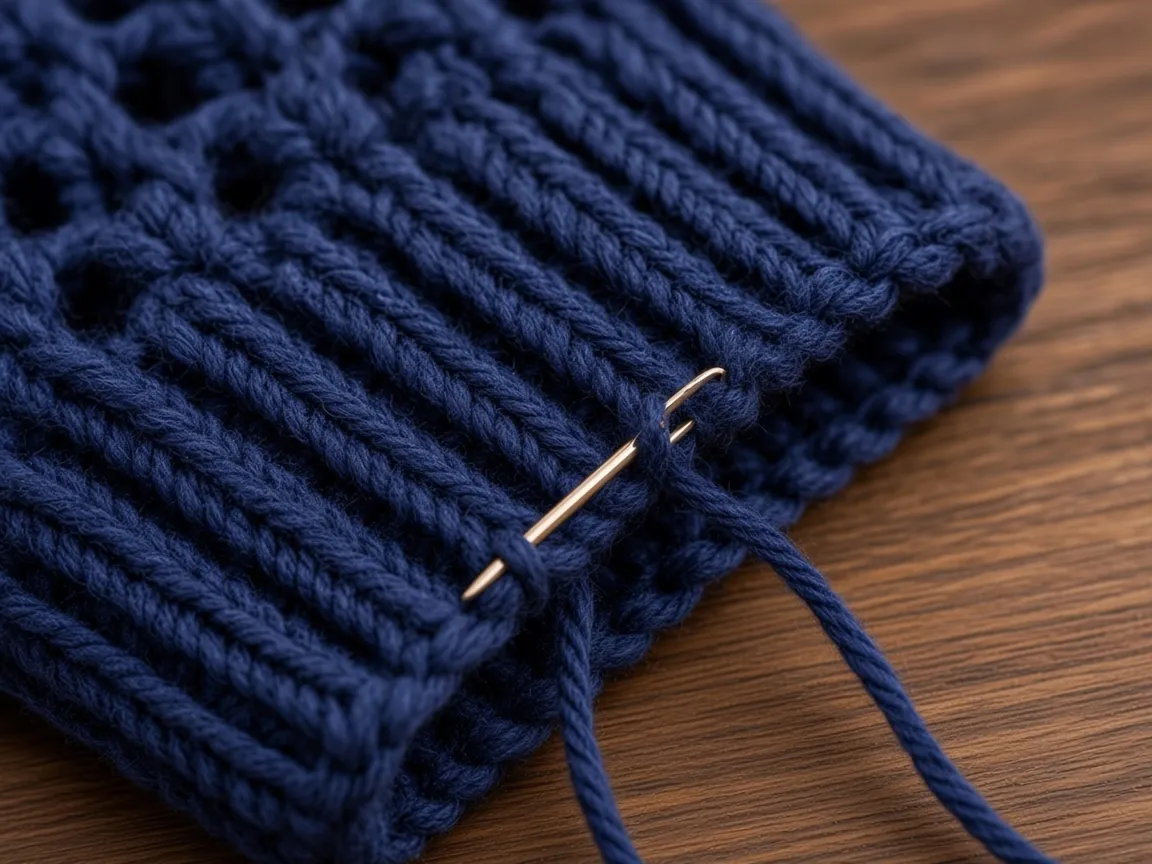
Do not knot every tail into a hard lump. One thick knot inside the cuff can rub the wrist, and a knot near the thumb opening can become uncomfortable when the thumb flexes. Use a sufficiently long weaving path, distribute the yarn through existing stitch texture, and keep the ribbing able to stretch. If the yarn is unusually slippery, consult the yarn manufacturer’s advice for secure finishing.
Turn the glove right side out and inspect the seam in daylight. The fabric should look consistent all around. Gently smooth each shell with your fingers. This is also the best moment to remove all stitch markers. Leaving a hard safety-pin marker hidden in a glove is an avoidable inconvenience and could be unsafe.
15. Wash and block the finished gloves
Blocking means encouraging the finished crochet into its intended shape with moisture and careful handling. It can make lace openings look more regular and help matching gloves resemble one another. It cannot fix severely incorrect sizing or a poorly placed thumb slit, so finish all construction corrections first.
Read the yarn label. For a washable wool blend, a short soak in cool or lukewarm water with a suitable gentle product may be appropriate; for other fibers, follow manufacturer guidance. Do not wring the gloves. Press them in a towel to remove excess moisture. Lay them flat on a clean towel or blocking mat, with the cuffs straight and shell rows aligned.
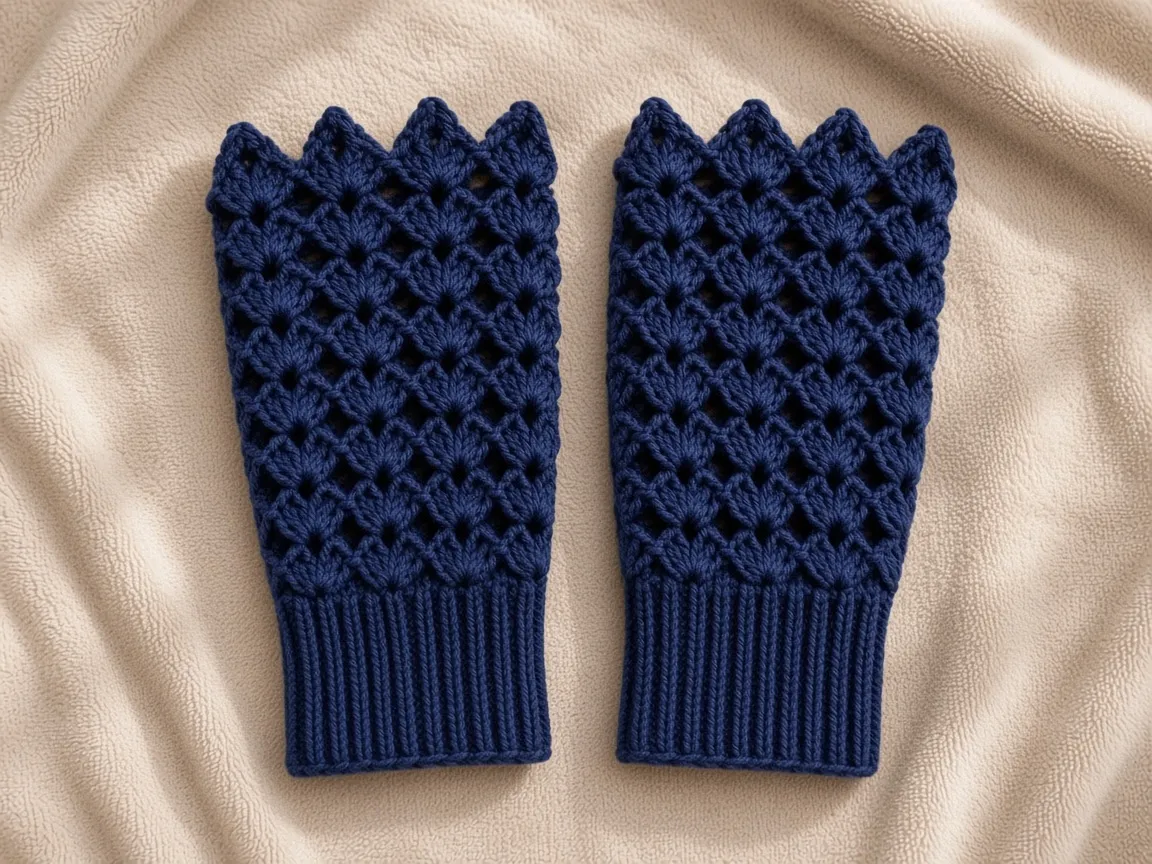
Open the chain-2 windows gently with your fingertips. Arrange the scalloped edge so each point is visible, but do not stretch the shells wider than the glove’s intended palm size. Oversized blocking makes the fabric sag and can destroy the close fit. Pinning may be helpful for delicate lace, but rustproof pins must remain well away from children and pets. Let the gloves dry fully before trying them on or putting them away.
Heat requires special care. Acrylic can be permanently flattened or altered by direct high-temperature contact, while wool can felt under heat and agitation. Do not press a hot iron directly onto the textured shells. If you use steam at all, first verify fiber compatibility and test on the original swatch. A gentle wet-block is usually sufficient for this project.
16. Fine-tune the fit for your actual hands
If the cuffs are too tight
First determine whether the tightness comes from width or fabric stiffness. If the cuff length around the wrist is too short, add BLO rows before sewing the seam. If its length seems right but it does not stretch comfortably, work the cuff with a slightly larger hook or a springier yarn. Adding one or two extra foundation sc at the upper edge will not fix a cuff that compresses the wrist all the way down its length.
If the cuffs slide toward the hands
Remove a few cuff rows, or use a smaller cuff hook if the fabric is excessively loose. Another option is to work the initial cuff with fewer rows and let the ribbing stretch to fit. Avoid elastic that has not been tested for comfort and laundering, particularly when gifting handwear. A secure crochet cuff should feel gently supportive without leaving deep marks on the skin.
If the hand section feels snug
Test it before completing the slit. You can choose thirteen shells instead of twelve, creating a foundation round of 39 sc, or fourteen shells with 42 sc. This increases the hand-lace circumference by one or two repeats, though the exact change depends on gauge. Spread the foundation stitches evenly over the cuff edge. If the hand is substantially wider than the wrist, a gradual increase round can bridge the difference: insert evenly spaced sc increases before beginning the first shell round, then distribute the larger shell count around the hand.
If the hand section is baggy
Reduce the number of shell stations or change to a slightly smaller lace hook. Also examine the separator chain. Our default uses one ch between shells. Additional separator chains will increase openness and width; removing the separator chain entirely can cause the shells to crowd. Choose a smaller repeat count first so the stitch architecture stays consistent.
If the glove does not reach high enough
Add one upper lace round before edging. If you need noticeably more coverage, add two rounds and try on again. Remember that more height creates greater potential for the top to interfere with finger bending. For a shorter, elegant wrist-warmer look, omit a pre-slit or upper round, then re-evaluate the slit location rather than blindly keeping the old opening height.
If the thumb slit pulls or pinches
Extend the open-row portion by one row or adjust its starting height. Do not make the opening larger by forcing your thumb into it repeatedly; that can stretch and weaken the lace. If the slit is well placed but the edging is restrictive, carefully remove the added border. The thumb web needs a soft, unobstructed path through the glove.
If the decorative edge flares
Try a smaller hook for the border, fewer stitches inside each shell center, or omit the picot. A dramatic pointed edge looks beautiful on a flat product photograph, but a practical daily glove should also tuck into sleeves and move smoothly past pockets and bag straps.
17. A size-planning method that scales beyond medium
Instead of publishing one universal size chart—which would be unreliable across many yarns—use this repeat-based calculation. First crochet a swatch in the actual yarn and hook. Determine the approximate width of one shell repeat. Second, divide the wearer’s palm circumference by that measurement. Round the result to a whole number of repeats, then test a circular lace tube before committing to the full glove.
For example, suppose your swatch suggests a shell interval of approximately 1.55 cm and your target hand circumference is 19 cm. Dividing 19 by 1.55 gives about 12.3 intervals, so begin by testing twelve shells. If twelve shells feel too tight, test thirteen. A changed hook, different stitch tension, or a 1.7 cm repeat width would change this calculation significantly. This is why the written default must not replace trying the work on.
Suggested initial exploration ranges—not standardized sizes—are ten to eleven shells for small hands, twelve for many medium hands, and thirteen to fourteen for larger hands, assuming a moderately compact DK shell gauge. These are starting experiments only, not promises of fit. Some yarns require a completely different number. If you are crocheting for someone remotely, ask them to measure a well-fitting fingerless glove or send wrist and palm measurements with the thumb excluded.
Maintain the cuff’s own measurement separately. A slender wrist with a broad palm may need 34 cuff rows joined into a smaller ring but 13 shell motifs around the hand. In that situation, do not insist on one foundation sc per row end. Make a smooth round of 39 sc distributed over the smaller cuff’s upper edge, check that the transition does not bunch badly, and adjust the shaping gradually if needed. The point of two-part construction is to fit the wrist and palm independently.
18. How to recognize and correct common mistakes
Mistake: the second cuff is noticeably longer. You probably counted the first cuff’s total rows incorrectly or changed hook tension. Count the raised rib columns, compare the flat strips before seaming, and remake the mismatched cuff if necessary. Small differences can be adjusted during blocking; major differences cannot.
Mistake: the shells move diagonally around the glove. This usually occurs when you slip stitch into the wrong location at the end of a round, or begin the next round in a separator chain instead of a shell center. Mark the first shell center of every round. The centers should form vertical columns when you hold the work upright.
Mistake: there are eleven shells instead of twelve. Count the foundation sc and identify which three-stitch group was skipped. It is easier to unravel one round than to hide a missing motif in later rounds. Do not add a random extra shell into the final join; that usually creates a lump.
Mistake: the chain-2 holes look uneven. Chains may be too tight or too loose compared with the double crochets. Practice deliberately relaxed chain motions while keeping dc tension stable. If the problem persists, test the next hook size. Lace can become more uniform after gentle blocking, but consistent working tension is still important.
Mistake: the ribbing has a slanted side edge. One stitch has probably been dropped or added at a row end. Count the 18 sc in every row, especially the final sc before turning. The last stitch can hide under the turning chain; inserting into the correct back loop keeps the cuff square.
Mistake: the thumb opening is in the wrong place. Put the cuff back on, mark the true thumb-side point, and reposition the seam or unravel to the beginning of the slit. Do not force a thumb opening on the back of the hand to function as a side opening. Hand comfort is more important than preserving a few minutes of work.
Mistake: the glove becomes too wide after the cuff. Examine how many sc were placed around the cuff edge and whether the shell hook is oversized. The foundation round should be smooth, not gathered into ruffles. Start by reducing repeat count or using a smaller lace hook, then reassess the transition.
Mistake: the shells curl inward. This can be caused by tight connectors, undersized hooks, or an edging that is too dense. Gently spread the work and check whether the issue disappears when worn. If the garment feels tight, do not rely on blocking alone; change the stitch count or hook.
Mistake: finishing yarn tails are visible. Dark yarn hides many errors but long tails crossing the lace windows can still show. Route tails inside dense cuff stitches or behind the lower sides of shells rather than across a hole.
Mistake: one glove twists when worn. Check whether you accidentally twisted the rib strip while joining it into a ring. Another possibility is inconsistent joining of lace rounds. Trace the vertical shell-center columns from cuff to top. A structural twist normally requires reworking the affected portion rather than stretching it flat.
19. Tips for working confidently with dark navy yarn
Navy lace is elegant in photos, but dark stitches are much harder to distinguish under weak lighting. Work near a window during the day or use a bright directional task lamp. Aim the light across the fabric at a slight angle; side lighting makes ridges and ch-2 windows visible through their shadows. A white cloth on your lap can improve contrast between the yarn and the background.
Use a removable marker in a contrasting color. Yellow, pale pink, or mint markers stand out clearly against deep blue. Move the beginning-of-round marker consistently and place one in the middle of a motif if you lose your place. Avoid dark markers that blend into the work. If you count aloud, say “one shell, two shells” rather than counting every dc; a full shell is the practical unit of the pattern.
Give your hands rest breaks. Repeated tight movements, especially when concentrating on nearly black yarn, can produce hand fatigue. The lace is meant to be relaxing to create. Loosen your grip on the hook if you notice stiff fingers, and use an ergonomic handle if that is more comfortable. Crochet quality often improves more from steady tension than from pulling the yarn firmly.
Before cutting a tail, check the project in natural light. A stray yarn loop caught around a neighboring shell is easier to notice in daylight than under warm indoor lighting. Photograph your first finished glove against a light surface; even a quick phone photo may reveal uneven shells that you did not see while working.
20. Optional variations for a personalized pair
Longer winter cuffs
Add chains to the initial cuff foundation so each row becomes deeper. For example, work 22–24 sc instead of 18 if your yarn gauge gives the extra length you want. Keep the number of rows around the wrist based on circumference. Remember that this adjustment makes the cuff deeper, not wider. Longer cuffs pair well with oversized sweaters and can be folded if the yarn remains flexible.
Delicate cropped mitts
Start with fewer cuff foundation chains and work one fewer full lace round. Recheck thumb placement because reducing the area below the opening changes how the glove sits. A compact version is useful in milder weather or for occasions when you want a lace accessory rather than substantial warmth.
Bold floral crowns
For a more pronounced decorative top, use a border motif such as (dc, ch 3, picot, ch 3, dc) into every shell center, with restrained joining stitches between motifs. Swatch this ornamental edge first. Open chains can become easily snagged, so reserve extra-large crowns for occasional wear rather than highly active use.
A two-tone color palette
Work the cuff in dark navy and the lace in denim blue, or choose charcoal cuffs with a lighter blue lace section. Color changes are simplest after the foundation round. Leave secure tails to weave into the dense area of the cuff. Two-tone gloves may show the shell geometry more clearly than a single dark color, although they differ from the tonal sophistication of the reference.
A subtle textured cuff finish
After sewing the cuff, add a single round of slip stitches or single crochets around the lower edge, taking care not to reduce elasticity. Test on the wrist before completing the second cuff. If the added border grips too tightly, remove it: the inherent BLO ribbing is already an effective finish.
Make a gift set
A matching headband, narrow scarf, or mug cozy can repeat the navy shell motif. When matching accessories, use the same yarn family and note that a stitch repeat sized for gloves may behave differently on a broad scarf. A gift card can include the fiber content and washing instructions. If gifting to someone with sensitive skin, obtain their yarn preferences beforehand.
21. Construction checkpoints: inspect as you go
A precise checkpoint routine makes this project approachable even when the lace looks intricate. After cuff Row 1, count 18 sc. After cuff Row 10, place the strip against the intended cuff-depth measurement. After the final cuff row, check resting circumference and stretch. After joining, inspect the seam and make sure the ring is not twisted. After the foundation round, count every sc and verify that the upper edge is smooth.
After Lace Round 1, count twelve shell centers; after Round 3, check the lace gauge and width by trying the tube over your hand. Before Slit Row A, mark the true thumb side. After Slit Row C, try the glove on with the thumb through the opening. Immediately after the first rejoining round, check that the thumb can flex comfortably. Before edging, compare the total height with the wrist-to-knuckle measurement. After edging, put the glove on and curl your fingers into a gentle fist.
When beginning the second glove, keep the finished first glove beside you as a live reference. Count rib rows before seaming and count shell rows at identical stages. Even if your yarn tension varies slightly from day to day, regular comparisons will help you catch differences while they are still easy to correct.
22. Troubleshooting fit through real movement
A fingerless glove should be tested in motion, not only while the hand is flat. First spread your fingers wide. The top border should not dig into the base of the index finger or little finger. Next make a loose fist. The back-of-hand lace should stretch enough that shells stay in place without pulling the cuff upward. Then open your hand and hold a mug. The palm side should remain comfortable even with the fingers curled around the handle.
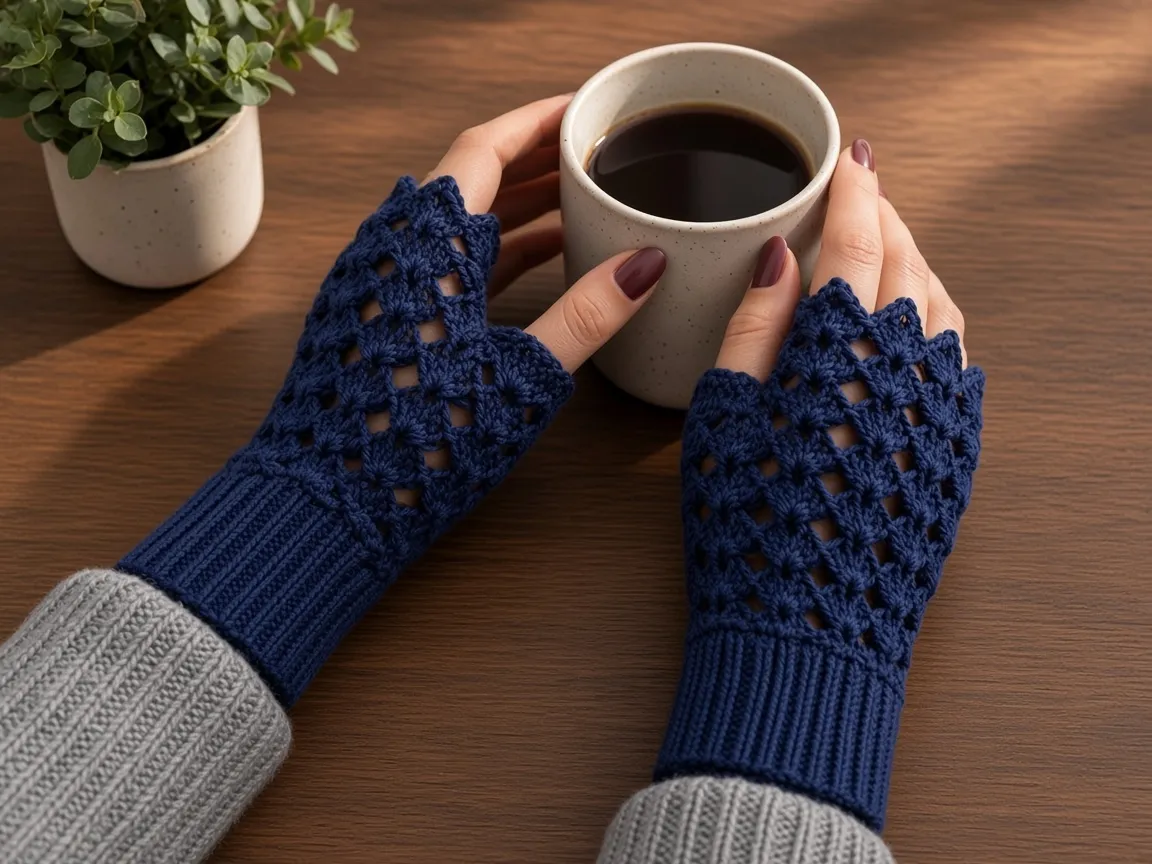
Move your thumb away from the hand and toward the little finger. Observe the thumb slit. If its top edge cuts into the thumb web, extend or raise the slit. If the slit drops toward the wrist when you reach for something, the hand section may be too wide or the cuff may not be secure enough. Try flexing the wrist backward and forward; the ribbing should bend without bunching painfully.
Finally, remove the glove and put it on again without arranging each shell. A well-fitted everyday mitt should settle naturally with only a small adjustment. If you must tug hard at the cuff every time or repeatedly push the thumb opening back into place, make the appropriate fit changes before completing the matching second glove.
23. Care, storage, and long-term wear
Store gloves clean and completely dry. Lay them flat or fold the cuffs gently instead of hanging them from their lace tops. Hanging can stretch the chain arches and change their shape. If you carry the mitts in a bag, place them away from exposed zippers, key rings, and rough hook-and-loop closures that can snag the decorative picots.
Wash according to the yarn band and avoid harsh scrubbing at the shell openings. After laundering, reshape the pair flat with both gloves aligned. If the cuffs slowly loosen, rewash and dry according to fiber instructions; recovery varies with yarn composition. Acrylic, cotton, and wool blends do not behave identically. A washable, resilient yarn and restrained blocking are the best choices for an accessory intended for frequent wear.
Small snags do not always require unraveling the entire glove. If a yarn loop is pulled but not broken, use a blunt needle to redistribute the excess length back into neighboring stitches. If a strand breaks, secure the area thoughtfully with matching yarn. Avoid cutting protruding loops until you know whether they are a structural stitch or a loose tail.
Frequently asked
Can an absolute beginner crochet this design?
Yes, after practicing chain, sc, sc BLO, dc, and slip stitch on small swatches. The construction involves keeping a steady stitch count, identifying ch-2 spaces, joining rounds, and changing to turned rows around the thumb. Those skills are manageable, but a complete beginner may find it helpful to crochet one practice cuff and a five-shell swatch in light-colored yarn first.
Why does the cuff look knitted even though it is crocheted?
Back-loop single crochet produces long, repeating ridges that resemble knit ribbing from a distance. It is still crochet. The effect depends on working sideways and then rotating the finished strip so the rows run vertically around the wrist. Using both loops would make a smoother strip and reduce the pronounced rib texture.
Do I have to use two hook sizes?
No. Two hooks are a convenient way to keep ribbing firm and the lace open, but the correct sizes depend on yarn and tension. If one hook gives a cuff that stretches comfortably and lace with a good drape, it is acceptable to use it for both sections. Prioritize measurement and comfort over the example hook labels.
Should I make the shell motif more complicated to match the picture?
Only if you enjoy experimentation and are comfortable checking gauge again. The reference may use denser clusters or multiple shell types. Adding unplanned front-post stitches or extra chains halfway through the project can change both width and height, so experiment on a swatch and document the complete repeat before changing the actual gloves.
Why does the thumb opening have no thumb tube?
The fingerless style in the reference keeps the thumb uncovered. A short side slit generally provides adequate movement without adding bulk. A thumb tube is possible but is a separate design choice that changes the silhouette. This guide concentrates on the simpler open-thumb construction.
Can I make the mitts warmer?
Use a wool-rich yarn with good body, work the hand with a slightly denser shell, or add a longer cuff. However, an openwork glove will never insulate as fully as a solid fabric mitten. Do not close the lace so tightly that the palm becomes inflexible or the thumb opening binds.
Can I make these for children?
Yes, with careful measurements, more suitable yarn thickness, and a properly scaled number of repeats. Do not assume that removing just one shell makes an adult glove child-sized; thumb placement, cuff depth, and total height also need adjustment. Avoid loose ornaments or attachments, and ensure the finished accessory fits safely and comfortably.
How do I know which side is the right side?
For the ribbing, select the side with the cleaner vertical ridges. For the lace, either face may be attractive, but keep the preferred surface outward on both gloves. The turned thumb rows can look slightly different from joined rounds; consistent orientation is more important than a single universally correct face.
Can I use cotton yarn?
You can, but a firm cotton may have less spring than a wool or acrylic blend. It can feel heavier and may hold an open shape when stretched. Consider a slightly smaller repeat count only after swatching and trying on a test tube. Soft cotton blends with good drape tend to work better than stiff kitchen cotton for fingerless gloves.
How many hours will the project take?
The time depends heavily on experience, yarn visibility, and how carefully you fit each piece. Beginners may spend substantial time learning the repeat and refining the first glove. More experienced crocheters may work through the repeat quickly. Rather than promise a fixed duration, allow time for the swatch, fitting checks, and careful finishing; those steps make a noticeable difference in quality.
May I sell gloves made from this tutorial?
You can generally sell objects you personally make using independently described crochet techniques, subject to applicable law and any requirements of the marketplace you use. Use your own finished-item photographs, describe your materials accurately, and do not present the reference image as a photograph of something you made. The Crochet Explained article text and original instructional graphics should not be redistributed without permission.
26. Complete condensed pattern for experienced crocheters
This reference section is designed for crocheters who understand the preceding explanations and want to follow the construction without rereading the tutorial. It is not a substitute for measuring and fitting.
This block is the construction only. It does not replace measuring and trying the glove on.
Cuff, make two: With smaller hook, ch 19. Row 1: sc in second ch from hook and across (18). Rows 2–36: ch 1, turn, sc BLO across (18). Adjust row count for a comfortable wrist circumference. Join short edges to form a ring. Position seam on thumb-side edge.
Foundation: With larger hook, sc evenly around top edge to total 36 sc, or 3 × desired shell count; join. Sample is 36 sc and 12 shell repeats.
Shell definition: SHELL = (2 dc, ch 2, 2 dc) in one specified stitch or center space. Between shells, work ch 1 unless on a slit row’s open edge.
Lace Rnd 1: *Skip 1 foundation sc, SHELL in next sc, skip 1 sc, ch 1; repeat from * twelve times around. Join.
Lace Rnds 2–4: Move to first shell center. *SHELL in next shell’s ch-2 sp, ch 1; repeat from * around, 12 shells total. Join each round. Check that the thumb-side seam is correctly placed and adjust height if necessary.
Slit Rows A–C: Work one SHELL into each of twelve shell centers, with ch 1 between neighboring shells, but do not join or bridge the end of the row to its start. Turn after Rows A and B. Work a third open row. The resulting split is the thumb opening; add or remove an open row as needed for thumb comfort.
Rejoin Rnd 1: Work one SHELL in each of twelve centers, with ch 1 between, and also ch 1 between last and first shells to close the tube. Slip stitch to join. Check thumb movement immediately.
Upper Rnd 2: Repeat standard shell round with twelve shells, ch 1 between; join. Add a third upper round if required for height.
Top border: In each shell center work (2 sc, picot, 2 sc), where picot = ch 3, sl st into first chain. Between centers, sl st loosely in separator ch-1 spaces. Join and fasten off. Optionally edge slit sides in relaxed sc if necessary.
Finish: Weave in all ends; wash and lay flat according to yarn label; gently shape the lace; compare the matching pair. Confirm comfort with fingers open, fingers curled, and thumb moving freely.
27. Final checklist before wearing or gifting
- Both cuffs are the same comfortable depth and circumference.
- The cuff ribs stand vertically when worn.
- The cuff seams are soft and not twisted.
- Both lace sections contain the same number of shell motifs.
- The shell centers form tidy columns instead of wandering around the hand.
- Both thumb slits face their respective thumbs.
- The opening permits comfortable thumb movement.
- The top scallops are secure and do not constrict finger movement.
- No loose stitch markers or exposed long tails remain.
- The yarn care information is available to the wearer.
- fingerless gloves
- lace
- navy
Read this next
- Elegant Twist Crochet Ear Warmer A ribbed half double crochet band with a folded front twist. Adult Small, Medium, and Large from gauge. US terms.
- 10 Christmas Crochet Ornament Patterns Ten mini ornaments: gingerbread, tree, snowman, reindeer, Santa, candy cane, stocking, gift, angel, and snowflake.
- Snowman Wink Crochet Hat A purple snowman beanie from a flat rectangle: white face band, one wink, a carrot nose, and a pompom. US terms.