

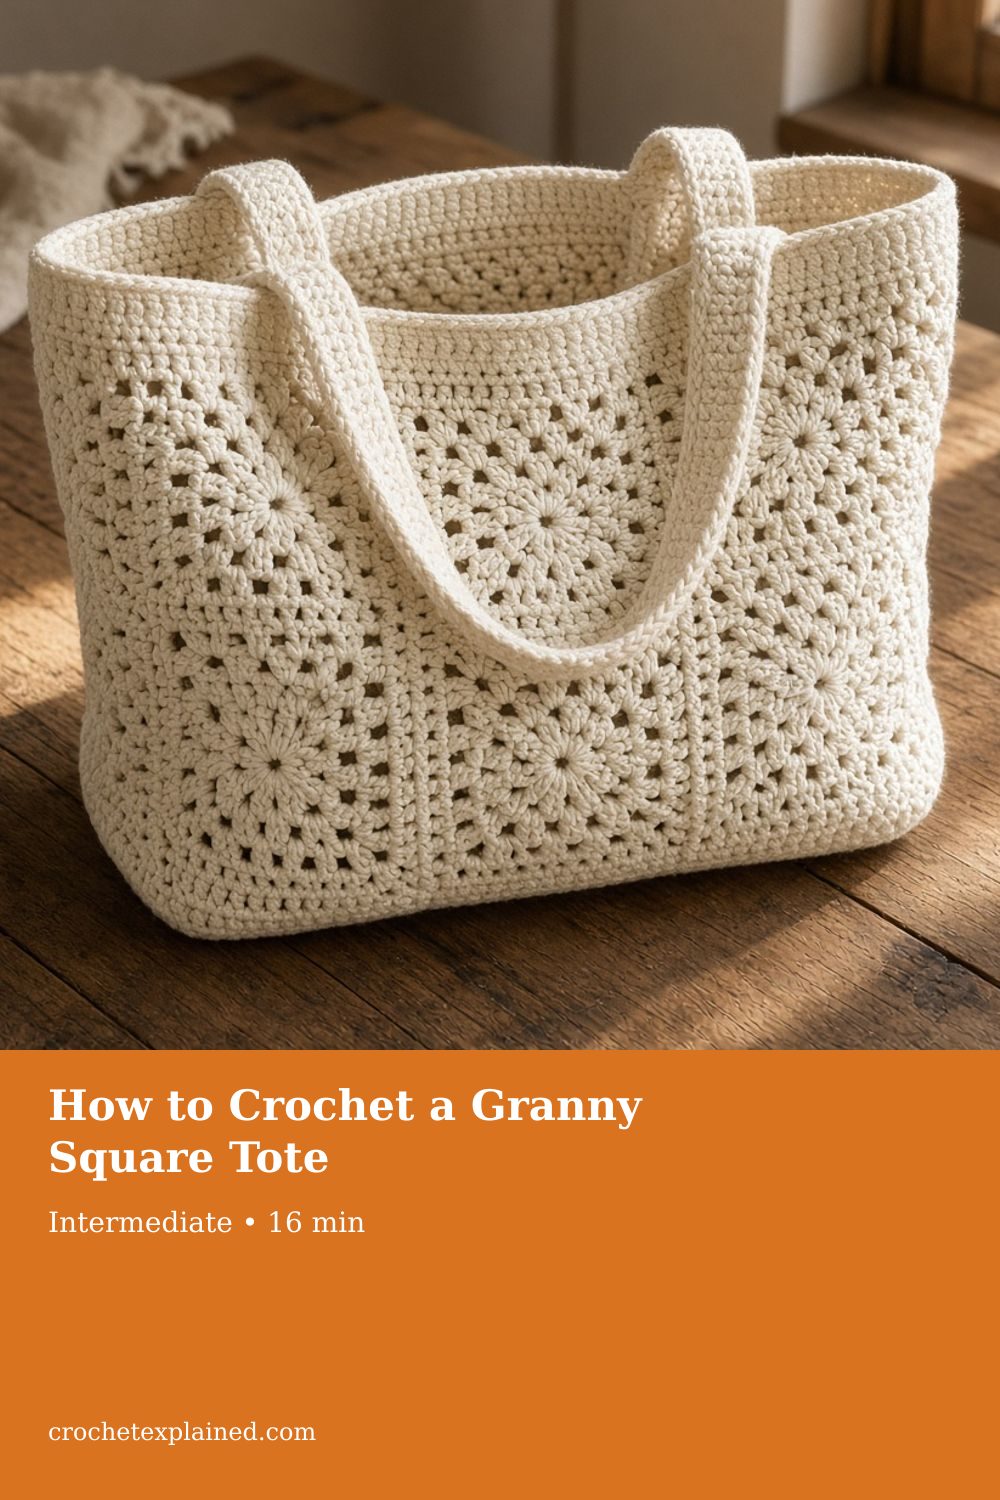
How to Crochet a Granny Square Tote
Join eight matching granny squares into two panels, seam three sides with equal stitch counts, and add a firm top edge and two straps.
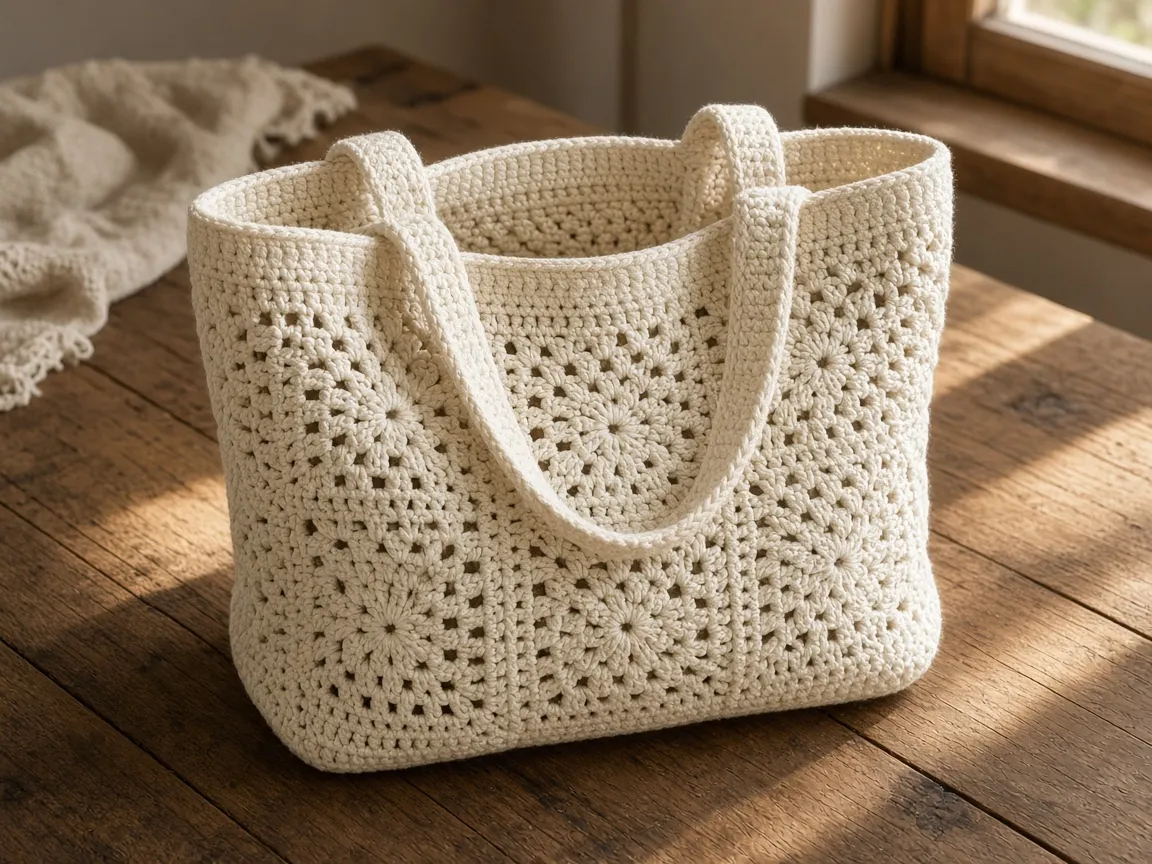
Eight granny squares joined into a flat cotton tote, with the edge counts that make every seam match. US terms. Sizes are gauge estimates.
At a glance
- Skill level
- intermediate
- Time
- Eight squares, three seams, an edge, two straps
- Finished size
- Two squares wide by two tall. About 10 in only if a square is 5 in.
- Yarn weight
- Worsted cotton
- Hook size
- The hook that gives matching squares
- Yardage
- Not weighed. Weigh one square and one strap section.
On this page
Track your progress
- Go to Step 1: round 1, four clusters in the ring
- Go to Step 2: round 2, two clusters in every corner
- Go to Step 3: round 3, one side cluster between corners
- Go to Step 4: round 4, two side clusters between corners
- Go to Counting the seam edge
- Go to Step 5: count 19 along one edge before you join anything
- Go to Assembly
- Go to Step 6: join two squares, then two pairs
- Go to Step 7: three seams, and leave the top open
Ticks are saved on this device only. Counting rows? Keep the stitch counter open in another tab.
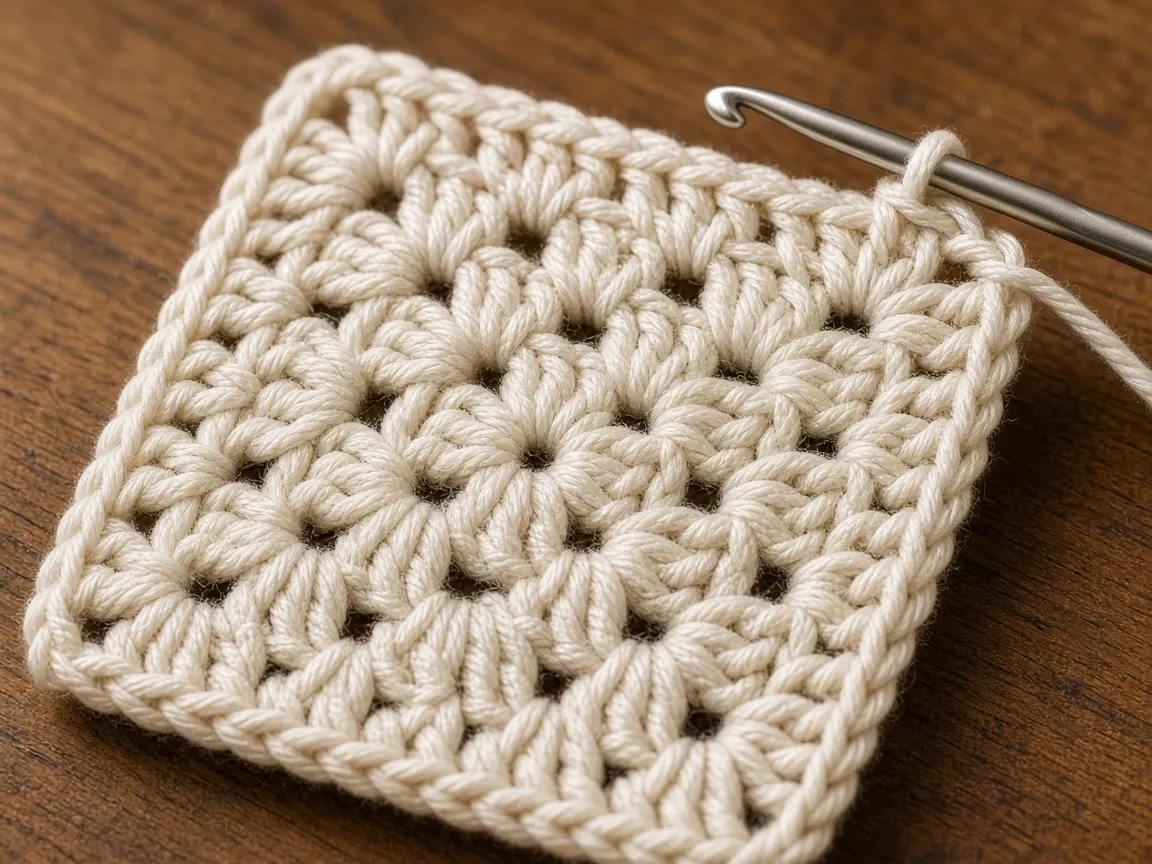
US crochet terms throughout. Sizes here are worked out from gauge rather than from a finished sample, so swatch and measure as you go, and the pictures of finished pieces are illustrations. Made one? Send a photo through the contact page.
A granny square tote is two flat panels of squares sewn together on three sides, with a firm edge around the opening and two straps. The squares are the easy part. The bag depends on counting: eight squares that match, seams with the same number of stitches on both layers, and straps sewn into something stronger than a chain space.
It is an open bag. A pen will drop through the holes, and rain will not stay out.
US terms. US double crochet is UK treble. US single crochet is UK double crochet. Abbreviations and the basic stitches. The pictures are illustrations. No tote for this page was crocheted, loaded, or carried. Inches below are estimates from a gauge you still have to swatch.
How the bag is built
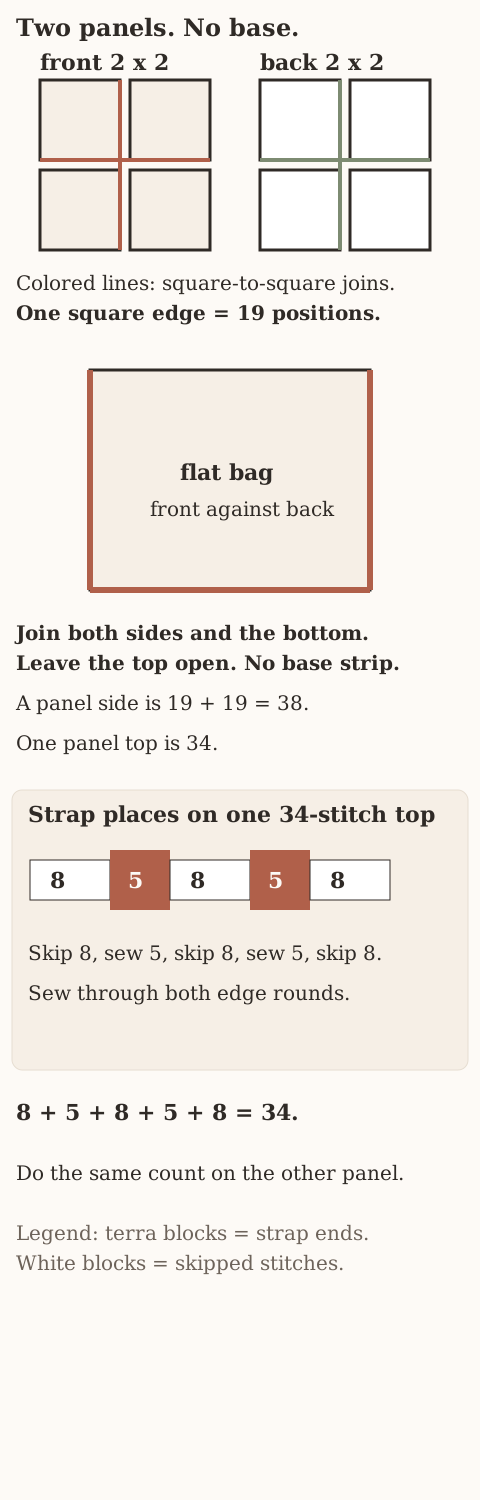
- Make eight squares, four rounds each.
- Join them into two panels, two squares by two.
- Put the panels right sides together and join the sides and the bottom. Leave the top open.
- Work two rounds of single crochet around the opening.
- Make two straps and sew them through that edge.
The bag is flat. It has no base, so a bulky item takes height out of it. A boxed bottom would need a separate base strip, which this page does not include. The size follows the square: each panel is about twice the side of one square. If your square is 5 inches, the panel is about 10 by 10 and the opening is about 20 inches around. If your square is 4 inches, every one of those numbers shrinks by a fifth.
Materials
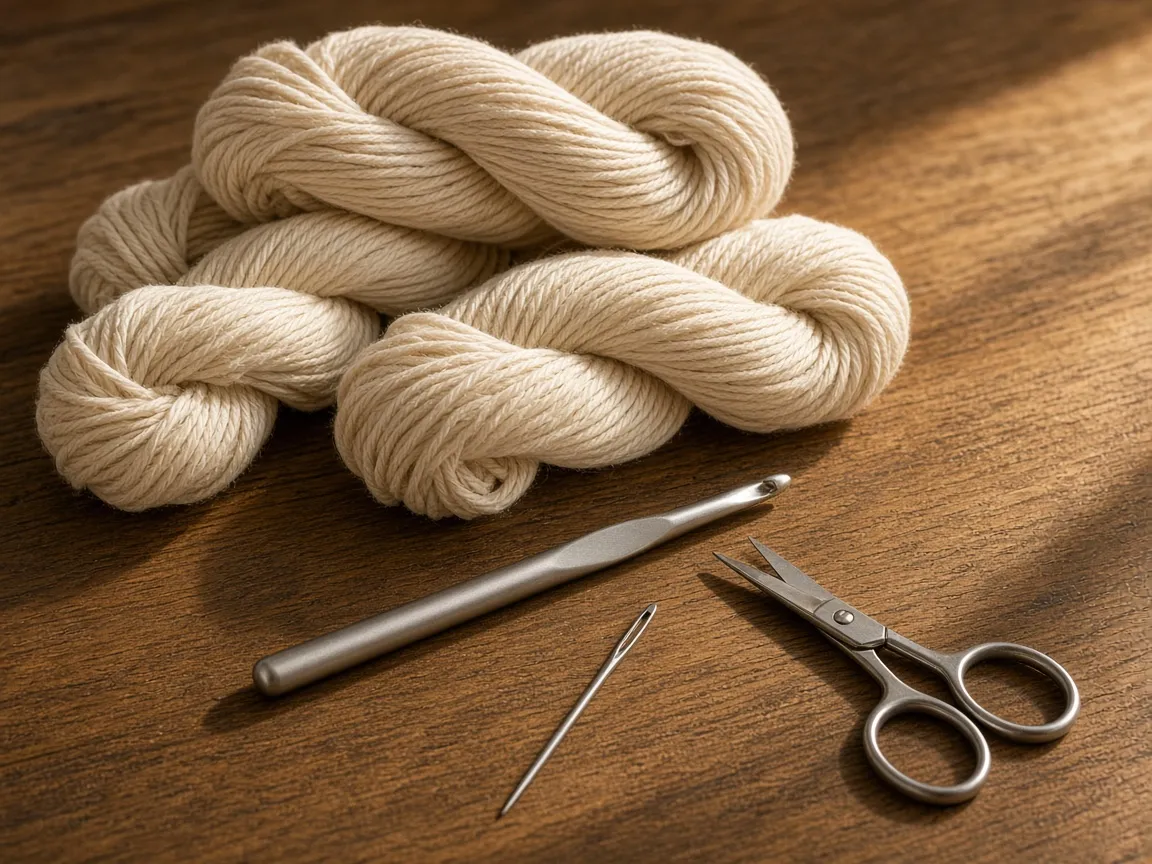
- Worsted cotton. It gives crisp clusters and a firm fabric. Every yarn lengthens when a loaded bag hangs from it, and cotton does not spring back once stretched. That is why the straps are single crochet, not chain, and why the bag should not be overloaded. Yarn weights.
- A US H/8 (5.0 mm) hook, or the hook that gives eight matching squares. Hook chart.
- Yarn needle, scissors, a few clips or locking markers to hold squares together while you seam.
To estimate yarn, weigh your first finished square and multiply by eight. Then weigh 10 rows of strap and multiply by 22 for two 110-row straps. Add some for the seams and the edge.
The square
The beginning ch-3 counts as a double crochet. Clusters go into chain spaces, never into the tops of stitches. The center is a chain ring. See working in the round.
Step 1: round 1, four clusters in the ring
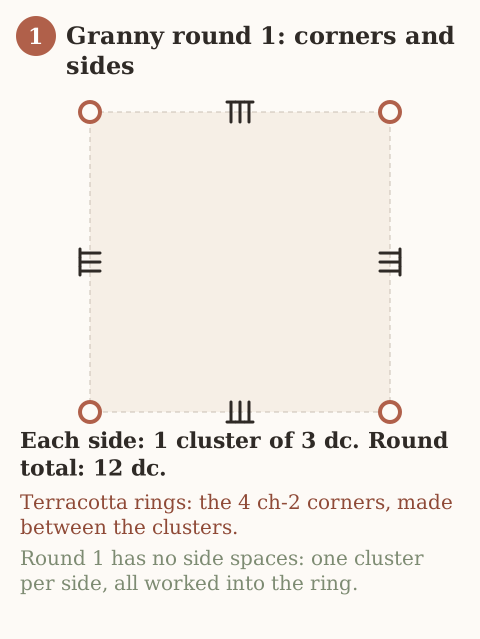
- Chain 4.
- Slip stitch into the first of those chains. You now have a small ring. All of round 1 goes into that ring, not into the chains one by one.
- Chain 3. Count it as the first double crochet.
- Make 2 more double crochet into the ring. That is cluster 1: 3 double crochet, if you count the chain 3.
- Chain 2. That chain 2 is corner 1. Do not put a stitch into it yet.
- Into the ring: 3 double crochet, then chain 2. That is cluster 2 and corner 2.
- Into the ring: 3 double crochet, then chain 2. Cluster 3, corner 3.
- Into the ring: 3 double crochet, then chain 2. Cluster 4, corner 4.
- Slip stitch into the top of the beginning chain 3.
- Count. You need 12 double crochet and 4 corner spaces. There are no side spaces yet. If you have 15, an extra cluster went into the ring.
Step 2: round 2, two clusters in every corner
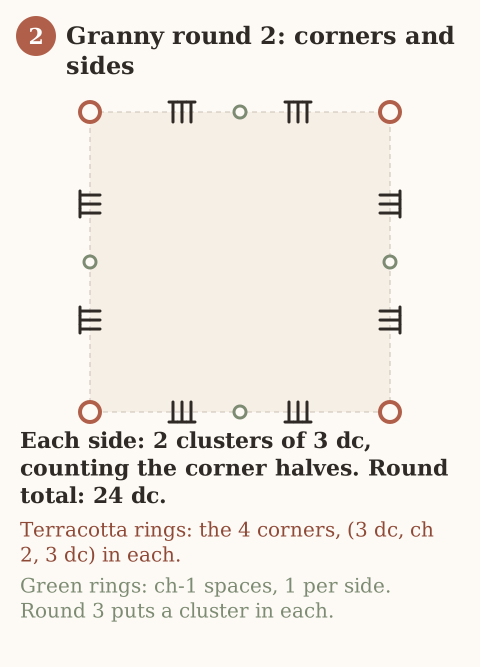
- Slip stitch into the next double crochet, then the next, then into the chain-2 corner space. You are moving to a corner without adding a cluster on the way.
- Chain 3. It counts as the first double crochet.
- In that same corner space: 2 double crochet, chain 2, 3 double crochet. One corner now holds two clusters with a chain 2 between them.
- Chain 1. That chain 1 is a side space. Leave it empty.
- In the next corner space: 3 double crochet, chain 2, 3 double crochet.
- Chain 1.
- Do that same corner, then chain 1, two more times. Four corners in all.
- After the fourth corner, chain 1 and slip stitch into the top of the beginning chain 3.
- Count 24 double crochet. Each side has one empty chain-1 space. Round 3 fills those. A cluster in this round goes into a corner space only.
Step 3: round 3, one side cluster between corners
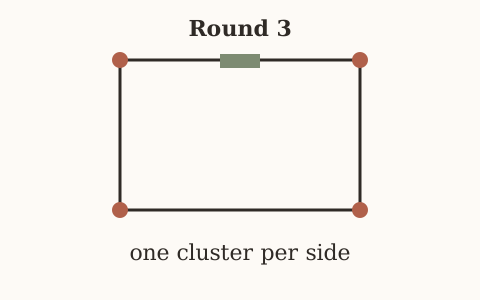
- Slip stitch across into the next chain-2 corner space.
- Chain 3, then 2 double crochet, chain 2, 3 double crochet, all in that same corner.
- Chain 1.
- Find the chain-1 space on the side, the gap between the clusters below. Make 3 double crochet in that gap. Do not put them into the top of a double crochet. If the gap closes, the square starts to cup.
- Chain 1.
- In the next corner: 3 double crochet, chain 2, 3 double crochet.
- Repeat that side-then-corner pattern until you have been around all four sides.
- Finish the last side with chain 1, 3 double crochet in the last side space, chain 1, and slip stitch into the top of the beginning chain 3.
- Count 36 double crochet. That is 12 times 3.
Step 4: round 4, two side clusters between corners
- Slip stitch into the next corner space.
- Chain 3, 2 double crochet, chain 2, 3 double crochet in that corner.
- Along the side you will meet two spaces. For each space: chain 1, then 3 double crochet in the space. After the second side cluster, chain 1 again.
- Next corner: 3 double crochet, chain 2, 3 double crochet.
- Walk the other three sides the same way: chain 1, side cluster, chain 1, side cluster, chain 1, corner.
- After the last side, slip stitch into the top of the beginning chain 3.
- Count 48 double crochet. That is 12 times 4. Fasten off.
- Weave the ends in before you start the next square.
Make 8 squares this way. Turn every square between rounds, or turn none of them. Do not mix the two habits. Stack the eight. Measure each one flat, without pulling a corner. If one is smaller, make it again. Do not stretch it into a seam.
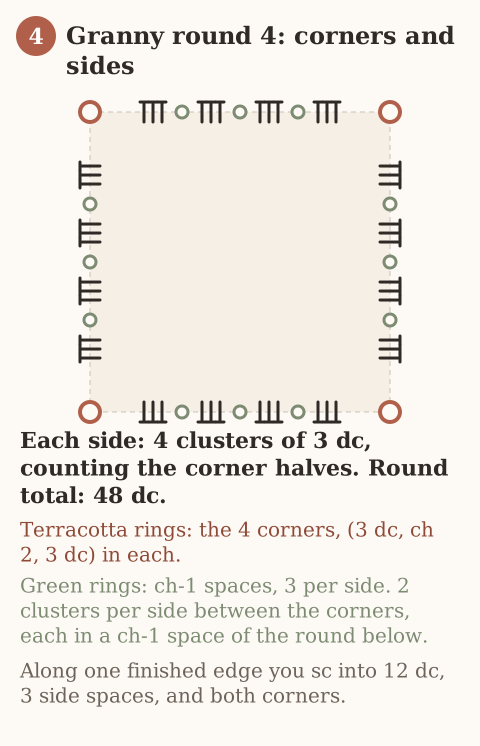
Checkpoint each round: round n has 12 × n double crochet, and n clusters along each side if you count the corner halves. A count that is not a multiple of 12 means a cluster was added or missed, often because one went into a stitch top instead of a space.
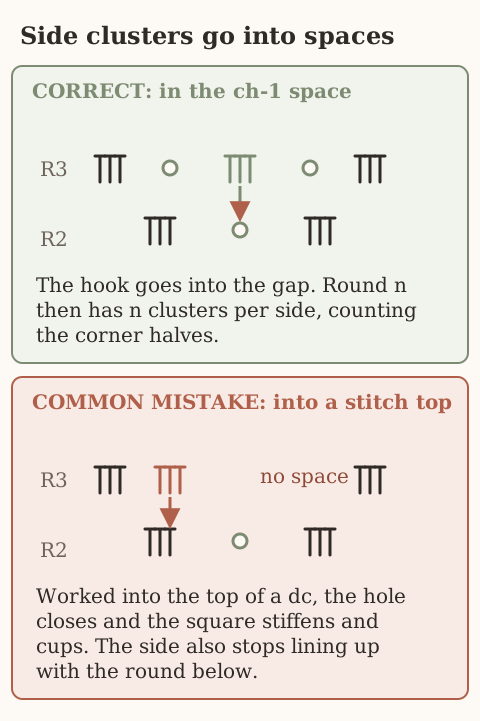
Some people turn the square over between rounds to reduce a slight twist. The instruction above already asks you to pick one habit and keep it.
Counting the seam edge
Step 5: count 19 along one edge before you join anything
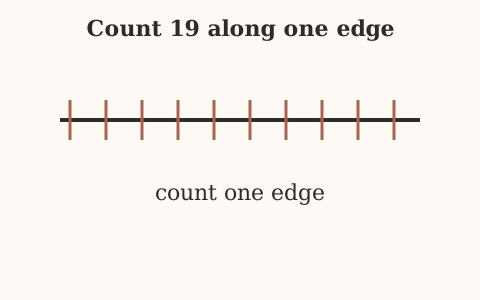
Lay one square flat. Walk one side from corner to corner and touch each spot:
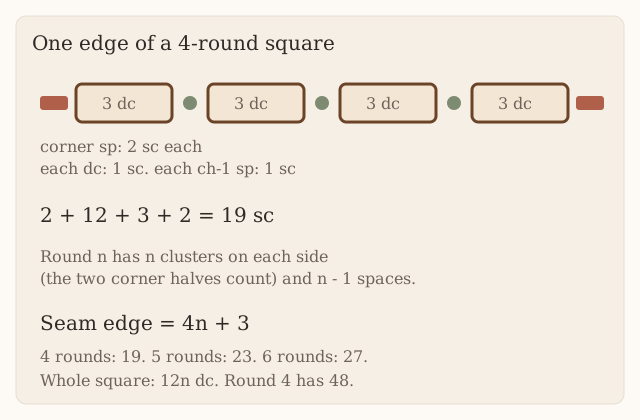
- The first corner chain-2 space.
- Then, along the side: 12 double crochet tops and 3 chain-1 spaces between the clusters.
- The corner space at the other end.
When you seam, that edge takes 2 single crochet in the first corner space, 1 single crochet in each of the 12 double crochet, 1 single crochet in each of the 3 chain spaces, and 2 single crochet in the far corner space. Add them: 2 + 12 + 3 + 2 = 19. For a square of n rounds the same edge is 4n + 3. A 4-round square is 19. Do not start the second seam until the first one is 19.
Assembly
Step 6: join two squares, then two pairs
- Hold square A and square B with right sides together. Line up one edge, stitch spot to stitch spot.
- Join yarn at the corner. Single crochet through both layers: 2 in the corner space, 1 in each double crochet, 1 in each chain space, 2 in the far corner. Count 19. Fasten off.
- If that seam is 18 or 20, pull it out. Do not copy a bad count onto the next pair.
- Join square C to square D the same way. Another seam of 19.
- Hold the AB pair against the CD pair, right sides together, along the long edge. That edge is two squares: 19 + 19 = 38.
- Single crochet through both layers and count 38. Where the seams cross in the middle, four corners meet. Put 2 single crochet in the corner space of each square. Skip one and a finger fits through the hole. Add extra stitches and the center bunches.
- Make the second panel the same way: two pairs, then one long seam of 38.
- Each panel should lie flat. It is about twice the side of one square.
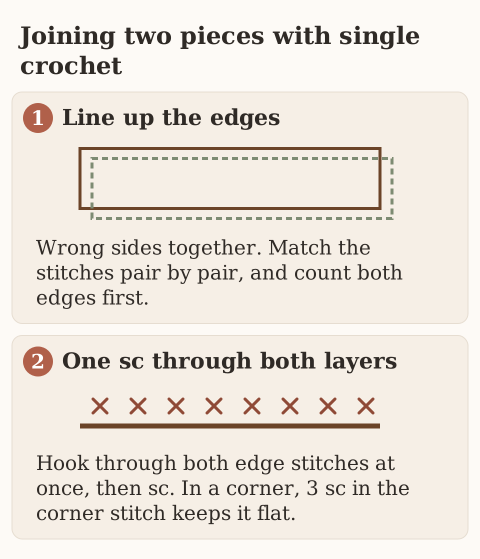
Where the long seam crosses the short seam in the middle, four corners meet. Keep to the count: 2 sc in the corner space of each square. Skip there and you leave a hole a finger can pass through. Add stitches and the center bunches.
Checkpoint: each panel lies flat and square, about twice the side of one square.
Step 7: three seams, and leave the top open
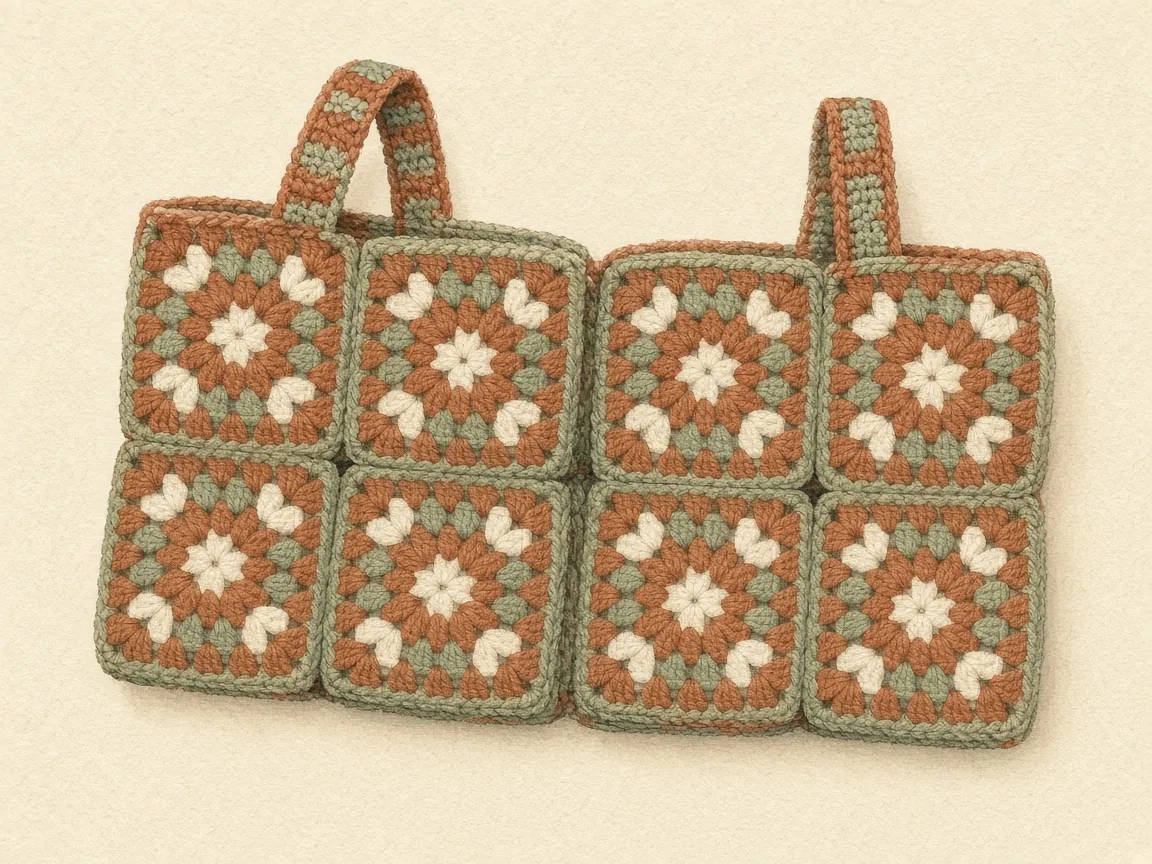
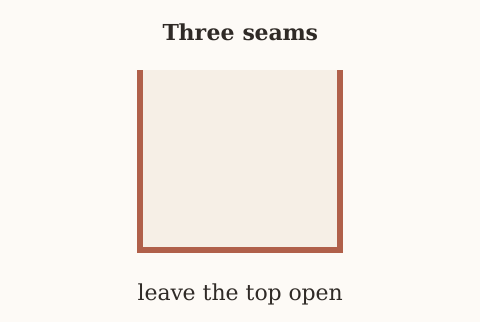
- Put the front panel and the back panel right sides together.
- Start at the top of one side. Single crochet down that side through both layers. Count 38.
- At the bottom corner, the two corner spaces already give you 4 single crochet in that turn. Do not add a separate turning chain.
- Single crochet across the bottom. Count 38.
- Turn the other bottom corner the same way, then single crochet up the second side. Count 38.
- Stop at the top. Do not seam the opening.
- Turn the bag right side out. The seam ridges stay inside.
The top edge
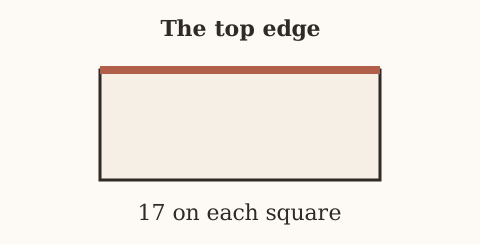
- Join yarn at a side seam on the top edge, with the bag right side out.
- Work around the opening: 1 single crochet in each double crochet, 1 in each chain-1 space, and 1 in each corner space.
- One square’s top edge is 17 stitches at 4 rounds. Four edges make the round: 17 + 17 + 17 + 17 = 68.
- Slip stitch to the first single crochet.
- Chain 1 and work a second round of 1 single crochet in each of those 68 stitches. Slip stitch to join.
- Count both rounds. More than 68 and the opening ruffles. Fewer than 68 and it draws in. Pull the round out and recount before you sew straps. The straps go into this edge, not into a chain space of a square.
This edge is the structural part of the bag. The straps are sewn into it, not into the squares. If the first round ruffles, you have more than 68. If it draws the opening in, you have fewer.
Straps
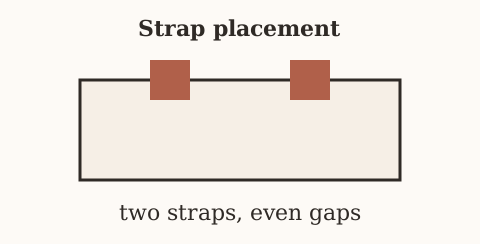
Make 2. The chain 1 at the end of a strap row does not count as a stitch.
- Chain 6.
- Single crochet in the second chain from the hook and in each chain across. Count 5. Chain 1, turn.
- Next row: single crochet in each of the 5 stitches. Count 5. Chain 1, turn.
- Repeat that row until the strap measures about 22 inches lying flat, not pulled. At 5 rows to the inch that is about 110 rows. Write down the row count you actually made.
- A 22 inch strap is for a hand. For a shoulder, measure from the bag at your side, up over the shoulder, and back down, and crochet to that length instead.
- Make the second strap to the same row count. Do not match them by stretching one to the tape.
Where the ends go. Each panel’s top is half of 68, which is 34 stitches.
- From a side seam, count 8 stitches and stop.
- The next 5 stitches are the first strap end.
- Count 8 more and stop.
- The next 5 stitches are the other end of the same strap.
- Count the last 8. That is 8 + 5 + 8 + 5 + 8 = 34.
- Lay about 1 inch of the strap end inside the bag, over those 5 stitches.
- Sew through both rounds of the edge, around the overlap and across it. Also catch solid cluster stitches under the edge. One inch of strap is longer than the two edge rounds, so the lower end of the overlap has to be sewn to the clusters, not left hanging behind a chain gap.
- Do the same four ends. A strap sewn only through a granny space will tear out.
A pen, a key, or a lipstick will fall through the holes. Use the makeup pouch for those. Rain comes through too. A book sleeve helps only on a dry day.
Before you load it
- All eight squares match.
- Every square-to-square seam is 19, and every panel edge is 38.
- The top edge is 68 on both rounds.
- Both straps have the same number of rows.
- Each strap end is sewn through both edge rounds, 8 stitches in from a side seam.
Make the joins visible before sewing straps
For a four-round square, a complete side includes twelve dc and three side ch-1 spaces. The two corner allocations determine whether it has nineteen seam positions or seventeen top-edge positions; they are not interchangeable. Mark the center seam of each two-square top edge and divide the full opening into two thirty-four-position panels. At each strap overlap, sew through both solid edging rounds and several underlying crochet stitches without crossing the opening. A one-inch overlap is longer than two sc rounds at the example gauge, so its lower end must also be anchored to solid cluster stitches rather than dangling behind a chain gap.
Troubleshooting
Squares come out different sizes. Your tension changed between them. Redo the odd one. A 4 inch edge eased into a 5 inch edge puckers the whole panel.
A square cups. Clusters went into stitch tops, or the hook is small for the yarn.
A seam puckers or ripples. The two layers took different counts. Pull it out and match 19 to 19.
There is a hole where four corners meet. You skipped the corner space on one square. Work 2 sc there.
The opening ruffles or draws in. The edge count is off. It should be 68.
The straps stretch with use. Chain straps, or a loose single crochet. Shorten them by rows rather than knotting them.
The bag sags at the bottom. It is a flat bag with no base, carrying weight on open fabric. Lighter loads, or a different bag design.
Care
Empty the bag. Hand wash cool. Dry flat, including the straps. Wet cotton stretches at the seams, so do not load the bag until it is dry.
Frequently asked
Can I use two colors?
Yes. Change color at the start of a round, and keep every yarn the same weight. A thinner cotton makes a smaller square, and it will not join cleanly.
Will it hold books?
It has not been load-tested, so this page makes no claim about how much it carries. Anything that fits through a granny space will fall out, and rain or a leaking bottle in the same bag will reach the covers.
Can I make it from two big squares instead of eight?
Yes. Work both squares to the same number of rounds, n. Seam three sides at 4n + 3 per edge. The top edge is 2 × (4n + 1). Work the strap spacing out from that number the same way as above.
Can I sell totes?
Finished bags, yes. Do not republish these rounds as your pattern.
Next
The same square, stopped at four rounds and worked in Halloween colors, is the coaster set. The same shell and corner worked in rows instead of rounds makes the lace bandana. A closed cotton pocket for the things this tote would lose is the makeup pouch.
- granny square
- tote
- cotton
- intermediate
Read this next
- How to Crochet a Christmas Tree Garlic Holder A small mesh garlic holder with scalloped branches, a gold star, and an open top. US terms. Sizes are design targets.
- How to Crochet a Christmas Tree Plastic Bag Holder Crochet a hollow Christmas tree that holds grocery bags. Bags go in the open top and out the brown trunk. US terms. Sizes come from gauge.
- How to Crochet a Compact No-Slip Kitchen Towel Holder A compact cotton crochet towel holder with two wooden rings, one above the other. Assembly counts are still being checked. US terms.