

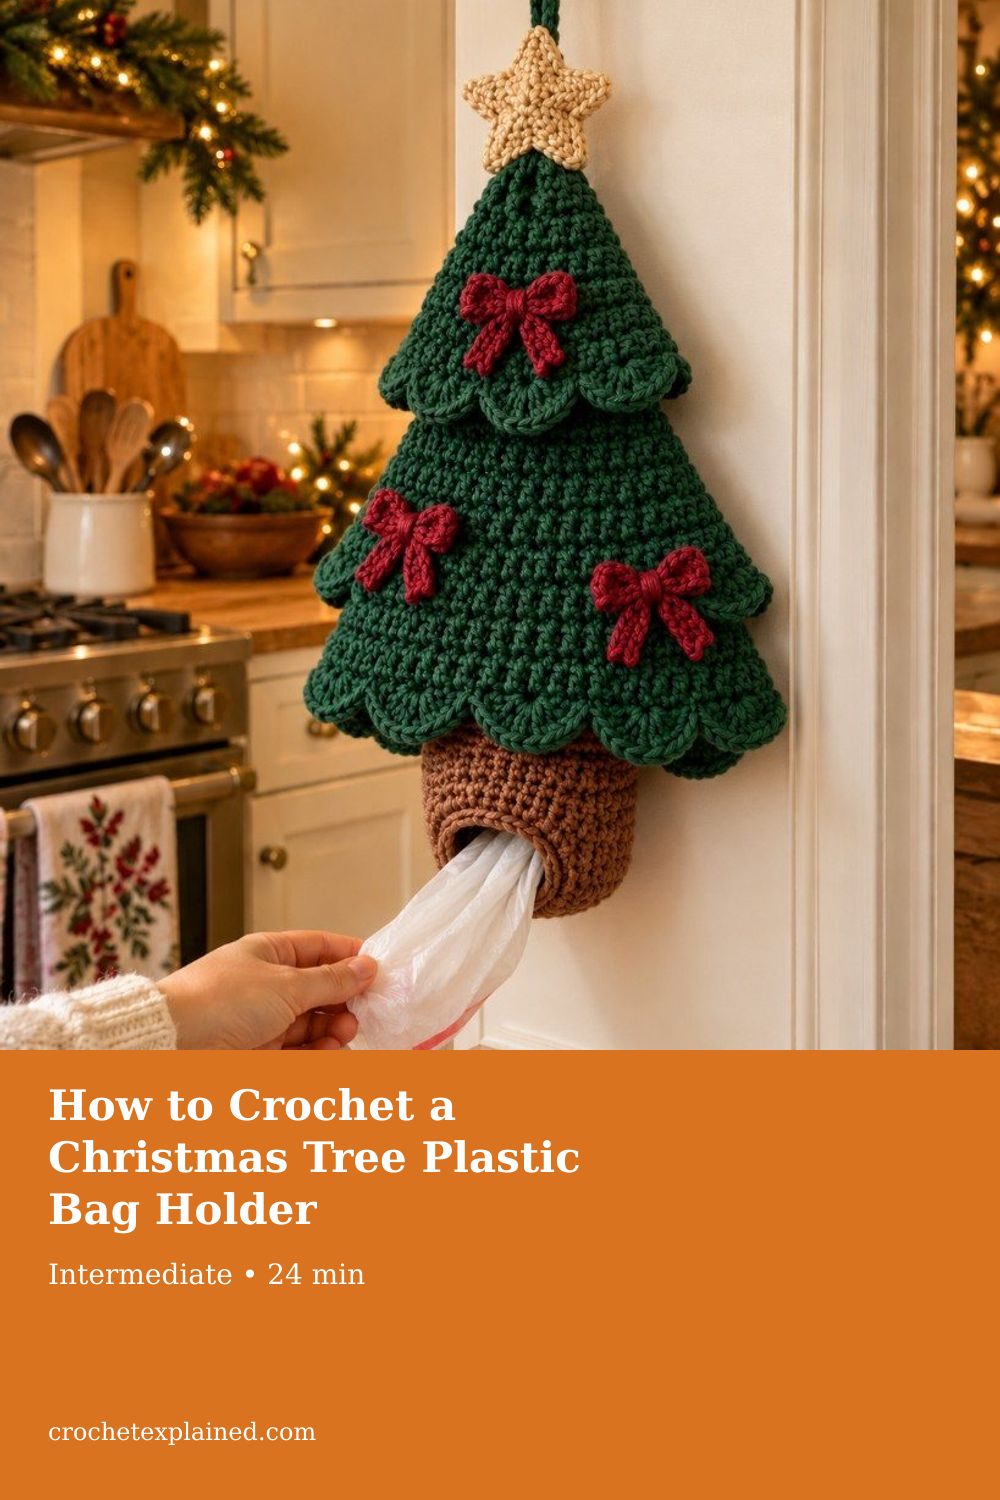
How to Crochet a Christmas Tree Plastic Bag Holder
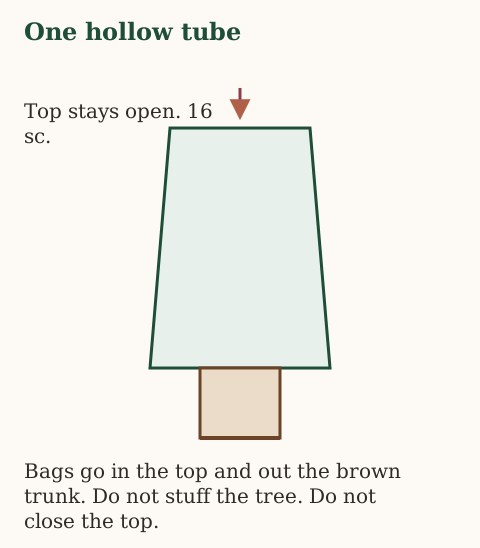
Crochet one hollow tube: an 8-round brown trunk of 24 sc, then a green body from 32 stitches up to 64 and back down to a 16-stitch open top. Shells sit on the front loops of rounds 6, 19, and 31. Bags go in the top and out the trunk. These sizes are from the gauge, not from a finished sample.
Crochet a hollow Christmas tree that holds grocery bags. Bags go in the open top and out the brown trunk. US terms. Sizes come from gauge.
At a glance
- Skill level
- intermediate
- Time
- Several sessions. The page time is the reading estimate, not a timed make.
- Finished size
- Design targets only, until a sample is measured
- Yarn weight
- Worsted cotton or cotton blend. Amounts are shopping allowances.
- Hook size
- 4.5 mm to start, then the hook that hits gauge
- Yardage
- Estimated in the pattern
On this page
- At a glance
- What you are making
- Why the tube is simpler
- Supplies
- Gauge
- Stitches, in US terms
- Stitch-count chart
- Step 1 — Prepare for a clean beginning
- Step 2 — Crochet the trunk dispenser
- Step 3 — Expand from trunk to the lower tree
- Step 4 — Shape the middle and upper tree
- Step 5 — Keep the top opening tidy and accessible
- Step 6 — Add the three scalloped branch tiers
- Step 7 — Crochet a sturdy hanging loop
- Step 8 — Make a simple cream-gold star
- Step 9 — Crochet and attach the optional bows
- Step 10 — Load and test the bags
- Finishing
- Troubleshooting
- Other colors, same tube
- Washing and care
- Frequently asked
- Checklist before you hang it
Track your progress
- Go to Step 1 — Prepare for a clean beginning
- Go to Step 2 — Crochet the trunk dispenser
- Go to Step 3 — Expand from trunk to the lower tree
- Go to Step 4 — Shape the middle and upper tree
- Go to Step 5 — Keep the top opening tidy and accessible
- Go to Step 6 — Add the three scalloped branch tiers
- Go to Step 7 — Crochet a sturdy hanging loop
- Go to Step 8 — Make a simple cream-gold star
- Go to Step 9 — Crochet and attach the optional bows
- Go to Step 10 — Load and test the bags
- Go to Finishing
Ticks are saved on this device only. Counting rows? Keep the stitch counter open in another tab.
US crochet terms throughout. Sizes here are worked out from gauge rather than from a finished sample, so swatch and measure as you go, and the pictures of finished pieces are illustrations. Made one? Send a photo through the contact page.
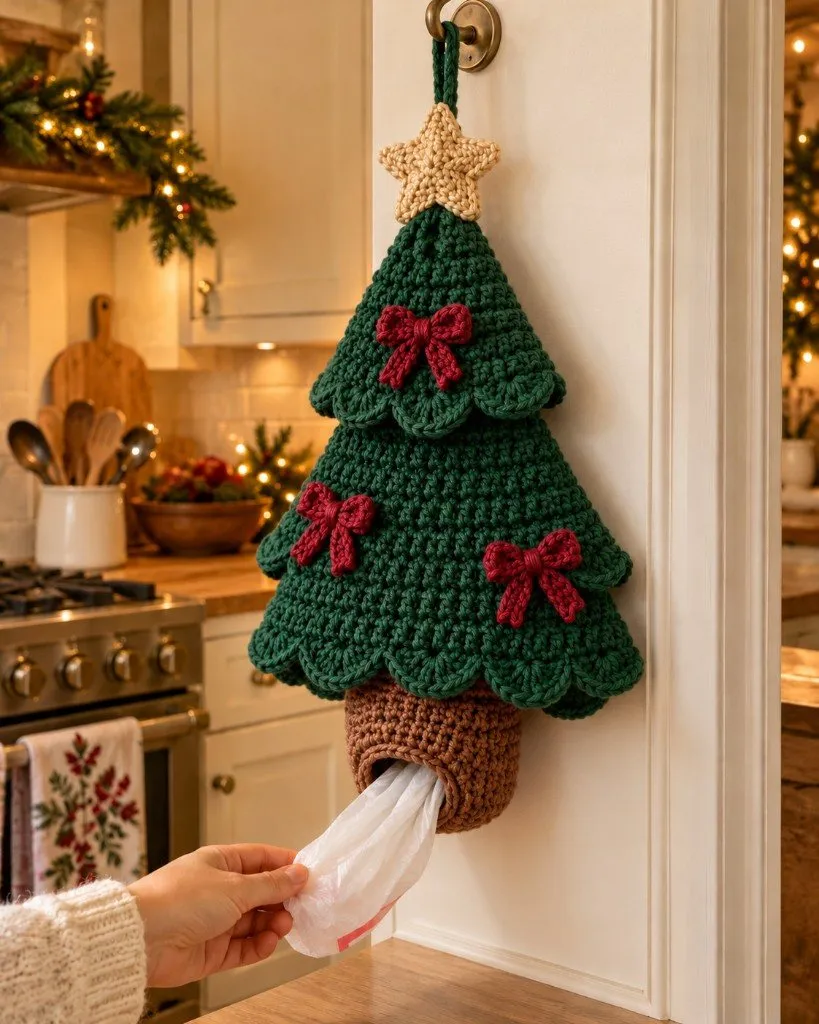
A kitchen full of loose grocery bags needs one hollow place to put them. This tree is that place: a forest-green tube that narrows as it rises, a short cocoa-brown trunk you pull a bag through, and three rows of shells that read as branches.
The picture is an illustration of the intended shape. It is not a photograph of a holder anyone has crocheted from these rounds. The stitch counts below are the written pattern. The centimeter figures are arithmetic from the gauge target, not tape measurements of a finished tree.
US terms. Single crochet, half double crochet, and double crochet are the US stitches. Names are in the abbreviations chart.
This is for clean, dry, lightweight grocery bags. It is not a tote, not a stuffed ornament, and not a place for anything hot, sharp, or heavy. Plastic bags are a suffocation hazard. Keep the holder away from children and pets, and away from stoves, candles, and heaters. The hanging loop has not been load-tested.
At a glance
| Feature | Written plan |
|---|---|
| Skill | Comfortable with joined rounds, increases, and decreases |
| Yarn | Worsted cotton or a cotton blend, category 4 |
| Hook | 4.5 mm to start |
| Colors | Forest green, cocoa brown, cream or gold, burgundy |
| Trunk | Chain 24, then 8 rounds of 24 sc. Bottom stays open. |
| Widest body | 64 sc after green round 5 |
| Shell anchors | Round 6 (64), round 19 (48), round 31 (32), back loop only |
| Top | Rounds 43–45 stay at 16 sc. The top stays open. |
| Shells | 16 + 12 + 8 = 36 |
| Bag path | In the top, out the brown trunk |
Yardage allowances, not weighed amounts: about 140–200 g green, 20–35 g brown, 5–15 g for the star, 10–20 g if you make three bows.
At 16 sc and 18 rounds per 10 cm, 64 stitches are about 40 cm around, 24 stitches about 15 cm around, and 16 stitches about 10 cm around. Those are circumferences, not diameters. Fifty-three rounds (45 green plus 8 brown) are about 29 cm of tube at that round gauge, before the star and the loop. A proposed overall height of 34–39 cm, and a proposed flat width of 22–26 cm across the shells, are design targets. They are not measurements of a made tree. A proposed capacity of 8–15 thin bags is the same kind of estimate.
What you are making
The body is one continuous tube. It is not three cones stacked on each other, and it is not stuffed. The shells are sewn into front loops that were left unused on three rounds, so the pouch behind them stays whole.
Bags go in through the 16-stitch opening at the top. They come out through the 24-stitch opening at the bottom of the brown trunk. The star and the bows are decoration. The green loop at the back is what hangs the tree, and it must not be sewn across the top hole.
Hang it on a hook that is rated for the wall or the cabinet, with room under the trunk. Do not hang it over a stove.
The same kitchen already has a plastic bag holder with a different shape, and a towel holder that is not a bag dispenser. Those counts do not build this tree.
Why the tube is simpler
A tree made of separate stuffed tiers has more seams and no place for bags. Here the storage is the tube, and the shells only change the outline. There is no elastic in the basic trunk. If a sample later needs elastic, that is a different version and it has to be written separately.
Rounds are joined. At the end of a round, slip stitch into the first stitch, chain 1, and start the next round. The chain 1 does not count. The first single crochet goes into the same stitch as the join. A marker in that first single crochet keeps the count honest. The joining slip stitch is never part of the stitch count.
Supplies
- Forest-green category 4 yarn, a shopping allowance of 140–200 g
- Cocoa-brown category 4 yarn, 20–35 g for the trunk
- Cream or champagne-gold yarn, 5–15 g for the star
- Burgundy yarn, 10–20 g if you want up to three bows
- 4.5 mm hook, then whatever hook hits the gauge. Hook sizes.
- Locking stitch marker, scissors, tape, yarn needle
- A hook on the wall or inside a cabinet
- Optional: extra markers in three colors, one for each shell round
Cotton holds its shape better than a soft acrylic for something that gets pulled. Plush yarn hides the front-loop ridges this pattern depends on. Yarn weights explain the category 4 label.
Gauge
The target is 16 single crochet and 18 single-crochet rounds in 10 cm, measured in the center, unstretched. It is a target to test, not a promise about every ball of category 4 yarn. The method is in Crochet Gauge.
Make a piece larger than 10 cm. If 10 cm holds more than 16 stitches, the stitches are small and a larger hook is the next try. If it holds fewer than 16, try a smaller hook. A short tube is a better check than a flat square, because joined rounds do not always match rows.
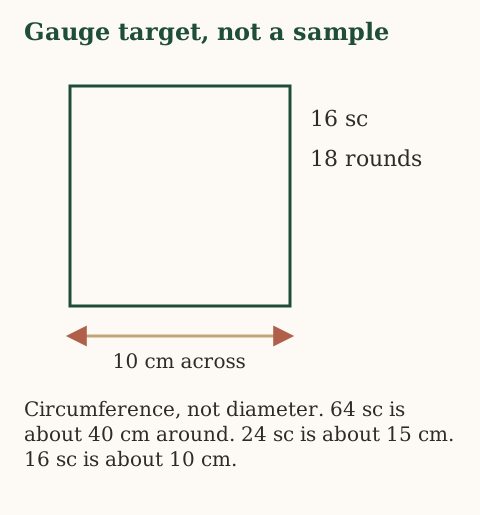
Each stitch at that gauge is 10 ÷ 16 = 0.625 cm along the circumference. Lay the tube flat and you are looking at about half the circumference, before the shells flare. Do not publish a flattened width as a diameter.
Before you commit the yarn, fold a real grocery bag and see whether it will pass a 16-stitch opening and a 24-stitch opening worked at your gauge. If it will not, change the opening on a sample before you treat these numbers as final. Bag sizes are not standard.
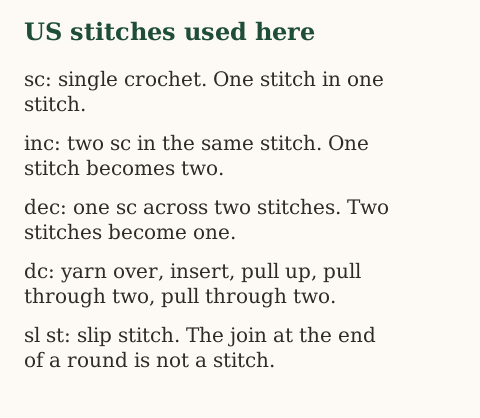
Stitches, in US terms
| Abbreviation | Meaning |
|---|---|
| ch | chain |
| sc | single crochet |
| hdc | half double crochet |
| dc | double crochet |
| sl st | slip stitch |
| inc | 2 sc in the same stitch |
| dec | 1 sc across the next 2 stitches |
| BLO | back loop only |
| FLO | front loop only |
A decrease turns two stitches into one. An increase turns one stitch into two. When the pattern says (sc 6, dec) 8 times, that uses 8 stitches in each repeat and makes 7. Eight repeats turn 64 stitches into 56.
For a back-loop round, the hook goes under the back strand of the V only. The front strand stays on the outside for the shells. If you work both loops on round 6, 19, or 31, that ridge is gone.
A double crochet is: yarn over, insert, yarn over and pull up a loop, yarn over and pull through two, yarn over and pull through two. A shell is five of those in one front loop.
Stitch-count chart
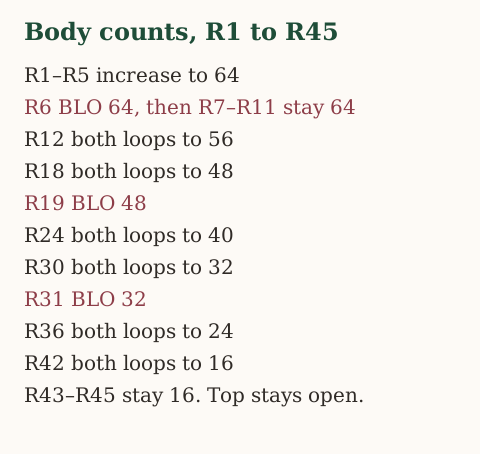
Crochet the brown trunk first. Switch to green. Increase to 64. Work three rounds in the back loop only, at the rounds named below. Decrease through both loops on the rounds named below. Leave the top open.
Trunk
| Round | Work | Count |
|---|---|---|
| Foundation | Chain 24, join without a twist | 24 chains |
| T1–T8 | Chain 1, sc in each stitch, slip stitch to join | 24 |
Green body
| Round | Work | Count |
|---|---|---|
| R1 | (sc 2, inc) 8 times | 32 |
| R2 | (sc 3, inc) 8 times | 40 |
| R3 | (sc 4, inc) 8 times | 48 |
| R4 | (sc 5, inc) 8 times | 56 |
| R5 | (sc 6, inc) 8 times | 64 |
| R6 | 64 sc in the back loop only | 64 |
| R7–R11 | sc in each stitch, both loops | 64 |
| R12 | (sc 6, dec) 8 times, both loops | 56 |
| R13–R17 | sc in each stitch | 56 |
| R18 | (sc 5, dec) 8 times, both loops | 48 |
| R19 | 48 sc in the back loop only | 48 |
| R20–R23 | sc in each stitch | 48 |
| R24 | (sc 4, dec) 8 times, both loops | 40 |
| R25–R29 | sc in each stitch | 40 |
| R30 | (sc 3, dec) 8 times, both loops | 32 |
| R31 | 32 sc in the back loop only | 32 |
| R32–R35 | sc in each stitch | 32 |
| R36 | (sc 2, dec) 8 times, both loops | 24 |
| R37–R41 | sc in each stitch | 24 |
| R42 | (sc 1, dec) 8 times, both loops | 16 |
| R43–R45 | sc in each stitch | 16 |
The only back-loop rounds are R6, R19, and R31. R18 and R30 are decreases through both loops. Fasten off after R45 and leave the 16-stitch opening open.
Step 1 — Prepare for a clean beginning
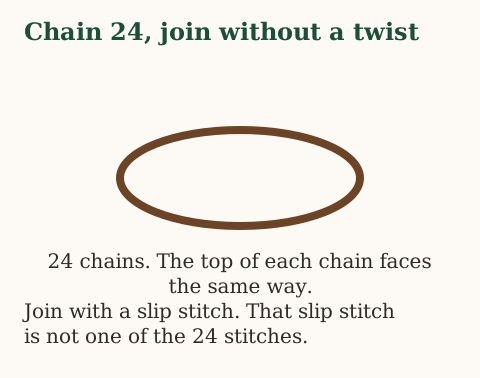
Wind the green and the brown. Keep the chart open. Crochet a short brown chain and look at the top of each chain. When you join, those tops have to face the same way all the way around. A twisted ring is faster to rip now than after eight rounds.
Practice an increase and a decrease in scrap yarn until you can see that an increase is two stitches in one, and a decrease is one stitch across two.
The first real stitch of a round is the first single crochet, not the slip stitch that closed the round before it.
Step 2 — Crochet the trunk dispenser
With brown, chain 24. Join to the first chain with a slip stitch, without twisting. Chain 1. Single crochet in each chain. Join to the first sc. You have 24 sc. Mark that first sc.
Work seven more rounds the same way: chain 1, 24 sc, join. Eight rounds in all.
The bottom edge is the opening a bag will come out of. Do not sew it shut. A slip-stitch edging is optional, and it must not shrink the hole before you have tried a bag in it.
At 18 rounds per 10 cm, eight rounds are about 4.4 cm of trunk. That is arithmetic, not a measured trunk. Extra even rounds would make a taller trunk, and they would also change the published count, so they are not part of this pattern.
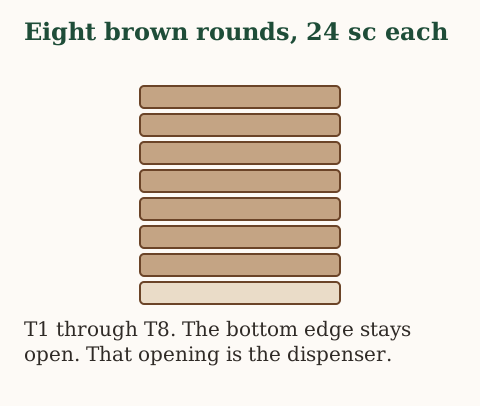
You should be able to see the bottom hole and put a finger through it without forcing the stitches apart. The 24 stitches should be even.
Step 3 — Expand from trunk to the lower tree
Join forest green at the start of the next round. Carry the brown tail for a few stitches if you want, then weave it in. Do not leave a knot inside the tube where a bag can catch it.
Green R1. Chain 1. (2 sc, inc) 8 times. Join. Count 32. The repeats use the 24 brown stitches: each repeat takes 3 and makes 4.
Green R2. (3 sc, inc) 8 times. Join. Count 40.
Green R3. (4 sc, inc) 8 times. Join. Count 48. A gentle flare is the point. A wavy ruffle usually means an extra stitch or a loose hook.
Green R4. (5 sc, inc) 8 times. Join. Count 56.
Green R5. (6 sc, inc) 8 times. Join. Count 64. This is the widest stitch count of the tube. The shells will stick out past it later.
Green R6. 64 sc in the back loop only. The front loops stay unused. That ridge is where the lowest shells will go. Do not weave a tail across it.
Green R7–R11. 64 sc through both loops on each round. Five rounds. Count at least round 7 and round 11.
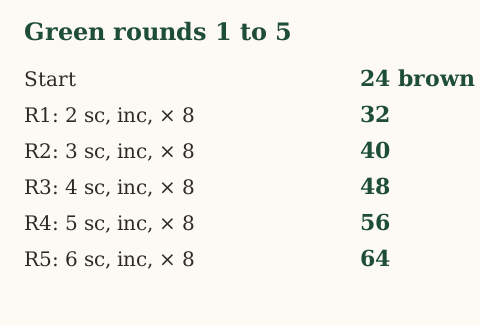
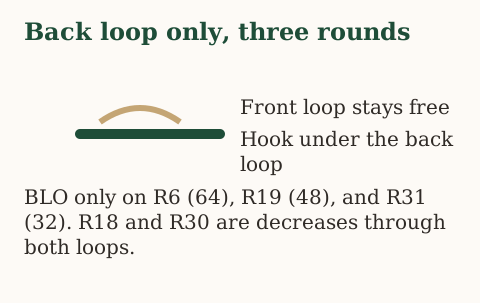
At the end of round 11 you still have 64 stitches, the brown trunk is still open, and round 6 shows a line of unused front loops.
Step 4 — Shape the middle and upper tree
Each decrease round removes 8 stitches, evenly. The rounds between them are plain single crochet through both loops. Do not sew the front wall to the back wall. The inside has to stay hollow.
R12. (6 sc, dec) 8 times, both loops. 56 stitches. Each repeat uses 8 stitches and makes 7.
R13–R17. 56 sc each round. Five rounds.
R18. (5 sc, dec) 8 times, both loops. 48 stitches. This is not a back-loop round.
R19. 48 sc in the back loop only. Those 48 front loops are the middle shells.
R20–R23. 48 sc each round. Four rounds.
R24. (4 sc, dec) 8 times, both loops. 40 stitches. Six old stitches become five, so 48 becomes 40. If you have 39 or 41, check the stitch next to the join before you go on.
R25–R29. 40 sc each round. Five rounds. Do not stretch the tube while you look at the height.
R30. (3 sc, dec) 8 times, both loops. 32 stitches. Not a back-loop round.
R31. 32 sc in the back loop only. Those front loops are the upper shells.
R32–R35. 32 sc each round. Four rounds.
R36. (2 sc, dec) 8 times, both loops. 24 stitches. Do not yank the decreases tight.
R37–R41. 24 sc each round. Five rounds.
R42. (1 sc, dec) 8 times, both loops. 16 stitches. This is the loading opening. Try a folded bag before you decide the opening is final. These instructions keep 16.
R43–R45. 16 sc each round. Three rounds. Join the last round, fasten off, and weave the tail down the inside of the edge without sewing the hole shut. Do not decrease to zero.
You should have a 16-stitch hole at the top, a 24-stitch hole at the trunk, and front-loop ridges at rounds 6, 19, and 31. A thin folded bag should be able to go in the top, and your fingers should find the trunk, before you add shells.
Step 5 — Keep the top opening tidy and accessible
The top is how bags get in. Some dispensers use a slit in the back instead. This one does not. The top stays open. The star sits on the front, just below the rim. The loop sits on the back. Neither one covers the hole.
Call the join line the back. An optional extra round of loose single crochet or slip stitch around the 16 stitches is a finish, not another shaping round. A tight edge can make loading worse, so round 45 is enough for many yarns.
Do not stuff the tree. Fiberfill would fill the chamber the bags need. A soft empty tube can look limp on a table. Hanging it, and putting a few bags in, is what gives it a shape. The shells add outline even when the tube is empty.
Step 6 — Add the three scalloped branch tiers
The same shell is used three times. In the saved front loops: slip stitch in the next loop, skip 1, 5 dc in the next loop, skip 1. That uses 4 loops. The body behind the ridge stays closed.
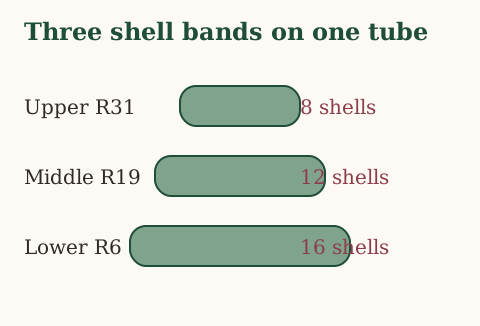
Lower tier, round 6, 64 front loops. With the trunk down, join green in a free front loop of round 6. Work the shell 16 times. 64 ÷ 4 = 16. Join and fasten off. Do not work through both loops.
Middle tier, round 19, 48 front loops. Join at the round 19 ridge, near the back seam so the tail can hide. Work the shell 12 times. Fasten off. Weave the tail into the tier, not across the inside of the pouch.
Upper tier, round 31, 32 front loops. Work the shell 8 times. Fasten off.
When the tree hangs, the 16 shells are lowest, then 12, then 8. Count them before you bury the tails: 16 + 12 + 8 = 36.
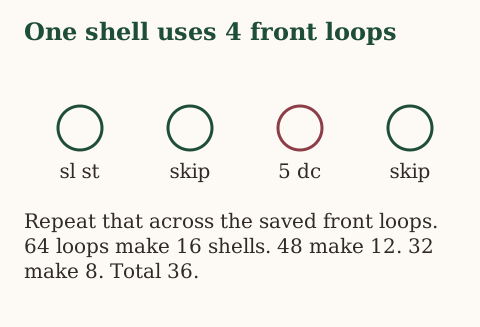
Shells may curl or lie flat depending on the yarn. The aim is a shallow scallop. If five double crochet is too heavy on a sample, a later version could use three double crochet in the same four-loop repeat. This written pattern uses five. Do not mix the two in one tree and then follow a diagram of the other.
One hollow body, three rows of shells on the outside, trunk still open.
Step 7 — Crochet a sturdy hanging loop
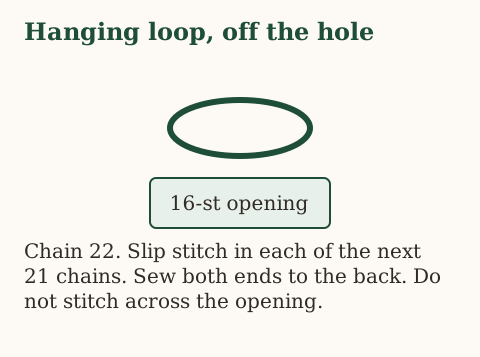
The loop carries the tree. On the back, opposite the star, chain 22 in green. Slip stitch in each of the next 21 chains, starting in the second chain from the hook. If the yarn is very soft, a row of single crochet instead of slip stitch makes a firmer cord. This pattern writes the slip-stitch cord.
Fold it into a loop. Sew both ends to the back, each end through several stitches, near the top but not across the 16-stitch opening. Use the yarn needle and pass through the fabric more than once. A single knot is not the join.
The loop has not been pull-tested with bags. If a sample stretches or tears, reinforce it before you trust the hook. Do not sew the cord across the top like a handlebar. A hand still has to put a bag in.
Step 8 — Make a simple cream-gold star
The star is a flat motif. It does not hold the tree up.
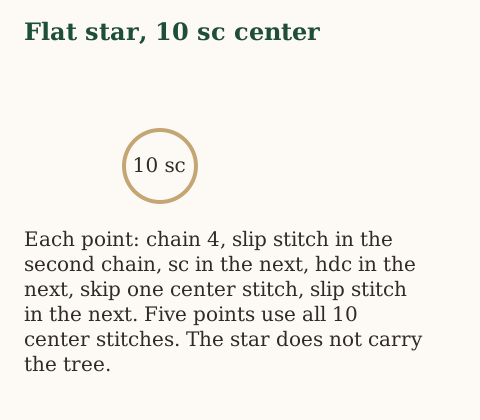
Magic ring, 10 sc into the ring, pull the ring closed, slip stitch to the first sc. If you would rather not use a magic ring, chain 4, join, and work the 10 sc into that ring.
Each of the five points uses two of those center stitches. Repeat five times: chain 4; slip stitch in the second chain from the hook; sc in the next chain; hdc in the next chain; skip one stitch on the center and slip stitch in the following center stitch.
Five points times two center stitches is 10, so the center is used up. Fasten off. Sew the star to the front, just below the loading edge, through the center and the inner part of a few points. Do not stitch the front wall to the back wall. Do not hang the tree from the star. Skip beads and anything stiff and sharp.
Step 9 — Crochet and attach the optional bows
Three bows are enough. One bow, or none, still leaves a tree. The star and the shells carry the shape.
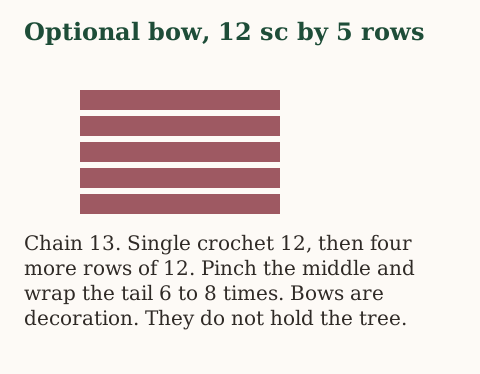
For one bow, chain 13 in burgundy. Starting in the second chain, sc 12. Chain 1, turn. Work four more rows of 12 sc. Five rows in all. Fasten off with a tail. Pinch the middle, wrap the tail around the center 6 to 8 times, and sew the bow to the green fabric, not to the tip of a shell if that tip droops.
Optional tails are two chains of 5, slip-stitched back along the chain, sewn under the wrap. They are not structure.
A calm placement is one bow near the upper tier, one toward the left of the middle, and one toward the right of the lower tier. That placement is styling, not a stitch count.
Step 10 — Load and test the bags
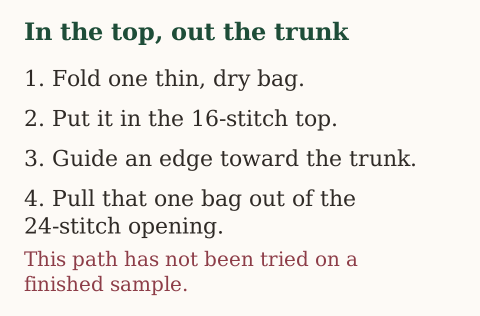
Use one clean, dry, thin grocery bag. Fold it lengthwise so it can enter the top. Do not knot it into a hard lump.
Lower it through the 16-stitch opening. If you can reach, guide one end toward the trunk and leave a little plastic showing. Add more bags only while the tube still lets you pull. Support the trunk with one hand and pull one bag with the other.
Three checks belong to a real sample, and they have not been done for this page: a bag goes in the top, one bag comes out the trunk, and the loop stays on its hook. Thin bags and thick bags do not behave the same way. Reusable totes are outside this pattern. Do not quote a bag count as a fact until someone has loaded a named bag and counted.
Finishing
The widest shell band is the lowest. Shape the shells with your hands. If the yarn label allows steam, steam from a distance. Do not press an iron on the stitches.
Weave ends into the fabric, not across the inside where plastic can snag. The trunk should read as the bottom of the tree, open end down, with the green tube growing out of it.
If the top hole looks loud, set the star just under the rim or let the loop tip the opening slightly toward the wall. Do not add a flap this pattern does not describe, and do not close the hole.
Troubleshooting
The tree looks too wide or too squat
Measure stitches and rounds before you change the taper. Wide stitches and short rounds make a squat tree. A different hook changes both. Adding even rounds between decreases is a new pattern, and the chart would have to change with it.
The tree collapses when it is empty
It is a soft tube. Hang it and put a few bags in before you decide it has failed. A firmer cotton is the next sample if it stays limp. Do not add bare wire in a kitchen holder.
The shells do not look like scallops
Count the four-loop repeat: slip stitch, skip, five double crochet, skip. You want 16, 12, and 8. Work the saved front loops, not a random spot on the fabric.
There is no front-loop ridge
The ridges are only on rounds 6, 19, and 31. If those rounds went through both loops, rip back and work them in the back loop. Surface crochet is a different pattern.
The top is too small for your bags
Sixteen stitches is a small opening. The fix on a future sample would be a larger final count, for example skipping the round 42 decrease and staying at 24. That changes the shape, so it is not this pattern. Do not stretch these 16 stitches until they split.
Bags fall out of the trunk, or the next bag does not follow
Fewer bags, or a looser fold, is the first try. The trunk is an open 24-stitch edge, and it may be looser than you want. Elastic is not part of these instructions. This holder does not promise that the next bag appears by itself. You may have to reach in and find the next edge.
The star sits crooked, or a bow is heavy
Pin the pieces before you sew. A heavy bow on the tip of a shell will drag that shell down. The tree should still look like a tree with no bows.
The loop pulls out
Stop hanging it. Sew both ends through more stitches. Check the wall hook. This is for light bags only.
Other colors, same tube
Sage with an ivory star and no bows uses the same rounds. Forest green, brown, and burgundy is the illustration. Omitting the star and the bows leaves a scalloped green dispenser that is not specifically Christmas. A smaller hook does not automatically leave you openings a bag can use. Test the holes again if you change the scale.
Washing and care
Empty the tree first. Follow the yarn label. If that label allows it, wash by hand in cool water, press the water out in a towel, reshape the shells, and dry the inside of the tube before you put bags back. Do not hang it wet by the loop.
Look at the loop and the sewn pieces after washing. A trunk that has frayed from pulling should be repaired before the hole grows.
The tree is a place for bags you already have. It is not a reason to collect more of them.
Frequently asked
Is this beginner-friendly?
It suits someone who can already work single crochet, increases, decreases, and joined rounds. The shells are double crochet. The star uses half double crochet. A first project should be a swatch, not this tube.
Can I crochet it in one color?
Yes. Brown on the trunk makes the tree easier to read. The counts do not depend on the color change.
Do I need plastic canvas, wire, or stuffing?
No. Stuffing would block the bags. Wire is not part of this pattern.
Where do the plastic bags go in?
Through the 16-stitch opening at the top. Do not sew that opening shut when you attach the loop or the star.
Where do I pull them out?
Through the open end of the brown trunk, 24 stitches around. The trunk is the bottom of the same tube, not a pocket sewn on the front.
Can I store thick reusable shopping bags?
This pattern is for thin grocery bags. A thick tote is a different fit, and it has not been tried.
How many bags will it hold?
Nobody has loaded a sample and counted. Gauge, bag thickness, and how hard you pack the tube all change the number. The 8–15 figure is only a design guess.
What if I dislike the bows?
Leave them off. The star and the three shell bands are enough.
Can I sell finished trees I crochet myself?
You may sell trees you make with your own hands from this pattern. You may not sell or share the pattern text or the diagrams.
Checklist before you hang it
- The trunk is 8 rounds of 24 sc, and the bottom is open.
- Green round 5 ends at 64.
- Front-loop ridges are on round 6 (64), round 19 (48), and round 31 (32).
- The decrease rounds end at 56, 48, 40, 32, 24, and 16.
- Round 45 is still 16 sc, and the top is open.
- The shells are 16, then 12, then 8.
- The loop is sewn at two points on the back and does not cross the hole.
- The star and any bows are sewn without closing the tube.
- A thin bag can go in the top and come out the trunk without forcing the stitches. This box is for your sample. It is not checked off here.
- The hook is away from heat, children, and pets.
There is a plain satisfaction in a tree that also puts the bags somewhere. Keep both openings usable, and count the decrease rounds before you admire the shells.
More kitchen crochet: the plastic bag holder, the towel holder, and the garlic holder. The garlic pouch is loaded from the top. It is not this tree.
More premium patterns
Other printable editions from the same collection.
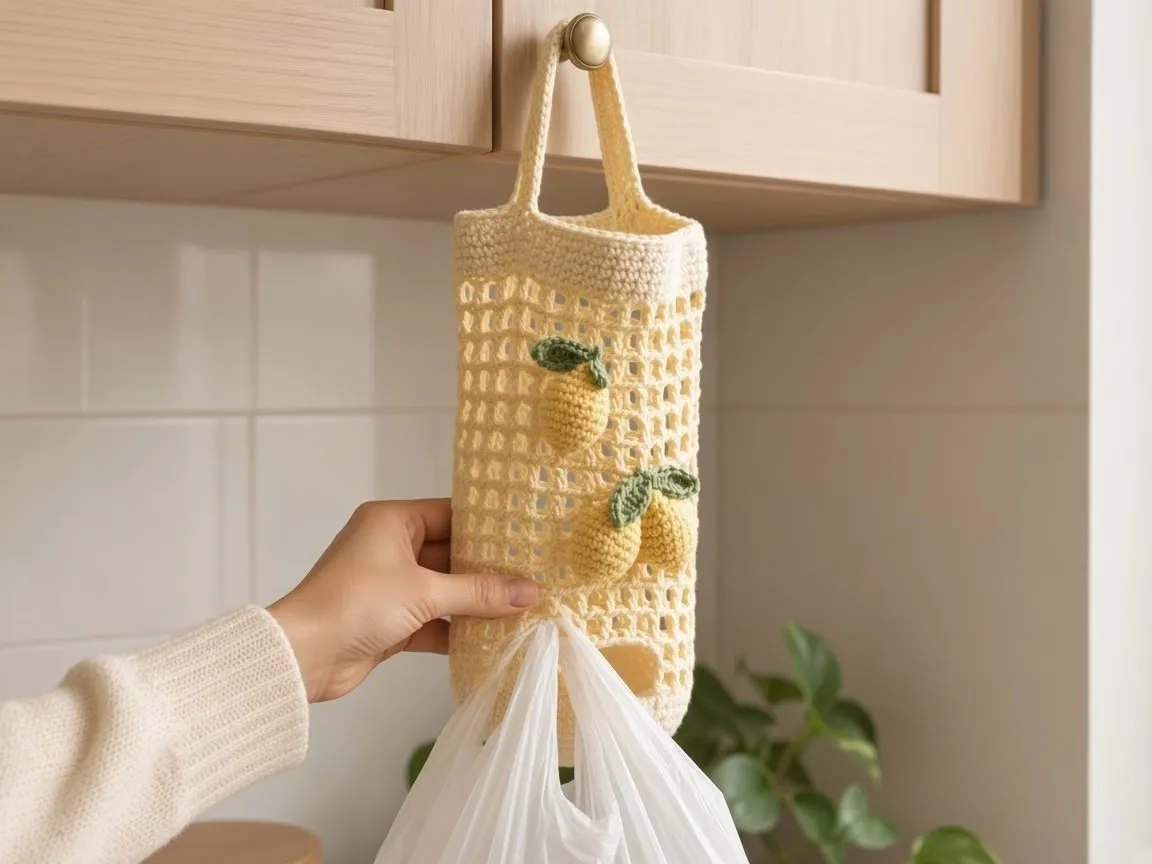
Kitchen Crochet
Crochet Lemon Plastic Bag Holder
A hanging mesh dispenser with a front opening, two straps, and lemon appliqués. The printable edition follows the free tutorial.
Difficulty: Beginner
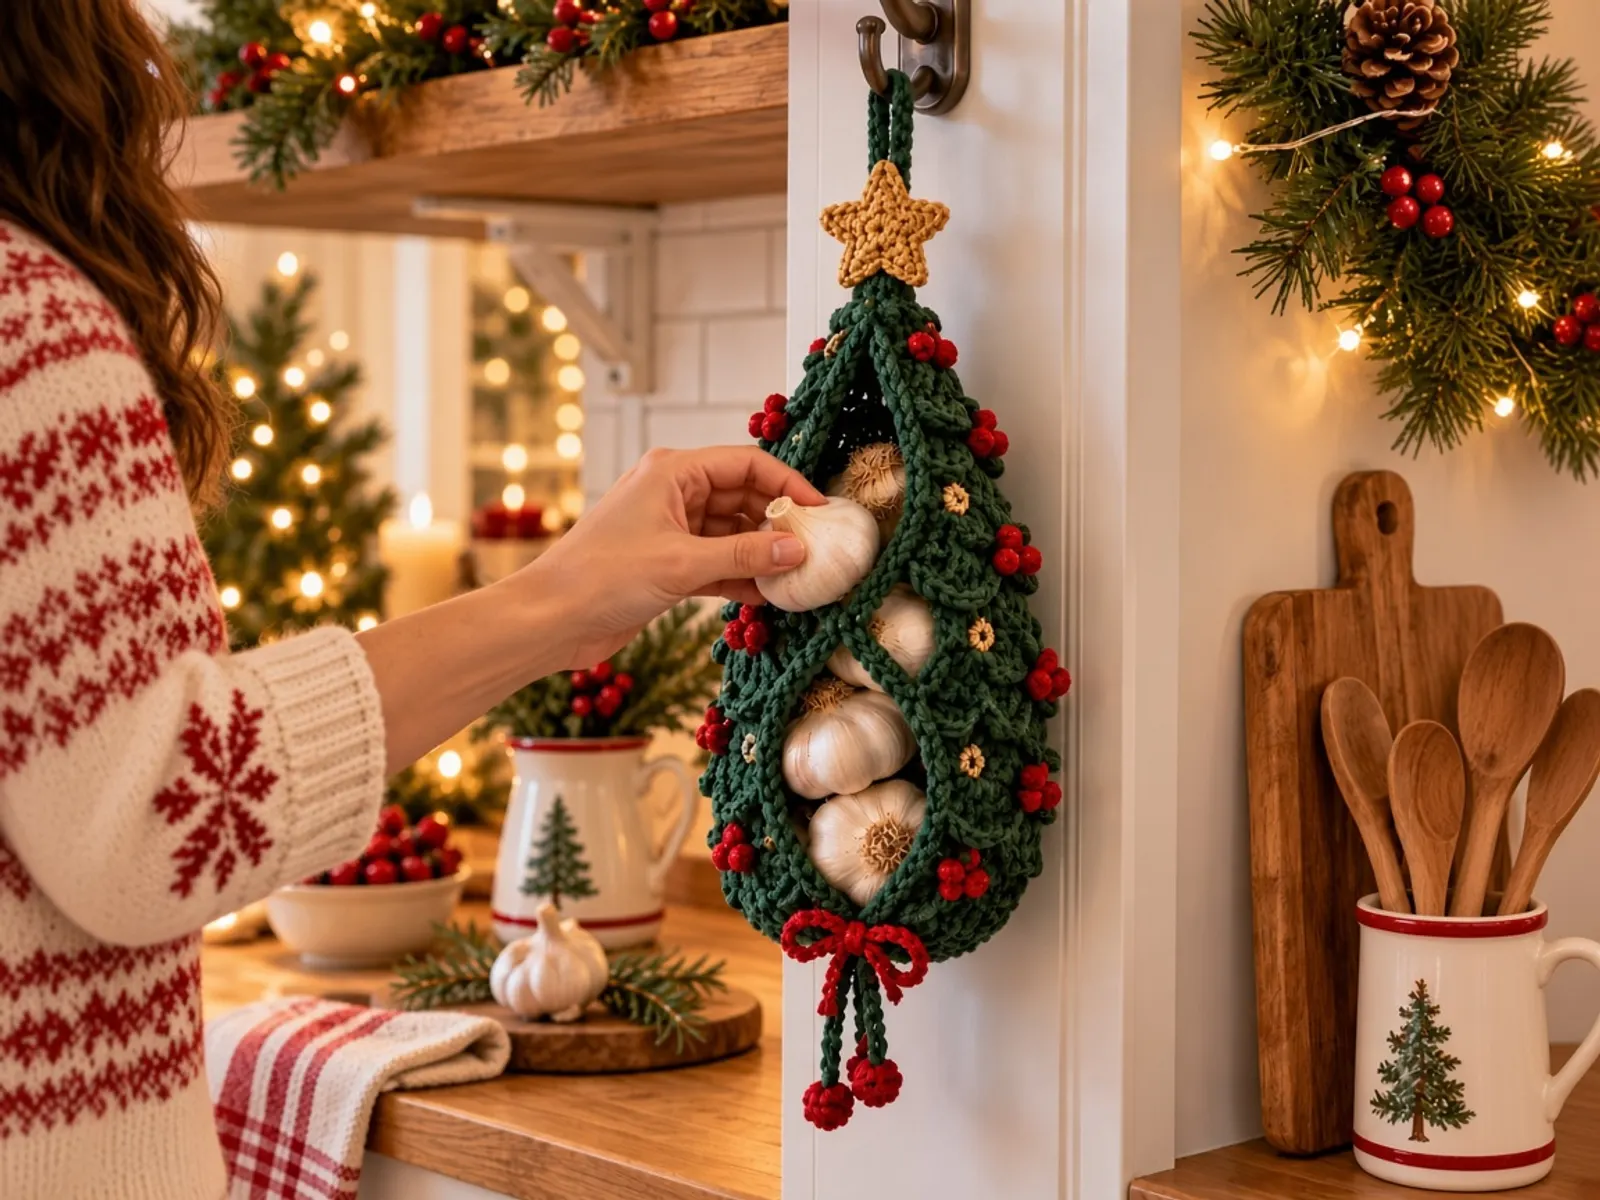
Christmas Patterns
Crochet Christmas Garlic Holder
A small mesh garlic holder shaped like a Christmas tree, with scalloped branches and a gold star. The printable edition follows the free tutorial.
Difficulty: Beginner
- christmas tree
- plastic bag holder
- kitchen
- holiday
Read this next
- How to Crochet a Christmas Tree Garlic Holder A small mesh garlic holder with scalloped branches, a gold star, and an open top. US terms. Sizes are design targets.
- How to Crochet a Compact No-Slip Kitchen Towel Holder A compact cotton crochet towel holder with two wooden rings, one above the other. Assembly counts are still being checked. US terms.
- How to Crochet a Hanging Plastic Bag Holder for Your Kitchen Crochet a pale yellow mesh grocery-bag holder with a front oval, two straps, and three lemons. US terms, with diagrams.