

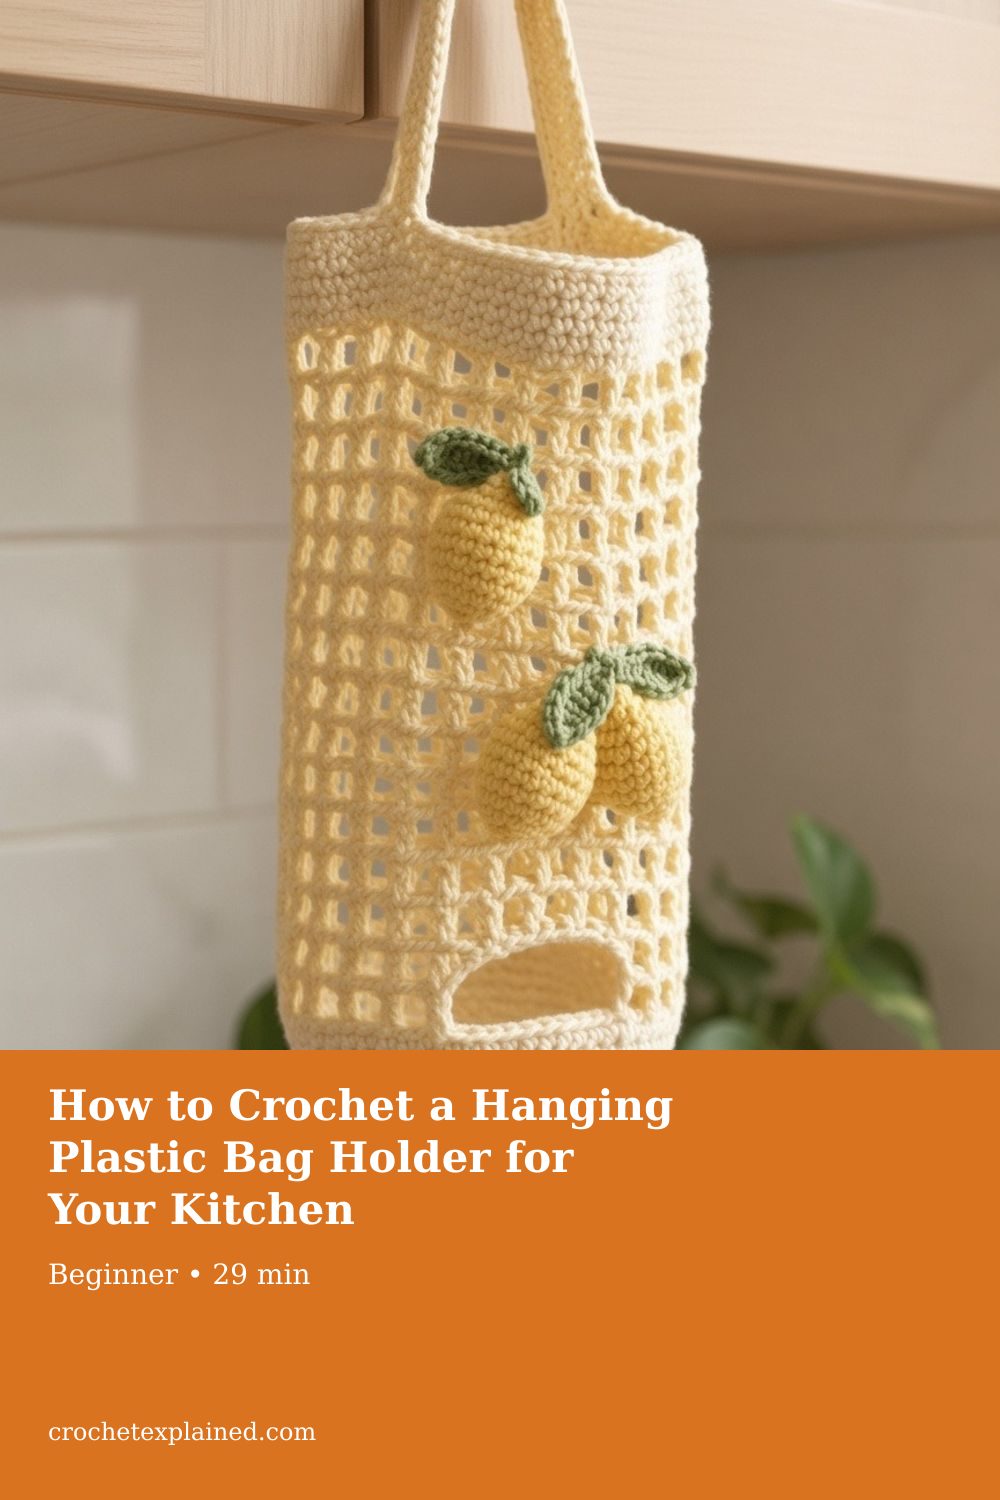
How to Crochet a Hanging Plastic Bag Holder for Your Kitchen
Work a pale yellow 48-stitch mesh tube with solid bands, leave a reinforced front oval near the bottom, add two integrated straps that meet on one knob, then sew on three stuffed lemons with sage-olive leaves. Bags load at the top and pull through the oval. Sizes come from the stated gauge.
Crochet a pale yellow mesh grocery-bag holder with a front oval, two straps, and three lemons. US terms, with diagrams.
At a glance
- Skill level
- beginner
- Time
- Several hours of crochet, then sewing lemons and straps
- Finished size
- About 13–14 in tall and 5.9 in flat at the sample gauge
- Yarn weight
- Worsted cotton in pale yellow, lemon yellow, and sage-olive
- Hook size
- 5.0 mm, or the hook that matches the gauge
- Yardage
- A shopping estimate of 160–220 g total, not a weighed sample
On this page
- Project at a glance
- What makes this dispenser useful?
- How the openings work
- Materials and tools
- Gauge and sizing math
- Abbreviations (U.S.)
- Construction plan and exact stitch counts
- Mesh stitch
- Illustrated step-by-step pattern
- How to judge the dispenser in everyday use
- Understanding the measurements
- Troubleshooting: what went wrong?
- Care and maintenance
- Frequently asked
- A final inspection before you hang it
- Next
Track your progress
- Go to Step 1 — Swatch before you start the tube
- Go to Step 2 — Solid bottom band
- Go to Step 3 — Mark and open the front oval
- Go to Step 4 — Reinforce the oval edge
- Go to Step 5 — Close above the oval and restore 48 solid stitches
- Go to Step 6 — Mesh body
- Go to Step 7 — Measure the tube before the rim
- Go to Step 8 — Solid top rim
- Go to Step 9 — Two integrated straps
- Go to Step 10 — Three stuffed lemons
- Go to Step 11 — Leaves
- Go to Step 12 — Place the lemons on the front
- Go to Step 13 — Load bags from the top and pull from the oval
- Go to Step 14 — Finish, check dimensions, and install safely
- Go to What to write down when you finish
- Go to The join zigzags up the back
Ticks are saved on this device only. Counting rows? Keep the stitch counter open in another tab.
US crochet terms throughout. Sizes here are worked out from gauge rather than from a finished sample, so swatch and measure as you go, and the pictures of finished pieces are illustrations. Made one? Send a photo through the contact page.
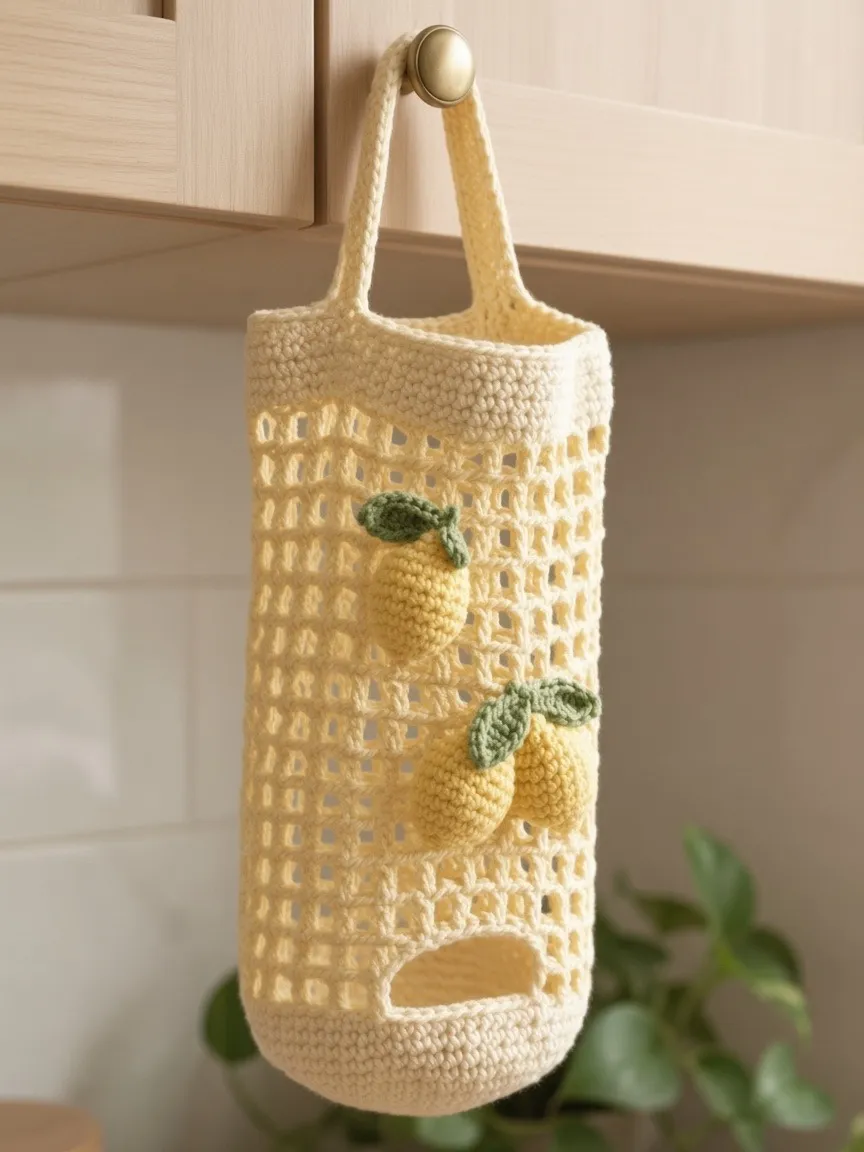
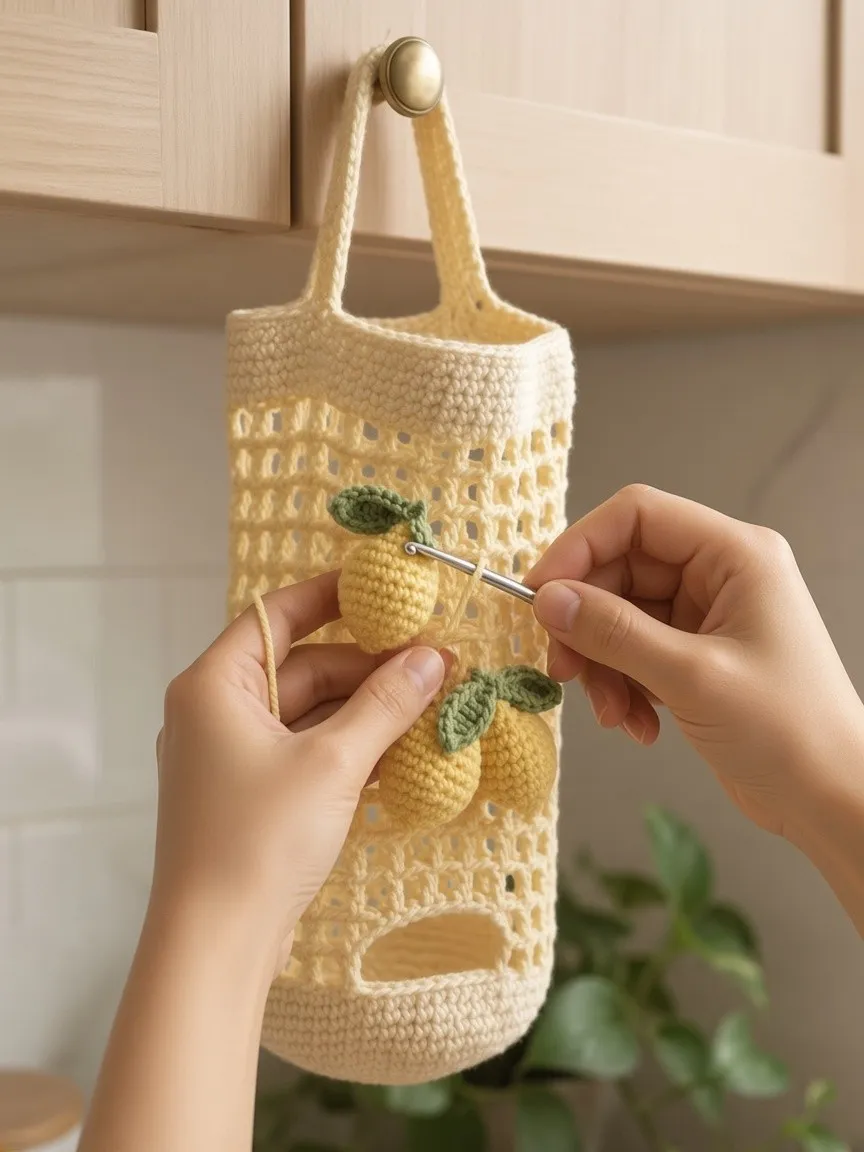
Plastic grocery bags are useful to reuse, but they rarely stay tidy when pushed into a kitchen drawer. A hanging crochet dispenser gives them a dedicated place and keeps the retrieval point visible. This tutorial builds one product only: the pale buttercream yellow open-square mesh holder in the opening illustration — solid bands at top and bottom, a reinforced horizontal oval on the lower front, two integrated straps that meet on one cabinet knob, and three stuffed lemon appliqués with sage-olive leaves.
Every photograph and diagram below describes that same construction. Alternate shapes (cream-and-sage stripes, a bottom-only pull hole, a single hanging loop) are out of scope. Stitch counts are arithmetic from a stated gauge. Construction diagrams and process images are illustrations. Nobody has crocheted and load-tested this exact sample on this site, so measure your own fabric and bags before you hang the holder.
Plastic bags are a suffocation and entanglement hazard. Keep them out of reach of children and pets. This holder is for clean, dry, lightweight grocery bags only. Hang it away from heat. The straps are for light storage; their working load has not been tested on this site.
Project at a glance
| Feature | Locked model |
|---|---|
| Skill level | Confident beginner (joined rounds + simple mesh + small amigurumi) |
| Crochet terms | U.S. notation; sc, hdc, dc, sl st, ch |
| Body color | Pale buttercream yellow (#E8D49A) |
| Mesh | Open square mesh (dc, ch 1, skip 1) |
| Bands | Solid single crochet at top and bottom |
| Hang | Two integrated straps meeting on one knob |
| Exit | One reinforced horizontal oval near the lower front |
| Decorations | Three stuffed lemons (#D8BA59), sage-olive leaves (#78894B) |
| Circumference | 48 stitches ≈ 30–32 cm at sample gauge |
| Flat width target | About 15 cm / 5.9 in when the mesh lies flat |
| Body height target | About 32–36 cm / 13–14 in excluding straps |
| Estimated crochet time | Several hours plus finishing; varies by experience |
| Article reading target | About 35 minutes with diagrams, checkpoints, and careful practice |
What makes this dispenser useful?
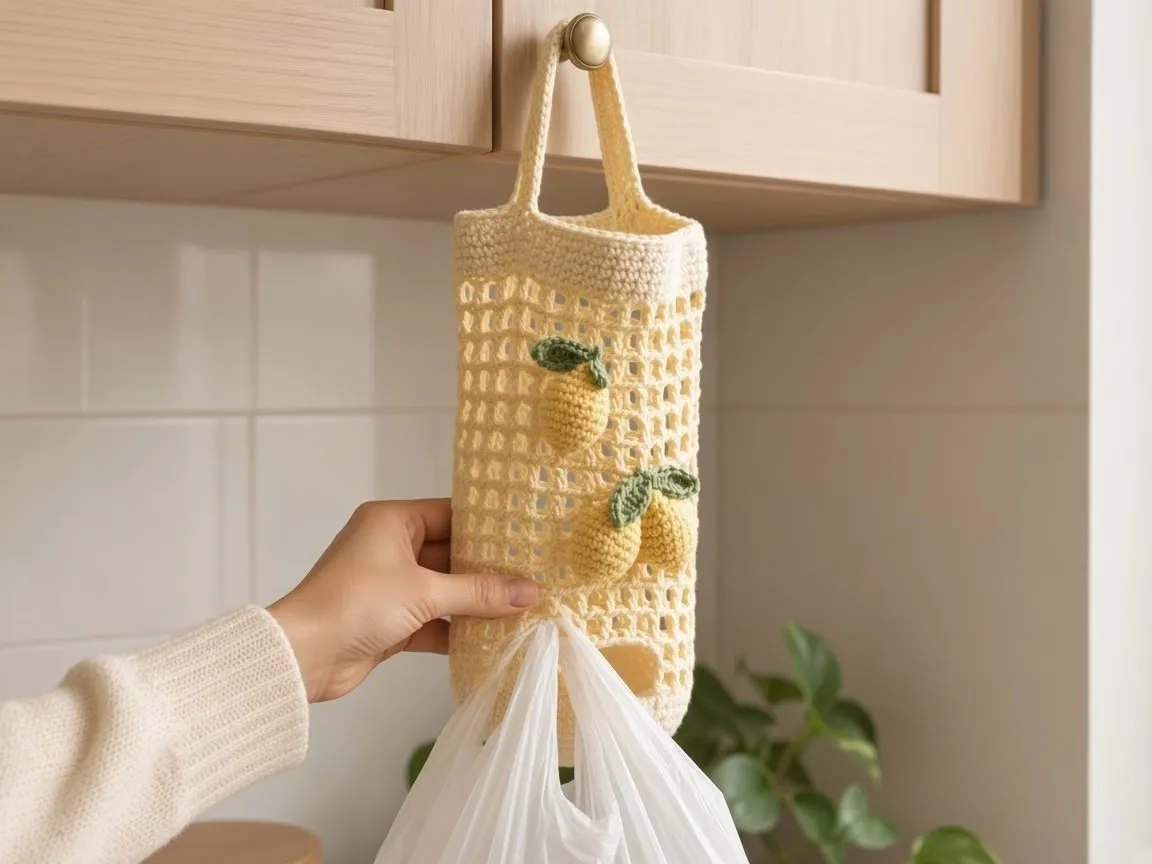
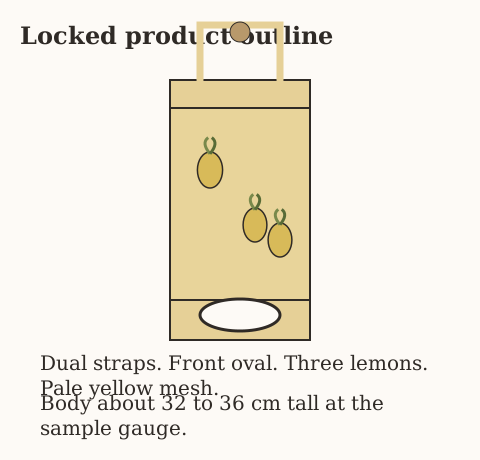
The openings have separate jobs. The top stays wide enough to load a small stack of folded bags without taking the holder off the knob. The front oval is the only exit: you pull one bag forward through a reinforced window near the lower solid band. The bottom of the tube stays closed fabric below that oval, so bags do not fall straight through a hole in the base the way they do on a bottom-pull model.
Between the solid bands, open square mesh keeps the cylinder light and lets you see how full the holder is. The three lemon appliqués mark the front face so the oval faces outward when you hang the straps. This holder is not intended for wet, oily, or heavily soiled plastic. It is also not a substitute for a child-resistant storage solution.
Skills this project practices
You do not need advanced lace or tapestry colorwork. You do need patience with counting. The solid bottom and rim train even joined rounds. The oval teaches you to hold a gap open for several rounds without losing the side stitch counts. The mesh is a short filet-style repeat that stacks into a visible grid. The straps are ordinary rows of single crochet worked from marked stitches on a rim. The lemons are small amigurumi ovals — useful practice if you have not stuffed a closed shape before.
If joined rounds still feel awkward, review crochet in the round before Round 1. If you are unsure whether a turning chain counts as a stitch, the short answer for this pattern is: on solid rounds the ch 1 does not count; on mesh rounds the ch 4 does count as the first dc plus its chain-1. Write that on a sticky note beside your markers.
Why mesh instead of a solid half-double tube
A solid hdc cylinder can work as a bag holder, but it hides the contents and uses more yarn for the same height. Open square mesh shows how full the dispenser is, sheds less bulk when empty, and matches the locked pale-yellow design. The trade-off is stretch: mesh grows under load more than dense fabric. That is why the oval gets a solid reinforcement round and why the top and bottom stay solid sc bands. Those bands act as firm “rims” that keep the mesh from pulling into a baggy sock.
Do not replace the mesh with a random open stitch you like better unless you are prepared to re-measure height, flat width, and oval behavior. Changing the fabric changes the product.
How the openings work
- Top: load folded bags while the holder stays on the knob.
- Front oval: the only exit. Pull one bag forward through the reinforced oval near the lower solid band.
- Closed bottom: fabric below the oval stays solid. Bags do not drop through a bottom ring on this model.
If you were looking for a cream-and-sage striped tube with a small bottom ring and one hanging tab, that is a different pattern. This page stays with the lemon mesh holder only.
Materials and tools
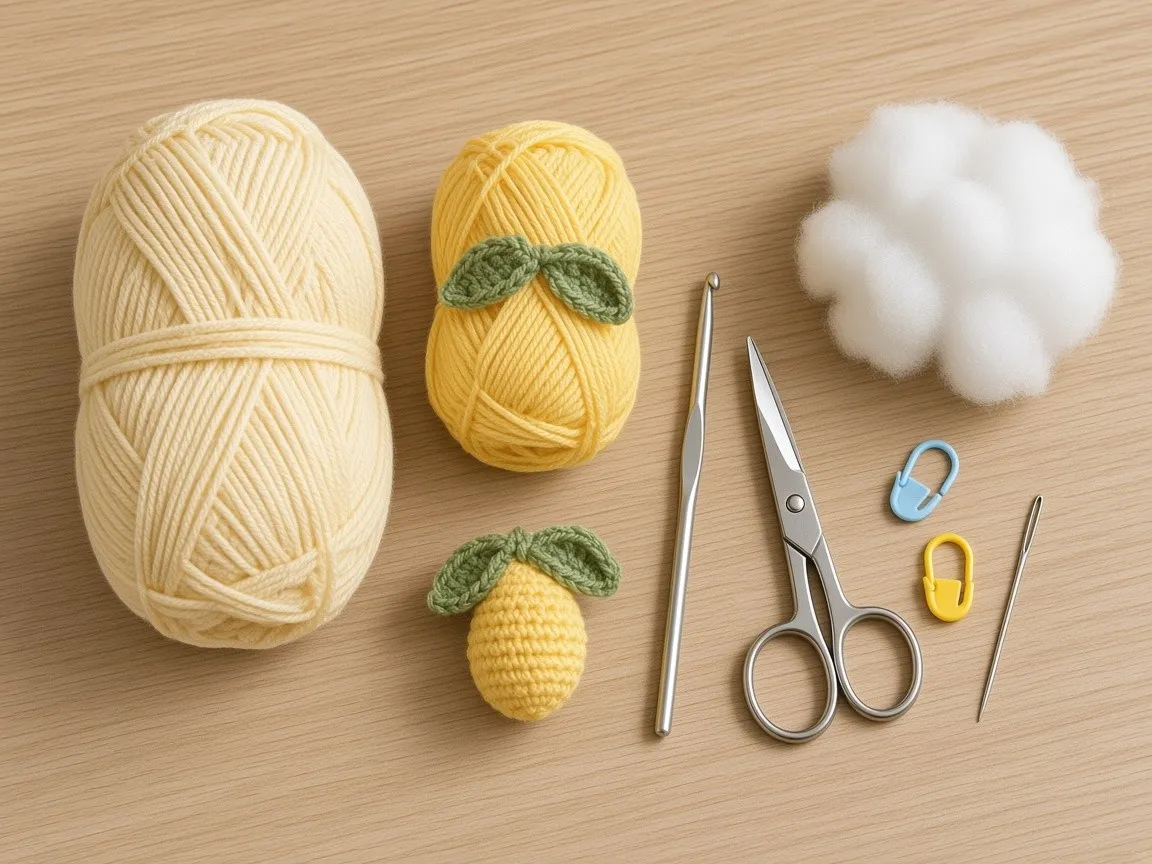
- About 160–220 g of worsted-weight cotton yarn in total; this is a shopping allowance, not measured consumption. Allow extra if your gauge or height differs.
- Color A: pale buttercream yellow
#E8D49A— body, solid bands, and both straps. - Color B: lemon yellow
#D8BA59— three stuffed appliqués. - Color C: sage-olive
#78894B— five or six small leaves. - A small amount of polyester fiberfill for the lemons.
- 5.0 mm / H-8 crochet hook as a starting suggestion, adjusted after swatching.
- Blunt tapestry needle, scissors, tape measure, two removable stitch markers.
- A few clean, dry folded grocery bags for fit checks; a fixed kitchen cabinet knob or solid hook.
- Optional short strip of cotton tape behind the strap join if you want extra reinforcement.
Choose smooth yarn that makes the V-shaped top loops easy to see. Avoid deliberately fuzzy yarn if you want plastic edges to snag less often. A cotton blend is possible, but test how it stretches. If you substitute yarn thickness, recompute the stitch counts instead of assuming the same shape. Keep the abbreviation chart and gauge lesson open if you need a refresher.
Gauge and sizing math
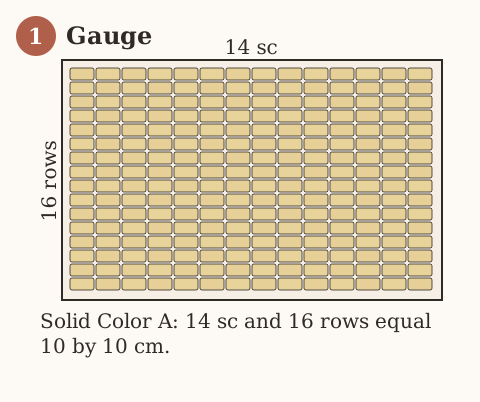
The sample calculation uses 14 sc and 16 sc rows = 10 × 10 cm in solid Color A. Mesh stretches differently from solid fabric, so also work a short mesh strip and record how many (dc, ch 1) repeats sit in 10 cm of width. A planning estimate for this mesh is about 8 repeats = 10 cm, but your fabric wins.
The key horizontal formulas for the solid gauge are:
- Body circumference from solid gauge: 48 stitches ÷ 14 stitches × 10 cm ≈ 34 cm.
- Flat width from that circumference: 34 ÷ 2 ≈ 17 cm if the fabric were solid and rigid.
- Practical mesh flat width: expect nearer 15 cm / 5.9 in once the open mesh relaxes — measure the real tube, do not treat the solid formula as a guarantee.
If your solid swatch shows 16 stitches per 10 cm, 48 stitches would give about 30 cm circumference rather than 34 cm. To keep a similar capacity, either change hook size to approach the sample gauge or redesign the foundation with a recalculated even stitch count. Do not add random stitches into the oval gap or the mesh repeat without rewriting the round map.
You do not need a perfect laboratory swatch for a dishcloth. You do need an honest 10 cm measurement before you commit to a 48-stitch kitchen holder, because bags that will not pass the oval waste a full evening of work.
Abbreviations (U.S.)
| Abbreviation | Meaning |
|---|---|
| ch | chain |
| sc | single crochet |
| hdc | half double crochet |
| dc | double crochet |
| sl st | slip stitch |
| st(s) | stitch(es) |
| rnd | round |
| MR | magic ring |
| inc | 2 sc into one stitch |
| dec | sc2tog (single crochet two together) |
| [instructions] × n | repeat the brackets n times |
Round conventions: On solid rounds, the starting ch 1 never counts as a stitch. Join each solid round by slip-stitching into the first actual stitch, never into the chain. On mesh rounds, ch 4 counts as the first dc + ch 1; join to the third chain of that start. Turn neither the solid nor the mesh rounds. Put a marker into the first stitch and move it up after each round.
Construction plan and exact stitch counts
| Rounds / piece | Action | Stitches or spaces |
|---|---|---|
| 1–6 | Solid bottom band in Color A | 48 sc |
| 7–14 | Front oval window (skip 12 / ch 12 each rnd) | 48 positions |
| — | Oval edge reinforcement | about 40 sc |
| 15–17 | Solid fabric above the oval | 48 sc |
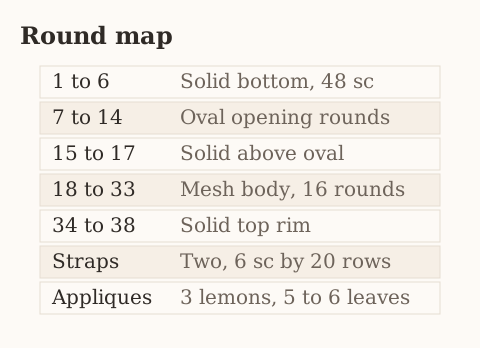
| 18–33 | Square mesh body (16 rounds) | 24 spaces |
| 34–38 | Solid top rim | 48 sc |
| Strap A and Strap B | Integrated from opposite 6-st spans | 6 sc × about 20 rows each |
| Lemons | Three stuffed ovals in Color B | see lemon rounds |
| Leaves | 5 or 6 in Color C | ch-8 leaf each |
Checking the math: the tube never leaves a 48-stitch position count on solid rounds. Mesh rounds convert that into 24 spaces. The oval skips 12 front stitches and replaces them with a chain bridge of 12 for eight rounds, then you crochet into those chains to close the top of the window. Strap tips are sewn together for about 2 cm so both hang over one knob.
Mesh stitch
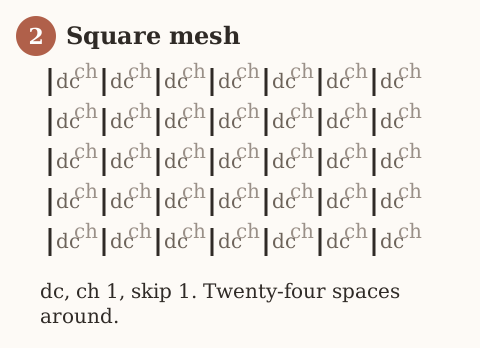
Repeat: dc in next stitch, ch 1, skip 1 around 48 stitches → 24 spaces.
On following mesh rounds, work a dc into each previous dc and a dc over (or into) each ch-1 space, with ch 1 between them, so the grid stacks in open squares rather than drifting into diamonds.
Illustrated step-by-step pattern
Follow the rounds in order. Each stage pairs a written count with a diagram or illustration. Illustrations are conceptual; the numerical instructions are the source of truth. Read a whole step before you pick up the hook for that step, especially for the oval rounds — once the window is the wrong height, fixing it means frogging through solid fabric you would rather keep.
Work with good light. Pale yellow hides missed stitches less than cream, but it still hides them better than a high-contrast color. If you lose the join, look for the short “step” of the slip stitch and put the marker back in the first real stitch of the new round before you continue.
Step 1 — Swatch before you start the tube
With Color A and a 5.0 mm hook, chain about 22 and work a solid sc rectangle at least 12 cm on each side. Relax the fabric, then measure an interior 10 cm square without stretching it. Write down stitches and rows. If you are far from 14 sc / 16 rows, change hook size before you chain the foundation for the holder. Optionally work a second strip in the mesh stitch so you know how open your grid will be.
Checkpoint: You have written numbers for solid gauge, and you know whether 48 stitches will feel wide enough for the bags you store.
Step 2 — Solid bottom band
With Color A, chain 48. Lay the chain on the table and check it is not twisted; join with a slip stitch into the first chain to form a ring.
Rounds 1–6: Chain 1 (not a stitch), work one sc in each stitch around; join with a slip stitch in the first sc. 48 sc each round.
This solid cup is the closed base of the holder. It sits below the future oval. Do not leave a bottom hole here. Place a marker in the first real sc of each round and move it up.
Checkpoint: Six solid rounds, 48 stitches every time, fabric standing as a short cylinder.
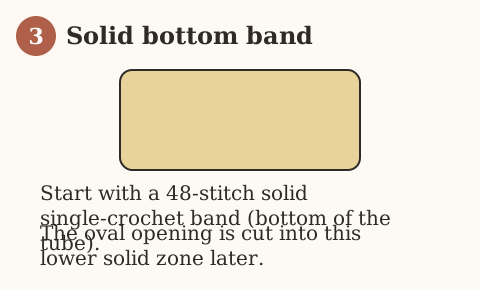
The first six rounds are solid fabric only. The open square mesh holes come later, above the oval — they are not part of this bottom band.
Step 3 — Mark and open the front oval
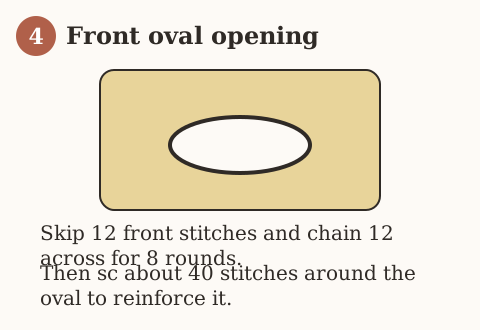
Lay the tube so the join sits at the back. On the front, mark a continuous span of 12 stitches. Those marks are the oval window. Counting from the join, many makers find it easiest to skip a fixed number of stitches on either side so the window sits centered on the front half — for example, work roughly 18 sc, mark the next 12, then work the remaining 18 — then adjust by a stitch or two if your join is not perfectly centered. What matters is a continuous front span of 12, not a perfect compass measurement.
Round 7: Chain 1, sc in each stitch up to the marks, chain 12, skip the 12 marked stitches, sc in each remaining stitch; join. You still have 48 positions around the round (36 sc + a ch-12 bridge). Put a removable marker in the first chain of the bridge and another in the last chain so the next rounds land on the same gap.
Rounds 8–14: Repeat the same gap. Sc along both solid sides of the oval, and chain 12 across the open front each round. Do not fill the window with sc yet. Eight oval rounds (7 through 14) give the opening enough height to behave like the horizontal oval on the finished model. If you stop after only three or four gap rounds, the window reads as a short slit. If you run the gap for twelve or more rounds, the opening becomes a tall slot that can stretch under bag weight.
Work the chain bridges at a firm but not strangling tension. Chains that are far looser than the sc fabric make a floppy oval; chains that are far tighter pinch a slit instead of a usable window. Match the chain length to the skipped span by eye: the bridge should sit across the gap without drawing the side posts inward.
Checkpoint: Hold a loosely folded grocery bag against the window. It should look passable without forcing the fabric. Count again: still 48 positions each round.
Step 4 — Reinforce the oval edge
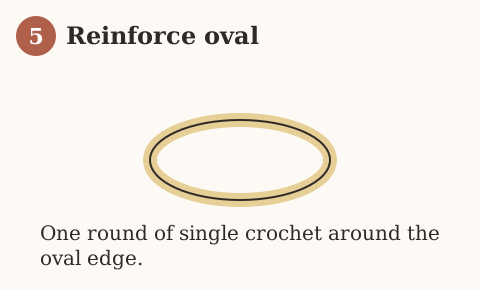
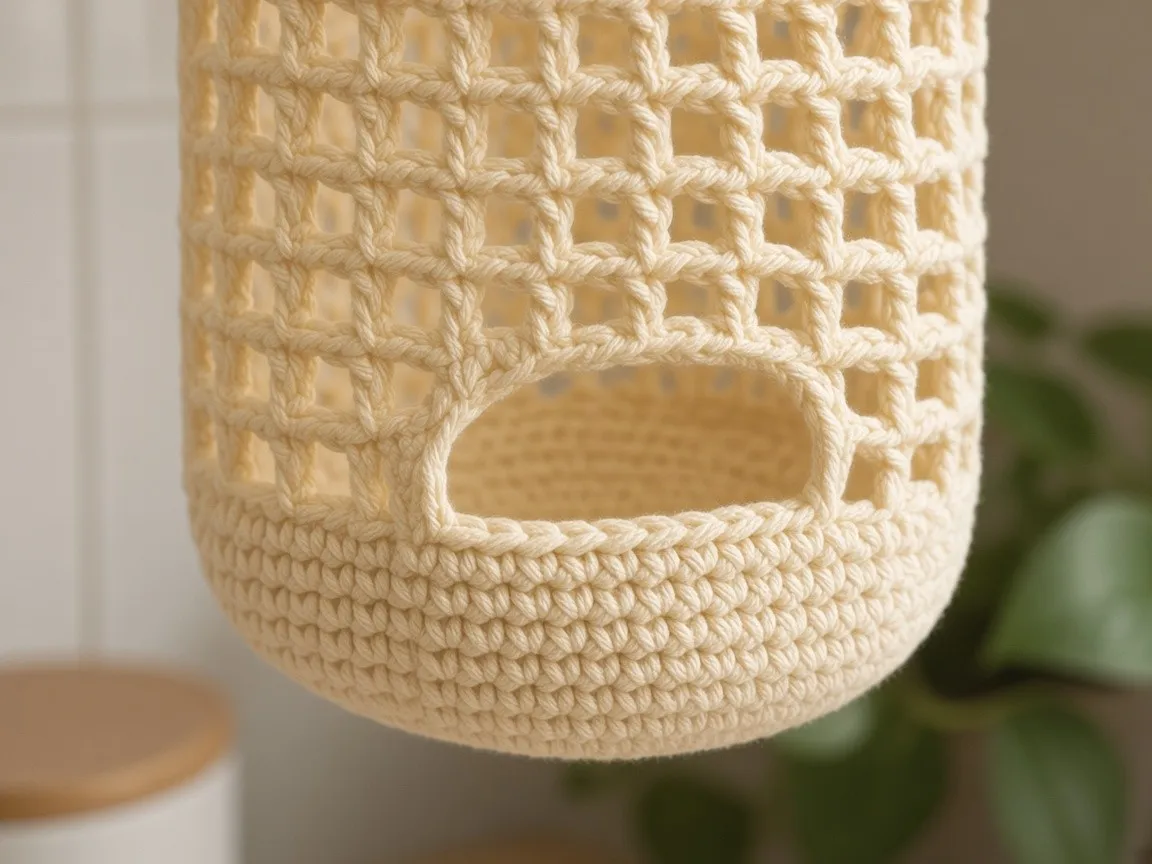
With Color A, work a round of single crochet evenly around the entire oval opening — along both side posts and into the chain bridges — about 40 sc total. Adjust by one or two stitches if needed so the edge lies flat without cupping. Weave the reinforcement tails through several solid stitches beside the window.
This border is what keeps the mesh-stage fabric from stretching the window into a torn look later. Skip it and the oval will grow every time you pull a bag.
Step 5 — Close above the oval and restore 48 solid stitches
Rounds 15–17: On the first of these rounds, work sc across the top of the window by placing one sc in each of the 12 chains of the last bridge, then sc even on the rest of the round so you return to a continuous 48 sc. Join. Work two more even sc rounds on 48.
You now have solid fabric both below and above the oval, with a reinforced horizontal opening on the front face only.
Checkpoint: Count 48 V-shaped tops. The oval is a window in the wall, not an open bottom.
Step 6 — Mesh body
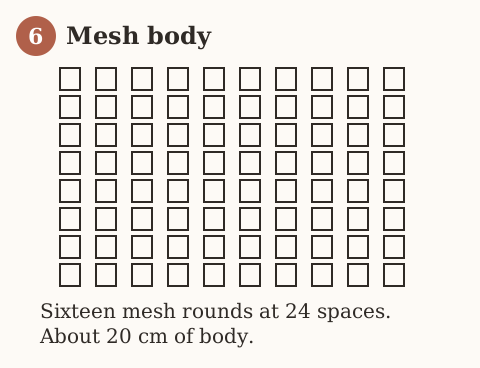
Round 18: Chain 4 (counts as dc + ch 1), skip the first stitch (or skip as needed to keep the grid even), then *dc in next stitch, ch 1, skip 1; repeat from * around. Join to the third chain of the beginning ch-4. You should have 24 mesh spaces.
Rounds 19–33: Mesh even: dc in each dc and over each ch-1 space, with ch 1 between them. That is 16 mesh rounds total including Round 18.
Keep the join at the back. Open mesh grows taller quickly; if you want a shorter holder, remove complete mesh rounds in pairs so the grid stays balanced. If you want a taller holder, add complete mesh rounds and re-measure before the top rim.
Step 7 — Measure the tube before the rim
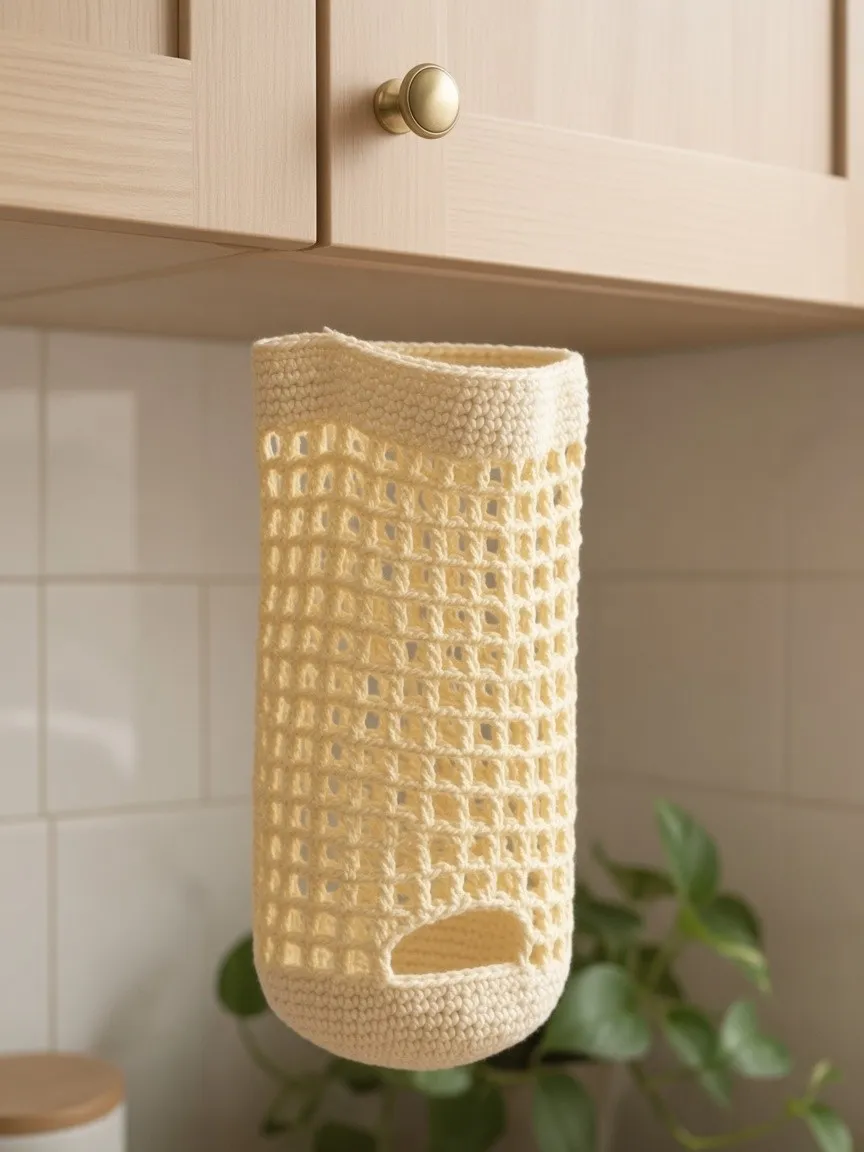
Lay the piece flat without stretching. Measure:
- Length from the bottom edge to the active top edge.
- Flat width across the mesh.
- Height and width of the oval window.
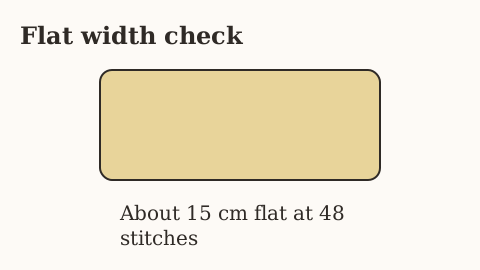
At the sample planning numbers you want roughly 32–36 cm of body height excluding straps and about 15 cm flat width. Crochet fabric is soft, so treat these as targets, not factory tolerances. Test-fit several loosely folded bags through the top without packing the cylinder hard.
Checkpoint: Room for loose bags, a clear front oval, and walls that are not bottle-necked at the join.
Step 8 — Solid top rim
Round 34: Restore solid fabric by working one sc in each dc and one sc in each ch-1 space around — 48 sc. Join.
Rounds 35–38: Chain 1, sc in each stitch; join. Four more solid rounds after the conversion round give a firm loading mouth. Fasten off, or keep the yarn attached if you will begin the first strap immediately from one marked span.
Keep sc tension supportive but not so tight that the mouth collapses. If the rim cups inward, redo those rounds with slightly looser tension or a hook 0.5 mm larger for the rim only.
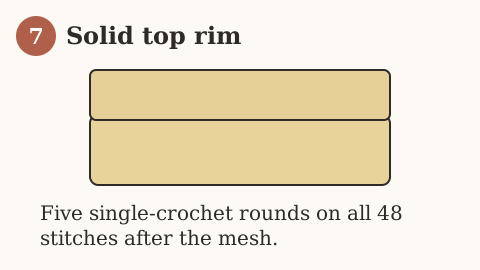
Checkpoint: Top rim is 48 sc for five rounds of solid fabric (conversion + four even rounds, or five even rounds if you count Round 34 as the first of five — keep your notes consistent).
Step 9 — Two integrated straps
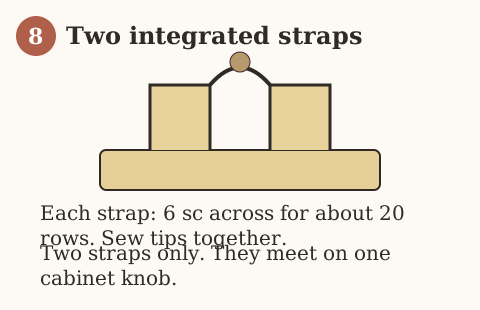
Mark two opposite spans of 6 stitches on the top rim. The oval should face forward between those strap roots so the lemons and window hang toward the room. “Opposite” means roughly half the circumference apart — about 24 stitches from the start of one 6-stitch span to the start of the other — not two neighboring clumps on the same side of the rim.
Each strap: Join Color A (if needed) in the first of the six stitches. Work sc across those 6 stitches for about 20 rows, chaining 1 and turning at the end of each row (turning chain does not count). Keep the edges straight; if the strap narrows, you are skipping the first or last stitch after the turn. Fasten off with a long sewing tail on each strap.
Before you sew the tips, hang the empty tube on your intended knob with scrap yarn to confirm the strap length. Twenty rows at the sample sc row gauge is a planning length, not a promise. Add or remove a few rows on both straps equally if the holder sits too high or too low for comfortable loading.
Sew the two strap tips together for about 2 cm so both hang over one knob. Pass the needle through both tip layers several times, then weave the sewing tails back through several strap rows. Optionally back the join with a short piece of cotton tape on the wrong side for extra security. Do not rely on a single knot at the tip. The safe working load of this join has not been tested on this site; treat the holder as light storage only.
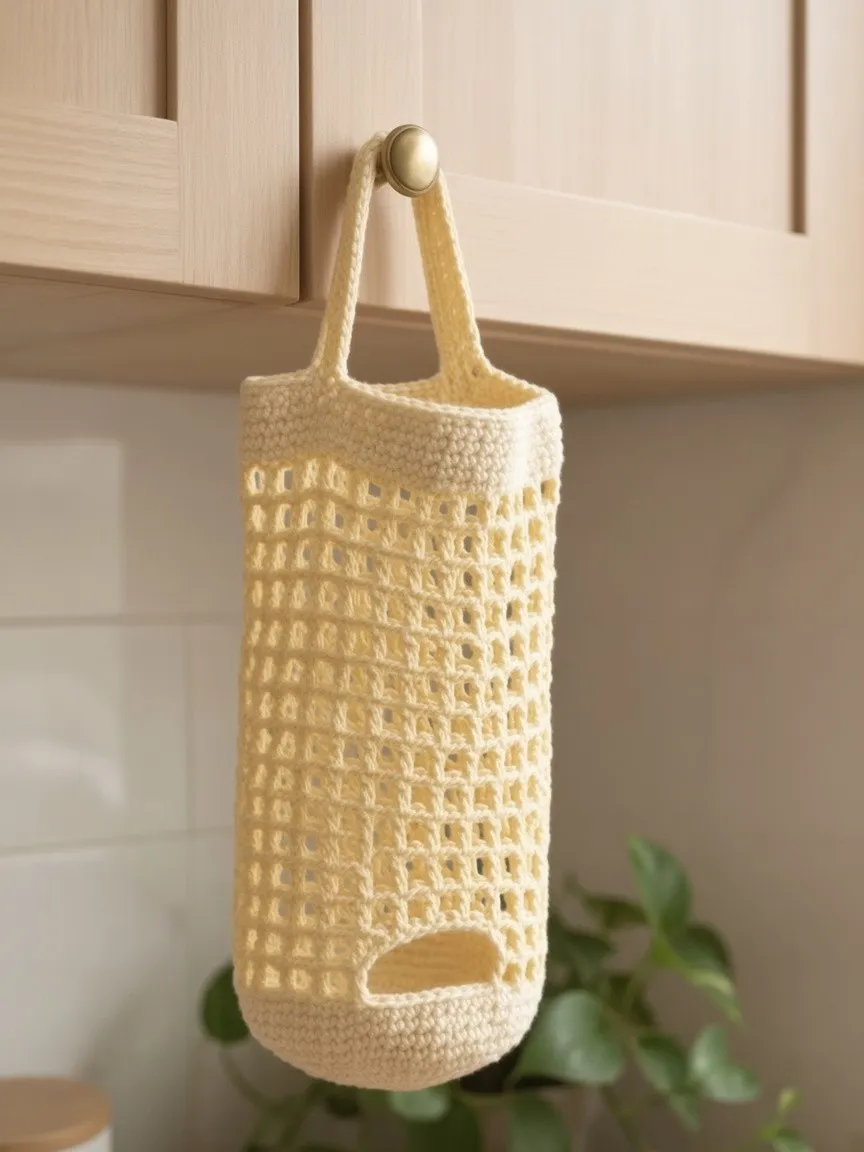
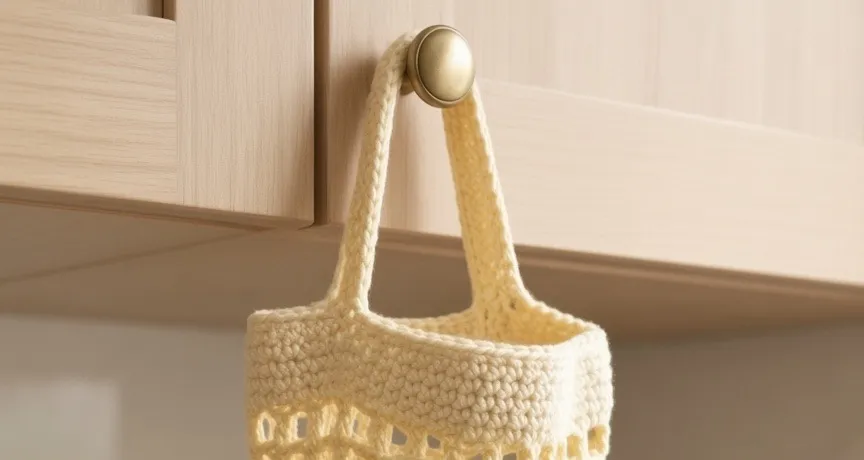
Checkpoint: Empty holder hangs straight on a fixed knob. The oval faces out. Neither strap is twisted.
Step 10 — Three stuffed lemons
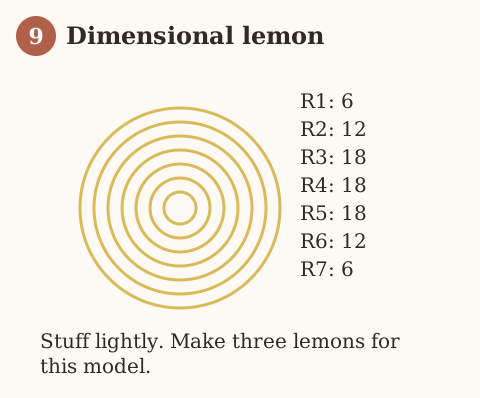
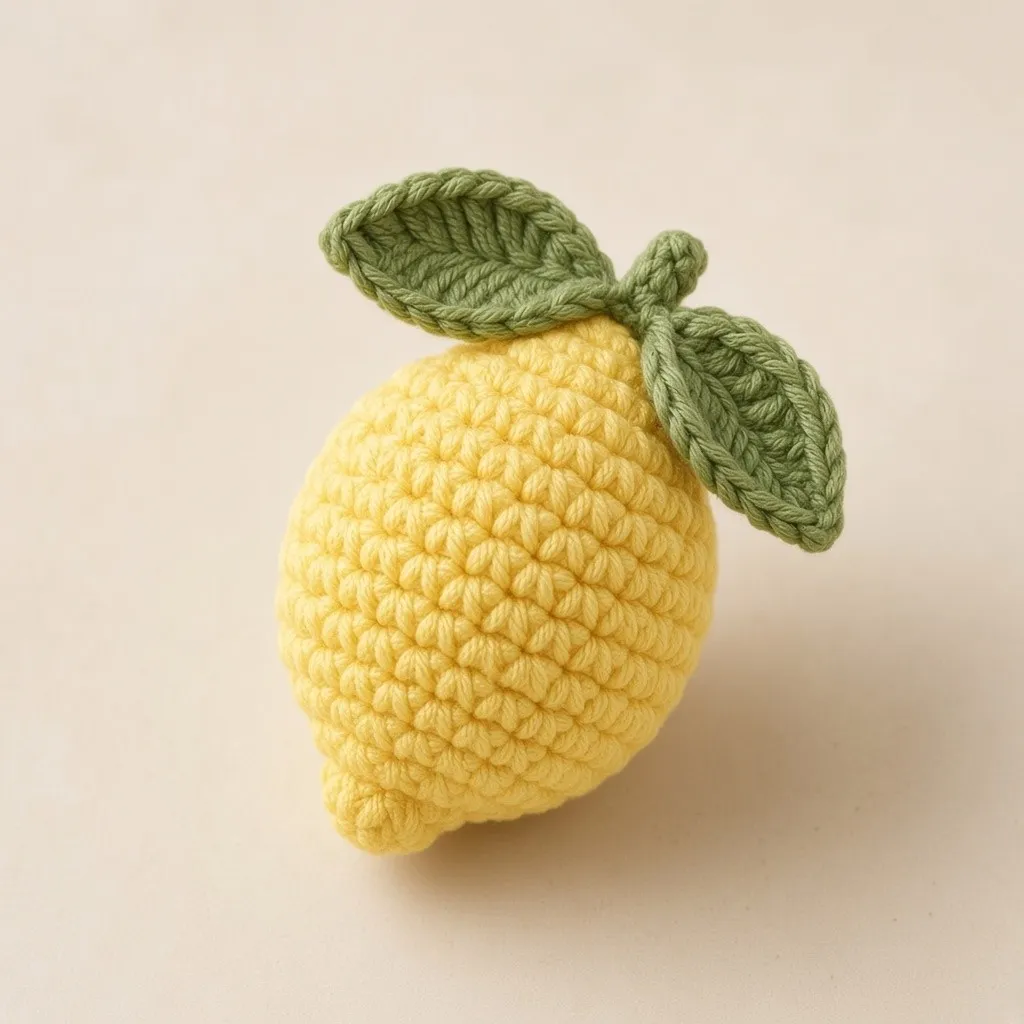
Make three identical lemons in Color B. Work in continuous rounds or joined rounds — pick one method and stay consistent.
- MR, 6 sc.
- Inc in each st → 12.
- (sc, inc) around → 18. 4–6. Sc even on 18 for three rounds.
- Stuff firmly but not hard enough to show fiberfill through the stitches.
- (sc, dec) around → 12.
- Dec around → 6. Close, weave end through remaining loops, bury the tail.
Checkpoint: Three small ovals of similar size, firmly stuffed, with no large gaps at the magic-ring start.
Step 11 — Leaves
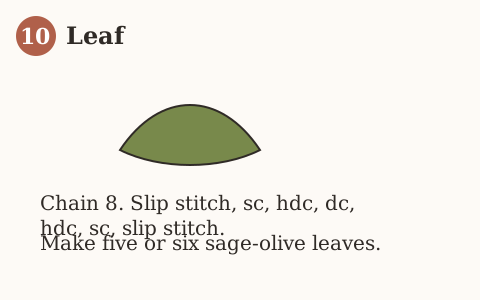
Make 5 or 6 leaves in Color C. For each leaf: chain 8. Working back along the chain, place sl st, sc, hdc, dc, hdc, sc, sl st (adjust by one stitch if your chain count needs it so the leaf points sit cleanly). Fasten off with a sewing tail.
Step 12 — Place the lemons on the front
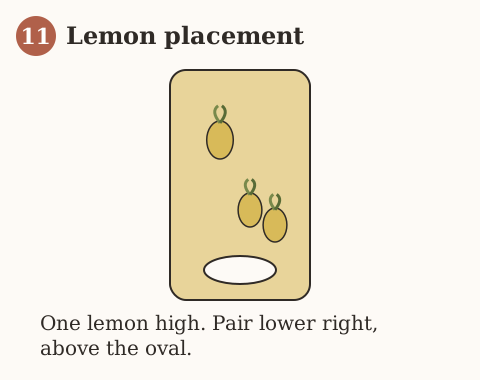
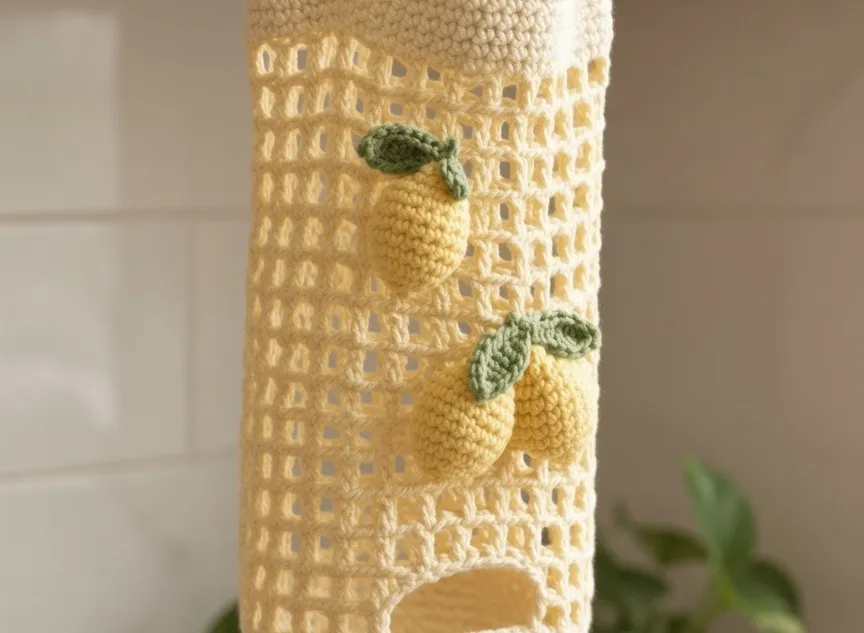
Sew one lemon on the upper front mesh and a pair lower on the front, just above the oval. Add one or two leaves at each lemon top. Take the needle through several mesh posts so the weight of the appliqué does not hang from a single strand.
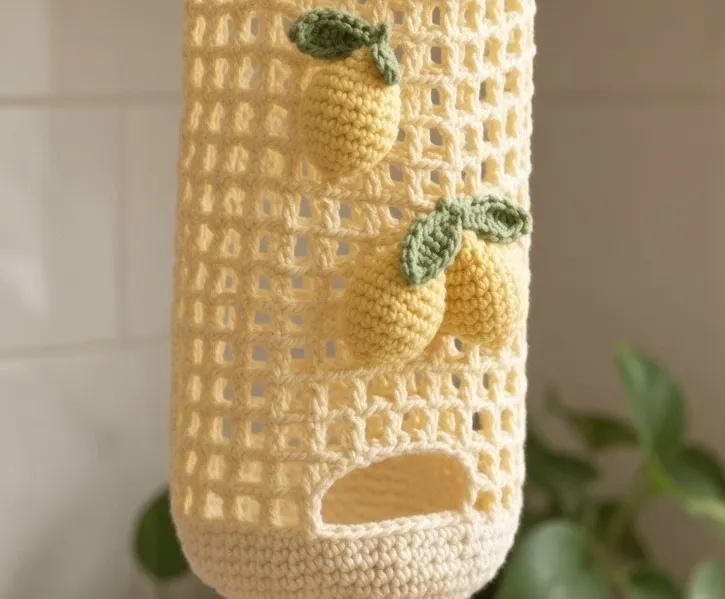
This placement matches the finished illustration: one lemon high, two clustered lower right above the window. If your oval sits slightly off center, shift the whole lemon group so it still reads as the front face.
Checkpoint: Three lemons, leaves attached, oval still fully usable and not sewn shut.
Step 13 — Load bags from the top and pull from the oval
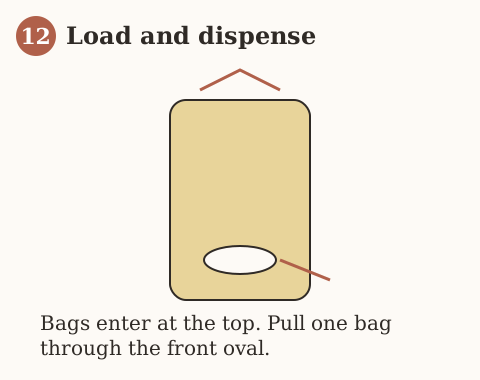
Collect clean, dry grocery bags and check that no sharp objects or liquids remain. Flatten each bag, bring the handles toward the body, then loosely roll or fold it so it enters the top opening without force. Place the first bag so a small graspable portion can be reached through the front oval; then add subsequent bags gently from the top.
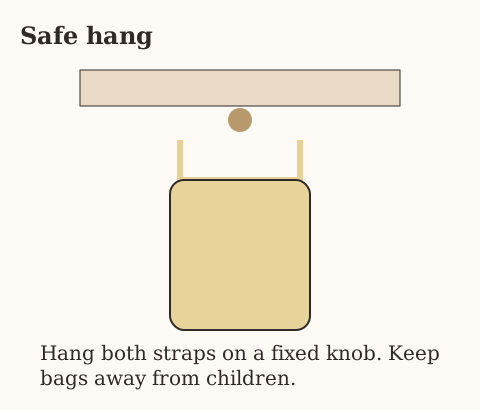
Hang both straps on a fixed knob. Pull one bag out through the oval with one hand while the other steadies the dispenser if needed. This is a storage dispenser, not a guaranteed automatic one-at-a-time mechanism: smoothness depends on bag texture, folding, load, and the size of your oval.
Checkpoint: Bags remain inside when untouched but can be removed without tearing the oval border or yanking the straps off the knob.
Step 14 — Finish, check dimensions, and install safely
After weaving in all tails, smooth the cylinder by hand and check for loose joins at the oval, strap roots, and lemon sew-ons. Measure body length, flat width, and oval opening on the actual finished item. Mount the holder on a sound cabinet knob or hook according to that hardware’s instructions. Keep the dispenser away from a stove or other heat source, and out of reach of small children or pets who might pull plastic bags free. Do not store food, sharp utensils, or heavy objects inside.
Checkpoint: Front oval works, dual straps stay secure on one knob, three lemons face forward, and the holder matches the locked design — not a bottom-pull or single-loop variant.
How to judge the dispenser in everyday use
A satisfactory holder should meet four practical tests. First, the top opening should take your usual folded bags without squeezing the rim until it deforms. Second, a few bags should remain in the chamber when the holder is hanging and you are not touching it. Third, pulling one bag through the front oval should not remove several others unexpectedly or require enough force to stretch the strap join. Fourth, the knob and mounting point should remain stable. These checks are a suggested test protocol, not a claim that this exact pattern has passed them on this site.
Start by filling with two or three bags rather than packing the tube tightly. Plastic varies widely: a thin grocery sack slides differently from a thicker tote-style bag. If several bags bunch together, fold them separately and arrange their graspable ends near the oval. If a very slippery bag drops out, make a firmer oval reinforcement next time — do not cinch the window so tightly that it tears bags.
Understanding the measurements
A crocheted tube is soft, and it can change length after hanging, washing, or filling. A nominal circumference from gauge math does not guarantee a perfectly circular mouth. Take measurements after the fabric relaxes and again while lightly filled. Measure the flat width without pulling the sides sideways. Strap rise is the vertical distance from the rim to the knob when the straps are gently supported; it is not the same as the full crocheted length of one strap before the tips were joined.
What to write down when you finish
Record four numbers on a scrap of paper or in your phone:
- Body length, bottom edge to top rim, excluding straps.
- Flat width across the mesh midsection.
- Oval width and oval height on the finished border.
- Strap rise from rim to the top of the joined tips when the holder is hanging empty.
Those four numbers let you resize the next one intelligently. If the oval was perfect but the tube was short, add mesh rounds only. If the tube was fine but the oval felt tight, reconsider chain tension or the 12-stitch span on a new sample rather than stretching the finished window until the border thins.
Resizing without breaking the design
If you prefer a shorter model, remove complete mesh rounds before the rim and keep the oval and strap logic unchanged. Removing solid bottom rounds is riskier because the oval needs enough solid fabric below it to keep the window in the wall rather than at the base. For a taller version, add complete mesh rounds and check whether the knob position is still comfortable. For a wider version, do not merely add random foundation chains: the oval skip count, mesh repeat, and strap spacing must all be recalculated for your gauge. A workable approach is to choose a new even circumference divisible by 2 (so mesh spaces stay even), place the oval as about one-quarter of that circumference, and keep each strap about one-eighth of the circumference wide — then swatch and revise before you call the new numbers final.
Assumptions that are not visible in the finished illustration are documented in the product notes for this page: strap tips are sewn together for one knob; the oval is formed by chaining across skipped front stitches for eight rounds; sizes come from stated gauge rather than a yarn-tested sample on this site.
Troubleshooting: what went wrong?
Bags fall out the bottom
This model’s bottom is closed solid fabric. If bags are falling through, you either left an open bottom ring by mistake or the oval was worked so low that the “window” behaves like a base hole. Compare your work to the locked design: solid cup first, then a front oval in the wall.
Bags will not pass through the oval
Make sure you are not stuffing the holder too tightly. Confirm you chained 12 and skipped 12 for eight rounds, then reinforced the edge. If the actual window measures much smaller than planned, compare your chain tension and sc gauge; redo the oval section rather than cutting the crochet.
The oval flares into a soft hole
The chain bridges were too loose, or the reinforcement round was skipped. Rebuild the window with firmer chains and a full sc border of about 40 stitches.
My body narrows upward
You may have been missing the first stitch after a join, treating the starting chain as a stitch, or dropping mesh spaces. Put a marker in the first real stitch of every round. Lay the tube flat every few rounds, count 48 solid tops or 24 mesh spaces, and correct mistakes before continuing.
The mesh looks like diamonds instead of squares
You are likely stacking dc into the wrong place relative to the previous ch-1. Aim for vertical posts over posts so the holes read as open squares, matching the finished illustration.
One strap only, or the holder tips
This model needs two straps from opposite 6-stitch spans, tips joined for one knob. If both roots sit on the same side of the rim, the oval will twist toward the wall. Reattach or re-crochet so the window faces forward.
The lemons sag or spin
Sew through several mesh posts and take a second pass through the lemon fabric. One stitch at the tip is not enough for a stuffed appliqué.
The yarn feels too soft for a filled tube
Choose a smooth, firmly twisted cotton. A loose fluffy yarn allows a filled tube to stretch and can catch bag edges. Swatch and hang a short trial with a few folded clean bags before deciding whether to remake the final version firmer.
The join zigzags up the back
Joined rounds often show a slight jog. Keep that jog at the back, behind the holder, where the cabinet hides it. Do not add a compensating stitch to “erase” the jog — that changes the count and can spiral the oval off center. If the jog becomes a spiral ramp, you are starting each round one stitch late or early; reset the marker on a known first stitch and continue.
Color looks wrong next to the illustration
The locked palette is pale buttercream for the body, brighter lemon for the appliqués, and sage-olive for the leaves. A stark white body or a neon lemon will still function as a dispenser, but it will not match the tutorial illustrations. If you substitute, keep value contrast similar: body light, lemons clearly yellower, leaves clearly greener.
Care and maintenance
Follow the actual yarn label rather than assuming all cotton can be machine washed at the same temperature. Remove every plastic bag before cleaning; do not iron the plastic or place the filled dispenser near heat. If the crocheted item is washable, use gentle handling and reshape it while damp. Dry it thoroughly before adding plastic bags. Inspect the strap join, oval border, and lemon sew-ons periodically for wear or loose stitches.
If you give this as a present, include a small note: bags load at the top and leave through the front oval; keep plastic away from children and pets; use the dispenser for lightweight, clean, dry bags only.
Frequently asked
Is this a beginner-friendly crochet pattern?
Yes for someone who has completed a basic flat project and understands a joined round. The oval is count-sensitive for eight rounds, and the lemons are small amigurumi. If you are newer, place markers at both edges of the 12-stitch oval span and at both strap roots before you crochet those sections.
Why a front oval instead of a bottom pull hole?
The locked product hangs with a closed base and a reinforced window on the lower front wall. That is the model this tutorial teaches. A bottom-pull cream-and-sage tube is a different construction and is not covered here.
Why two straps instead of one loop?
The finished design uses two integrated straps that meet on one knob. A single tab sewn to the back rim is a different hanging system.
Is cotton better than acrylic?
Smooth cotton is a practical starting point because it gives clear stitch definition and tolerates routine handling. Acrylic or a cotton blend can work, but stretch, abrasion, and care directions differ. Make a swatch, and do not assume a substitute will retain the same dimensions or be safe near heat.
Can I skip the lemons?
Yes. The tube, oval, and straps still form a working dispenser. The lemon placement is decorative and helps mark the front; without it, mark the oval side somehow so you hang the holder facing outward.
How many grocery bags will fit?
There is no reliable universal number. Thin compact bags occupy far less volume than thick folded bags. Test with a few bags of the kind you actually use, then gradually increase the quantity until the dispenser still allows comfortable retrieval through the oval.
Does this dispense one bag automatically every time?
No. It is a manual holder with a front exit, not a mechanically separated dispenser. With some bag textures and folds, two bags may catch one another; adjust loading and do not force them through.
Can I hang it on a cupboard door?
You can use a properly installed knob or a stable cabinet-side fixture, provided it is appropriate for the surface and does not damage the cabinetry. Avoid placement where opening doors pinch the yarn, and keep it away from burners, hot water, and children.
How long will it take to crochet?
Time depends on your skill, yarn, speed, and whether you resize the project. This article is written for careful reading with repeated references to photos and diagrams; the crocheting and finishing are a separate time commitment. Do not interpret the page’s reading-time estimate as a guarantee that the project is completed in that many minutes.
Was this pattern yarn-tested on this site?
No. Counts are paper-checked from the stated gauge. Illustrations show the locked design. Measure your own fabric and bags.
Can I sell a handmade holder made from this pattern?
You may make your own version of the practical object, but follow applicable laws for your circumstances and do not reproduce this article’s written instructions, photos, or illustrations as your own editorial materials. There is no claim that these measurements reproduce a third-party designer’s pattern.
A final inspection before you hang it
Look at the finished dispenser from the front, side, and underside. Pale yellow mesh should sit between solid bands. The front oval should be reinforced and usable. Two straps should meet for one knob. Three lemons with sage-olive leaves should mark the front above the window. If the holder looks like a different product — bottom exit only, single loop, striped cream and sage body — stop and compare against the opening illustration before you call the project finished.
The reward of this practical project is a repeatable daily routine: fold a grocery bag, slip it into the top, and pull one through the front oval when needed. A cleanly built holder can make that small routine easier and keep a cluttered cupboard more organized.
Next
If mesh tension still feels unfamiliar, revisit how to keep a consistent gauge. For stitch shorthand while you work the oval and straps, keep the crochet abbreviations chart nearby. For another kitchen-scale project that practices joined rounds, see the granny square tote.
The same room can use a different holder. The Christmas tree bag holder is a hollow tree, not this lemon tube. The towel holder hangs a towel from two rings. The garlic holder is a mesh pouch for whole dry bulbs. None of those stitch counts build this dispenser.
More premium patterns
Other printable editions from the same collection.
Christmas Patterns
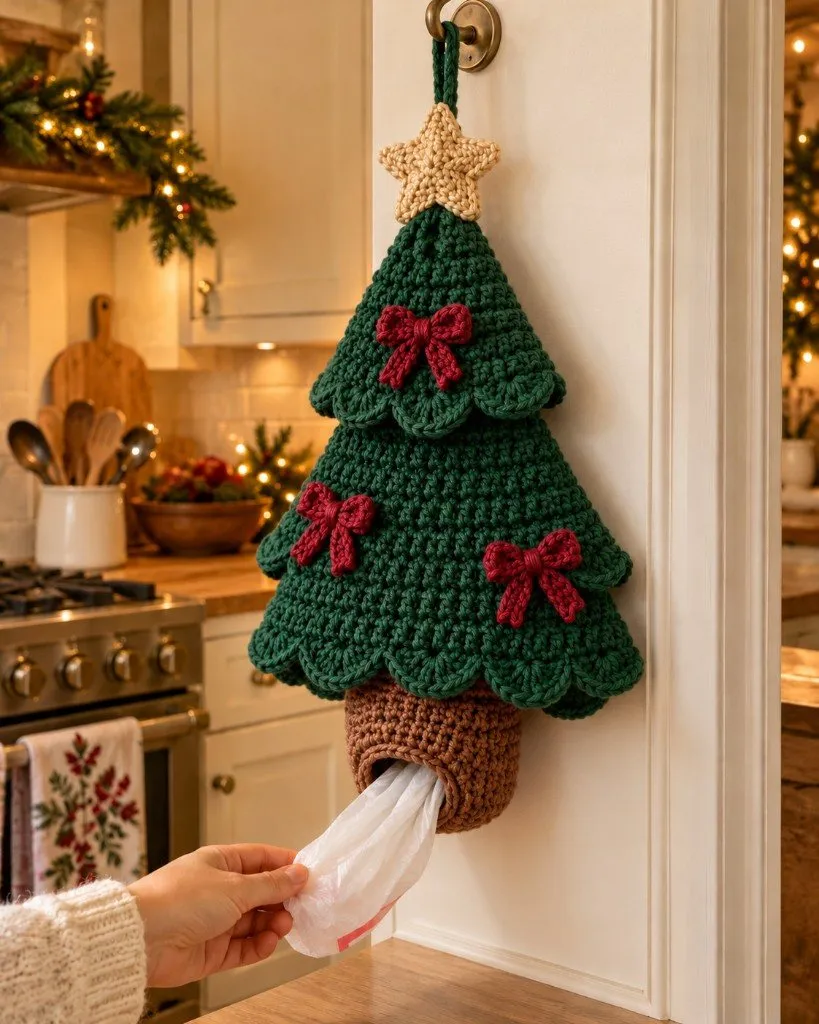
Crochet Christmas Tree Plastic Bag Holder
A hollow Christmas tree that holds grocery bags, with a brown trunk and shell rows. The printable edition follows the free tutorial.
Difficulty: Intermediate
Christmas Patterns
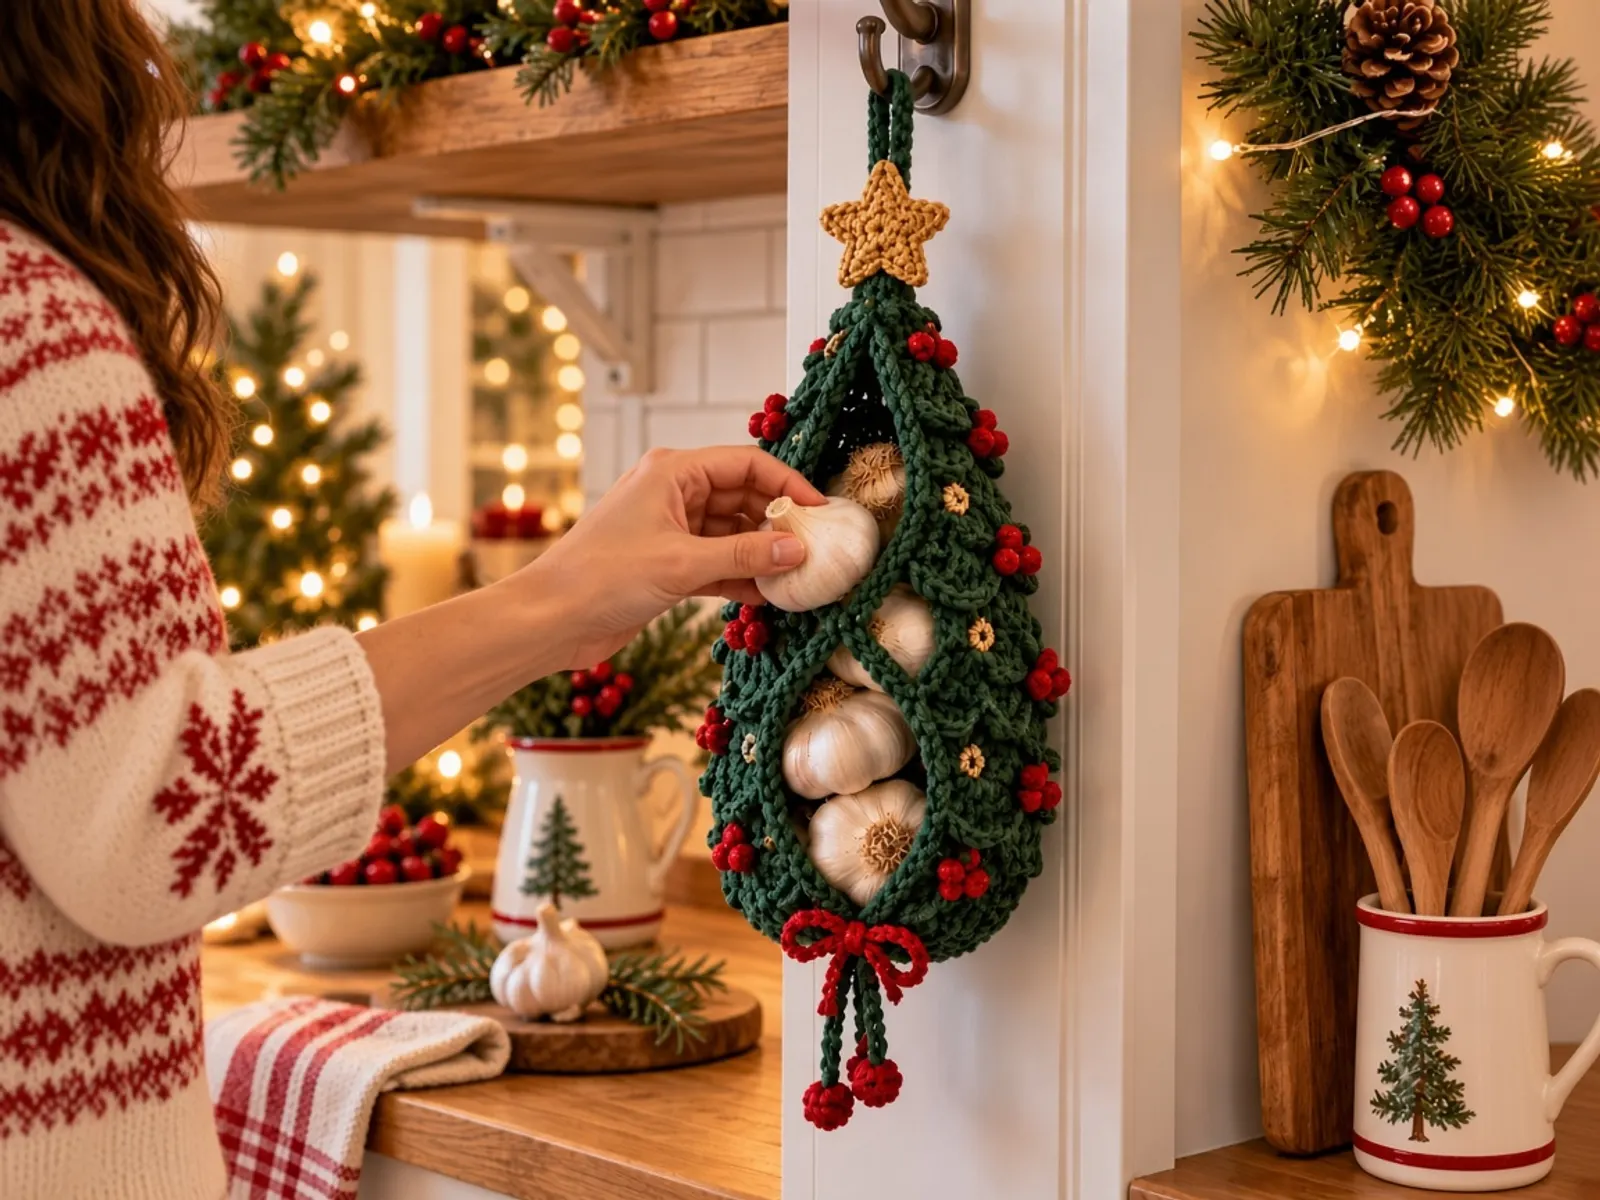
Crochet Christmas Garlic Holder
A small mesh garlic holder shaped like a Christmas tree, with scalloped branches and a gold star. The printable edition follows the free tutorial.
Difficulty: Beginner
- crochet plastic bag holder
- kitchen crochet
- grocery bag dispenser
- lemon crochet
- hanging crochet organizer
Read this next
- How to Crochet a Christmas Tree Garlic Holder A small mesh garlic holder with scalloped branches, a gold star, and an open top. US terms. Sizes are design targets.
- How to Crochet a Christmas Tree Plastic Bag Holder Crochet a hollow Christmas tree that holds grocery bags. Bags go in the open top and out the brown trunk. US terms. Sizes come from gauge.
- How to Crochet a Compact No-Slip Kitchen Towel Holder A compact cotton crochet towel holder with two wooden rings, one above the other. Assembly counts are still being checked. US terms.