

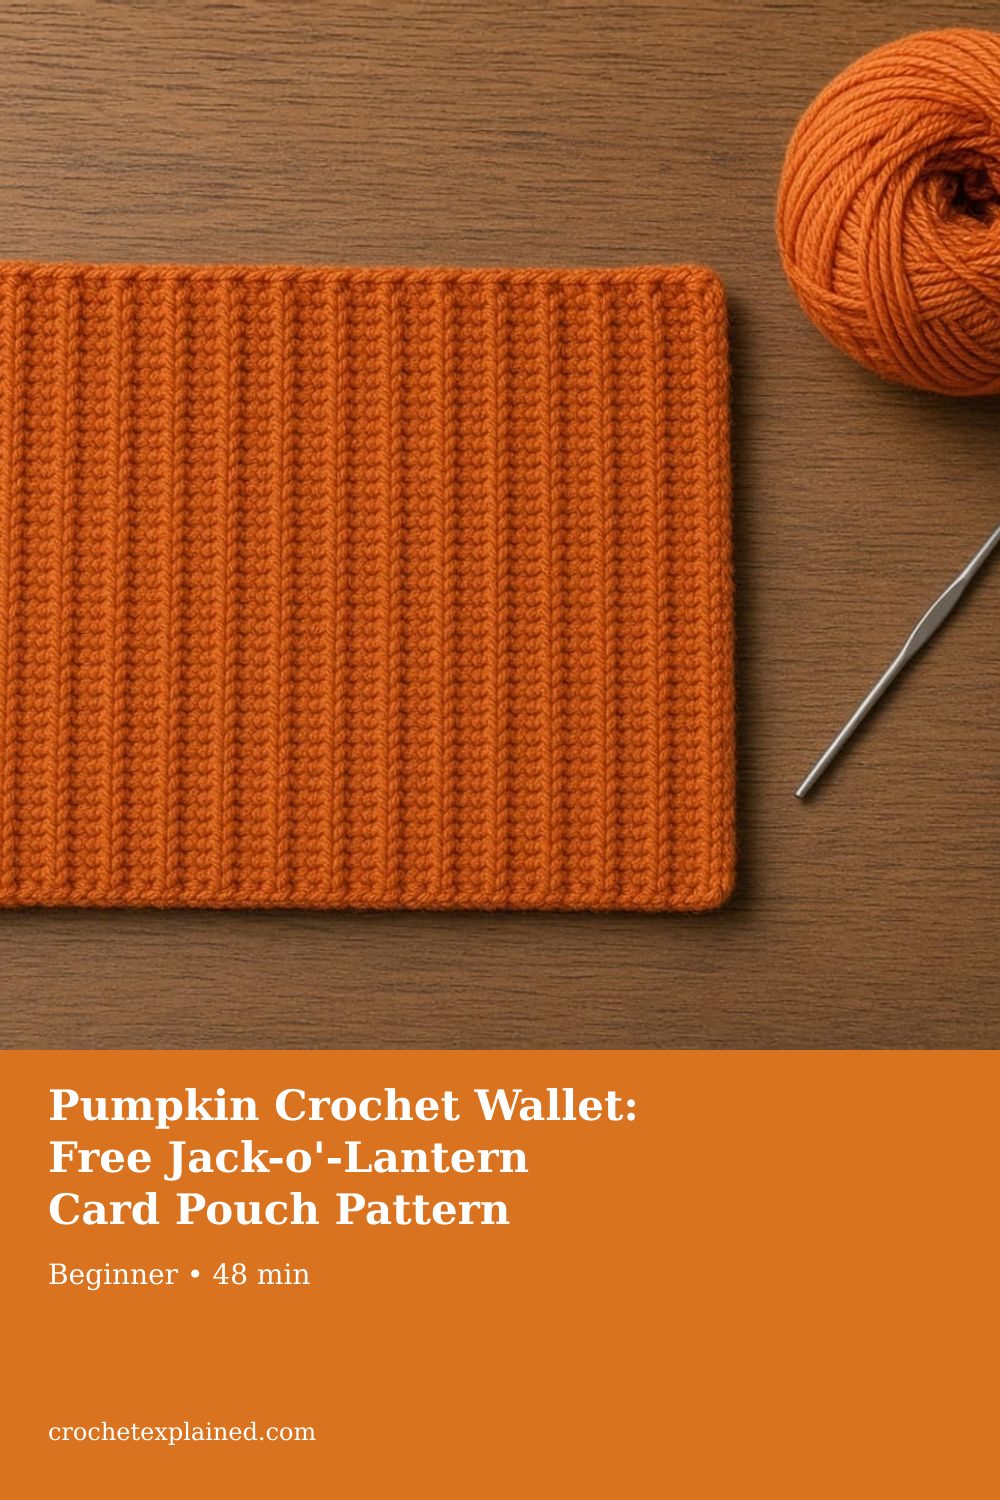
Pumpkin Crochet Wallet: Free Jack-o'-Lantern Card Pouch Pattern
Chain 21 and work 20 single crochet, then turn every row and work into the back loop only for about 22 rows, which makes vertical pumpkin ribs. Single crochet along both long edges, embroider the face, fold in half, and seam the two sides. A rolled stem and a green leaf tab with a snap finish it.
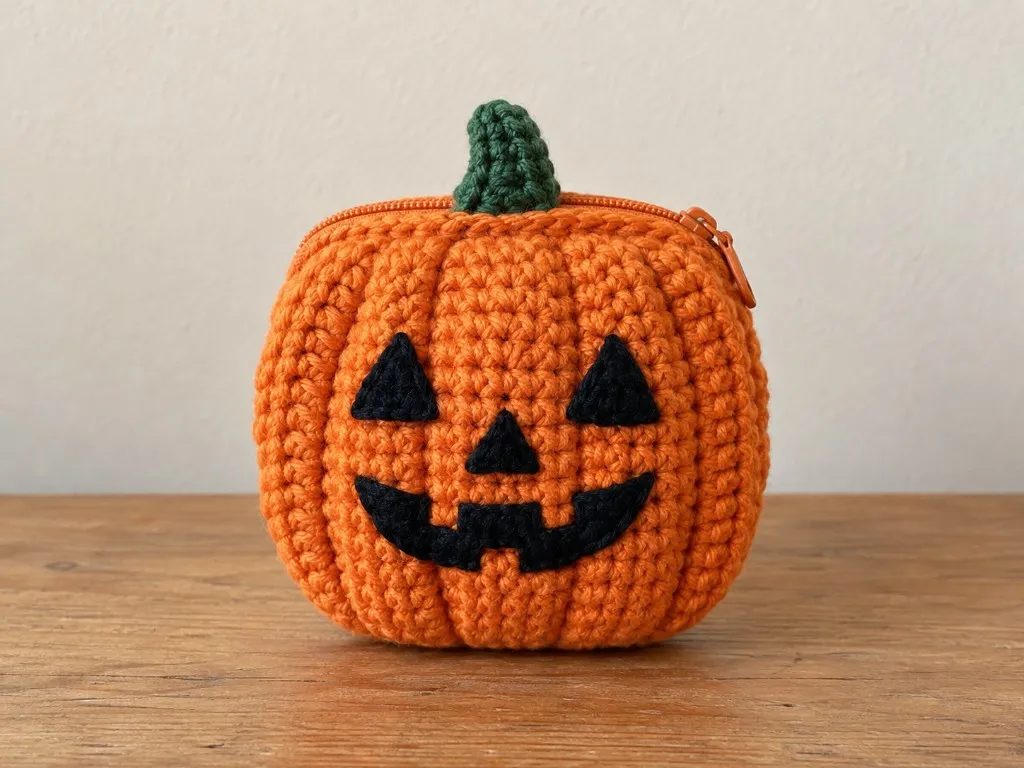
A jack-o'-lantern card wallet worked sideways in back-loop ribs, folded once, with a stitched face, rolled stem, and a leaf tab that snaps shut.
At a glance
- Skill level
- beginner
- Time
- About 22 short rows, two rims, a stem, a tab, embroidery
- Finished size
- About 4.25 x 2.5 in. Inside about 3.9 x 2.4 in on paper.
- Yarn weight
- Worsted (CYC 4) in orange, scraps of black and green
- Hook size
- US G/6 (4.0 mm), or the size that gives the gauge
- Yardage
- About 24 sq in of fabric, 1.5 times a 4 in swatch. Weigh to estimate.
On this page
- Materials
- Abbreviations and stitches
- Size and gauge
- How to read the sideways piece
- What the ribs should look like
- What the rims, the face, and the fold should match
- The pattern
- Stem, tab, and snap, in order
- Make it yours
- Label the two rims before embroidery
- Common mistakes and fixes
- Care
- Frequently asked
- More Halloween wallets
Track your progress
- Go to Step 1: the first row, both loops
- Go to Step 2: every row after row 1, back loop only
- Go to Step 3: one stitch per row end on each rim
- Go to Step 4: place the face on the front half only
- Go to Step 5: fold, then seam one short edge at a time
- Go to Step 6: the stem, flat first, then rolled
- Go to Step 7: the leaf tab
- Go to Step 8: sew the tab, the snap, then the stem
Ticks are saved on this device only. Counting rows? Keep the stitch counter open in another tab.
US crochet terms throughout. Sizes here are worked out from gauge rather than from a finished sample, so swatch and measure as you go, and the pictures of finished pieces are illustrations. Made one? Send a photo through the contact page.
Most crochet pumpkins are round, which is a poor shape for cards. This one is a flat pouch that still reads as a jack-o’-lantern, because the ribs run up and down the way a real pumpkin’s do.
You get those ribs for free by working sideways in the back loop only. No color changes, no counting ribs, and one fold makes the pocket.
It is one of five patterns in the Halloween crochet wallet collection, and the most forgiving one for a first project.
The finished size and card fit here are worked out from the example gauge rather than measured from a finished wallet, so swatch in back loops (those rows run shorter) and slip a real bank card in before you fold. A standard US bank card is 3.370 by 2.125 inches, the ISO/IEC 7810 ID-1 size.
Materials
- Worsted weight (CYC 4) yarn in orange. Cotton shows the ribs most crisply. Yarn weight chart.
- Scraps of black for the face and green for the stem and tab.
- US G/6 (4.0 mm) hook, or the size that gives the gauge. Hook size chart.
- One sew-on snap, 3/8 in (10 mm), and thread.
- Tapestry needle, scissors, a stitch marker, one card.
Weigh a back-loop swatch
- Do not look for a weight taken from a made wallet. There is not one on this page.
- Treat the pouch as about 24 square inches, roughly 1.5 times a 4 inch swatch.
- Weigh your back-loop swatch, multiply by 1.5, and add 20 percent.
A plain single-crochet swatch does not use the same amount of yarn per inch as ribbed rows. Weigh the back-loop swatch.
Abbreviations and stitches
US terms. See the abbreviations chart.
| Abbreviation | Meaning |
|---|---|
| ch | chain |
| sc | single crochet |
| BLO | back loop only: insert the hook under the loop farther from you |
| sc3tog | single crochet three together: pull up a loop in each of 3 stitches, yarn over, pull through all 4 loops |
| st(s) | stitch(es) |
Turning chain rule. Every row: ch 1, turn. The ch 1 does not count as a stitch.
What the chain 1 is allowed to do
- Chain 1 at the start of the row.
- Turn.
- Leave that chain out of the stitch count.
- Put the first single crochet into the first stitch of the row below, not into the chain.
A single crochet worked into the turning chain makes the row 21. That edge grows a bump every row. The chain 1 is not a stitch.
Size and gauge
Gauge: 16 sc and 20 rows = 4 in in single crochet, as an example.
Swatch in back loops before you trust the tape
- Work the swatch in BLO. Back-loop row gauge can differ from plain single crochet.
- Measure the middle of the swatch, the way the gauge guide shows.
- Skip the edge stitches when you measure. They lie, and they will set a false row count if you include them.
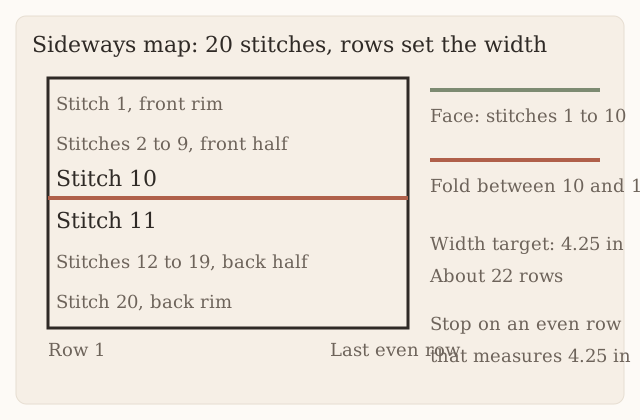
What the 20 stitches set, and what the rows set
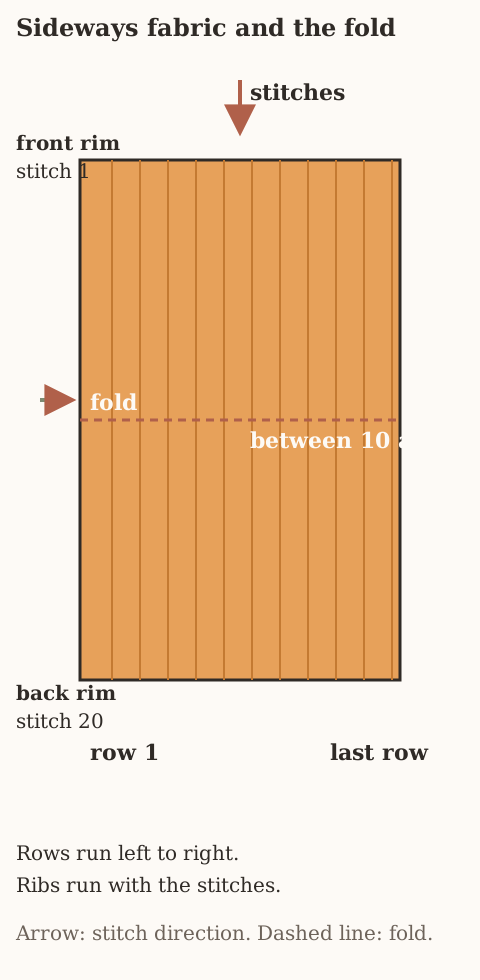
- Work the piece sideways.
- Let the 20 stitches in each row set the height before folding: 5 inches, which folds to 2.5.
- Let the number of rows set the width.
- Work rows until the piece measures 4.25 inches. At the example gauge that is about 22 rows, whatever your back-loop row gauge turns out to be.
- After seaming, read the inside as about 3.9 inches wide and 2.4 deep against a 3.37 by 2.125 inch card.
The 4.25 inch stop is the tape, on an even row. The number 22 is the example at 20 rows to 4 inches. It is not a quota if your rows are taller or shorter.
How to read the sideways piece
The pumpkin is a rectangle with the ribs running the short way, then folded once. Nothing in the construction is round.
Stop if the fabric leaves this shape
- Look at the piece while the rows are still on the hook. It should stay a flat rectangle.
- Pull back if the fabric starts to cup. A cupped piece has left this pattern.
- Pull the stem out if it becomes a long tube. The stem in this pattern is a short roll, not a tube you keep building.
- Use the counts already written below. They are not a new size.
Lay a card long-ways, then ignore that picture while you row
- Lay an imaginary card on the table in landscape, the long side left to right.
- Notice that the crochet does not follow that picture while you are making the rows.
- Treat each row as a short vertical strip of 20 single crochet.
- Sit the next row beside it.
- Stop when you have enough rows to measure 4.25 inches. The pile of strips is then wide enough for the card.
- Run the fold across the middle of every strip. The height of the pouch is half of those 20 stitches.
Read the height off the example gauge
At the example gauge, 16 single crochet equal 4 inches, so one stitch is a quarter inch.
| What you are measuring | Count at the example gauge | Figured size |
|---|---|---|
| One stitch | 16 single crochet = 4 inches | a quarter inch |
| Full row, before the fold | 20 stitches | 5 inches |
| Front half, rim down to the fold | 10 stitches | 2.5 inches |
| Inside depth on paper | the same front half, after the opening | about 2.4 inches |
| Card, short side | ID-1 | 2.125 inches |
| Paper clearance that way | 2.4 minus 2.125 | about a quarter inch |
- Treat that 2.5 inch figure as the outside height before the side seams take a little fabric.
- Treat the inside depth on paper as about 2.4 inches.
- Treat the quarter inch of clearance as arithmetic from the example gauge.
- Do not treat it as a measurement from a finished wallet.
- Slip a real card in before you fold, as the size section already says, and trust the card over the quarter inch.
The outside height is half of 20 stitches, 2.5 inches at the example gauge. Measuring from the outside of one rim, around the fold, to the outside of the other rim includes both lips and can read near 5.4 inches. That path is not the card path.
Stop on an even row that measures 4.25 inches
- At the example row gauge, 20 rows equal 4 inches, so one row is 0.2 inch.
- A width of 4.25 inches is 4.25 divided by 0.2, which is 21.25 rows.
- Rows have to be whole, and this pattern stops on an even row, so 20 rows and 22 rows are the two even neighbors of 21.25.
| Even row | Width at 0.2 inch per row | Against the 4.25 inch target |
|---|---|---|
| 20 | exactly 4 inches | short of 4.25 |
| 22 | 4.4 inches | a little over 4.25 |
- Expect back-loop rows to come out shorter than plain single crochet. That is why the pattern says “about 22 rows” and then tells you to measure.
- Keep going to the next even row that hits the tape if your back-loop swatch is tighter and you are still under 4.25 inches at row 22.
- Stop at row 20 if your rows are taller and the tape already reads 4.25 inches there.
- Use the tape plus an even row as the written rule. The number 22 is the example, not a quota.
Do not stop at 21 because 21 is close to 21.25. An odd edge disappears into one side seam and not the other, so one short side of the pumpkin looks heavier.
Read the inside width after the seams
- Read the inside width on paper as about 3.9 inches after the side seams.
- Start from the outside target of 4.25. The two seams together are treated as about 0.35 inch of take-up, roughly the thickness of a whipstitched edge on each side.
- Set the card at 3.370 inches wide.
- Against a 3.9 inch inside, the paper clearance is a little over half an inch in total, split between the two sides.
- Expect a tight whipstitch to spend that clearance.
- Test the card before the stem and the tab go on.
- Loosen the seam if the card binds.
- Do not add stitches to the row to make room. The row is 20.
Pin three labels that do not reverse on the turn
- Write three labels on a scrap and safety-pin the scrap to the fabric, or copy the numbers onto a piece of masking tape stuck to the table.
- Call stitch 1 the front rim.
- Call stitch 10 the stitch that sits next to the fold on the front.
- Call stitch 20 the back rim.
- Treat those numbers as positions in the row, not as whichever edge happens to be in your right hand.
- Expect a turned row to reverse the physical edge. The label does not reverse.
- Stop if you count from the hand that is nearest you after a turn. Stitch 1 and stitch 20 trade places in your head, the face lands on the back half, and the fold line is still in the middle of the fabric but the embroidery is on the wrong side of it.
The fold stays between stitch 10 and stitch 11 even when a turn flips the fabric in your hands. Recount from the pinned front rim, not from the edge nearest your hook.
Look up a blurred row before you keep going
- Open the abbreviations chart if a row of letters starts to blur. Check sc, BLO, and sc3tog there.
- Open the gauge guide to measure the middle of a swatch so the edge stitches, which lie, do not set your row count.
What the ribs should look like
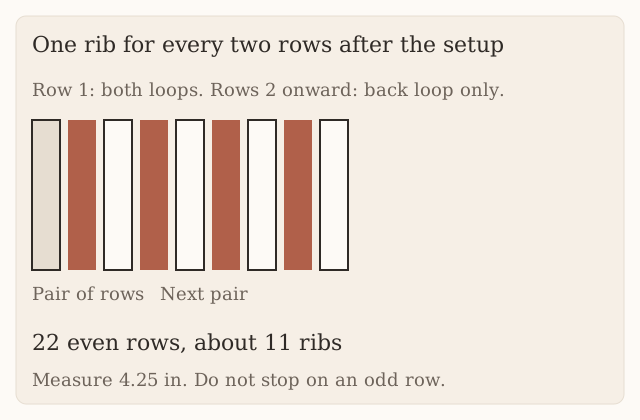
Row 1 is the only smooth row
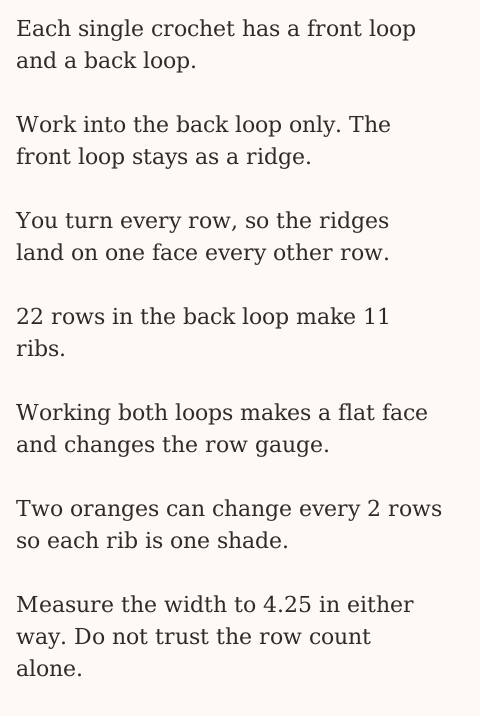
- Work row 1 as ordinary single crochet through both loops of the chain.
- Leave it smooth on purpose. It is the only row that looks that way.
- From row 2 on, put the hook under the strand farther from you.
- Leave the strand closer to you on the surface. That abandoned strand is the rib.
- Do not chain extra stitches to make ribs.
- Do not count ribs as you work.
- Count stitches, count rows, and let the ribs appear because the front loops were left alone.
Name the nearer strand again after every turn
- Look at the top of a finished single crochet before you insert the hook.
- Find the V. It has two strands side by side.
- Tip the fabric toward you.
- Call the strand that moves closest to your body the front loop.
- Call the strand that stays back against the previous row the back loop.
- After you turn, treat “closer to you” as a new direction.
- Do not try to remember which strand was the front loop on the row below.
- Re-identify the nearer strand on the row you are about to enter.
If you keep using the same physical strand you used before the turn, you are alternating front loop and back loop. The ribs break into a checker instead of running as lines.
Mark the sharper face by row 6 or row 8
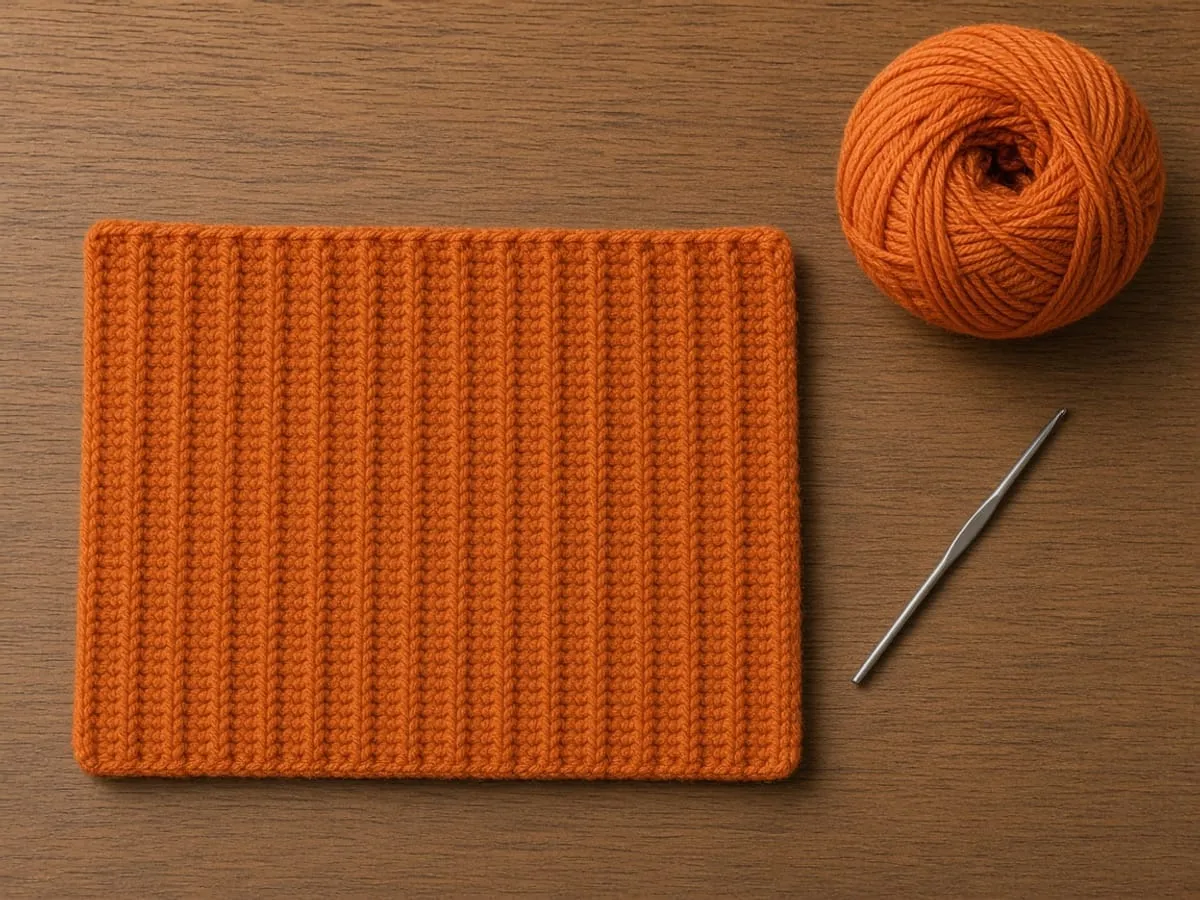
- Expect turned back-loop fabric to show a ribbed face on both sides.
- Pick the side that is usually a little sharper. That sharper side is the right side for this wallet.
- Mark it as soon as you can see the difference, which is often by row 6 or row 8.
- Use a scrap of contrasting yarn through one stitch. Do not use a pin you might sew over.
- If you wait until the piece is 4.25 inches wide, both faces look similar in flat light and the face gets embroidered on the quieter side.
The marker is only there so the right side stays obvious. It is not a stitch, and it does not change the count of 20.
Count the ribs once, after the last even row
Each rib is the front loops of a pair of rows. At about 22 rows you should see about 11 ribs running from the front rim toward the back rim, parallel to each other, the same distance apart.
| What you see | What it means | What to do |
|---|---|---|
| About 11 ribs | That supports a 22-row claim | Keep the row tally and the 4.25 inch tape as the stop rules |
| Ten and a half, with one unpaired row at the chain edge or the last-row edge | The last row is odd | Pull back to the last even row that still measures at least 4.25 inches, or add the one row that makes the count even and measure again |
| A stop at 21 because 21 is close to 21.25 | The even-row rule was skipped | Do not split the difference. The two side seams need matching rib pairs |
- Count the ribs once, at the end, as a check on the row tally.
- An odd edge disappears into one side seam and not the other, so one short side of the pumpkin looks heavier.
- Keep the pattern’s even-row rule so the two side seams meet matching rib pairs.
A drifting rib means the row left 20
- Look along the ribs from rim to rim. They should run straight.
- Stop if a rib drifts toward one side. The first or last stitch of some rows was skipped or doubled.
- Count. The row is no longer 20 stitches, and the fabric is being pulled on the diagonal.
- Expect a slanted rectangle to miss the fold between stitch 10 and stitch 11. The edges will not meet.
- Expect the side seams to pucker, and the card to catch on the short edge that ended up longer.
Measure flat, with the working yarn loose
- Lay the piece flat and unstretched.
- Put the zero of the tape on the chain edge, not on the tail.
- Read at the top of the last row, not at a loop you are still holding.
- Do not pinch back-loop fabric. It compresses.
- Do not measure while the piece is still on the hook and the working yarn is tight. You will stop early and the card will be wider than the pouch.
- Take the hook out of the live loop only if you can put it back without twisting.
- Easier: let the loop sit loose, smooth the fabric with your palm, then measure.
A tight working yarn shortens the reading. The pouch then stops under 4.25 inches, and the 3.370 inch card spends the clearance the seams still have to take.
Find the first stitch under the turning chain
- Look under the turning chain for the first stitch of a back-loop row. It hides there.
- Count 20 at the end of row 2, row 4, and every even row after that.
- Count every row if your turns are unreliable.
- Count every few rows once the edges look straight.
- Remember that the chain 1 at the start of the row is not a stitch. The abbreviations chart lists ch and sc separately for this reason.
| Count at the end of the row | What happened |
|---|---|
| 19 | The first stitch under the turning chain was skipped. The rib at that edge looks like it started one stitch late. |
| 20 | The first stitch and the last stitch were both worked. This is the row. |
| 21 | The turning chain was worked as well as the first stitch. That edge grows a bump every row. |
Both long edges need a stitch head
- Look for a stitch sitting on the front-rim edge and a stitch sitting on the back-rim edge.
- Count 18 between them. That is a correct 20-stitch row.
- See the two edge stitches as the last legs of the fabric.
- Treat a long edge that looks like a chain with no stitch head on it as an edge that lost its stitch.
- Treat a long edge that looks twice as thick as the other as an edge that gained a stitch into the turning chain.
What the rims, the face, and the fold should match
Match the rim to the row count you wrote down
- Leave the two long edges as raw row ends until you work the rims.
- Read a row end as a small bump, one bump for each finished row, including row 1.
- On a 22-row piece, walk a needle along the edge and count 22 bumps.
- Work the rim as one single crochet in each bump and nothing else.
- Set the stitch count of the rim to the row count you wrote down. It is not automatically 22.
- Write the number before you join the yarn. That is what keeps you from filling in a gap with a second stitch.
| Rows worked to hit 4.25 inches | Rim stitches on each long edge |
|---|---|
| 20 | 20 |
| 22 | 22 |
| 24 | 24 |
A wave is an extra stitch. A tuck is a skip.
| What the rim does | What went into the bumps | What to do |
|---|---|---|
| Ripples, longer than the edge | Two stitches in one bump | Pull the rim out and match the written row count |
| Pulls in, and the rib next to a bump bends | A bump was skipped | Pull the rim out and match the written row count |
| Lies along the edge without a wave or a tuck | One single crochet in each bump | Leave it |
Do not try to block a rippled rim flat. The extra stitch is still there, and it will ripple again when the tab pulls on the opening.
Measure the card path, not both lips
- Remember that the rim does not add a new pocket depth. It sits on the opening.
- Let stitch 1’s rim and stitch 20’s rim meet at the top after the fold.
- Keep the depth of the pocket as the front half, stitches 1 through 10.
- Ignore a path that runs from the outside of one rim, around the fold, to the outside of the other rim. People get something near 5.4 inches and think the pouch is too tall.
- That path includes both lips. The card path is from the fold up to the opening, which is the front half.
Place the face only on stitches 1 through 10
- Wait until the rims exist, so you know which long edge is the front rim.
- Embroider only on stitches 1 through 10.
- Stop black yarn at stitch 10. Stitch 10 is the last stitch that may take it.
- A stitch past stitch 10 crosses the fold. When you fold, that crossing stitch sews the opening area to the back, and the card stops against a bar of embroidery.
Do not push the needle past stitch 10. You will sew the fold shut, and the card will stop on the embroidery.
For a real 22-row piece, mirror the face across the middle
Row 5 mirrors row 18, because 23 minus 5 is 18. Row 6 mirrors row 17. Row 7 mirrors row 16.
| Shape | Rows | Stitches | What it has to do |
|---|---|---|---|
| Left eye | 5, 6, and 7 | 3, 4, and 5 | Sit the same distance down from the front rim as the right eye |
| Right eye | 16, 17, and 18 | 3, 4, and 5 | Mirror the left eye |
| Nose | 11 and 12 | 6 and 7 only | Use the two middle rows of a 22-row piece |
| Mouth | 6 to 17 | 8 and 9 | Step between stitch 8 and stitch 9 every two rows |
| Empty tab rectangle | 10 through 13 | 1 through 5 | Stay empty. The leaf tab covers it |
- Keep both eyes the same distance down from the front rim.
- Leave the rectangle on rows 10 through 13, stitches 1 through 5, empty.
- If you fill it, the tab hides the embroidery and the snap has to be sewn through black stitches, which makes the socket sit proud of the fabric.
If the row count is not 22, move the nose to the measured middle
- Do not leave the eyes on rows 5 and 16 if the piece is not 22 rows.
- Find the middle with the tape.
- Shift the nose to that middle.
- Keep the eyes the same distance on either side of the nose that the written face uses.
- End the left eye two rows before the nose area, with a gap.
- Start the right eye after a matching gap.
- Use the measured middle rather than copying rows 11 and 12 onto an 18-row or 26-row piece.
- Keep the empty tab rectangle on the front rim side, about four rows wide, centered over the same middle, on stitches 1 through 5.
- Do not move the face onto stitches 11 through 20 to balance the pumpkin. That half is the back.
Copying rows 11 and 12 onto an 18-row or 26-row piece puts the nose off the middle. The tab rectangle then covers the wrong rows, and the socket sits on embroidery or on the fold.
Backstitch the outline, then fill, then follow a rib
- Outline with backstitch so the line is solid. The needle comes up a short step ahead and goes down at the end of the last stitch.
- Fill the triangles with straight stitches sitting next to each other so the orange does not show through as stripes.
- Follow a rib with the mouth. If the mouth crosses ribs on a diagonal, it fights the vertical lines and the face reads as a patch instead of a jack-o’-lantern.
- Point each eye triangle either toward the rim or toward the mouth.
- Point both eyes the same way. Mixed points look like a mistake in counting, even when the stitch numbers were right.
Pair ten stitches on each short edge
Fold between stitch 10 and stitch 11, right side out. The ribs and the face stay outside.
| Front stitch | Meets this back stitch |
|---|---|
| 10 | 11 |
| 9 | 12 |
| 8 | 13 |
| 7 | 14 |
| 6 | 15 |
| 5 | 16 |
| 4 | 17 |
| 3 | 18 |
| 2 | 19 |
| 1 | 20 |
- Use that list on the chain edge. That is ten pairs.
- Use the same ten pairs on the last-row edge.
- Whipstitch one pair at a time.
- Catch the rim stitch at the top pair, the pair where stitch 1 meets stitch 20.
- Missing that rim stitch leaves a notch at the opening that the card snags on.
Fold right side out before the first whipstitch
- Look at the ribs while you seam. A right-side-out fold means you can see them.
- Check whether a pair is off by one stitch. The ribs will jog at the side instead of meeting.
- Do not fold wrong side out, seam, and turn. The turn has to go through an opening that is only 2.5 inches, and the ribs compress.
- This pattern does not ask for that turn. Fold right side out from the start.
A wrong-side-out seam hides the jog until you turn the pouch. The opening is only 2.5 inches, and the turn compresses the ribs. Fold with the face outside before you thread the needle.
The pattern
Step 1: the first row, both loops
Use orange.
- Slip knot on the hook. Chain 21. Do not count the loop on the hook.
- Skip the chain nearest the hook. Single crochet in the second chain from the hook.
- Single crochet in every chain after that, one stitch per chain.
- Count. You need 20.
Count 20 before you turn the first time
| Count | What happened |
|---|---|
| 19 | A chain was skipped |
| 20 | One single crochet in each chain after the skipped chain. This is row 1. |
| 21 | The chain next to the hook was used |
Row 1 is the only row worked through both loops of the chain. From row 2 on, the hook moves to the back loop and the front loop becomes the rib.
Step 2: every row after row 1, back loop only
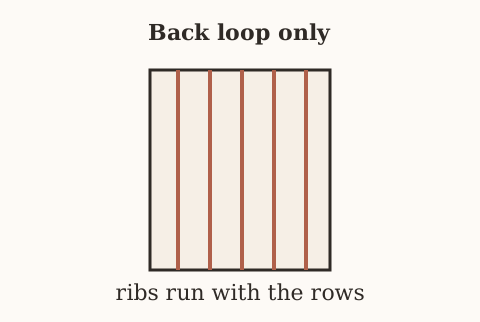
Name the back loop on the row you are about to enter
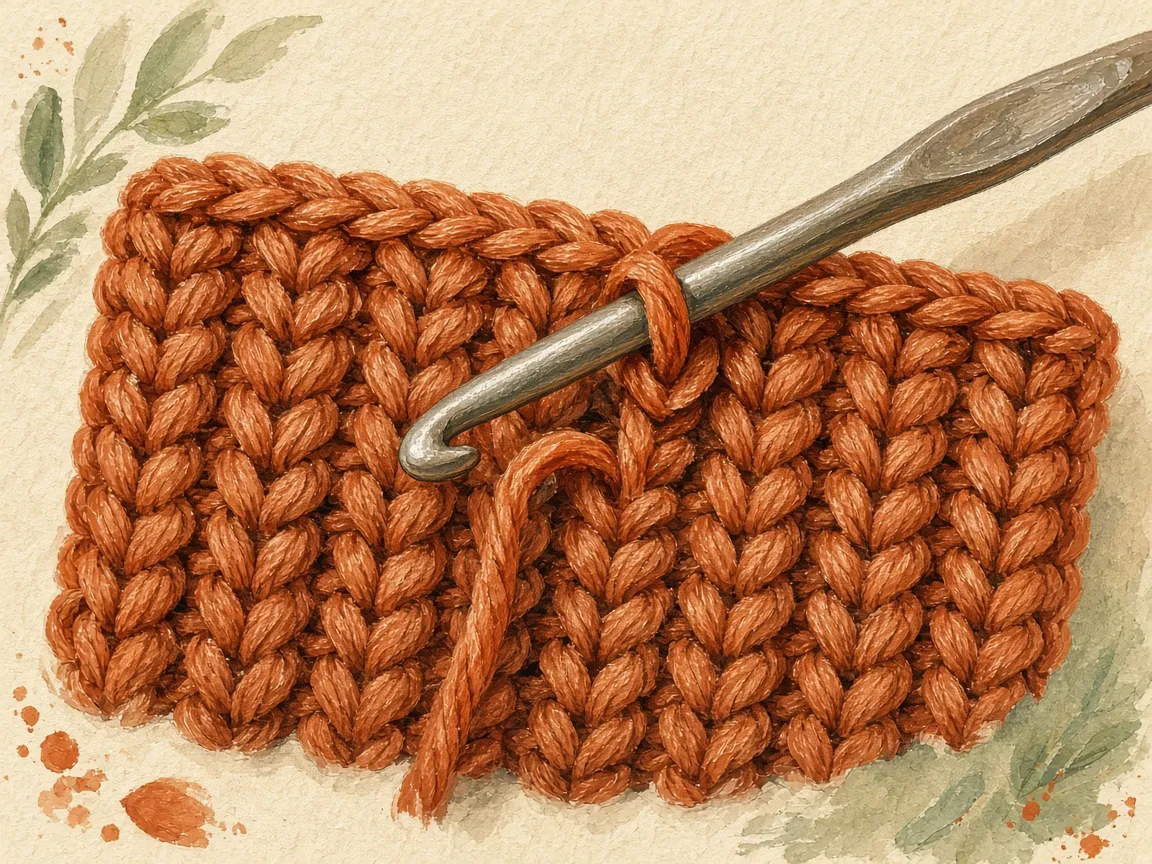
- Look at the top of a stitch. The V has two strands.
- Call the strand closer to you the front loop. Leave it sitting there.
- Call the strand farther from you the back loop.
- Put the hook under that farther strand only.
- After a turn, name the strands again. The nearer strand is a new direction.
Do this list for row 2, then again for row 3, and keep going:
- Chain 1. It does not count.
- Turn the work.
- Insert the hook under the back loop only of the first stitch. Finish a normal single crochet: yarn over, pull up a loop, yarn over, pull through both loops.
- Do that in every stitch across, including the last one.
- Count 20 before you turn again.
Stop on an even row at 4.25 inches
- Measure from the chain edge to the top of the row you just finished.
- Stop when that measurement is 4.25 inches and the row number is even.
- At the example gauge that is about 22 rows.
- Let your row gauge ask for a different even number if that is what hits 4.25 inches.
- Measure. Do not stop at 22 if the tape says something else.
- Fasten off.
Stopping at 22 while the tape is still under 4.25 inches makes a pouch narrower than the card clearance this pattern describes. Keep going to the next even row that hits the tape.
Mark the sharper side and name stitch 1
- Call the side with the raised ribs the right side.
- Put a marker on it.
- Pick one long edge to be the front rim.
- From here on, stitch 1 is that front rim, stitch 10 sits next to the fold, and stitch 20 is the back rim.
- Write those three numbers on a scrap of paper and keep it next to the work, because turned rows reverse which physical edge is on your right.
Count 20 at the end of every few rows. Back-loop rows are easy to miscount at the turn, because the first stitch’s back loop hides under the turning chain.
Step 3: one stitch per row end on each rim
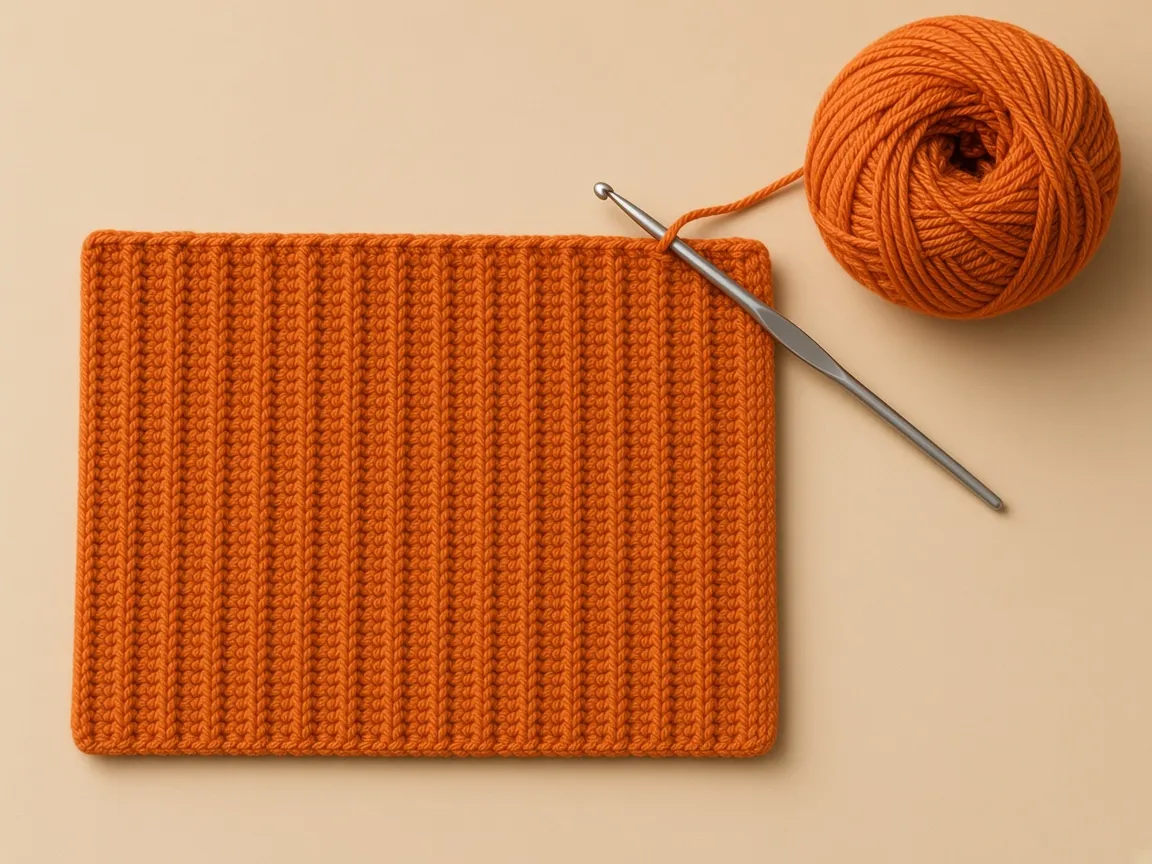
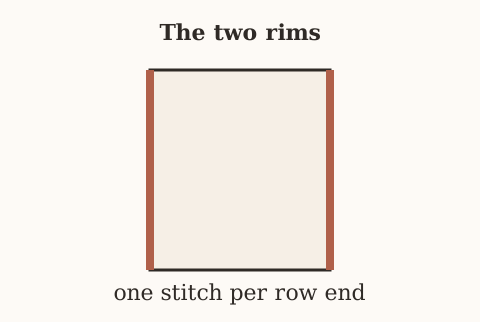
- Lay the piece right side up.
- Turn it so the long edge at stitch 20, the back rim, is at the top of the table.
- Count the row ends along that edge. One bump per finished row. Write the number down. If you worked 22 rows, you need 22.
- Join orange at the right-hand corner of that edge. Chain 1.
- Make 1 single crochet in the first row end. Move to the next bump and make 1 single crochet. Do not put two stitches in one bump.
- Continue to the last row end. The stitch count must match the row count you wrote down.
- Fasten off.
- Join orange at the other long edge, the front rim, and do the same thing: 1 single crochet in each row end, then fasten off.
If the rim ripples or puckers
| What you see | What happened |
|---|---|
| A ripple | Two stitches went into one row end |
| A pucker | A row end was skipped |
| A rim that matches the written row count | One single crochet in each bump |
- Pull that rim out.
- Match the count you wrote down before you joined the yarn.
- Do the same check on the front rim. The two rims use the same row count.
A rim that is longer than the edge will ripple again when the tab pulls on the opening. Blocking will not remove the extra stitch.
Step 4: place the face on the front half only
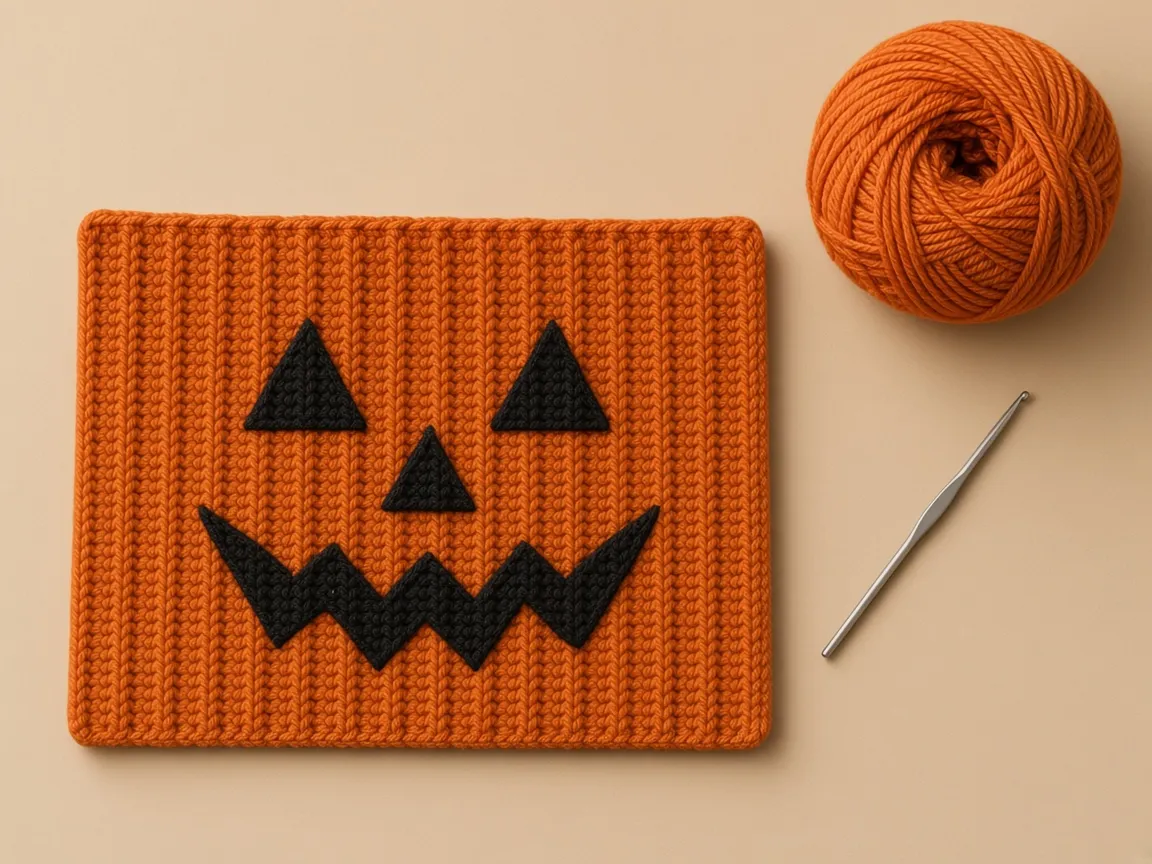
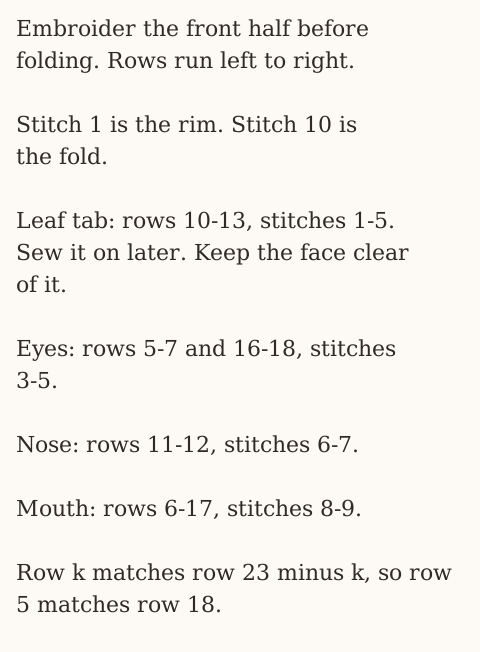
Stay on the right side, on stitches 1 through 10
- Stay on the right side.
- Give embroidery only to stitches 1 through 10.
- Call stitch 1 the front rim.
- Call stitch 10 the last stitch before the fold.
- Do not push the needle past stitch 10, or you will sew the fold shut.
Shift the nose if the piece is not 22 rows
- Find the middle row with a tape if your row count is not 22.
- Shift the nose to that middle.
- Do not copy rows 11 and 12 onto a piece that is 18 or 26 rows tall.
Leave the tab rectangle empty
- The leaf tab will cover rows 10 to 13 on stitches 1 to 5.
- Leave that rectangle empty.
- Sew the socket later into that empty fabric, not through black stitches.
Left eye
If row 1 is on your left:
- Thread black.
- On rows 5, 6, and 7, over stitches 3, 4, and 5, outline a triangle in backstitch.
- Come up a short step ahead, go down at the end of the last stitch, and repeat until the triangle is a solid line.
- Fill the inside with straight stitches sitting next to each other.
- Point the triangle toward the rim or toward the mouth.
Right eye
- Work the same triangle on rows 16, 17, and 18.
- Stay over stitches 3, 4, and 5.
- Point this triangle the same way as the left eye.
Nose
- Outline a smaller triangle on rows 11 and 12.
- Stay over stitches 6 and 7 only.
- Fill it the same way, with straight stitches sitting next to each other.
Mouth
- Backstitch from row 6 to row 17.
- Start on stitch 8.
- Every two rows, step over to stitch 9, then back to stitch 8.
- Follow a rib so the points line up.
- Stop at row 17.
On a 22-row piece, row 5 mirrors row 18 because 23 minus 5 is 18. The same mirror puts row 6 with row 17 and row 7 with row 16. Both eyes stay on stitches 3, 4, and 5.
Step 5: fold, then seam one short edge at a time
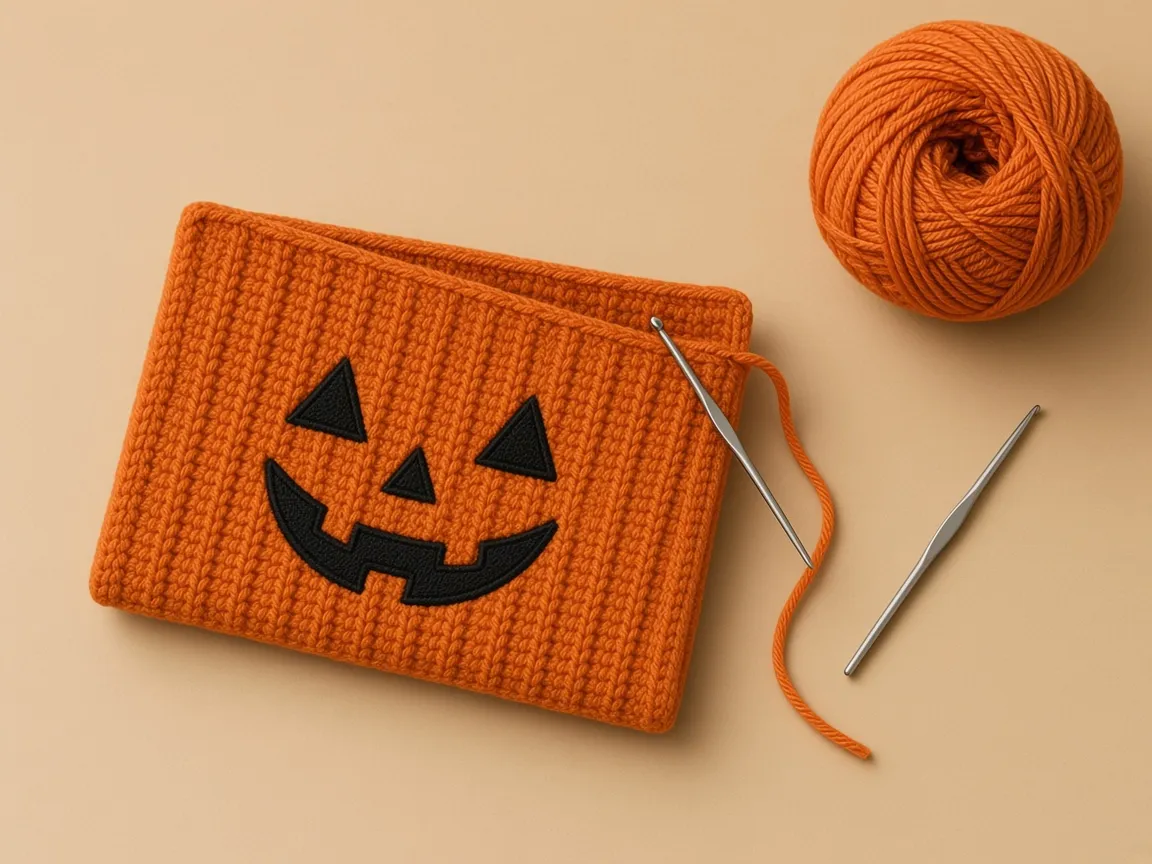
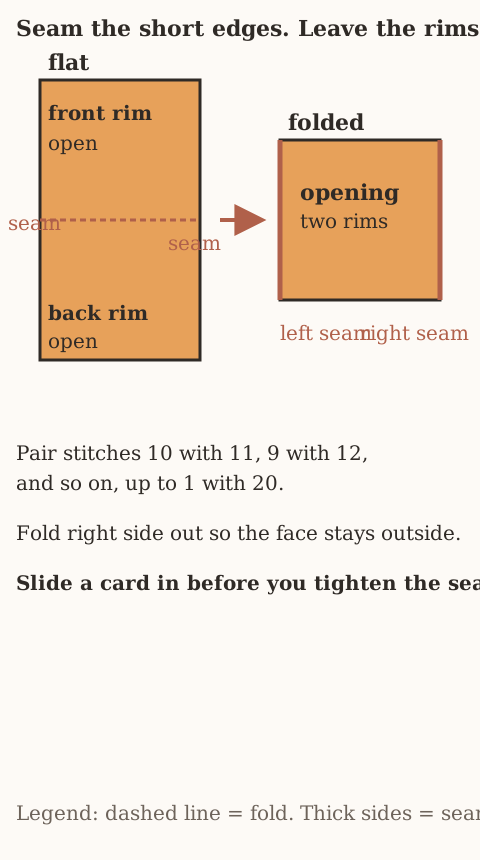
Fold between stitch 10 and stitch 11
- Fold the fabric between stitch 10 and stitch 11, right side out.
- Keep the ribs and the face on the outside.
- Let the two rims meet at the top and stay open.
Pair the chain edge, then the last-row edge
| Front stitch | Meets this back stitch |
|---|---|
| 10 | 11 |
| 9 | 12 |
| 8 | 13 |
| 7 | 14 |
| 6 | 15 |
| 5 | 16 |
| 4 | 17 |
| 3 | 18 |
| 2 | 19 |
| 1 | 20 |
- Pair the stitches on the chain edge in that order, until stitch 1 meets stitch 20.
- Thread orange on a needle.
- Whipstitch that edge through both layers, one pair at a time.
- Catch the rim stitch at the top.
- Do not pull the thread tight. A tight seam makes a card bind.
- Do the same pairs on the last-row edge, the other short side.
- Slide a card in. It should lie flat.
- If it sticks at a seam, loosen those whipstitches.
Ten pairs on each short edge is the whole seam. Adding a stitch to the 20-stitch row will not make room for a card that is binding. Loosen the thread.
Step 6: the stem, flat first, then rolled
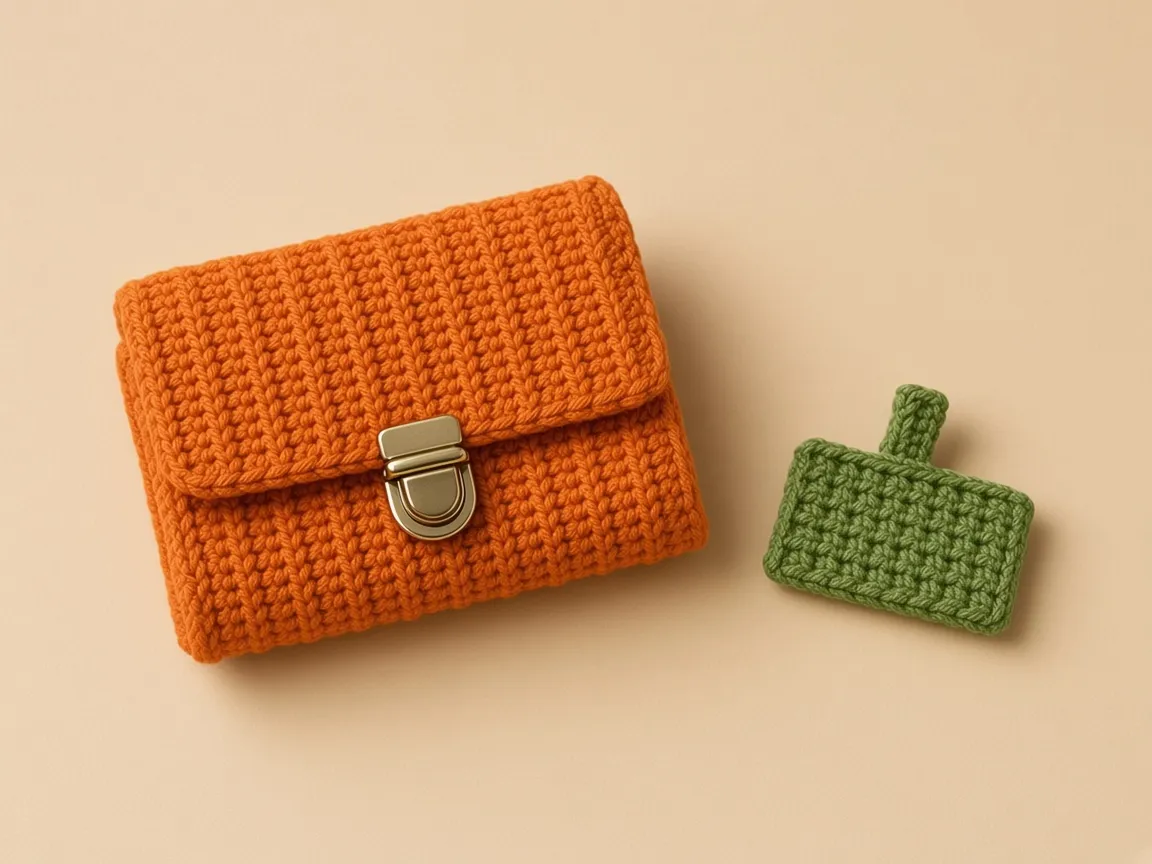
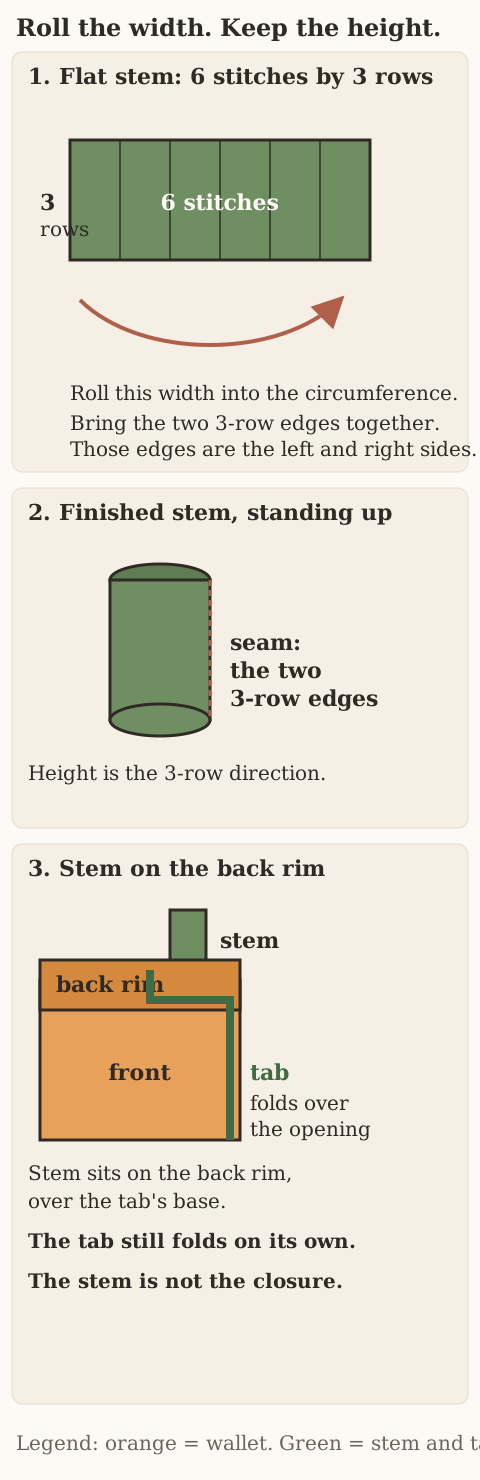
Use green.
- Chain 7. Single crochet in the second chain from the hook and in each chain across. Count 6.
- Row 2: chain 1, turn, single crochet in each of the 6 stitches.
- Row 3: the same. Count 6 again.
- Fasten off and leave a tail about 10 inches long.
- The piece is a small rectangle. The long sides are the 6-stitch edges. The short sides are the 3-row edges.
Roll the six-stitch width
- Roll the 6-stitch width so the two 3-row edges meet.
- Sew those two short edges together with the tail.
- Read the 3-row direction as the height of the little cylinder, about 0.6 inch at the example row gauge.
- Do not roll from a short end. That makes a long thin tube instead of a stem.
| Which way you roll | What becomes the height | What you get |
|---|---|---|
| The 6-stitch width, until the two 3-row edges meet | The 3-row direction, about 0.6 inch | The stem |
| From a short end | The 6-stitch direction | A long thin tube |
A roll from the short end sends the 6-stitch length up as the height. You get a thin tube near 1.2 inches tall. It no longer sits like a pumpkin stem on a 2.5 inch pouch, and the tail is in the wrong place to sew it upright.
Step 7: the leaf tab
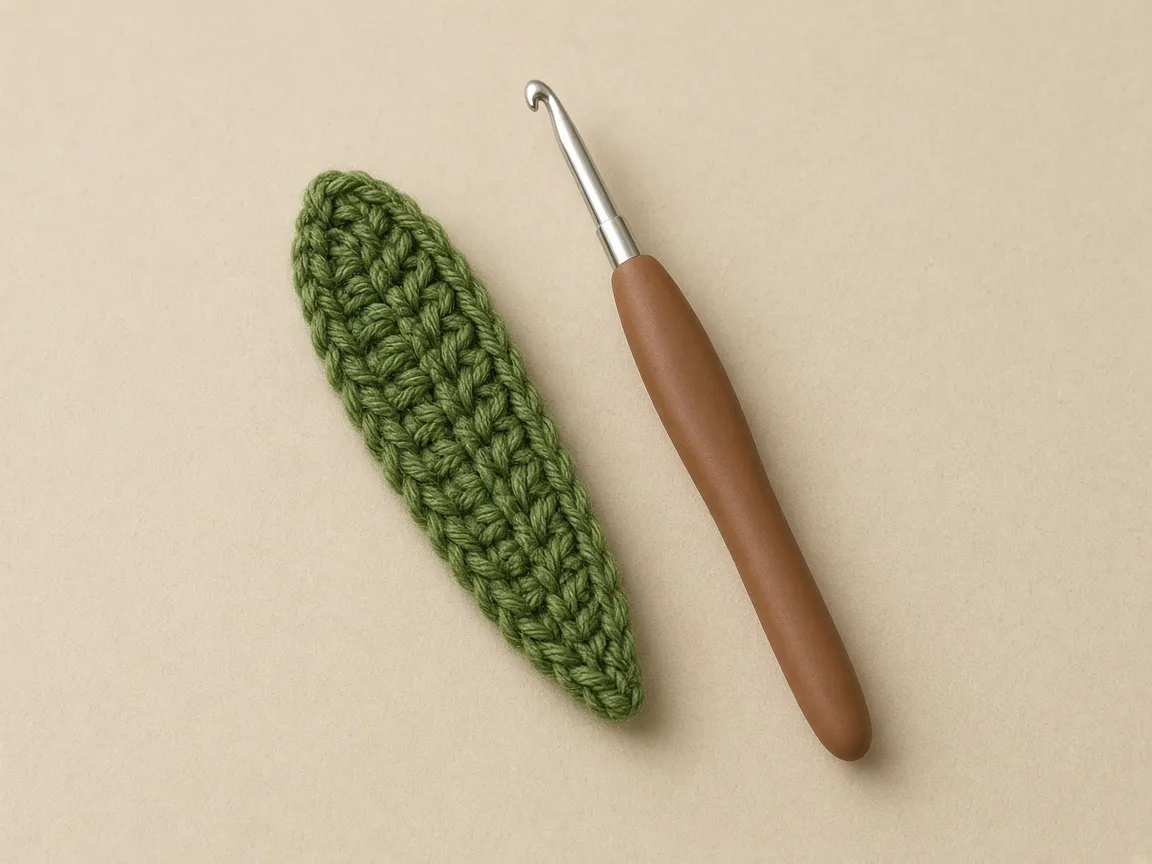
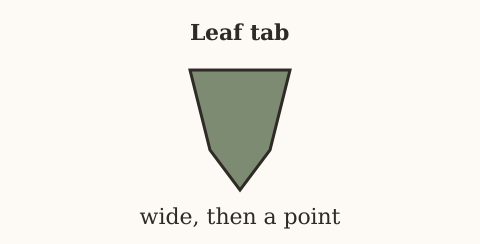
- With green, chain 4. Single crochet in the second chain from the hook and in each chain across. Count 3.
- Rows 2, 3, 4, 5, and 6: chain 1, turn, single crochet in each of the 3 stitches. Count 3 at the end of each row.
- Row 7: chain 1, turn, single crochet three together across all 3 stitches. One stitch remains.
- Fasten off with a tail about 10 inches long.
Close the three-stitch tip in one pull
- Pull up a loop in the first stitch.
- Pull up a loop in the second.
- Pull up a loop in the third.
- Yarn over, and pull through all four loops.
- Look at the tip. One stitch remains.
| Count before row 7 | What it does to the tip |
|---|---|
| 4 | The turning chain was worked as a stitch. sc3tog will not decrease cleanly, because it needs exactly three loops pulled up. |
| 3 | The row the decrease expects |
| 2 | The first or last stitch was skipped. The tab will be too narrow to cover a 3/8 inch snap. |
At the example gauge the tab is about 0.75 inch wide and 1.4 inches long. Over 7 rows, that 1.4 inch length is the strip that has to fold over both rims and down the front.
Step 8: sew the tab, the snap, then the stem
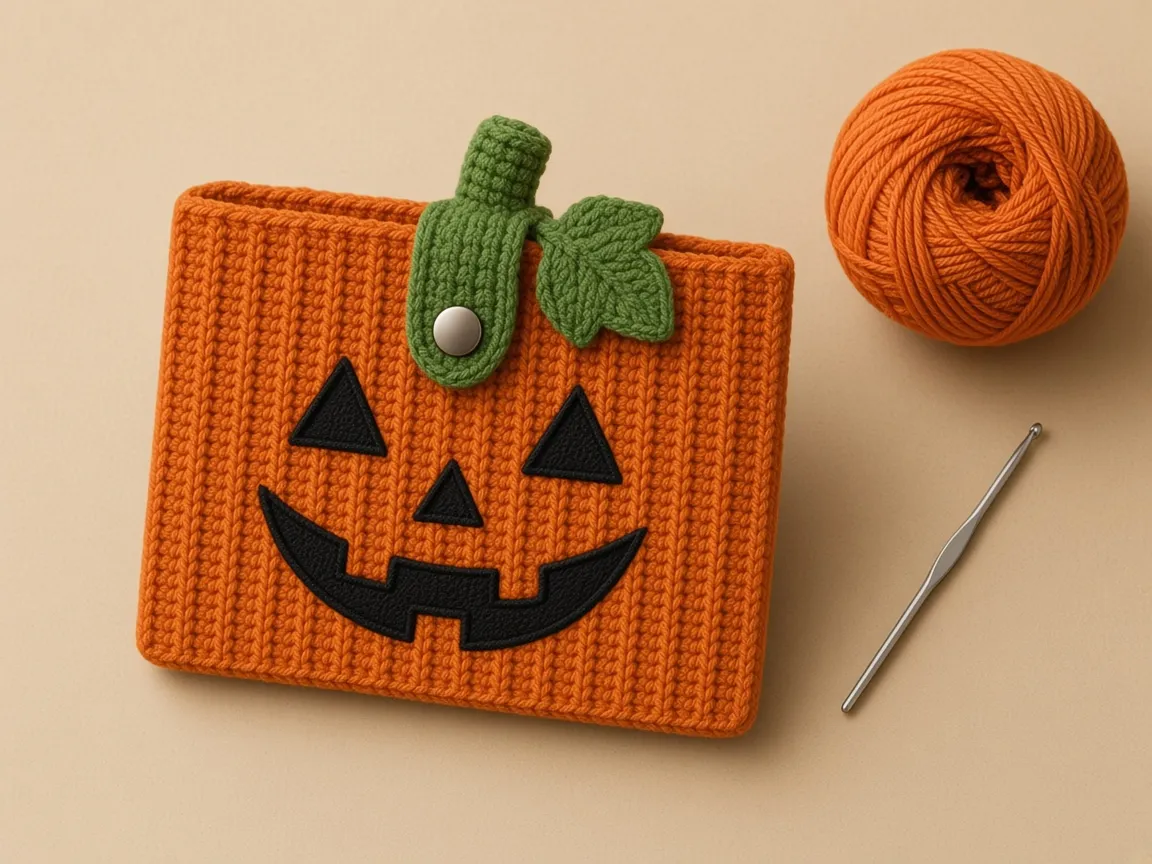
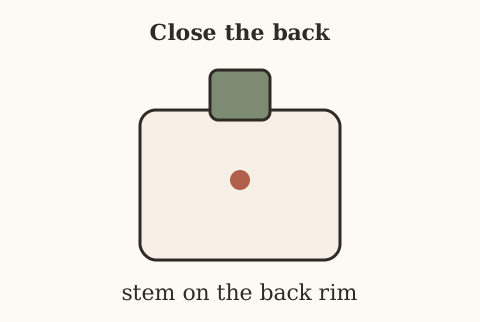
Sew the chain edge to the middle 3 rim stitches
- Find the center of the back rim: the middle 3 rim stitches.
- Sew the tab’s chain edge to the inside of that rim, over those 3 stitches.
- Use the starting end, not the pointed end. If you sew the point to the rim, the tab has nothing left to fold over the opening.
Mark the snap with a card inside
- Put a card in the pouch.
- Fold the tab over both rims and down the front.
- Mark where the tip lands.
- At the example gauge that is stitches 3 to 4 of the front, between rows 11 and 12.
- Use your mark, not the example, if the rims came out taller.
Sew the ball, then the socket, each through one layer
- Sew the ball half of the snap to the underside of the tab at row 6.
- Use doubled thread, 4 or 5 passes through each hole, through the tab only.
- Sew the socket to the front at the mark you made, through the front layer only.
- Do not sew through to the back of the pouch.
Stand the stem on the tab’s base
- Stand the stem upright on the back rim, on top of the tab’s base.
- Sew through the rim and catch the tab’s base too.
- Fold the tab. It has to swing over the opening by itself.
- Treat the stem as an anchor only. It is not the closure.
A stitch that catches the back of the pouch divides the pocket. You will feel it when the card stops halfway in. A stem stitch that grabs the middle of the tab pins the tab open or pins it shut. Catch only the base.
Weave the ends inside the pocket
- Weave the ends inside the pocket along the seams. See weaving in ends.
- Weave in ends inside the pocket along the seams. See weaving in ends.
Stem, tab, and snap, in order
The stem, the leaf, and the snap are three separate objects that meet at one spot on the back rim. The order is what keeps the stem from becoming the closure.
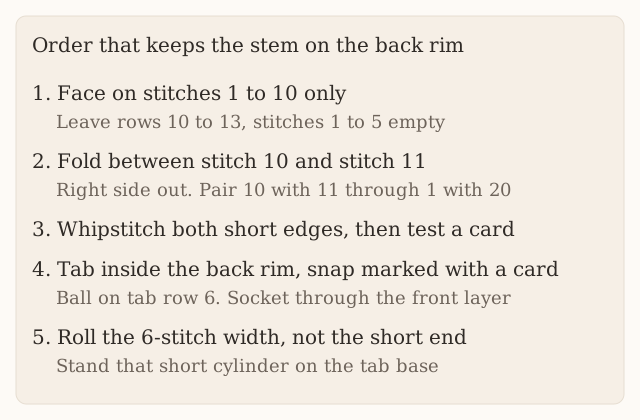
This stem is an anchor, not a gathered top
- A round pumpkin pattern often stuffs a cylinder and sews it over a gathered top. This wallet does not gather.
- Keep the stem as a 6-stitch by 3-row strip, rolled on the 6-stitch width, standing on the back rim as an anchor.
- If you roll it the other way, or sew it across the opening, you have made a different closure than the one written.
Make the rectangle, then choose which edge is the height
- Make the stem while the pouch is already seamed, so you can hold the little rectangle against the back rim and see the scale.
- Chain 7, single crochet in the second chain from the hook and in each chain across, and count 6.
- Work two more rows of 6 single crochet.
- Finish a rectangle whose long sides are the 6-stitch edges and whose short sides are the 3-row edges.
- At the example row gauge of 20 rows to 4 inches, three rows are 0.6 inch.
- Read that 0.6 inch as the height of the cylinder after you roll the 6-stitch width and sew the two 3-row edges together.
- Read the circumference of that cylinder as the 6-stitch edge, about 1.5 inches at 16 stitches to 4 inches, so the rolled stem is a short, stubby tube.
- Rolling from a short end instead stacks the three rows into the circumference and sends the 6-stitch length up as the height.
- You get a thin tube near 1.2 inches tall. It no longer sits like a pumpkin stem on a 2.5 inch pouch, and the tail is in the wrong place to sew it upright.
Leave the 10-inch tail on the stem until it is sewn. The tail is the sewing thread. Weaving it in early leaves you with a new length of yarn and a stem that can unroll at the seam.
Count 3 on the tab before the decrease
- Work the tab as a separate green strip, 3 stitches wide.
- Chain 4 gives 3 single crochet.
- Keep rows 2 through 6 plain, still 3 stitches.
- Work row 7 as single crochet three together across those 3 stitches, so the tip is one stitch.
- At the example gauge the strip is about 0.75 inch wide and, over 7 rows, about 1.4 inches long.
- Count 3 at the end of each even row.
| Row count before the tip | Usual cause | What the tab does |
|---|---|---|
| 4 | The turning chain was worked as a stitch | The tip will not decrease cleanly, because sc3tog needs exactly three loops pulled up |
| 3 | The row the pattern asks for | The tip closes to one stitch |
| 2 | The first or last stitch was skipped | The tab will be too narrow to cover a 3/8 inch snap |
Sew the chain edge, centered on the rim you actually made
- Sew the tab’s chain edge to the inside of the back rim, over the middle 3 rim stitches.
- Use the chain edge, the starting end, not the pointed end.
- If you sew the point to the rim, the tab has nothing left to fold over the opening.
- Find the middle 3 rim stitches as the center of whatever rim count you wrote down.
- Fold that rim in half and use the stitch at the fold plus one stitch on each side.
- Do not copy a row number from the 22-row example onto a rim that came out even but not 22.
Mark the snap on the empty rectangle
- Put a card in before you mark the snap.
- Fold the tab over both rims and down the front.
- Expect the tip to land about 3 to 4 stitches below the front rim.
- At the example gauge that landing is stitches 3 to 4 of the front, between rows 11 and 12.
- That spot sits inside the empty rectangle you left in the embroidery, rows 10 to 13 on stitches 1 to 5.
- If your rims are taller than the example and the tip stops on the rim itself, add a plain row of 3 single crochet to the tab before row 7, then work the decrease.
- Do not add the row after the decrease.
A row after the point makes a second blob past the tip, and the snap at row 6 is no longer near the end of the tab.
Sew one layer at a time, then the stem on the base
- Put the ball half of the snap on the underside of the tab at row 6, through the tab only, with doubled thread and 4 or 5 passes through each hole.
- Put the socket on the front at the mark, through the front layer only.
- A stitch that catches the back of the pouch divides the pocket. You will feel it when the card stops halfway in.
- Sew the stem after the snap, upright on the back rim, through the rim and through the tab’s base.
- Fold the tab once that stitch is in. The tab has to swing over the opening by itself.
- If the stem stitch grabbed the middle of the tab, the tab is pinned open or pinned shut.
- Catch only the base, the chain-edge rows you already sewed to the rim.
Check the opening in this order
- The two rims meet and are not sewn to each other.
- The face is entirely on the front half.
- The empty rectangle is where the snap socket sits.
- The side seams are ten pairs each, with the rim stitch caught at the top.
- The stem is a short cylinder whose height is the 3-row direction.
- The tab crosses the opening and snaps on the front.
- A card slides in without catching embroidery or a tight seam.
- Any one of those checks failing means that step is redone.
- Do not compensate by moving the stem onto the front to hold the cards in. The stem is an anchor on the back rim.
Moving the stem onto the front makes it the closure. The written closure is the tab and the snap. The stem stays on the back rim, on the tab’s base.
Weigh the back-loop swatch, then the scraps
- Keep the yarn estimate as the one in the materials list.
- The pouch is about 24 square inches, roughly 1.5 times a 4 inch swatch, plus 20 percent.
- Weigh the back-loop swatch, because a plain single-crochet swatch does not use the same amount of yarn per inch as ribbed rows.
- There is no weighed finished wallet to quote.
- Treat orange for the body, black for the face, and green for the stem and tab as scrap quantities beyond that estimate.
- The green pieces are small: a 6 by 3 rectangle and a 3 by 7 strip.
- If you run out of green mid-tab, a second green of the same weight is fine.
- A change of weight changes the 0.75 inch width and the snap will not sit flat.
If the ribs vanish, look at the fiber
- Cotton shows the ribs because it has less halo than a fuzzy acrylic.
- The same stitches in a brushed yarn still count as ribs, but the abandoned front loops disappear into the fuzz and the jack-o’-lantern reads as a plain pouch with a stem.
- That is a yarn choice, not a counting error.
- If the ribs vanish, look at the fiber before you rip the fabric out.
The stitch count is still 20, and the row stop is still 4.25 inches on an even row. Fuzzy yarn hides the front loops. It does not change those counts.
Shape the ribs while the fabric is damp
- When you wash it, the ribs can lean.
- Shape them with your fingers while the fabric is damp, pushing each raised line back to vertical, from the front rim toward the fold.
- Do not iron the ribs flat.
- Test black and green on a white paper towel before the orange gets wet.
- A black that runs will outline the face in a gray halo that backstitch cannot undo.
Make it yours
- Two oranges. Change color every 2 rows on the last yarn over, as in changing yarn color. Carry the unused color up the edge, under the rim.
- No ribs. Work both loops. Row gauge changes, so still work to 4.25 inches.
- A friendly face. Round eyes and a curved smile instead of triangles.
- A white or green pumpkin. Same counts, different yarn.
- Lining. Cut fabric 4.25 by 5 inches plus a 1/4 inch fold all around, sew it to the wrong side before folding, and fold the two together.
Label the two rims before embroidery
Set stitch 1 from the front rim, not from the hook
- Lay the twenty-stitch rows horizontally and the row-count direction vertically.
- Choose one row-end edge as the front rim.
- Label the stitch positions from that edge as 1–20 on every row, regardless of the direction in which that row was worked.
- Keep the fold between positions 10 and 11.
- Let both row-end edges become the opening.
- Pair positions 10/11, 9/12, continuing to 1/20 when seaming the foundation and last-row edges.
- Work each rim into exactly one row end per completed row.
- Use that actual rim count to center the tab.
- If it is not twenty-two rows, recenter the face from the measured midpoint rather than copying rows 11 and 12.
The label stays on the edge you chose. A later row worked from the other direction does not rename stitch 1.
Common mistakes and fixes
The ribs show on both sides. That is normal in turned BLO rows. If the texture changes partway through, check that every row after row 1 was worked into the back loop only.
The piece slants. The first or last stitch of rows got skipped. Count 20.
The rims ripple. More than one sc went into some row ends. One per row end.
The face is on the wrong half. Stitches were counted from the wrong edge. Stitch 1 is at the front rim.
The tab will not reach. The tab tip should land 3 to 4 stitches below the front rim. Add a row to the tab before row 7 if your rims came out tall.
Cards fall out. Normal if the tab is open. The pouch is a card sleeve, not a coin purse.
A slanted piece is a 19 or a 21 hiding in the rows
- Count the row that started the slant.
- A 19 means the first or last stitch was skipped.
- A 21 means the turning chain was worked.
- Pull back to the last row that still counts 20. Do not add a stitch at the end of a later row to square the edge.
A short tab gets a row before the decrease
- Fold the tab over both rims with a card inside.
- The tip should land 3 to 4 stitches below the front rim.
- If it stops on the rim, add one plain row of 3 single crochet before row 7.
- Then work the single crochet three together.
- Do not add that row after the point.
Care
- Hand wash cool.
- Dry flat.
- Shape the ribs with your fingers while damp, pushing each raised line back to vertical from the front rim toward the fold.
- Test the black and green for color running on a white paper towel before the first wash.
- Do not iron the ribs flat. A black that runs will outline the face in a gray halo that backstitch cannot undo.
Frequently asked
Will a bank card fit?
On paper, yes: about 3.9 by 2.4 inches inside against a 3.37 by 2.125 inch card, so test with a real card before you fold.
- Read the 3.9 inch width as the 4.25 inch piece after the two side seams.
- Read the 2.4 inch depth as the front half, stitches 1 through 10, after the opening is formed.
- Both numbers come from the example gauge of 16 single crochet and 20 rows to 4 inches.
- A back-loop swatch that does not match that gauge changes the fit even when you still stop at 4.25 inches wide, because the height is set by the 20 stitches, not by the tape.
- If those 20 stitches measure more than 5 inches, the pouch is taller than 2.5 inches folded and the card has extra room.
- If they measure less than 5 inches, redo the gauge with a larger hook before you embroider.
- Do not drop to 18 stitches to shrink a tall piece. That is a different pattern.
Extra rows change the width. They do not change the height. The height is the 20 stitches. A larger hook is the change when those 20 stitches measure less than 5 inches.
Why sideways?
- Sideways back-loop rows make ribs that run up and down, like a pumpkin.
- Worked bottom to top, the ribs would run sideways.
- The fold has to cross the ribs, between stitch 10 and stitch 11, so the lines on the front half continue the lines on the back half.
- A bottom-to-top rectangle would fold across the rows instead, and the face grid in this pattern, which counts rows from side to side and stitches from the rim down, would no longer land on the front.
Can a beginner make this?
Yes. It is single crochet, a fold, and two short seams. The embroidery is the slowest part.
- The skill that usually needs a second look is the back loop after a turn, because the nearer strand changes hands.
- The abbreviations chart is enough vocabulary: chain, single crochet, back loop only, and single crochet three together for the tab tip.
- Count 20 at the end of the row before you turn again. That one count prevents most of the slanted pieces.
Do I need the snap?
Not strictly.
- Without it, the tab lies over the opening and cards stay in if the pouch stays upright.
- Sew the tab and the stem in the same places either way.
- The stem still does not cross the opening.
- If you skip the snap, the empty rectangle on rows 10 to 13 can stay empty. It marks where the socket would have gone.
Can I sell the finished pouches?
Yes. Link here rather than reposting the pattern.
How many ribs should I see?
- About one rib for every two rows.
- A piece that stopped at 22 rows shows about 11 ribs from the front rim toward the back rim.
- Count ribs only as a check.
- The row tally and the 4.25 inch tape are the rules you stop by.
- A rib count of 11 on a piece that measures 3.5 inches means the rows are tight, not that you should add ribs with extra chains.
Eleven ribs support a 22-row claim. They do not replace the tape. If the piece is 3.5 inches wide, the rows are tight and you keep going to the even row that measures 4.25 inches.
Which edge is stitch 1 after I turn?
- Stitch 1 is the edge you chose as the front rim, on every row, including rows you worked from the other direction.
- Pin that edge before row 3 so a turn cannot rename it.
- The face, the empty tab rectangle, and the fold between stitch 10 and stitch 11 all use that same edge.
- The back rim is stitch 20 on that same labeling, and it is where the tab’s chain edge and the stem are sewn.
What if the stem looks like a pencil?
- It was rolled from a short end.
- Unpick the seam, flatten the 6-stitch by 3-row rectangle, and roll the 6-stitch width until the two 3-row edges meet.
- The height of the cylinder should be the 3-row direction, about 0.6 inch at the example gauge, not the 6-stitch direction.
Can the face use a different stitch count?
- The triangles and the mouth use the stitches already written for a 22-row piece: eyes on stitches 3 to 5, nose on stitches 6 and 7, mouth on stitches 8 and 9, and nothing past stitch 10.
- A different row count moves those shapes so the nose sits on the measured middle.
- It does not move them onto the back half, and it does not fill the tab rectangle on stitches 1 to 5.
More Halloween wallets
- Black cat crochet wallet: a seamless tube with ears
- Ghost crochet wallet: shaped panels and a scalloped hem
- Witch hat crochet wallet: two pockets and a buttonhole
- Spiderweb crochet wallet: an embroidered web on a pointed flap
For round pumpkins, see how to crochet a pumpkin. For a zipped pumpkin pouch, see the pumpkin zipper pouch.
The pumpkin depends on two habits: back loops on every row, and one single crochet per row end on the rims. Work to 4.25 inches, embroider the face before you fold, and let the stem anchor the tab.
- halloween
- wallet
- pumpkin
- jack-o-lantern
- card holder
- beginner
- free pattern
Read this next
- How to Crochet a Christmas Tree Garlic Holder A small mesh garlic holder with scalloped branches, a gold star, and an open top. US terms. Sizes are design targets.
- How to Crochet a Christmas Tree Plastic Bag Holder Crochet a hollow Christmas tree that holds grocery bags. Bags go in the open top and out the brown trunk. US terms. Sizes come from gauge.
- How to Crochet a Compact No-Slip Kitchen Towel Holder A compact cotton crochet towel holder with two wooden rings, one above the other. Assembly counts are still being checked. US terms.