

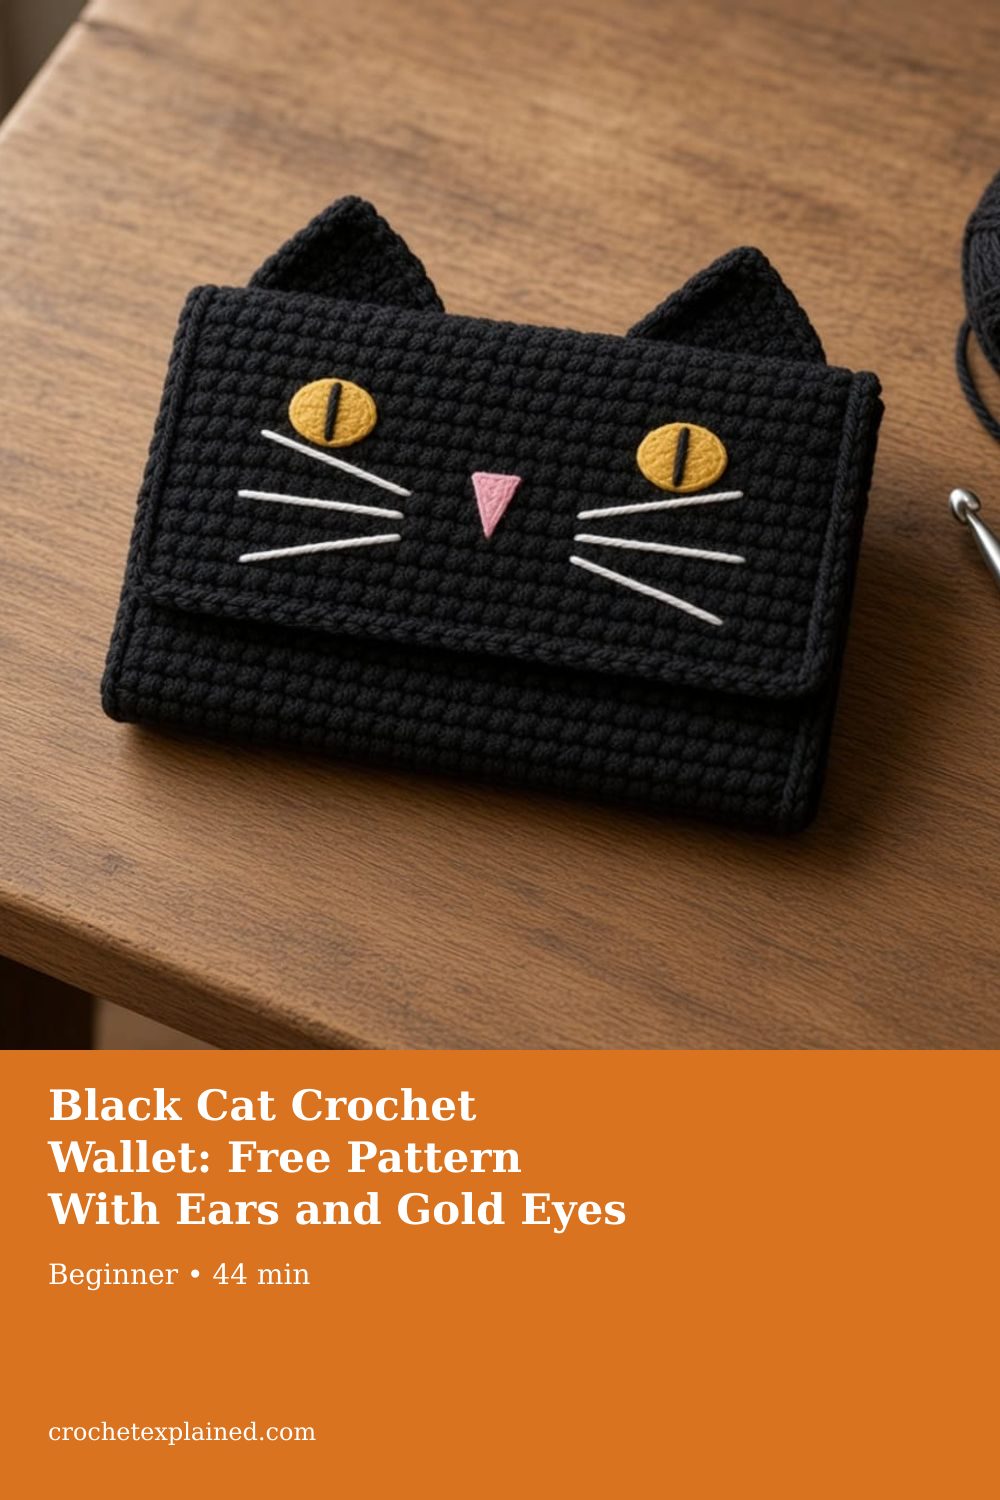
Black Cat Crochet Wallet: Free Pattern With Ears and Gold Eyes
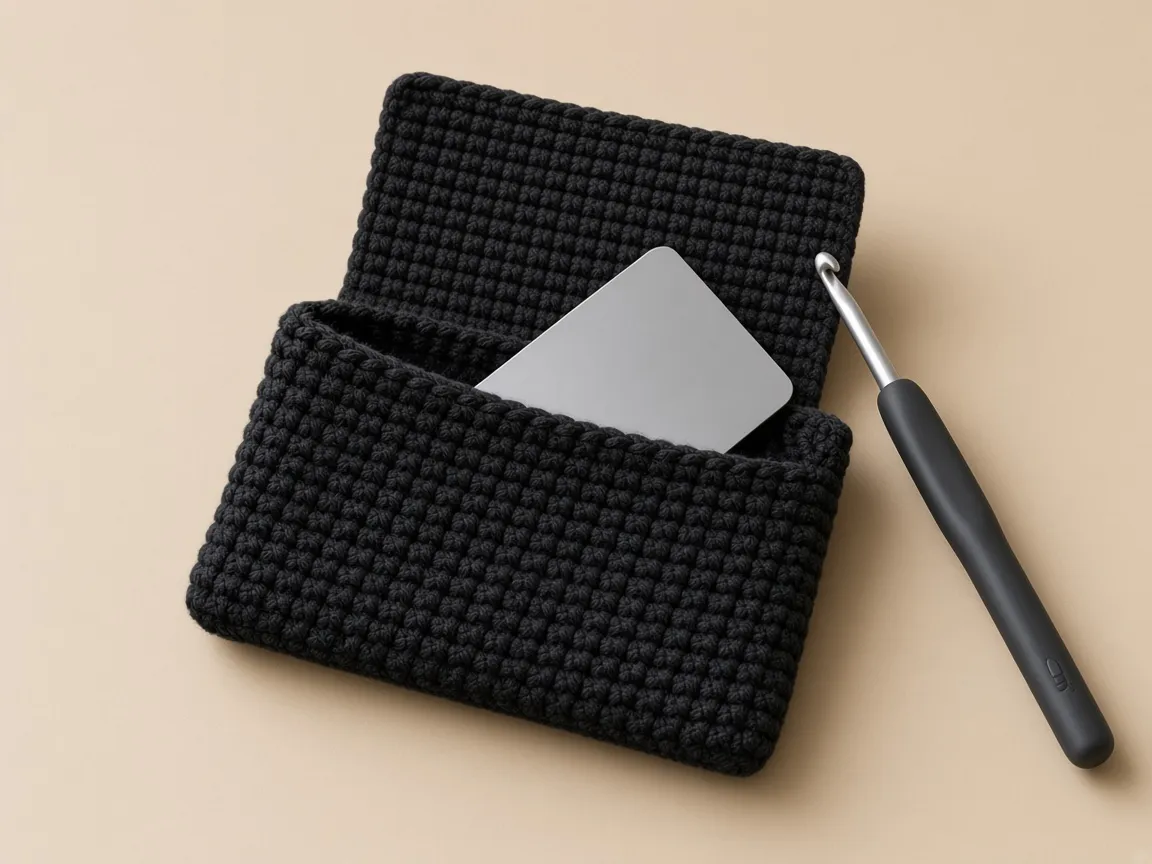
Chain 17 and work 16 single crochet along each side of the chain for a 32-stitch round. Twelve joined rounds make a seamless pocket about 4 inches wide. Work a 9-row flap over the back half, sew two 3-row ear triangles on the fold, embroider the face, and close with a snap.
A black cat card wallet worked as a seamless tube, with a snap flap, standing ears, and embroidered gold eyes. Full rounds and counts, US terms.
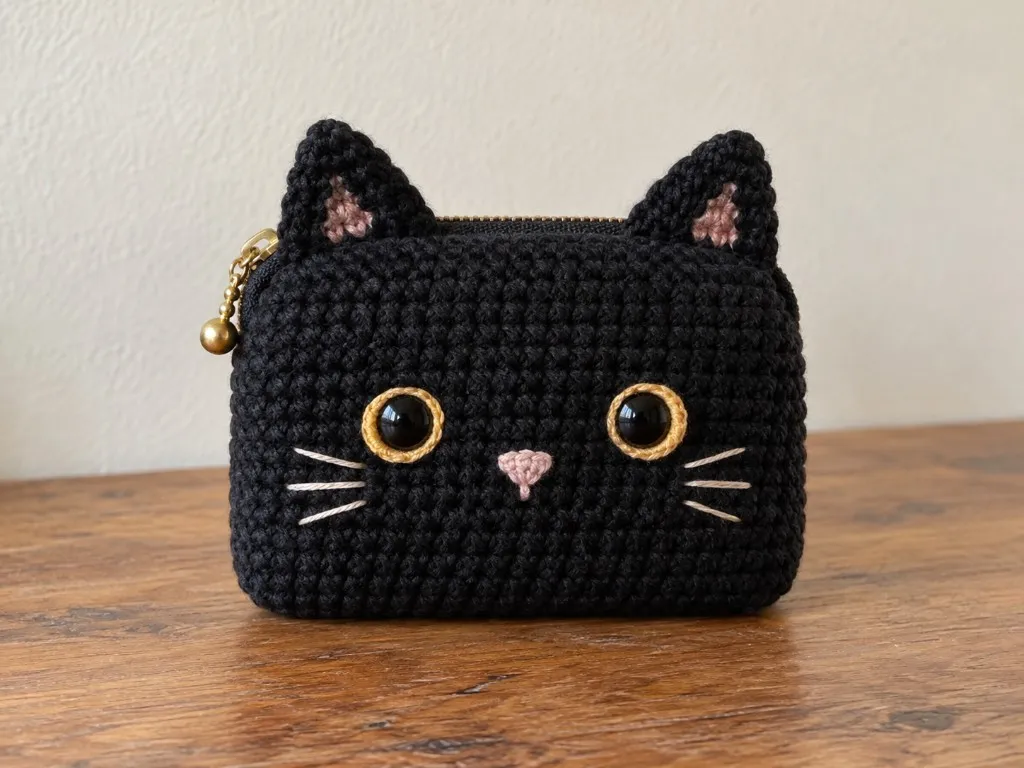
At a glance
- Skill level
- beginner
- Time
- 12 rounds, a 9-row flap, two small ears, embroidery
- Finished size
- About 4.0 x 2.4 in, ears extra. Inside about 3.8 x 2.3 in on paper.
- Yarn weight
- Worsted (CYC 4) in black, scraps of gold, pink, white
- Hook size
- US G/6 (4.0 mm), or the size that gives the gauge
- Yardage
- About 27 sq in of fabric, 1.7 times a 4 in swatch. Weigh to estimate.
On this page
- How the 32 stitches sit
- What firm fabric looks like before you start the tube
- How to see the stitch you are about to count
- Materials
- Abbreviations and stitches
- Size and gauge
- The pattern
- Make it yours
- Check the flap and closures before sewing
- Common mistakes and fixes
- Care
- Frequently asked
- More Halloween wallets
Track your progress
- Go to Where the join is allowed to sit
- Go to Step 1: stitches on both sides of one chain
- Go to Step 2: twelve rounds, counted every time
- Go to Step 3: mark 16 stitches for the flap
- Go to Step 4: two ears, three rows each
- Go to Step 5: close the flap, then embroider
- Go to Step 6: ears on the fold
- Go to Step 7: the snap
- Go to Step 8: tails
- Go to What if the join will not sit on a side fold?
Ticks are saved on this device only. Counting rows? Keep the stitch counter open in another tab.
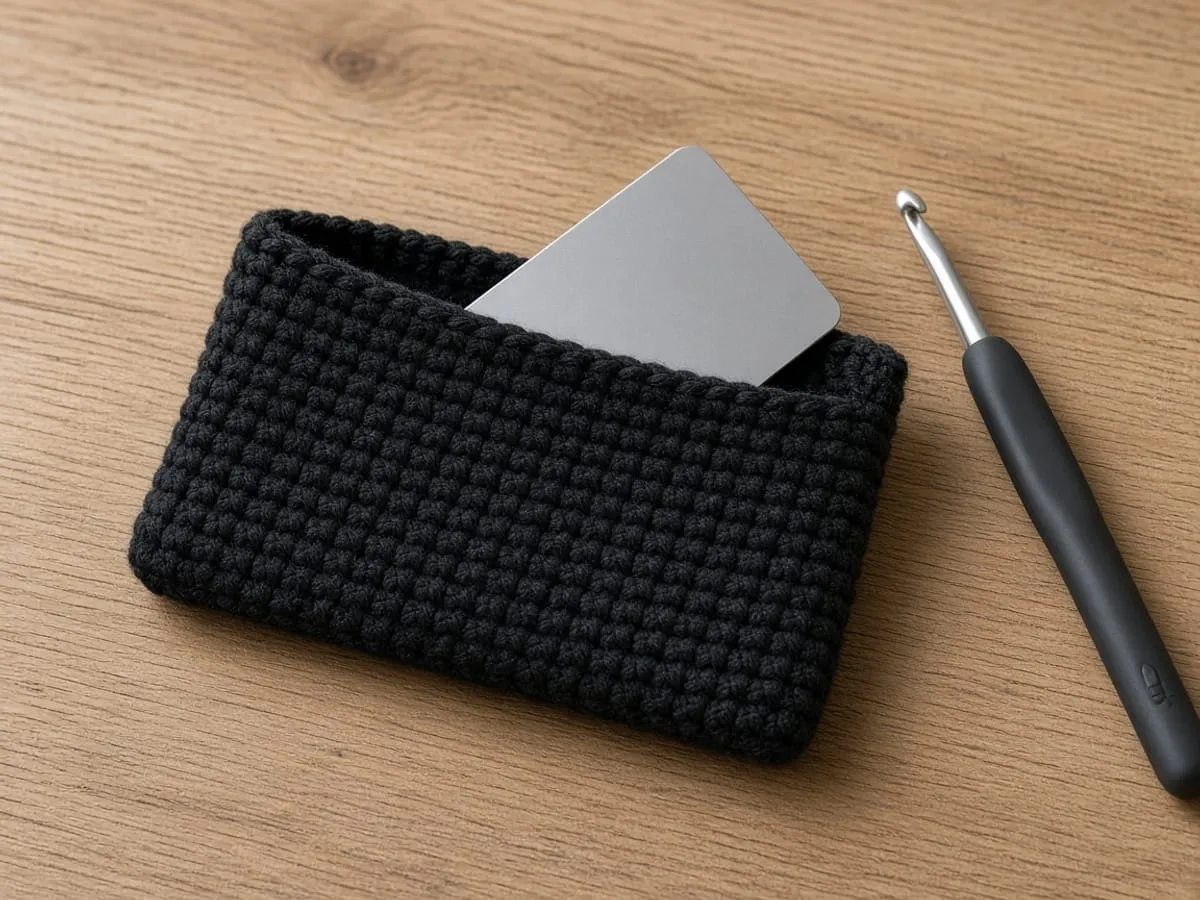
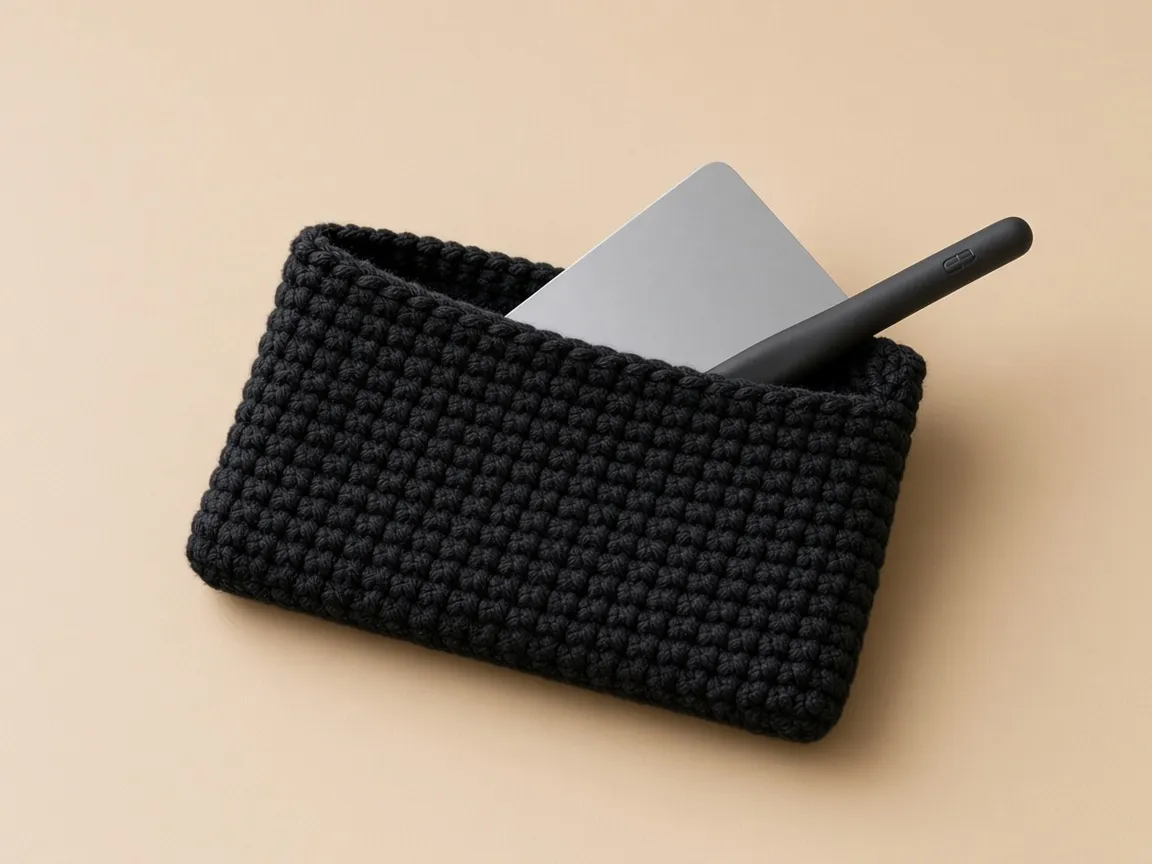
US crochet terms throughout. Sizes here are worked out from gauge rather than from a finished sample, so swatch and measure as you go, and the pictures of finished pieces are illustrations. Made one? Send a photo through the contact page.
A black cat is the Halloween wallet people recognize from across the room, and this one is built so the pocket has no side seams at all. You work around both sides of a starting chain, which turns the chain into the bottom fold. Then a flap grows from the back half, two small triangles become ears on the fold, and a snap keeps it shut.
This page is one of five patterns in the Halloween crochet wallet collection. The skill it teaches is working into both sides of a foundation chain, which is also how many pencil cases and amigurumi bodies start. Joined rounds, as opposed to a continuous spiral, are covered in crochet in the round. The chain 1 that starts each round and each flap row is the same non-stitch explained in turning chains.
The finished size and card fit here are worked out from the example gauge rather than measured from a finished wallet, so make a quick gauge swatch and slip a real bank card in at round 10 to check the fit. A standard US bank card is 3.370 by 2.125 inches, the ISO/IEC 7810 ID-1 size.
How the 32 stitches sit
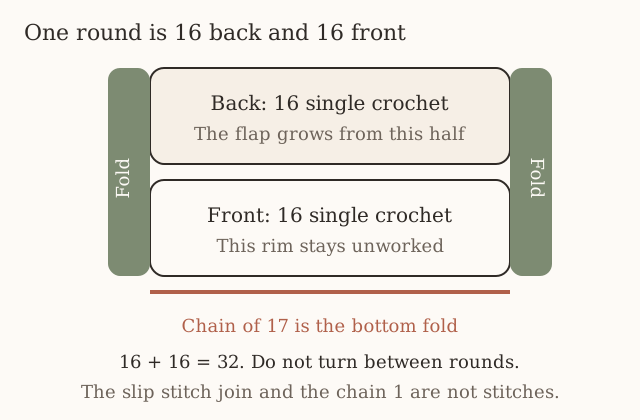
The pocket is one piece of fabric. There is no side seam to sew. The side edges are folds in a tube.
What round 1 has to look like
- Open round 1 with your fingers, or hold it up to a window.
- Look for two straight runs and two tight bends. That is a narrow racetrack, not a strip and not a twist.
- Name the parts before you count them. The straight runs are the future front and back. The bends are the future side folds. The chain hides along one long side only.
A flat strip with a chain along one long edge means you never rotated to the underside. A twisted loop means the chain flipped halfway along. Pull either one out and start the round again.
Count the two runs, then add
- Count the top run. It is the 16 single crochet worked into the chain.
- Count the underside run. It is the 16 single crochet worked into the free loops.
- Add them. 16 + 16 = 32.
- Join with a slip stitch into the first single crochet. Leave that slip stitch out of the count.
A count of 33 usually means the slip stitch was included. A count of 31 usually means a bend was skipped. The chain 1 that starts the next round is not a stitch either.
Where the join is allowed to sit
- Start the join at one end of the chain. That end wants to become a side fold.
- Let a slight lean happen as the tube grows. A drift of a stitch or two toward the front or the back is still a 32-stitch round.
- When you mark the flap later, mark the real folds of the flattened tube. Do not follow a seam that has wandered onto the back.
Do not turn until the flap
- Work every round after round 1 as a copy of the round below it.
- Do not turn. The right side stays on the outside, and the single-crochet ridges stack in the same direction.
- Turn for the first time when the flap begins. The flap is worked in rows.
Turning the tube would put a ridge on the outside of every other round and would swap which edge the hook approaches. The pattern does not do that.
What the example gauge means in inches
These inches are the gauge applied to the stitch counts. They were not measured on a sewn wallet. Your swatch decides whether a 3.370 by 2.125 inch card slides in.
| What you are measuring | Count at the example gauge | Figured size |
|---|---|---|
| One face, outside width | 16 stitches at 4 sc per inch | 4.0 in |
| Inside width, after the side folds take a little | same 16, pressed flat | about 3.8 in |
| Outside height | 12 rounds at 5 rounds per inch | 2.4 in |
| Inside depth | same 12 rounds | about 2.3 in |
What firm fabric looks like before you start the tube
Read the swatch before you read the embroidery
- Make the gauge swatch first. The wallet fails in the swatch, not at the face.
- Pinch the fabric. It should hold a flat shape and still let a card enter.
- Reject both extremes, then change the hook. Do not pull the stitches taller to split the difference.
| What you see | What it does to the wallet | What to change |
|---|---|---|
| Soft, loose single crochet | The opening gapes, the flap misses the snap, and the three-row ears wilt | A smaller hook |
| Tight single crochet with no give | The card will not enter at round 10, and the flap buckles over the rim | A larger hook |
| 16 stitches already under 3.75 in | The card is tight at the stated counts | A larger hook, or the chain-18 option in the gauge warning |
Taller stitches change the round gauge. The height math on this page is 20 rounds to 4 inches. Looser rounds make 12 rounds taller than 2.4 inches, and the 9-row flap hangs farther than the 1.6 inches the pattern describes.
Yarn, snap, and how much color you actually need
- Prefer cotton or a cotton blend if you have it. The stitches grip, so the tube stays where you press it.
- Use acrylic if that is the yarn in your hand, as long as the gauge is right. It is smoother and a little more elastic. It curls more at a decrease. The stitch counts do not change.
- Use a 3/8 inch sew-on snap. A larger snap covers more of row 8 than the two center stitches, and the sewing spills into the decreased ends.
- Skip a prong snap. This pattern sews through stitches that already exist, and it sews the front wall only. A prong that passes into the pocket is the wrong hardware.
- Sew with black thread. Light thread draws a dotted line around the socket.
Weigh the yarn from the swatch. The wallet is about 27 square inches of fabric, about 1.7 times a 4 by 4 inch swatch, plus 20 percent for seams and tails. That estimate is arithmetic from the gauge. Gold, pink, and white are straight stitches through the flap only. A yard or two of each is enough.
How to see the stitch you are about to count
The V you work into
- Find the two loops on top of the stitch. The front loop is closer to you. The back loop is farther away.
- Insert under both loops. This pattern never says to use one loop only.
- Stop if a ridge appears along the row. You have started catching only the back loop. The gauge opens up, and 16 stitches measure wider than the swatch.
The bump on the underside of the chain
- Look at the top of the chain. Each chain looks like a V or a braid.
- Rotate. On the underside, one free loop sits behind that braid. That loop is the bump.
- Work one single crochet into each bump for the second half of round 1. You need 16 bumps.
- Roll the chain back if a bump is missing. You are looking at the top braid again.
A two-stitch decrease
Used on flap rows 8 and 9, and on ear row 2.
- Pull up a loop in the first stitch.
- Pull up a loop in the next stitch. Three loops are on the hook: those two, plus the loop that was already there.
- Yarn over and pull through all three. One stitch remains.
- Look at the lean. It tips a little toward the second stitch. That lean is the step at the end of the row.
Worked into one stitch twice, the count does not drop and the edge stays square. Worked over three stitches by mistake, that end drops two stitches and the corner pulls in harder than the pattern.
The three-stitch tip of the ear
The abbreviations table calls this sc3tog. It is the last row of each ear only.
- Pull up a loop in each of the three stitches of row 2. Four loops sit on the hook.
- Yarn over once and pull through all four.
- Check the point. It should sit over the middle of the three stitches.
Closing the loops in pairs, the way some cluster stitches are closed, makes a bulkier knot and the point tilts. Increases and decreases shows the loop count if the four-loop tip is new. The wallet counts do not change if you already know the move.
Slip stitch versus single crochet
- Look at the height. A slip stitch has almost no post. It is a flat link from the last stitch back to the first.
- A single crochet has a post about as tall as the stitches beside it.
- Skip the flat link when you count a round.
- Chain 1 to step up to the right height. The first real single crochet goes into the same stitch the slip stitch entered.
If that first single crochet goes into the next stitch, the join stitch stays empty. The round becomes 31. You will see a small gap in the same place every round, and it stair-steps if you keep skipping.
Materials
- Worsted weight (CYC 4) yarn, black. Cotton or a cotton blend holds a pocket’s shape better than soft acrylic, but acrylic works. See the yarn weight chart.
- Scraps of gold or yellow for the eyes, pink for the nose, and white or light gray for the whiskers. Worsted or a thinner yarn both work for embroidery.
- US G/6 (4.0 mm) hook, or whichever size gives the gauge below. That is smaller than most worsted ball bands suggest, on purpose. A wallet needs firm fabric. Hook size chart.
- One sew-on snap, 3/8 in (10 mm), and black sewing thread.
- Tapestry needle, scissors, stitch marker, and one card to test the fit.
How much yarn. Not weighed from a made wallet. The wallet is about 27 square inches of fabric. Make your gauge swatch, measure it, and weigh it. A 4 by 4 inch swatch is 16 square inches, so the wallet uses about 1.7 times its weight. Add 20 percent for seams and tails. The scrap colors use a yard or two each.
Abbreviations and stitches
US terms. US single crochet is UK double crochet. Full list in the abbreviations chart.
| Abbreviation | Meaning |
|---|---|
| ch | chain |
| sc | single crochet |
| sl st | slip stitch |
| sc2tog | single crochet two together: pull up a loop in each of 2 stitches, yarn over, pull through all 3 loops. One stitch fewer. |
| sc3tog | single crochet three together: the same with 3 stitches. Two stitches fewer. |
| rnd | round |
| st(s) | stitch(es) |
Working the other side of a chain. After the last stitch along the top of the chain, rotate the work so the chain’s underside faces up. Each chain has a single free loop there. Insert the hook under that loop for each stitch. See basic stitches if single crochet is new.
Joined rounds. At the end of each round, slip stitch into the first single crochet. Chain 1, which does not count as a stitch, and make the first single crochet of the next round in the same stitch as the join. Do not turn.
Size and gauge
Gauge: 16 sc and 20 rows (or rounds) = 4 in in single crochet. Make a swatch about 5 inches square and measure the middle, as in the gauge guide.
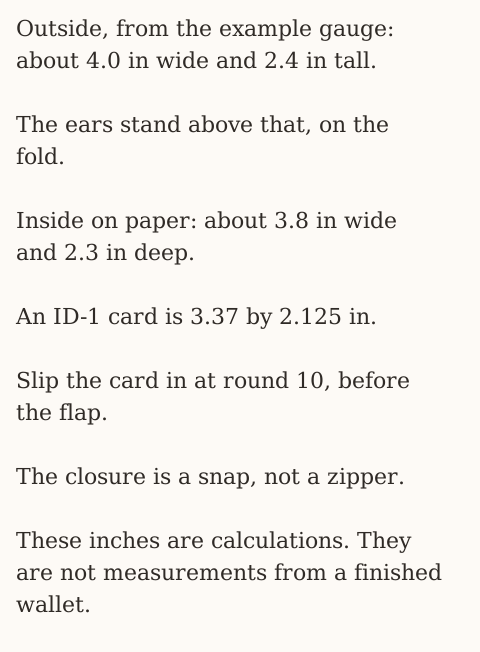
The pocket is a flat tube 16 stitches across each side. At 4 stitches to the inch, that is 4.0 inches wide outside. The two side folds take a little, so the inside is about 3.8 inches. An ID-1 card is 3.37 inches wide, which leaves about 0.4 inch of ease for a few cards. Twelve rounds at 5 to the inch make 2.4 inches outside, about 2.3 inside, so a 2.125 inch card sits just below the rim.
If 16 stitches measure less than 3.75 inches, the card will be tight. Go up a hook size, or chain 18 so each side has 17 stitches. All flap counts then go up by 1 (17, 15, 13), and the face and ear placements must be recentered on the new flap width. Do not copy the 16-stitch placement chart onto a wider flap.
Measure the middle of the swatch
- Pin the swatch flat, or press it under a book for a minute. Single crochet curls toward the back at the sides.
- Lay the ruler on the center 16 stitches. Skip the cast-on edge and skip a curled side.
- Write stitches-per-inch and rounds-per-inch on a slip of paper and keep it with the hook.
Width is the stitch count and the hook. Depth is the round count. Extra rounds will not make a tight tube wider. Judge the height at round 12. At round 10 you are only checking that the card enters.
What changes if your rows are taller or shorter
The pattern says that at the example gauge the finished flap covers about 1.6 inches of the front.
- Close the flap over a card when you mark the snap.
- Mark where row 8 actually lands on your fabric.
- Do not transfer a measurement from the diagram with a ruler.
The pattern
Step 1: stitches on both sides of one chain
Use black.
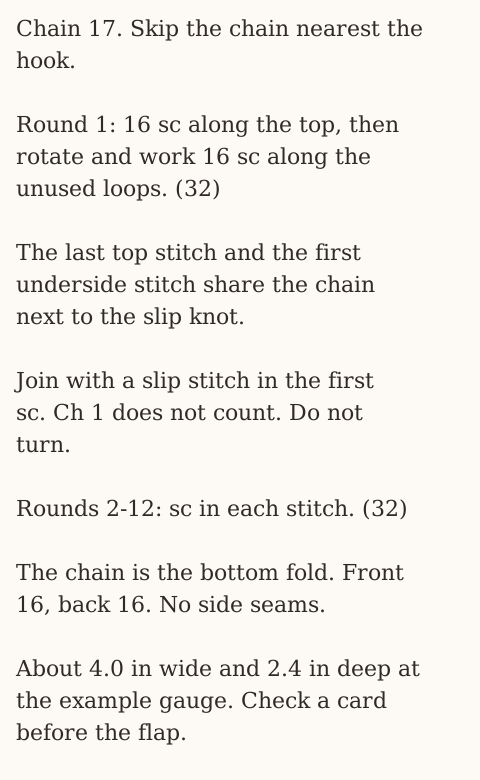
- Chain 17. Do not count the loop on the hook.
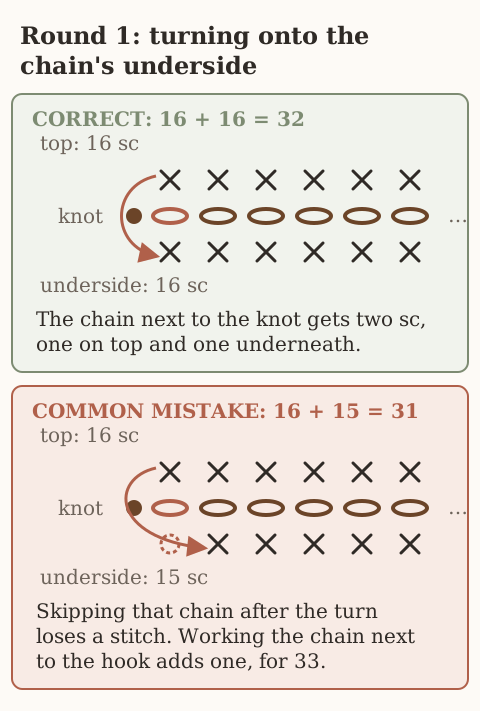
- Skip the chain nearest the hook. Single crochet in the second chain, then in every chain across the top. Count 16. Stop. Do not fasten off.
- Rotate the chain so the underside faces you. Each chain has one free loop on that underside.
- The first underside stitch goes into the same chain as the last stitch on top. That shared chain is the one next to the slip knot, not the chain you skipped beside the hook.
- Single crochet in the free loop of every chain back to the start. Count 16 on this side.
- Slip stitch into the first single crochet of the round.
- Count the whole round: 16 + 16 = 32. Thirty-one means the first underside stitch skipped a chain. Thirty-three means the skipped chain next to the hook was worked.
The two ends are not the same chain
- Find the end beside the hook. That is the chain you skipped. It is one of the 17, and it is the bend at the hook end. Do not put a single crochet into it on the way across, and do not pick it up on the way back.
- Find the end beside the slip knot. That is the shared chain. The last top stitch and the first underside stitch both live there.
- Stop and name the error before you continue.
| Count | What happened |
|---|---|
| 33 | The skipped chain next to the hook was worked. An extra stitch is piled on the fold. |
| 32 | The shared chain was used on both faces. This is the round. |
| 31 | The underside started one chain too late, or two chains were skipped at the start. One bend has a stitch on the top only. |
Look at the piece from above
- Count 16 V’s on one face and 16 V’s on the other.
- Check both ends. They should meet without a hole and without a double stitch.
- Run a finger along the bottom fold. You should feel a cord inside the stitches. That cord is the chain of 17.
A hole at the slip-knot end means the underside started one chain too late. A bulky end at the hook means the skipped chain was worked. A loop of chain sitting outside the stitches means a bump was skipped. Do not sew that loop down. Pull back to the rotation and put the underside stitches in the bumps.
Leave the tail where it is
- Leave the slip-knot tail hanging at the bottom fold. Six inches is enough to weave later.
- Do not cut it now. A short end in that spot is where cards will rub.
- Keep the working yarn on the hook. Round 2 begins in the same stitch as round 1’s slip stitch.
Step 2: twelve rounds, counted every time
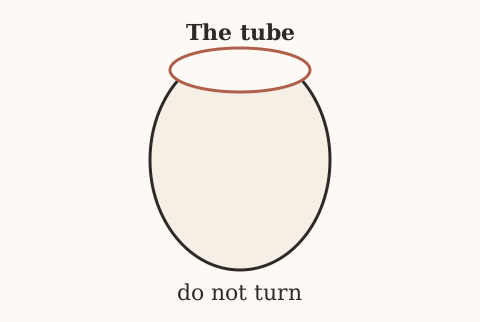
Do this for round 2, then the same list for rounds 3 through 12. Do not turn.
- Chain 1. It does not count as a stitch.
- Single crochet in the same stitch as the slip stitch join.
- Single crochet in every stitch around until you are back at the start.
- Slip stitch into the first single crochet.
- Count 32. Move a marker up into the first stitch so you can see where the round started.
Stop at round 10
- Flatten the tube with the join at one side fold.
- Slide a card in. It should lie flat with a little room at each side.
- Take the card out before rounds 11 and 12.
- Do not fasten off after round 12. The working yarn stays on for the flap.
| What the card does | What to do |
|---|---|
| Lies flat, with a little room at each side | Keep going |
| Will not enter, or touches both folds | Start over on a larger hook. More rounds will not add width. |
| Swims in the tube | Start over on a smaller hook |
Crocheting with the card inside bends the side folds. The next stitches go tight on the front and loose on the back. The height after round 12 is the gauge figure already given, about 2.4 inches outside.
Move the marker into a real stitch
- Clip the marker into the first single crochet of the round you just finished, the one the slip stitch entered.
- On the next round, put the first single crochet into that marked stitch.
- Do not clip the marker into the slip stitch. That flat link is hard to see, and the first stitch of the new round often lands in the second single crochet. The round then has 31 real stitches and a growing gap at the start.
Count in groups
- Count eight, eight, eight, and eight. Or count one face of 16 and the other face of 16.
- Count the far side, the side away from the join. That is where the hook skips when you are watching the marker.
- Do not assume the far side matches the near side.
A missed stitch is a jog, not a lump to hide
- Look at the top edge. It should be a level ring of 32 V’s.
- If the rounds above a spot pull toward a hole, that round is short there.
- Pull back to the round where the count first failed. Do not work two stitches into the next V. That makes 32 again for one round, leaves a lump, and the hole underneath is still there.
- Count ridges from the chain if you are not sure which round you are on. Round 1 is the round worked into the chain. The tube is done at 12 rounds. A 13th ridge is an extra round. Stopping at 11 leaves the card test one round short of the height the pattern describes.
If the join has leaned off the fold
- Keep going straight into the flap if the join is still on a fold.
- If it has leaned onto the back or the front, fasten off and rejoin in the first marked back stitch.
- Do not walk the yarn over with a round of slip stitches. That leaves a ridge across the back. The rejoin is a new start. It is not a 33rd stitch.
Step 3: mark 16 stitches for the flap
Mark the back before the first flap stitch
- Press the tube flat on the table, chain fold down, rim up. Do not mark it while it is still round.
- Seat the two bends at the left and right edges.
- Count 16 rim stitches on the front and 16 on the back.
- Put one marker in the left bend and one in the right bend.
- Choose one face as the back. Those 16 stitches are the flap. The other face stays unworked.
- If the round’s join is not sitting on a side fold, fasten off and rejoin the yarn in the first marked back stitch. If the join is already on the fold, keep going.
Marking a round tube puts the “side fold” wherever your fingers pinched. The back can be 15 stitches and the front 17.
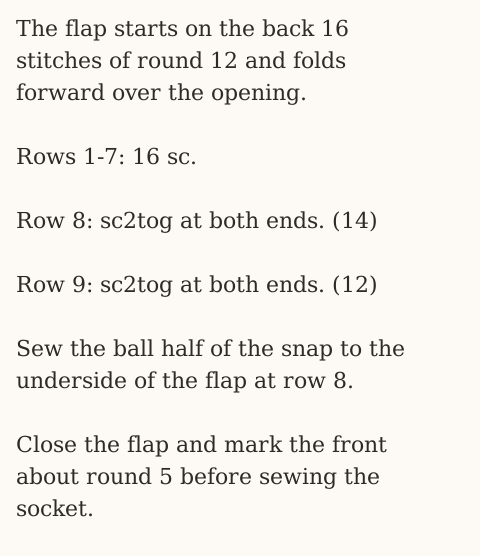
Row 1. Chain 1. It does not count. Single crochet in the same stitch as the join, then in the next 15 stitches. Turn. Count 16.
Rows 2 through 7. Each row: chain 1, single crochet in every stitch, turn, count 16.
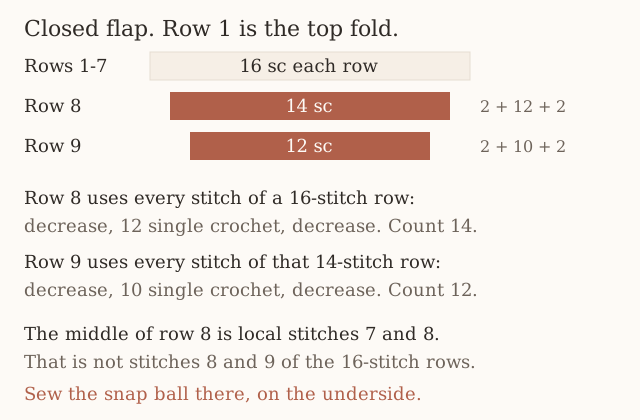
Row 8. Chain 1. Decrease over the first 2 stitches. Single crochet in the next 12. Decrease over the last 2. Turn. Count 14. The math is 2 + 12 + 2 = 16 stitches used from the row below.
Row 9. Chain 1. Decrease, single crochet in the next 10, decrease. Count 12. That uses 2 + 10 + 2 = 14.
Fasten off and leave a tail about 6 inches long. Fold the flap over the opening. At the example gauge it covers about 1.6 inches of the front and leaves the bottom third showing.
Check rows 1 through 7 before you shape
- Work row 1 with the right side of the back facing you, into the 16 rim stitches, then turn.
- Count 16 at the end of every row. The chain 1 is not included.
- Look at the side edge after row 7. It should be a straight strip the full width of the back, with a chain-1 bump at the start of each row and no step.
| Row count | Usual cause |
|---|---|
| 17 | A single crochet was worked into the turning chain |
| 15 | The first or last V was skipped. The first V is the one under the turning chain. The last V sits on the edge and tilts. |
| Wider at the top than at the rim | Increases crept in. Row 8 will not land. |
| Narrower than the rim | Decreases crept in. Pull back. |
Row 8, one decrease at each end
- Decrease over stitches 1 and 2.
- Count 12 plain single crochet. Those are stitches 3 through 14 of the row below.
- Decrease over stitches 15 and 16.
- Count 14. Look for a small step at both corners, the same size on both corners.
If you count a decrease as one of the 12, stitches are left over at the end. If you forget the starting decrease, the decrease lands in the middle and one end stays square. A step on one corner only means one decrease was a plain stitch.
Row 9, one more step in
- Decrease over the first 2 stitches of the 14.
- Work 10 plain single crochet. Those are the middle 10.
- Decrease over the last 2.
- Count 12. Close the flap and look at the bottom corners. Each corner should be empty of flap by two stitches of the row-7 width.
The tail and which way is up
- Leave the 6-inch tail at the end of row 9. Weave it later. Do not sew the flap down with it. The flap has to open.
- Fold the flap shut before you read any later chart. Row 1 is at the top fold. Row 9 is at the bottom.
- Put the ball half of the snap, later, on the underside of row 8. Embroidery passes through the flap and not the pocket.
If you number rows while the flap is still standing up, row 9 is at the top and the face will be upside down. Close it, then count.
Step 4: two ears, three rows each
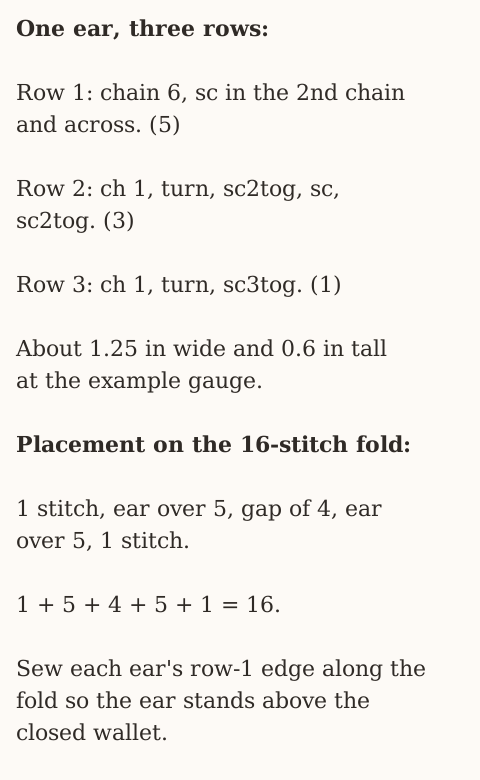
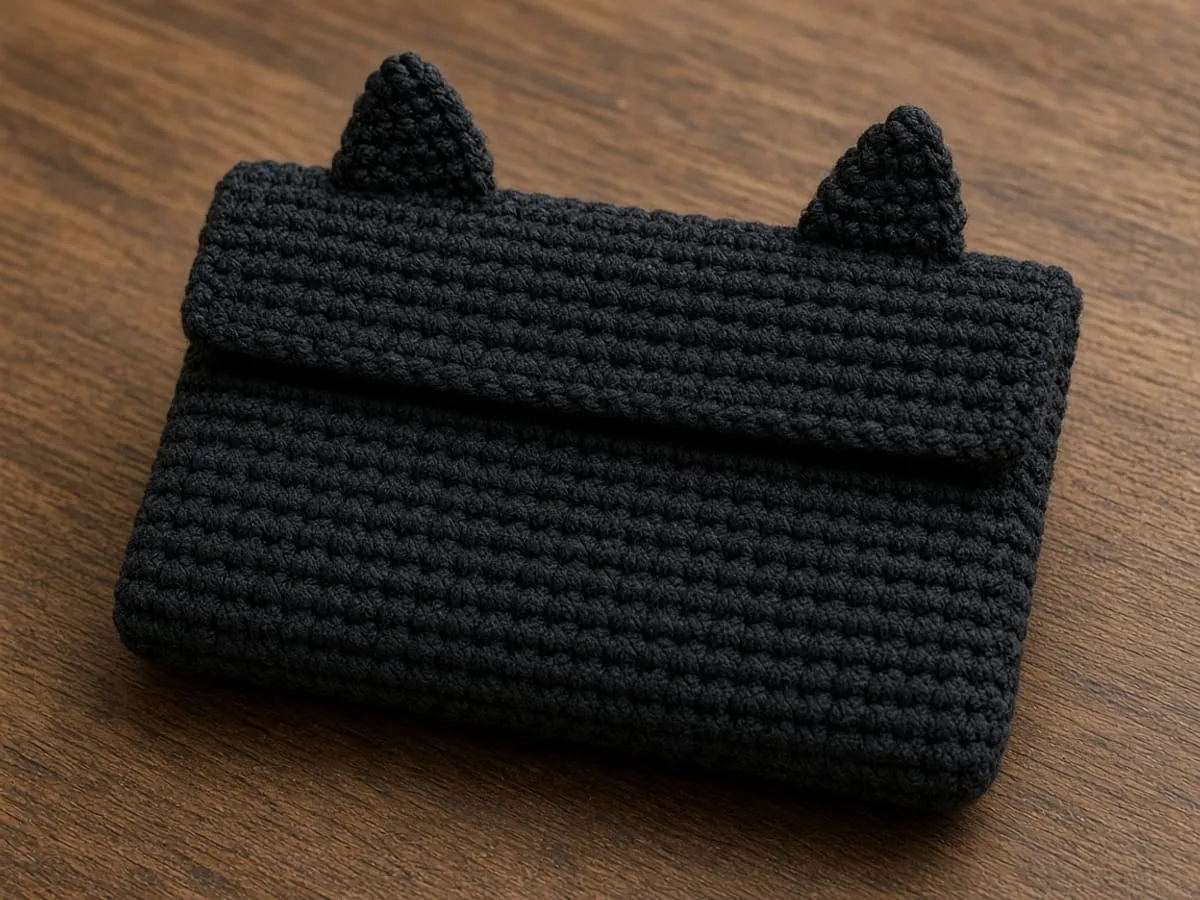
Make 2 in black. Leave a tail about 10 inches long at the start of each, for sewing.
- Chain 6. Single crochet in the second chain from the hook and in each chain across. Turn. Count 5.
- Chain 1. Decrease, 1 single crochet in the middle stitch, decrease. Turn. Count 3.
- Chain 1. Pull up a loop in each of the 3 stitches, yarn over, pull through all four loops. One stitch remains.
- Fasten off.
At the example gauge each ear is about 1.25 inches across the base and 0.6 inch tall.
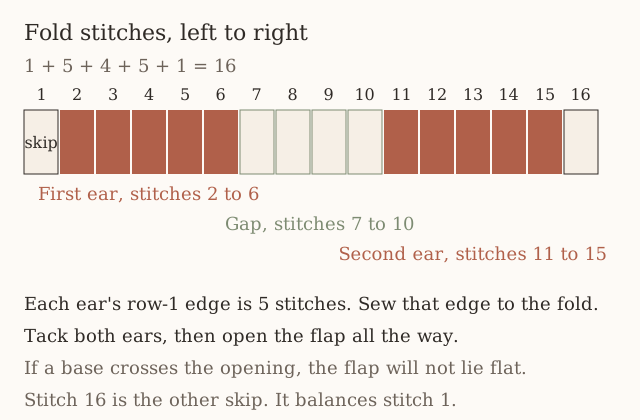
Row 1 is the base you will sew
- Skip the chain nearest the hook. The chain of 6 gives 5 single crochet.
- Check that the base is a straight, firm strip. Count 5 loops along the foundation edge before you cut the yarn.
- If the base is floppy next to the wallet fabric, make the ear again on a hook one size smaller. The wallet hook stays the one that matched the gauge.
The starting tail is the sewing thread. About 10 inches. Sewing with a new length adds two more ends on a piece that is only three rows tall. Leave the fastening-off tail long enough to weave after the ear is sewn.
Row 2 narrows the strip
- Decrease over stitches 1 and 2.
- Single crochet in stitch 3, the middle of the 5.
- Decrease over stitches 4 and 5.
- Count 3. The middle stitch should sit over the middle of row 1, with a step at each end.
| What you count | What it means |
|---|---|
| 5 | The decreases were plain stitches |
| 3 | This is the row |
| 1 | A decrease ate more than two stitches at an end |
Row 3 is the tip
- Enter all three V’s of row 2 before you close.
- Yarn over and pull through all four loops.
- Fasten off. The tip points away from the base, centered.
A tip that leans has usually dropped one of the three stitches. The closed loop is then a two-stitch decrease sitting on one side. Pull row 3 back.
Make the second ear match the first
- Hold the two bases together. They should be the same width.
- Remake the one that differs. Do not stretch the smaller one.
- Each base has to cover 5 fold stitches. A mismatch will throw the placement chart off.
The height at the example gauge is about 0.6 inch, which is 3 rows at 5 rows to the inch. That figure is gauge arithmetic, the same as the rest of the sizes on this page.
Step 5: close the flap, then embroider
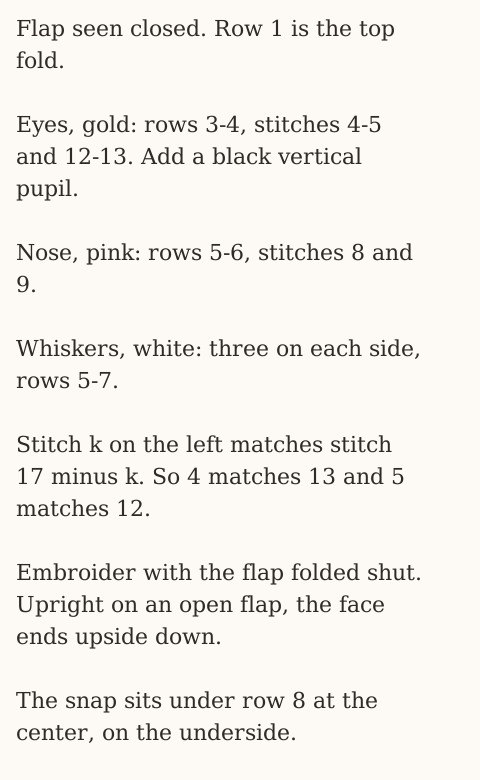
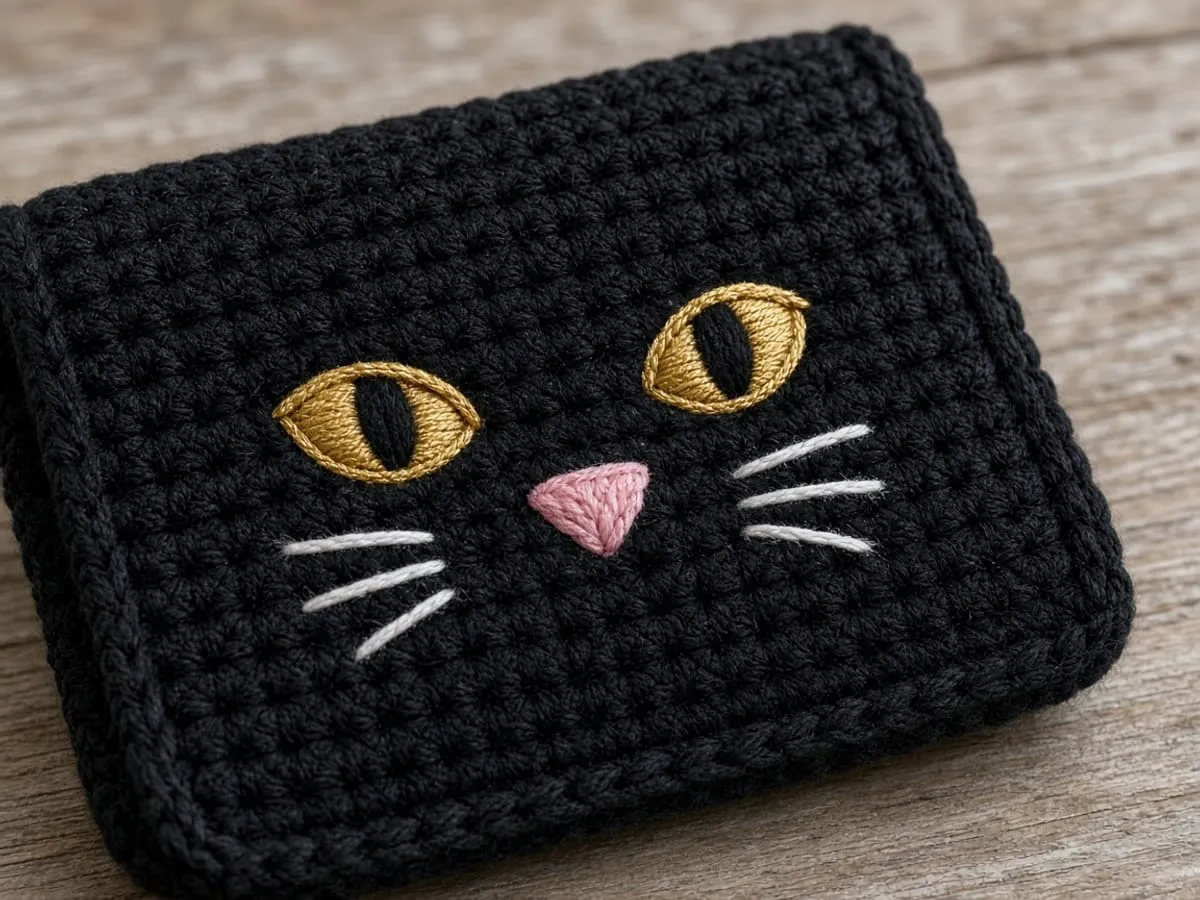
- Close the flap before the first embroidery stitch. Row 1 is now at the top fold. Rows 8 and 9, the narrower ones, are at the bottom of the flap.
- Count across the closed flap from the same edge every time. Rows 1 through 7 have 16 stitches. Row 8 has 14, so its middle is not the same stitch number as row 1.
- After the first eye, stop and check the orientation before you repeat it. The narrowed rows are closest to the table. The fold is closest to where the ears will go.
If you stitch with the flap standing up, the face comes out upside down. Pick the stitches out from the underside. Because you did not knot them, they pull back out.
Eyes. With gold, on rows 3 and 4, over stitches 4 and 5, lay down 4 or 5 straight stitches side by side until they read as one oval. Repeat over stitches 12 and 13.
Pupils. With black, one vertical straight stitch down the middle of each gold oval, from the top of row 3 to the bottom of row 4.
Nose. With pink, on rows 5 and 6, between stitches 8 and 9, make 3 or 4 stitches that start at one bottom point and fan upward. The point faces down.
Whiskers. With white, three straight stitches on each side of the nose. Fan them across rows 5 to 7, out to about stitch 2 on one side and stitch 15 on the other. Keep each whisker shorter than half an inch so it does not snag. Tack each whisker at its middle with one tiny stitch laid across it.
Every stitch goes through the flap only. On the underside, keep the threads short and do not knot them. That underside rubs the front of the wallet every time it opens.
Place the eyes from one edge
- Lay a finger on stitch 1 before every eye. Count from the fold, from that same edge.
- First eye: stitches 4 and 5, rows 3 and 4.
- Second eye: stitches 12 and 13, the same two rows.
- Check the mirror. On a 16-stitch row, stitch 4 pairs with stitch 13, because 4 + 13 = 17. Stitch 5 pairs with stitch 12.
The gap between the eyes is stitches 6 through 11. That space is the forehead. If the second eye sits on 11 and 12, the face crowds the center and the nose on stitches 8 and 9 will collide with it. Counting from the other edge by mistake puts both eyes on the same pair of numbers.
Fill the gold, then the pupil
- Lay 4 or 5 straight gold stitches side by side, each running from the top of row 3 to the bottom of row 4.
- Cover the two-stitch width. A single outline stitch reads as a dash from across the room.
- Put one black vertical stitch down the middle. Keep it shorter than the gold so a rim of gold shows.
- Skip a French knot and skip a horizontal dash. A horizontal pupil reads as a closed eye.
Nose, then whiskers
- Find the center pair on the 16-stitch row: stitches 8 and 9. Seven stitches sit on each side (1 through 7, and 10 through 16).
- Fan 3 or 4 pink stitches. They share a point at the bottom, on the lower edge of row 6, and spread as they go up into row 5. The point faces row 9, toward the bottom of the flap.
- Start the whiskers beside the nose, after the nose is in. Three on each side, across rows 5 to 7.
- Stop the outer ends near stitch 2 and stitch 15. Each whisker stays under half an inch.
- Tack each whisker at its middle with one short stitch laid across it, through the flap only.
A dense satin nose covers the place the whiskers should start. A whisker that reaches the side edge snags every time the wallet opens. A whisker with no tack pulls out the first time something slides past.
Keep the underside tidy after each shape
- After each eye, run the gold tail under the backs of the stitches you just made.
- Cut it short. Do the same with the pink and the white.
- Do not leave a long tail until the end. It tangles, and any tail that passes through to the right side is a speck on the black.
- Do not knot. Knots and long ends make a lump under the flap and show as a bump on the front.
Step 6: ears on the fold
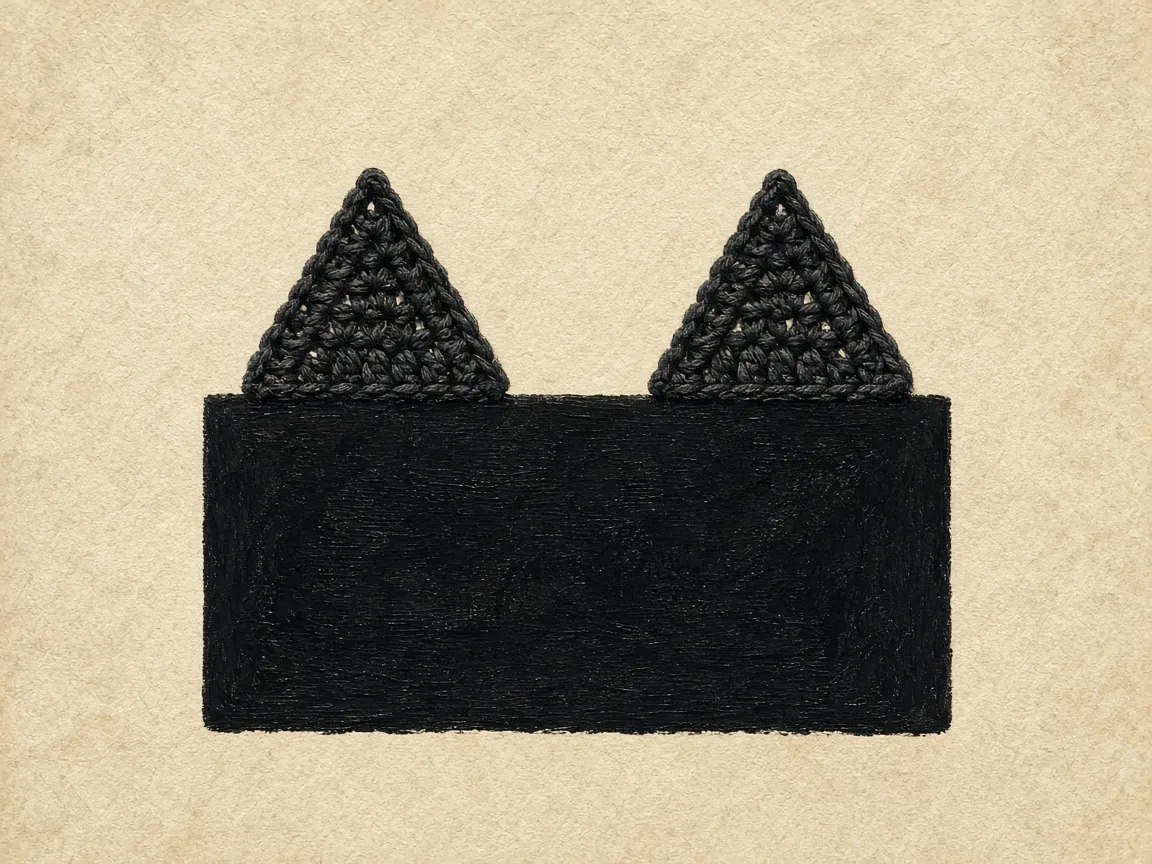
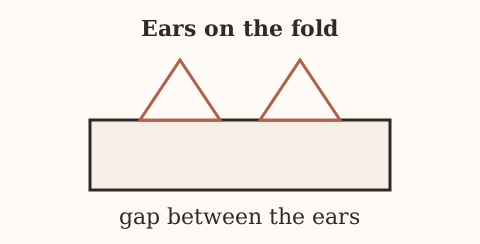
- Hold an ear upright. Its row-1 edge, the 5-stitch base, lies along the top fold where the flap meets the back.
- Count the fold from the same edge you used for the face, with the flap closed. Stitch 1 of the fold is the same side as stitch 1 of the flap.
- Skip 1 stitch, place an ear over the next 5, leave a gap of 4, place the second ear over the next 5, leave 1 stitch. That is 1 + 5 + 4 + 5 + 1 = 16.
- Tack both ears with a scrap of thread and open the flap all the way. The bases must not bridge across the opening.
- Whipstitch each base through both loops of the fold, then go back along the base a second time.
The stitch numbers on the fold
| Fold stitches | What sits there |
|---|---|
| 1 | Skip |
| 2 through 6 | First ear |
| 7 through 10 | Gap. The nose, between stitches 8 and 9, sits under the middle of this gap. |
| 11 through 15 | Second ear |
| 16 | Skip |
The eyes on stitches 4–5 and 12–13 fall inside the ear bases, not outside them. The gap is 4 rather than 2 so the nose has room. Starting the first ear on stitch 1 shifts both ears one stitch to the side, and the gap is no longer centered over the nose.
Open the flap before the sewing is permanent
- Open the flap until it lies flat against the back, the way it will when someone takes a card out.
- Look at the bottom of each ear base. Every sewing stitch should be in the fold, the back rim, and not in the front rim.
- If a tack dives into the front, cut it and move the ear up onto the fold.
A base that bridges the opening catches the front wall. The flap then stops a stitch short of closing, and the snap will not meet.
Two passes, then check that the ear stands
- First pass: tack the position, through both loops of the fold and through the base.
- Second pass: fill the gaps so the ear cannot hinge backward.
- The ear should stand up off the fold, with row 3 at the top.
- If it lies down over the face, the base was sewn to the front of the flap. The whipstitches should be on the fold line, not a row lower.
Step 7: the snap
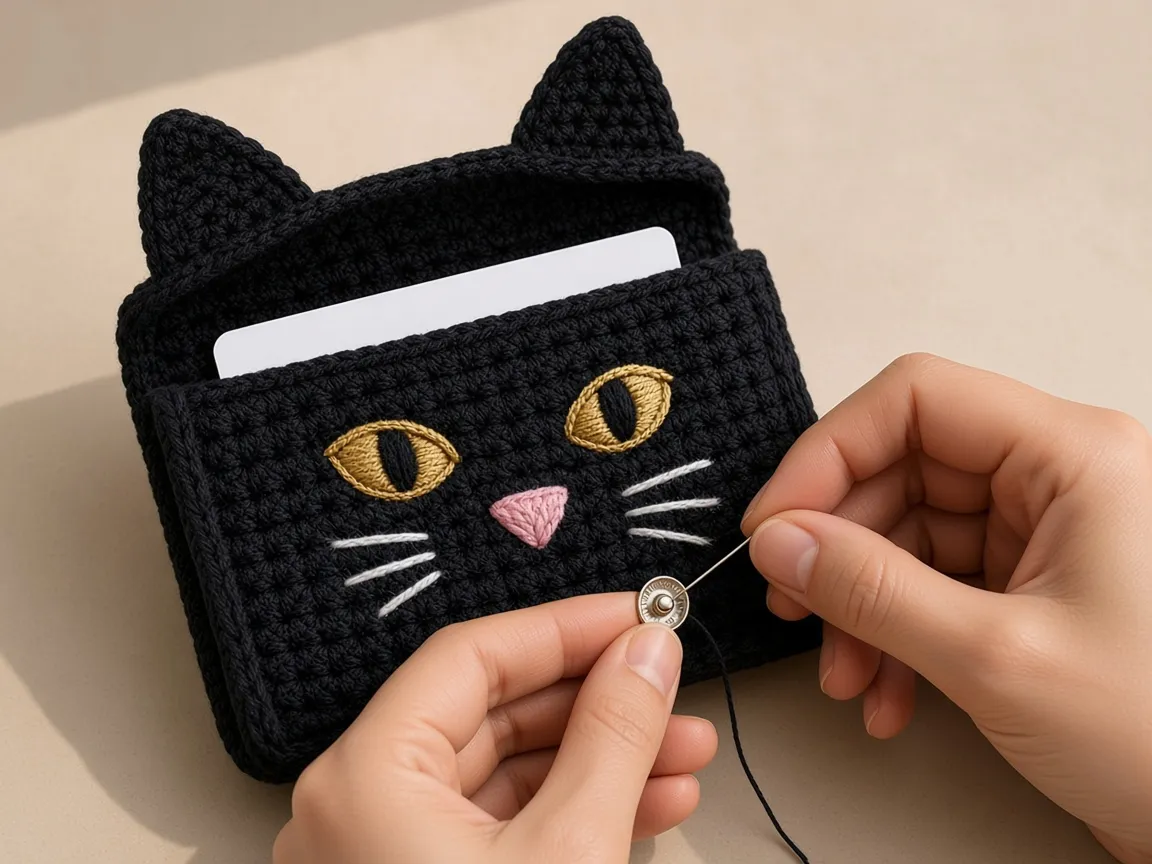
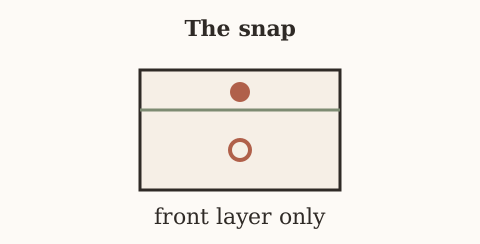
- Put a card in. An empty pocket collapses, and the flap reaches farther down than it will with a card inside.
- Close the flap and lay the wallet flat.
- Mark the front with a clip or a loop of spare thread where the center of flap row 8 lands. Do not push a pin toward your hand.
- On the underside of the flap, row 8 has 14 stitches. Count that row only. The middle is local stitches 7 and 8, with six stitches on each side.
- Sew the ball half there, so the ball faces the front when the flap is closed.
- Sew the socket to the outside of the front at your mark. At the example gauge that is near round 5. Use your mark, not the diagram, if your row gauge differs.
- Doubled black thread, 4 or 5 passes through each hole.
- Open and close the flap a few times before you bury the thread tails.
Do not reuse stitch numbers 8 and 9 from the 16-stitch face chart. Those are the nose. On the 14-stitch row the center pair is 7 and 8. Sewing the socket on round 5 because the diagram said so, when your mark is on round 4 or 6, is how the halves miss.
Sew the front wall only
- On the flap, the needle enters the underside and comes back out on the underside. Catch the back bar of the stitch. Do not pierce through to the embroidered face.
- On the pocket, the needle enters the outside front and comes back out on the outside front. Do not enter the inside of the tube.
- Stop at 4 or 5 passes per hole. More passes build a lump. Fewer pull out when the snap is popped.
A stitch that enters the tube will rub the card and will show on the inside as a thread across the place the card slides.
If the halves miss
- Unpick the socket, the half on the plain front, and move it. Leave the ball next to the embroidery alone if you can.
- The flap should lie flat when closed, with row 9 just below the snap, not folded under it.
- If row 9 is stuffed under the snap, the mark was made with the flap stretched. Mark it again with the card in.
Step 8: tails
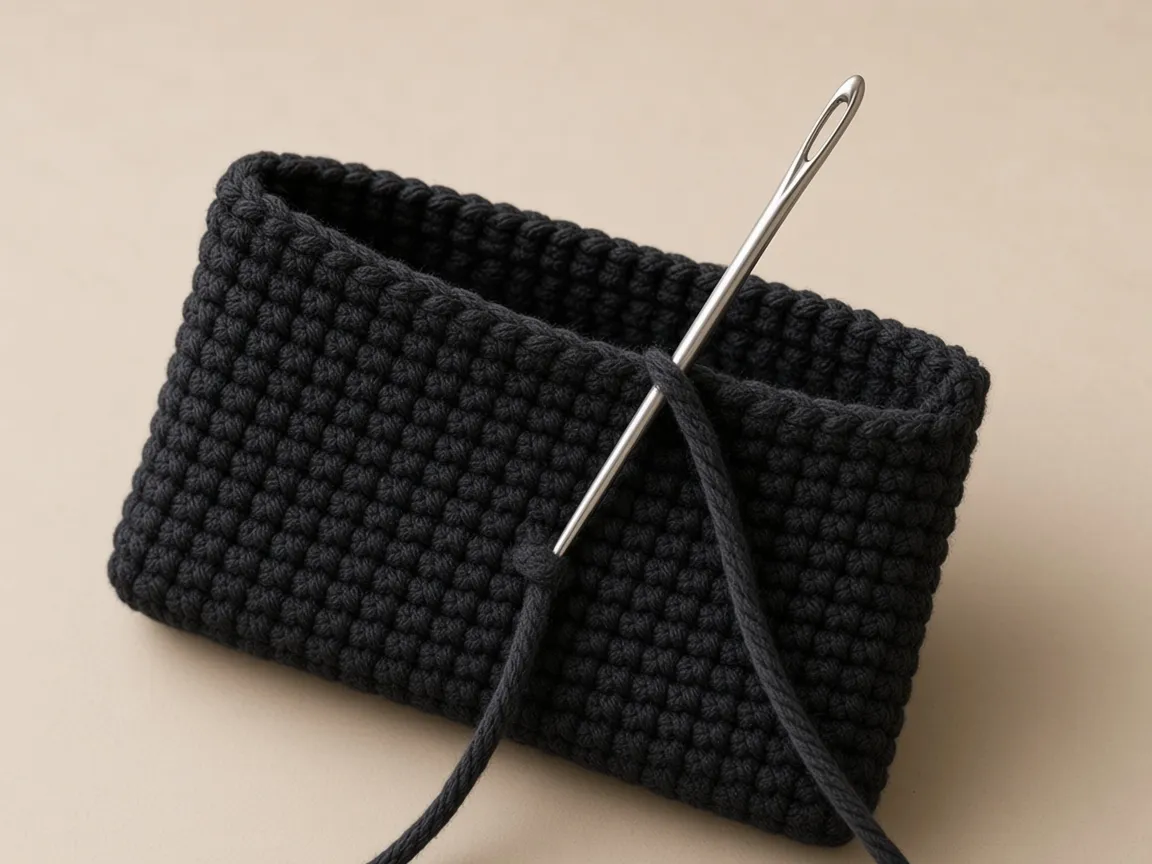
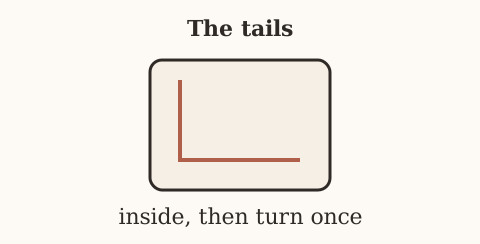
Weave the tails inside the tube along a fold, then change direction once, as in weaving in ends.
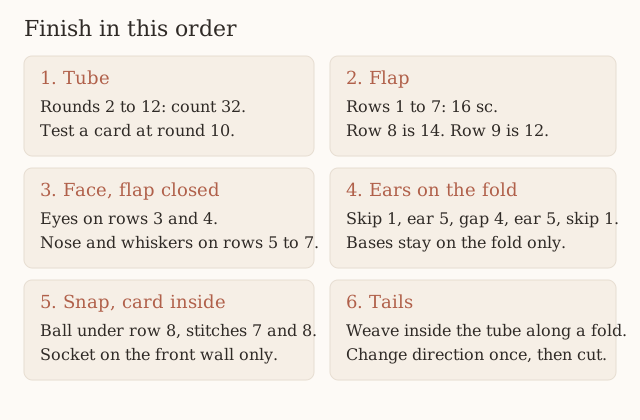
Do the stages in this order
- Count the tube to 32 through round 12. Test the card at round 10. Then start the flap.
- Finish the flap, including the two decreased rows, before you sew an ear. The ears sit on the fold, and the fold is row 1 of that flap.
- Close the flap before the first embroidery stitch. Rows 3 and 4 are counted down from the fold, not up from the fastened-off tip.
- Tack the ears and open the flap all the way before the whipstitch is permanent. That is the only moment you can see a base bridging the opening.
- Mark the snap with a card inside and the flap closed, after the face is in place, so you can see that the underside of row 8 is still clear of embroidery knots.
- Weave the tails last, inside the tube, with one change of direction.
Weaving a tail across the opening, or across the underside of the flap where the ball will sit, puts yarn where a card or the snap will catch it.
If a stage happened too early
| What already happened | What to do | What does not change |
|---|---|---|
| The face was stitched before the flap was folded | Pick it out. Count again with the flap closed. | The stitch counts |
| The snap was sewn before the card test, and the tube is tight | Rip the socket out, change hooks, and start over | The stitch counts |
| An ear landed on the front rim | Move it to the back fold once you know which 16 stitches are the back | The stitch counts |
Make it yours
- Wider or deeper. One more chain adds one stitch to each side, about 0.25 inch of width. Each extra round adds about 0.2 inch of depth. Change the flap counts by the same number of stitches.
- Eye color. Green or amber eyes read as cat just as well. Avoid white eyes on black; they read as a ghost.
- A gray or orange cat. Black embroidery for pupils, a darker nose, and the same counts.
- Lining. A fabric lining takes up the ease the card needs. Chain 19 instead of 17, then hand-sew a fabric tube inside with the raw edge folded under at the rim.
- Reinforcement. Sew a small felt circle behind the socket half of the snap on the inside of the front, so the snap pulls on felt rather than on two stitches.
Check the flap and closures before sewing
- Number the embroidery from the same physical edge each time, on the closed flap.
- Remember the local centers. Rows 1–7 are 16 stitches. Row 8 is 14. Row 9 is 12. The narrowed rows do not share the center numbers of row 1.
- Tack the ears to the back-fold edge, open the flap fully, and check that the bases do not bridge the opening.
- Put the loaded wallet on the table to mark the snap. Use a clip or a removable thread marker.
- Open and close it several times before you secure the sewing tails.
- On a wider version, recenter the face and make a new closure mark. Do not reuse this chart.
Common mistakes and fixes
Round 1 has 31 or 33 stitches. The skipped chain was worked, or the first chain on the other side was skipped. The first single crochet on the underside goes into the same chain as the last one on top.
The join leans. A slight lean can occur even with correct joined-round counts. Count 32 stitches, exclude the joining slip stitch and ch 1, and work the first sc into the same stitch as the join. Set the flap position from the actual side folds, not from a seam that has drifted.
The flap is off center. Row 1 started in the wrong place. The flap should start right at the marked side fold. Rejoin there if the round join has drifted.
The face is upside down. It was embroidered with the flap standing up. Pick it out and work with the flap closed.
The ears flop. Loose fabric. Make the ears on a hook one size smaller, and sew the base twice. A drop of fabric stiffener inside the ear is an option, but test it on a swatch.
The snap will not meet. The flap was closed loosely when you marked it. Mark with a card inside the wallet.
Row 8 comes out to 13 or 15. One end was decreased and the other was not, or one decrease ate three stitches.
- The row below has 16.
- Decrease on stitch pair 1–2.
- Work twelve single crochet.
- Decrease on stitch pair 15–16.
- Pull the row out if the count is 13 or 15. A 15-stitch row 8 makes row 9’s “decrease, 10 single crochet, decrease” run off the end or stop short, and the bottom edge will not be centered.
The eyes are not level with each other. One eye used rows 3 and 4 and the other used rows 4 and 5, or the two eyes were counted from opposite edges. Pick out the eye that sits lower or farther out. Count from the fold, from the same side edge, and place both ovals on rows 3 and 4.
A whisker crosses the nose. The whiskers were worked before the nose, or they started on stitch 8 instead of beside it. Pick out the crossing stitch. The nose owns stitches 8 and 9 on rows 5 and 6. The whiskers leave those stitches and travel outward.
The ear count is 4 or 6 at the base. The chain was 5 or 7, or the first row used the chain next to the hook. The base has to be 5 stitches to match the fold chart. Remake the ear. Do not skip a fold stitch to hide a 6-stitch base, and do not stretch a 4-stitch base across 5 fold stitches. Both of those move the gap off the nose.
Care
- Empty the wallet.
- Hand wash in cool water and dry flat.
- Test a new black yarn before the first wash. Wet a scrap, press it in a white paper towel, and look for color. Gold and white next to black can pick up dye.
Frequently asked
Will a bank card fit?
On paper, yes. The inside is about 3.8 by 2.3 inches against a 3.37 by 2.125 inch card. Test with a real card at round 10.
How many cards?
It depends on your gauge and the cards. No card-stack capacity has been measured.
- Test the stack you actually carry before you place the snap.
- A thicker stack needs more width and more flap reach. The pattern does not add those stitches for you.
Can it carry coins?
No. The flap covers the opening, but the corners are open, and a snap pops under weight.
Can I use safety eyes?
No. Their backs press into the pocket and catch cards. Embroidery lies flat.
Is it left-handed friendly?
Yes. The rounds travel the other way. The counts and the placement do not change. See left-handed crochet.
Can I sell what I make?
Yes, the finished wallets. Please link to this page rather than reposting the pattern.
Why chain 17 if each side is 16 stitches?
- One chain is skipped, the one nearest the hook.
- The other 16 each receive a single crochet on the top and share the work of the underside.
- The skipped chain is the fold at the hook end. It is part of the foundation. It is not an extra stitch in the round.
- Chain 16, if you still skipped one, would give 15 stitches on a side. The width math of 4.0 inches at the example gauge would no longer match.
Does the chain 1 at the start of a round count?
No. It brings the yarn up to the height of a single crochet.
- The first stitch you count is the single crochet in the same stitch as the join.
- The same rule applies to every flap row and every ear row.
- If a row count is one high, look for a stitch worked into that chain.
What if the join will not sit on a side fold?
- Count 32 first.
- A correct count with a wandering join is a lean. Fasten off and rejoin at the first marked back stitch.
- A count of 31 or 33 is a missed or added stitch. Rejoining will not center the flap. Fix the round before you mark anything.
- Mark the folds of the flattened tube, not the path of the lean.
Can I embroider the face before I sew the ears?
Yes. The ears go on the fold after the face, so they do not block the stitches on rows 3 to 7.
- Close the flap first. The row numbers assume row 1 is at the fold and the narrowed rows are at the bottom.
- Sew the ears after the face so you can still see stitches 2 to 6 and 11 to 15 while you place the bases.
Why not a button and a loop?
- A button needs a flap that reaches past it, and a loop at the center of row 9.
- This flap decreases at row 9 to 12 stitches. The closure is a snap under row 8, on the underside, so nothing sits on the embroidered face.
- A loop would need a new row or a chain arch. This pattern does not include one.
- The snap is sewn to stitches that already exist.
What if I want a second snap?
- The pattern marks one snap, at the center of row 8.
- A second pair, closer to the side folds, can keep the corners down. It also makes the card harder to slide out, because each snap has to clear the card.
- Keep a second snap on row 8 so both balls are on the same decreased row.
- Sew the front wall only, the same way as the center snap. Mark both with the card in.
- There is no second position charted on the 16-stitch face.
How do I keep from dropping stitches inside a decrease row?
- Finish the decrease and stop. Count what is on the row so far. It should be 1.
- Count the plain stitches as you make them. Stop at 12 on row 8, or at 10 on row 9.
- Look at how many stitches of the row below are left. You want exactly two. Those two become the last decrease.
- Three left means one plain stitch too few. One left means one plain stitch too many.
- Do not finish the row and hope the last decrease absorbs the error. The last decrease is two stitches.
Which row is row 1 after the flap is closed?
- Row 1 is the row you worked into the back rim. It is the full-width row touching the fold, and it has 16 stitches.
- Row 9 is the row with the tail. It is 12 stitches wide, at the bottom.
- If the narrow end is nearest the ears, the flap has not been folded into its finished position. Fold it over, then count down.
Will the gold or the white color the black yarn?
It can, in a wash, if the embroidery yarn is not colorfast.
- Wet a scrap of the black, press it in a white paper towel, and look for color before you wash the wallet.
- Do the same with a scrap of the gold against a dry black scrap if you are unsure of the gold.
- That test is about dye, not about the stitch pattern.
- Empty the wallet before any wash, and dry it flat so the ears are not creased while they are wet.
More Halloween wallets
Each wallet in the set teaches a different construction:
- Ghost crochet wallet: two shaped panels and a scalloped hem
- Pumpkin crochet wallet: sideways back-loop ribbing and a leaf tab
- Witch hat crochet wallet: an inner divider and a worked buttonhole
- Spiderweb crochet wallet: a pointed flap and an embroidered web
To size a flap wallet for any card stack, see the Halloween card wallet. Decreases are explained in increases and decreases.
The cat wallet comes down to one round worked around both sides of a chain. Count 32 at the end of every round, test the card at round 10, and embroider with the flap closed.
- halloween
- wallet
- black cat
- card holder
- beginner
- free pattern
Read this next
- How to Crochet a Christmas Tree Garlic Holder A small mesh garlic holder with scalloped branches, a gold star, and an open top. US terms. Sizes are design targets.
- How to Crochet a Christmas Tree Plastic Bag Holder Crochet a hollow Christmas tree that holds grocery bags. Bags go in the open top and out the brown trunk. US terms. Sizes come from gauge.
- How to Crochet a Compact No-Slip Kitchen Towel Holder A compact cotton crochet towel holder with two wooden rings, one above the other. Assembly counts are still being checked. US terms.