

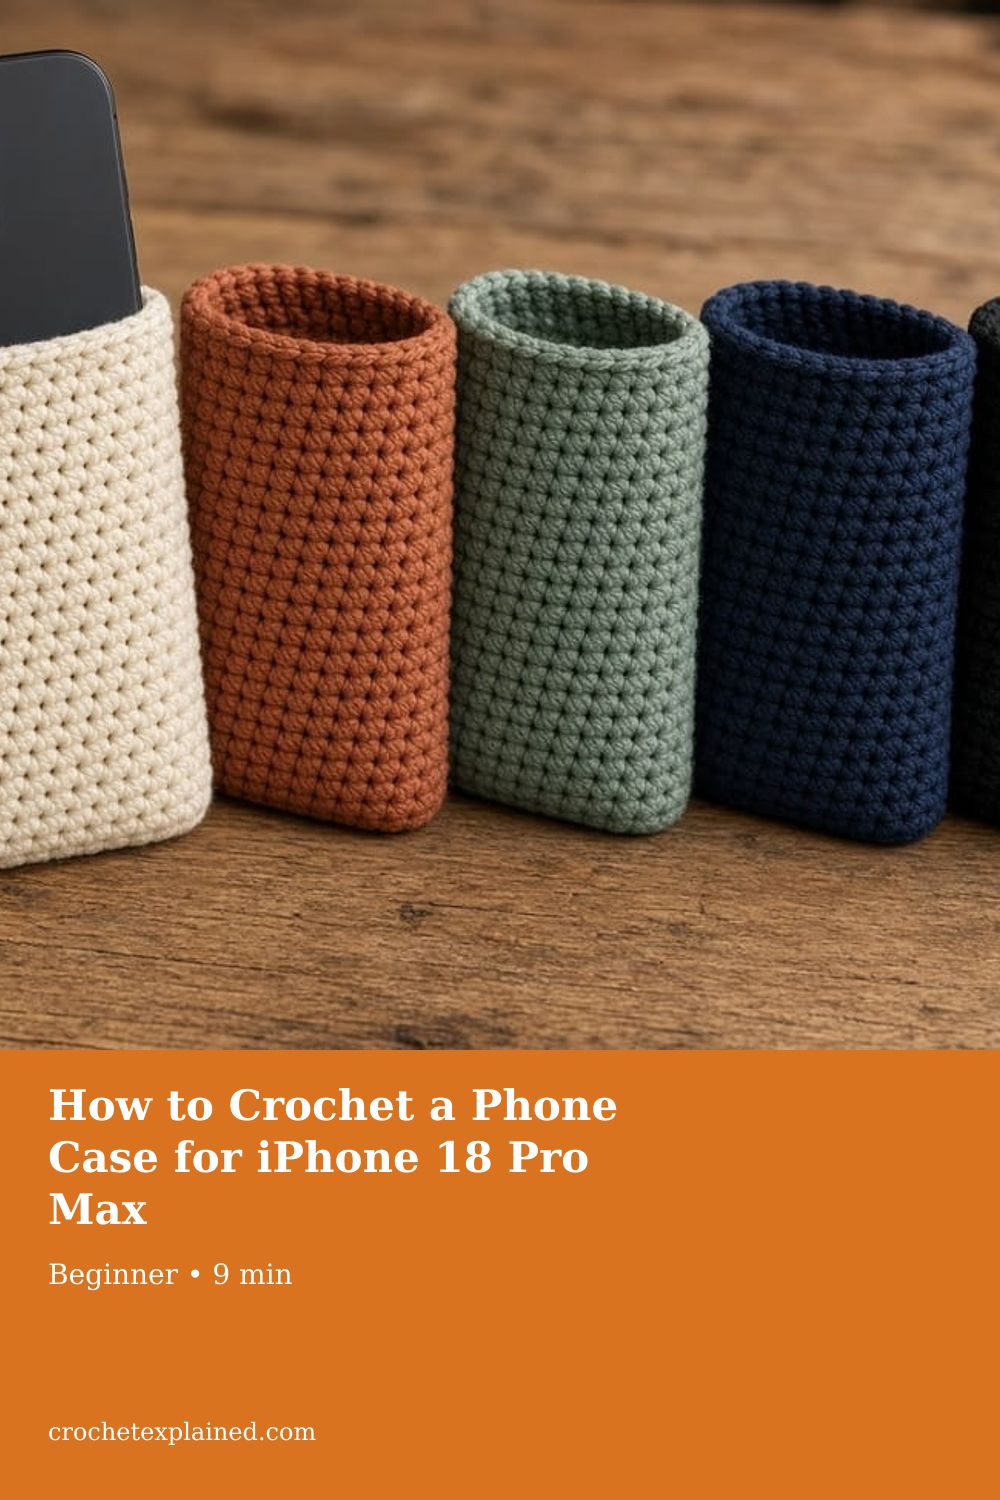
How to Crochet a Phone Case for iPhone 18 Pro Max
The sleeve has to be wider than the phone body, because the fabric also wraps both edges. The body used here is 3.07 by 6.43 inches.
Size a single-crochet sleeve from the iPhone 18 Pro Max body, 3.07 by 6.43 inches, and the edge it also has to cover. US terms.
At a glance
- Skill level
- beginner
- Time
- One rectangle, folded and seamed
- Finished size
- Worked from the phone's width, height, and depth
- Yarn weight
- Smooth worsted cotton
- Hook size
- The hook that gives a dense swatch
- Yardage
- Not weighed. Weigh the first 10 rows.
On this page
Track your progress
Ticks are saved on this device only. Counting rows? Keep the stitch counter open in another tab.
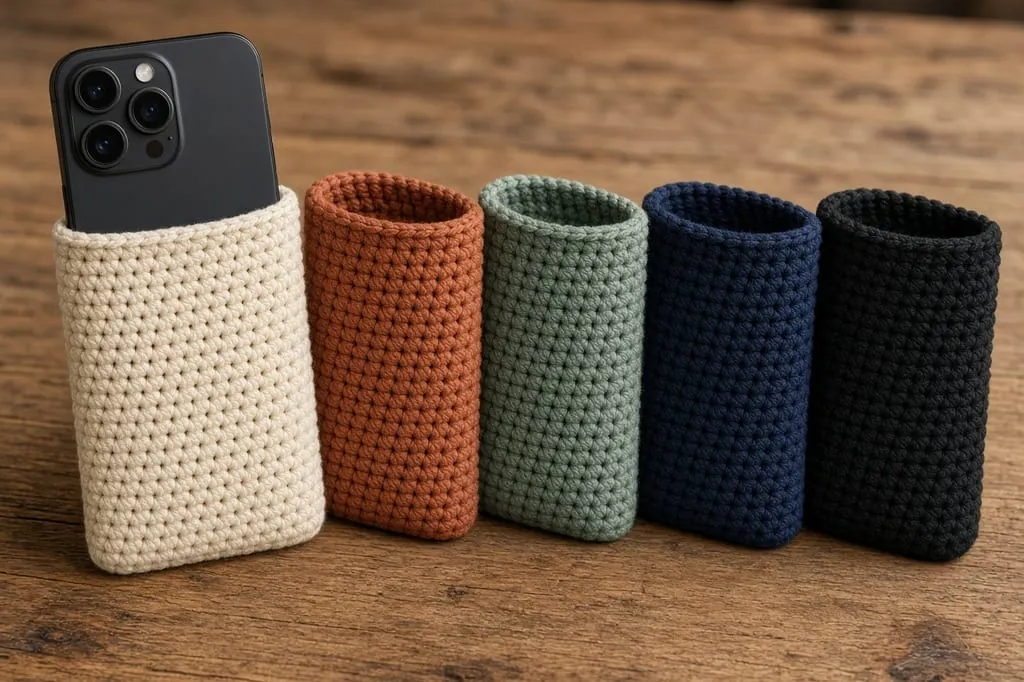
US crochet terms throughout. Sizes here are worked out from gauge rather than from a finished sample, so swatch and measure as you go, and the pictures of finished pieces are illustrations. Made one? Send a photo through the contact page.
A crochet phone sleeve fails in one predictable way: it is chained to the phone’s width, seamed, and then the phone will not go in. The fabric does not only cover the front and back. It also wraps both edges, so the flat sleeve has to be wider than the phone. This page works out by how much, using one specific phone, and then makes the sleeve.
The iPhone 18 Pro Max body is 3.07 inches wide (78.0 mm), 6.43 inches tall (163.4 mm), and 0.34 inch thick (8.75 mm), per Apple’s tech specs. Those are the bare phone. No sleeve for this page was crocheted or fitted on a phone, and the pictures are illustrations. The method works for any phone. Put your own three numbers into the table.
US terms. US single crochet is UK double crochet. Abbreviations.
How the sleeve is built
One rectangle of single crochet. The foundation chain sets the width. The rows build the length. Fold it in half so the fold is the bottom, seam the two sides, and leave the top open. There is no shaping and no separate base.
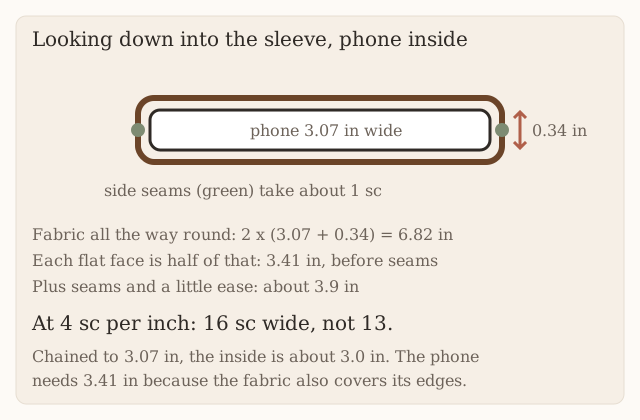
Wrap a strip of paper around the phone the short way and mark where it meets. That length, about 6.82 inches here, is what the sleeve has to go around. A flat sleeve has two faces, so each face must be at least half: 3.41 inches. The side seams then take up roughly one stitch of the width, and you want a little ease so the phone slides. That makes the fabric about 3.9 inches wide.
The same thing happens at the bottom. The fold wraps the bottom edge, so each face starts about half the depth, 0.17 inch, above the fold. The pocket needs about 6.6 inches of depth on each side before the phone is covered.
Yarn and hook
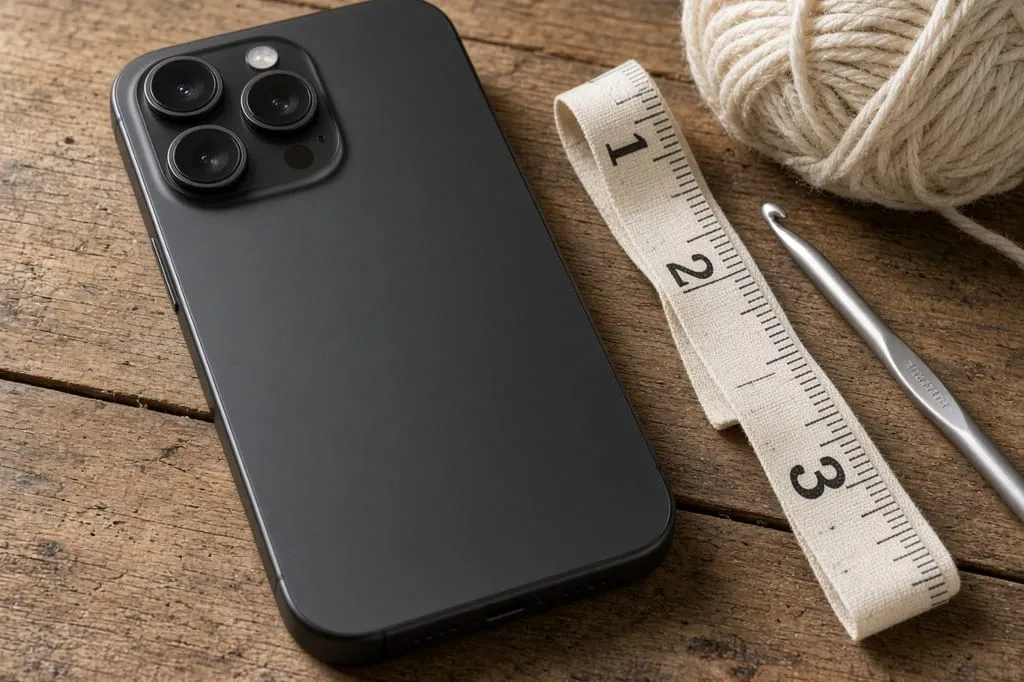
- Smooth worsted cotton. Cotton slides on the phone’s glass and frame. Fuzzy yarn grips it, sheds lint into the ports, and pills inside. Yarn weight chart.
- A hook that makes dense fabric, often US G/6 (4.0 mm). Drop a size if you can see light through the stitches. Hook chart.
- The phone, without its case. If you keep a case on, measure the phone in its case instead.
- Yarn needle, scissors.
Crochet a swatch at least 4 inches wide and measure stitches and rows per inch. A gauge swatch is worth it here, because the width has almost no room for error.
The worked example
| Part | Arithmetic | Result |
|---|---|---|
| Around the phone | 2 × (3.07 + 0.34) | 6.82 in |
| One flat face | 6.82 ÷ 2 | 3.41 in |
| Fabric width | 3.41 + about 0.25 seams + about 0.25 ease | about 3.9 in |
| Stitches | 3.9 × 4, rounded up | 16 sc, chain 17 |
| Pocket depth per side | 6.43 + 0.17 at the fold + about 0.4 collar | about 7.0 in |
| Rows | 2 × 7.0 × 5 | 70 rows |
A chain of just over 3.07 inches is about 13 stitches at 4 stitches per inch. Seamed, that leaves roughly 3.0 inches inside a sleeve that needs 3.41.
Stage 1: chain and first row
Chain 17. Single crochet in the second chain from the hook and in each chain across. Ch 1, turn. (16)
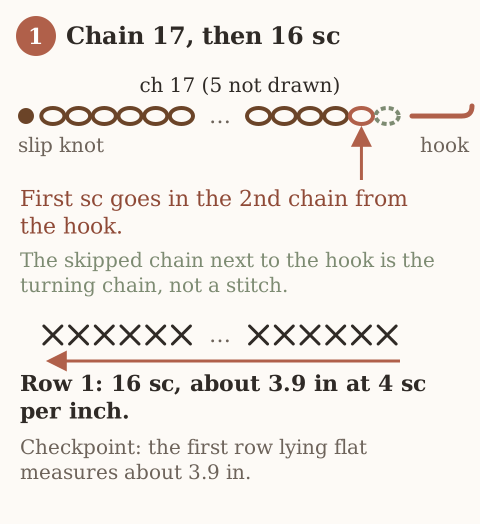
Keep the chain looser than the rows, or use a hook one size larger for the chain only. A tight chain pulls the bottom edge in, and the fold will pucker.
Checkpoint: lay the first row flat. It should measure about 3.9 inches. Fold a strip of paper of that width around the phone. It should close with a little overlap.
Stage 2: the rectangle
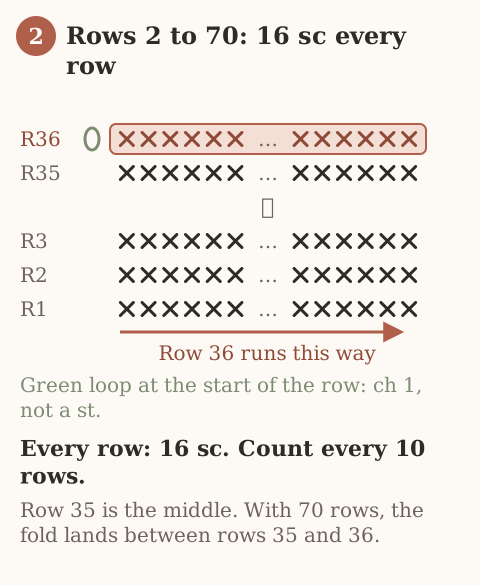
Single crochet in each stitch across. Ch 1, turn. The ch 1 does not count as a stitch. (16)
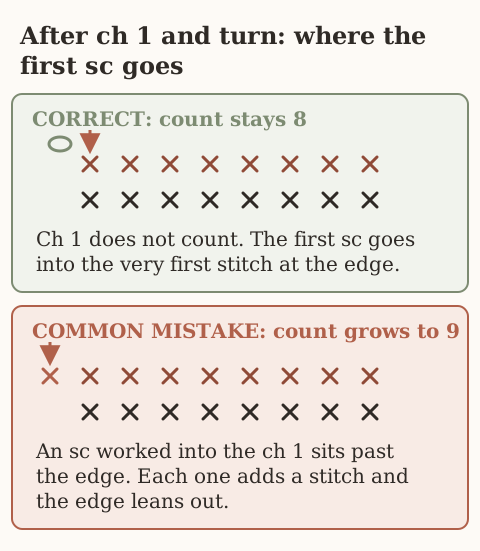
Count the stitches every 10 rows. Single crochet edges often gain a stitch when the first stitch goes into the turning chain, and each gained stitch is a quarter inch of looseness at that row.
Stop at about 70 rows, or when the rectangle folded in half covers the phone with a little collar above the top edge. Measure it lying flat, not hanging.
Checkpoint: fold the rectangle with the phone inside, without seaming. The two long edges should meet beside the phone with no strain. If they gap, the sleeve is too narrow. Start again with more stitches. Do not stretch it.
Stage 3: fold and seam
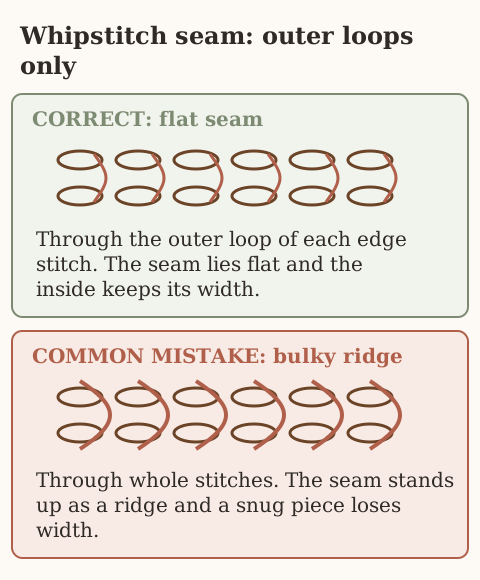
Fold the rectangle in half with the right side inside. Whipstitch each side from the fold to the top, through the outer loop of each edge stitch only. Going deeper into the stitch takes width from the inside. Turn it right side out so the seams are inside.
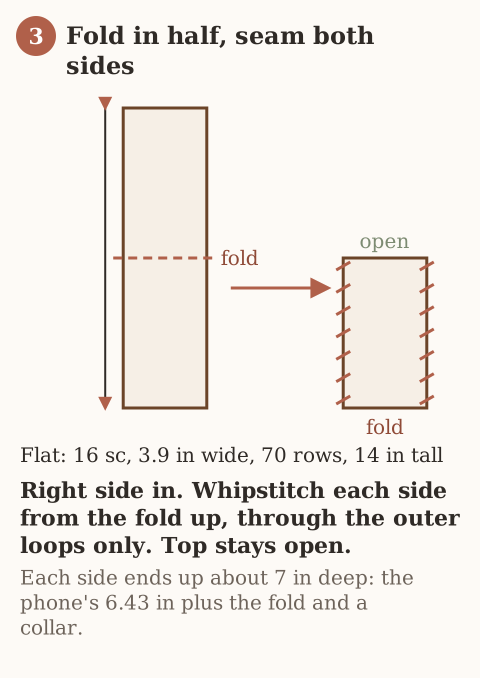
Slide the phone in before you weave the tails. It should go in without force and stay put when you tip the sleeve. If the opening fights you, the last rows are tighter than the rest. Redo them more loosely. Weave ends on the inside, where they cannot catch on the buttons. See weaving in ends.
Color
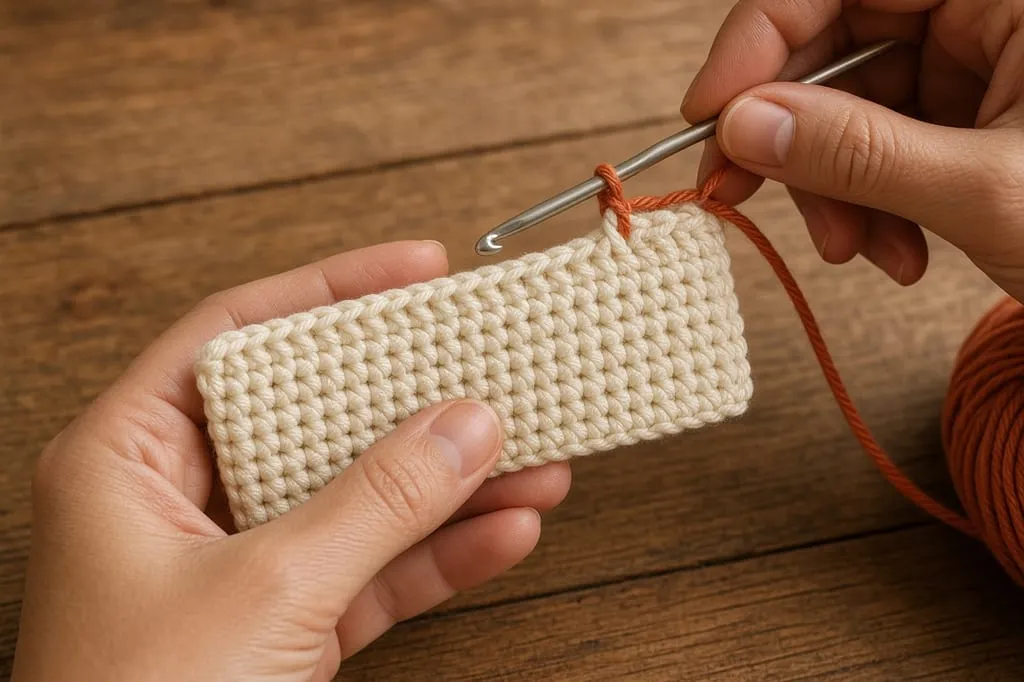
Solid. Best first sleeve. You can see every stitch you need to count.
Two-tone. Work 35 rows in color A, change color, and finish in color B. The color change lands on the fold.
Stripes. Change every 4 rows. On a piece this small, two-row stripes read as noise. Cut the old color unless it returns within two rows. A strand carried up the side is on the inside of the seam, where it snags on the phone.
Keep every color the same yarn weight. A thinner yarn makes a narrower stripe, and the phone sticks there.
Make the optional flap a complete separate stage
For a straight eight-stitch flap, mark the middle eight stitches of the back rim and join at the first marked stitch. Row 1: ch 1, sc in each marked stitch (8). Rows 2–6: ch 1, turn, sc across (8). With the phone inside for marking, check it reaches the intended button location; add full rows if needed. Final row: ch 1, turn, sc 3, ch 3, skip 2, sc 3 (six sc and a loop). Test your button through the loop, remove the phone, then sew the button through the front wall alone. This replaces the unspecified optional shaping.
Troubleshooting
The phone will not go in. The sleeve was sized to the face, not around the phone. Recheck the width against 2 × (width + depth) ÷ 2, plus seams.
It goes in but sticks at the top. The camera plateau. Add a few loose rows to the collar, or work the last 4 rows with a larger hook.
The phone slides out when tipped. Too much ease, or a loose fabric. Redo with one fewer stitch or a smaller hook.
One side is longer than the other. Gained or lost stitches. Count back to the row where you still had 16.
The bottom corners stick out. The fold is not square. Refold along a single row.
Frequently asked
Does this work for a different phone?
Yes. Measure width, height, and depth, or look them up on the maker’s spec page, and redo the table.
Should I cut a hole for the camera?
No. The plateau sits at the top, and the open collar clears it. A hole in a single-crochet sleeve stretches and runs.
Does the sleeve protect the phone from a drop?
No. It keeps scratches and lint off the glass. It does not cushion a fall.
Can I sell sleeves I make?
A plain sleeve sized from published measurements is yours to make. Do not copy someone else’s charted motif onto it.
Next
The same “fabric goes around, not across” rule sizes every folded sleeve in the device case guide, from a book to a laptop. A round tube sized for a smaller object is the pouch method on that same page.
- phone case
- iPhone 18 Pro Max
- beginner
- color change
- how to
Read this next
- How to Crochet a Christmas Tree Garlic Holder A small mesh garlic holder with scalloped branches, a gold star, and an open top. US terms. Sizes are design targets.
- How to Crochet a Christmas Tree Plastic Bag Holder Crochet a hollow Christmas tree that holds grocery bags. Bags go in the open top and out the brown trunk. US terms. Sizes come from gauge.
- How to Crochet a Compact No-Slip Kitchen Towel Holder A compact cotton crochet towel holder with two wooden rings, one above the other. Assembly counts are still being checked. US terms.