

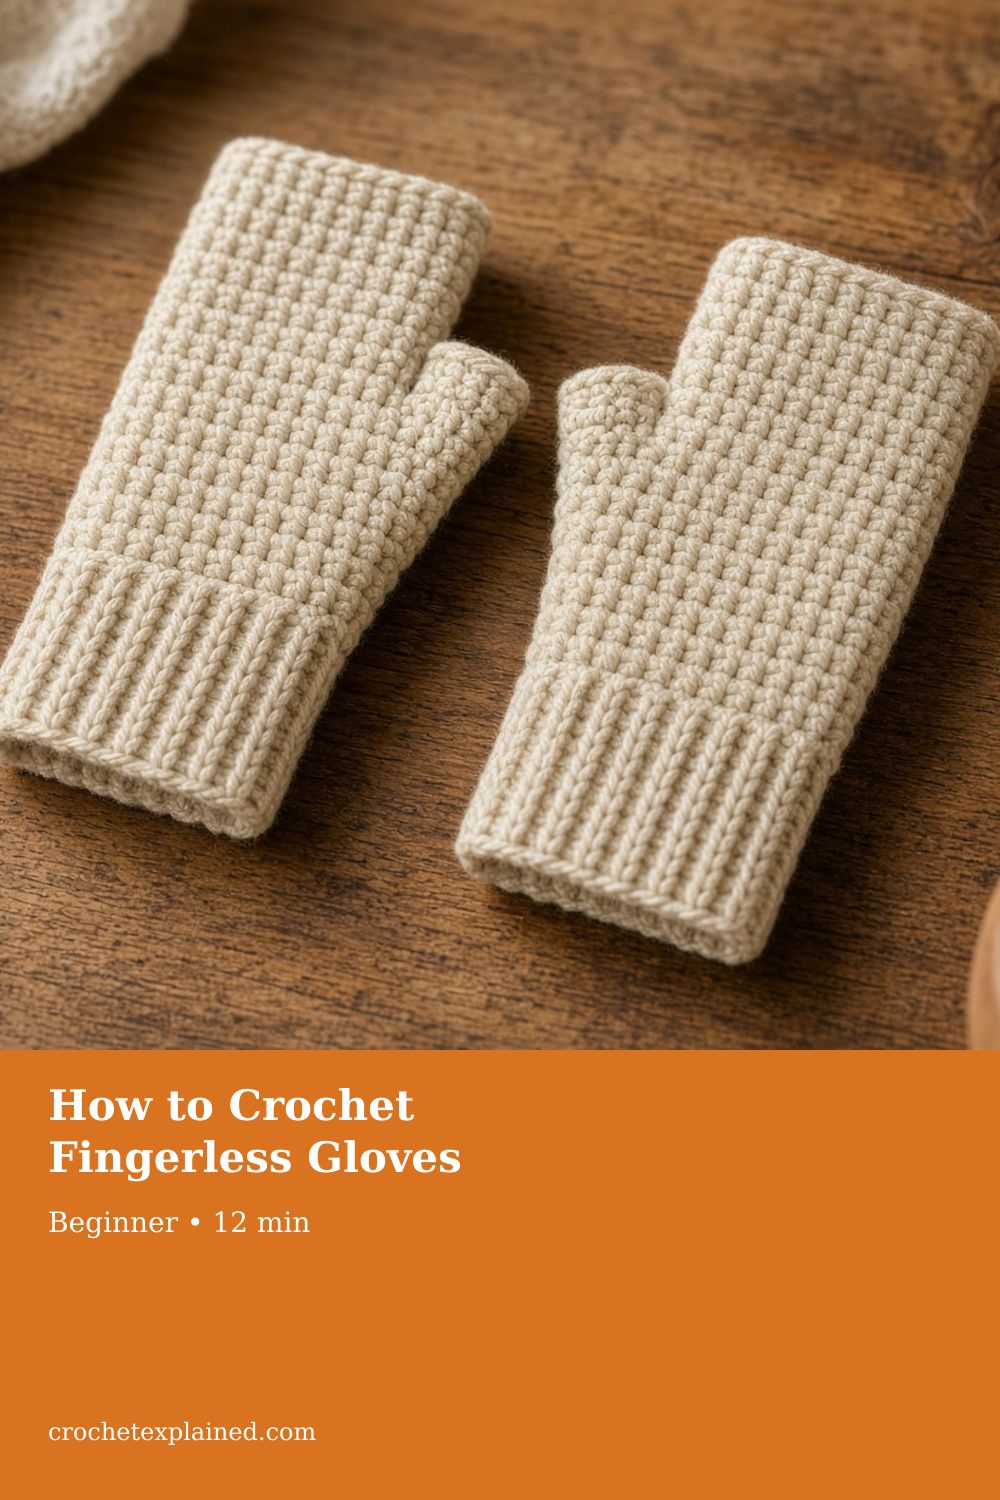
How to Crochet Fingerless Gloves
Sew a ribbed cuff into a ring, work single-crochet rounds for the hand, and leave one gap for the thumb. Size it from the wrist, knuckles, and thumb.
Fingerless gloves from a ribbed cuff and single-crochet rounds, sized from your wrist, knuckles, and thumb. US terms.
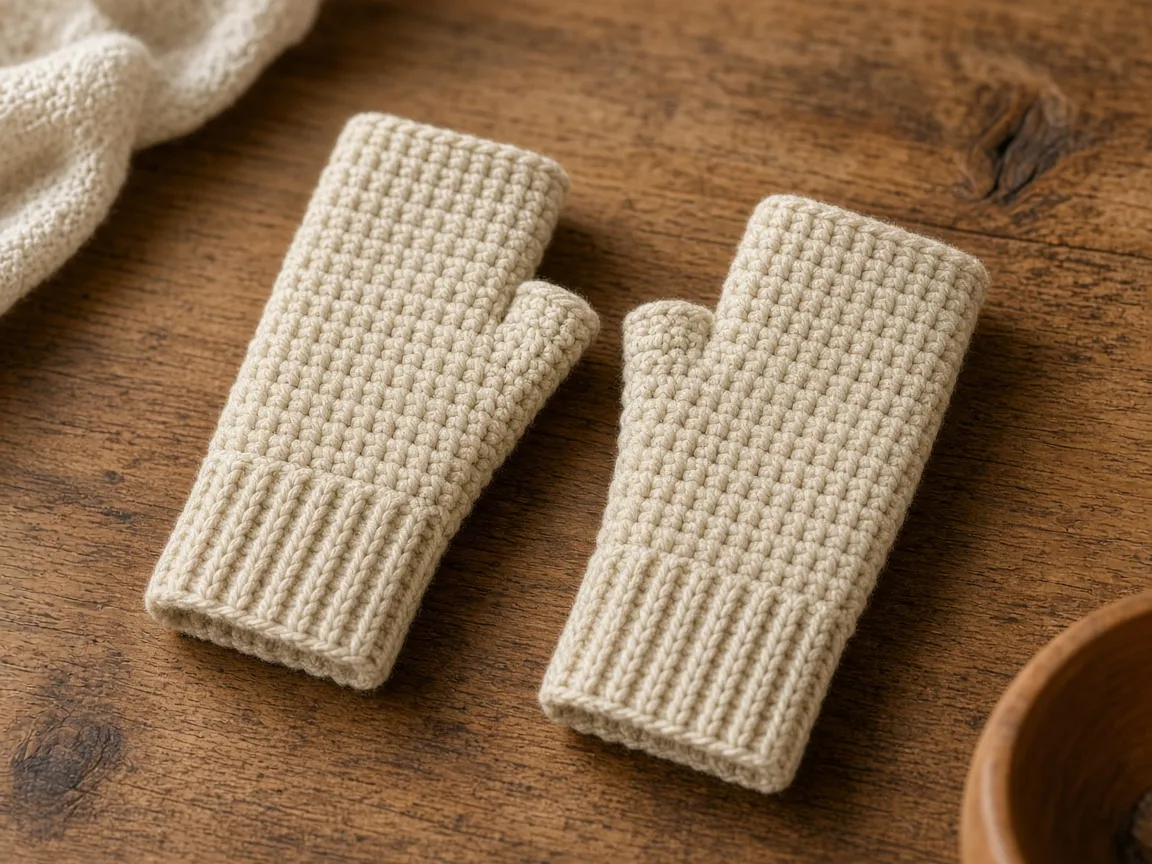
At a glance
- Skill level
- beginner
- Time
- A cuff, a tube in rounds, one thumb gap
- Finished size
- From five hand measurements
- Yarn weight
- Smooth worsted, ideally with some wool
- Hook size
- The hook that matches your swatch
- Yardage
- Not weighed. Weigh the first glove.
On this page
- How the glove is built
- Measure five places
- Yarn, hook, and gauge
- The worked example
- Stage 1: the cuff
- Stage 2: the hand, up to the thumb
- Stage 3: the thumb gap
- Stage 4: the upper hand and the edge
- The second glove
- Recenter the thumb gap after a fit adjustment
- Troubleshooting
- Care
- Frequently asked
- Next
Track your progress
- Go to Stage 1: the cuff
- Go to Stage 2: the hand, up to the thumb
- Go to Stage 3: the thumb gap
- Go to Stage 4: the upper hand and the edge
Ticks are saved on this device only. Counting rows? Keep the stitch counter open in another tab.
US crochet terms throughout. Sizes here are worked out from gauge rather than from a finished sample, so swatch and measure as you go, and the pictures of finished pieces are illustrations. Made one? Send a photo through the contact page.
A fingerless glove is three parts. A ribbed cuff is worked flat and sewn into a ring. A tube of single crochet is worked in rounds from the cuff’s edge. One round leaves a gap for the thumb. There is no shaping. The fit comes from five measurements and two conversions: turning cuff rows into hand stitches, and bridging the thumb gap without changing the stitch count.
US terms. US single crochet is UK double crochet. Abbreviations. The pictures are illustrations. No pair for this page was crocheted or worn. The hand numbers below describe one example hand so the arithmetic has values. They are not a size chart.
How the glove is built
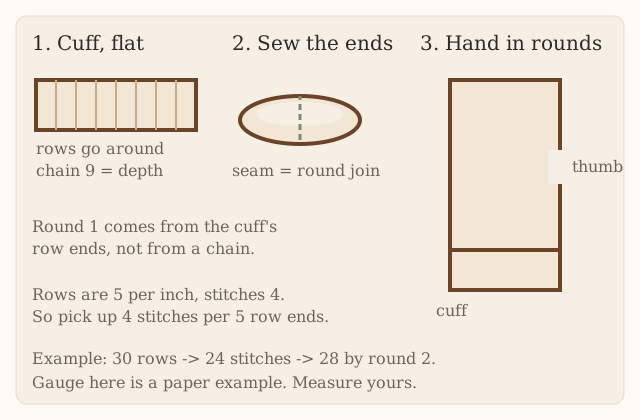
The cuff is worked sideways for a reason. Back-loop single crochet makes ridges along the rows. Turned on its side, those ridges run up the arm, and the fabric stretches around the wrist, which is the direction a cuff needs to give. The 4-H Crocheting Handbook builds its mitten cuffs on the same principle: rows of back-loop single crochet, ends joined, hand worked from the row ends. No pattern from that book is used here.
The hand is a straight tube. It does not get wider over the knuckles, because the knuckle count is reached on round 2 and held. The thumb is not cased in. A thumb opening is the whole design.
Measure five places
Write these down for the hand you are fitting. The example values are one hand on paper.
| Measure | Example | Becomes |
|---|---|---|
| Around the wrist, where the cuff sits | 6.5 in | Cuff length |
| Around the knuckles, thumb tucked out of the tape | 7.5 in | Hand stitch count |
| Wrist crease to the web of the thumb | 1.5 in | Rounds below the thumb gap |
| Wrist crease to the base of the fingers | 3.5 in | Total hand rounds |
| Around the thumb at its base | 2.5 in | Width of the thumb gap |
The example takes half an inch off the wrist and the knuckles so the glove stays put: 6 inches and 7 inches. Single crochet has less stretch than the rib, so that half inch is more likely to be too much on the hand than at the wrist. If you are unsure, plan the hand at the full knuckle measurement and try it on at round 3.
Yarn, hook, and gauge
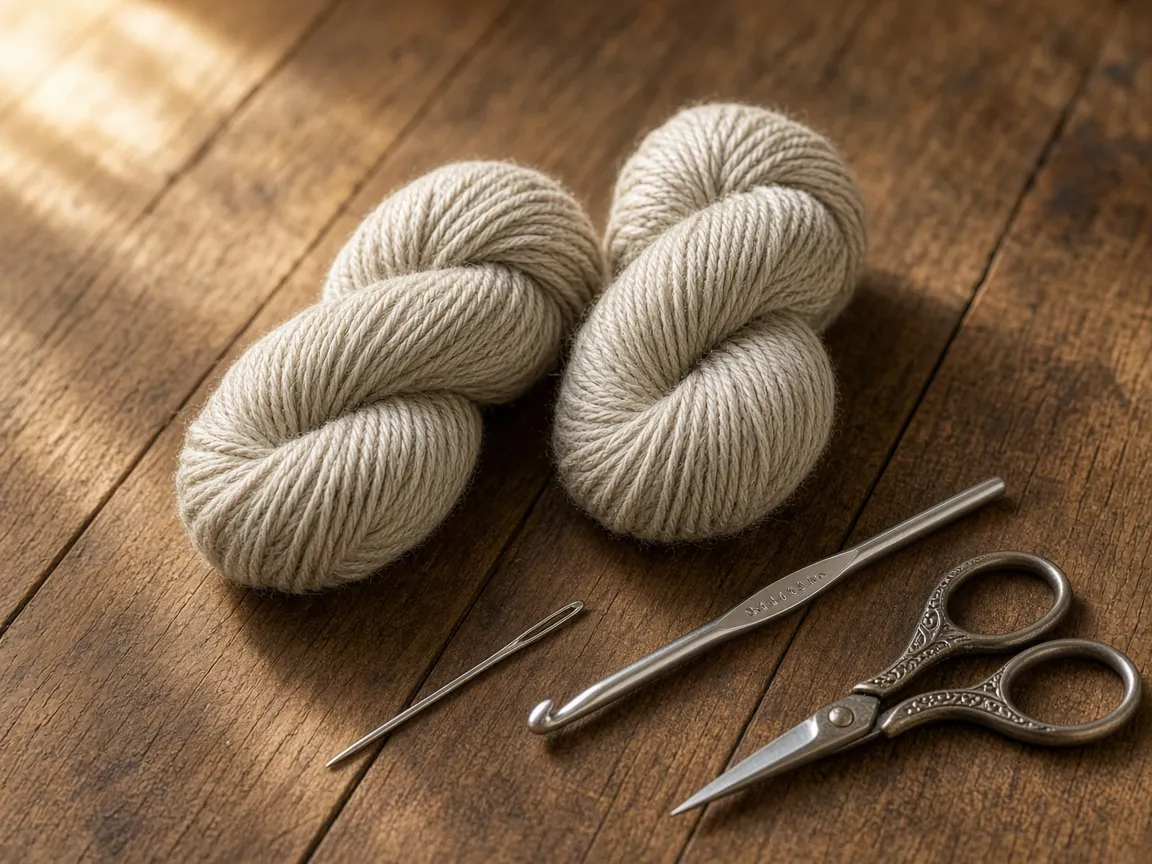
- Smooth worsted yarn, ideally with some wool. Wool recovers after it stretches. Cotton has little spring, so a cotton glove that fits in the morning can be loose by the evening. Fuzzy yarn hides the stitches you need to count. Yarn weights.
- A US G/6 (4.0 mm) hook as a starting point, or whatever hook matches your swatch. Hook chart.
- Two stitch markers: one for the first stitch of the round, one to mark the thumb round.
- Yarn needle, scissors, tape measure.
Make two small swatches, because the cuff and the hand are different fabrics. In plain single crochet, measure stitches and rows per inch. In back-loop single crochet, measure rows per inch. A back-loop rib does not have to match the plain fabric. The example assumes 4 stitches and 5 rows per inch in plain single crochet, and 5 rows per inch in the rib. Gauge explains how to measure without stretching.
The worked example
Every number below follows from the five measurements and the gauge. Change either, and redo this table before you chain.
| Part | Arithmetic | Result |
|---|---|---|
| Cuff depth | 2 in × 4 sts | 8 sts, chain 9 |
| Cuff length | (6.5 − 0.5) in × 5 rows | 30 rows |
| Round 1 | 6 in of cuff × 4 sts | 24 sts, 4 for every 5 row ends |
| Hand | (7.5 − 0.5) in × 4 sts | 28 sts from round 2 |
| Thumb gap position | 1.5 in × 5 rounds | Gap on round 8, after 7 rounds |
| Thumb gap width | 2.5 in ÷ 2 × 4 sts | Skip 5, chain 5 |
| Hand length | 3.5 in × 5 rounds | 17 rounds, 3.4 in |
Do not treat 28 cuff rows as 7 inches. At 5 rows per inch, 28 rows are 5.6 inches. Do not chain more stitches than you skip for the thumb, or a 28-stitch hand becomes 30.
Stage 1: the cuff
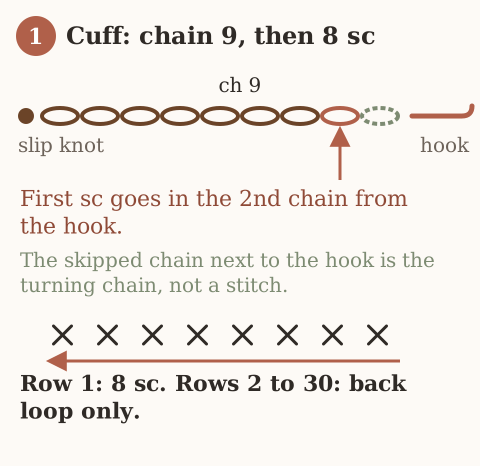
Chain 9.
Row 1: Sc in the second chain from the hook and in each chain across. Ch 1, turn. (8)
Row 2: Sc in the back loop only of each stitch across. Ch 1, turn. (8)
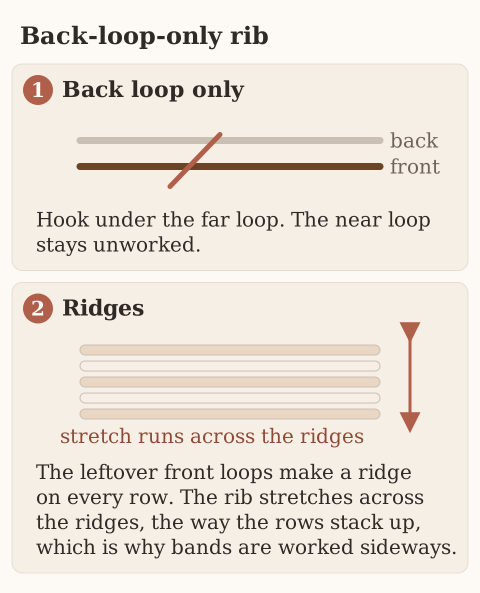
Repeat row 2 until you have 30 rows. The ch 1 does not count as a stitch.
Record rows as you work; use ridges as a cross-check, not a replacement for the row count. In back-loop rows, each raised ridge is two rows, so 30 rows show 15 ridges on each side. Count the stitches every few rows too. A ninth stitch makes the cuff deeper at one end, and the seam will not meet.
Checkpoint: relaxed, the strip is about 6 inches long. Wrap it around the wrist. It should close with a little stretch. If it overlaps, take out rows. If it gapes, add them.
Fold the strip so row 30 meets row 1, right sides together, and slip stitch through both layers across the 8 stitches. Do not twist the strip. Turn it right side out. That seam is where every round of the hand will start and end. Wear it on the little-finger side of the wrist.
Stage 2: the hand, up to the thumb
Round 1: Join yarn at the seam on one row-end edge. Ch 1. Work 24 sc around the edge by working 1 sc in each of 4 row ends, then skipping 1, all the way round. Slip stitch to the first sc. (24)
The cuff edge is 6 inches. At 4 stitches per inch, 6 inches holds 24 stitches. One stitch in every row end would make 30, which is 7.5 inches of fabric on a 6 inch edge, and the glove flares above the cuff like a bell. The bowl cozy uses the same 4-for-5 ratio to join row ends to stitch tops.
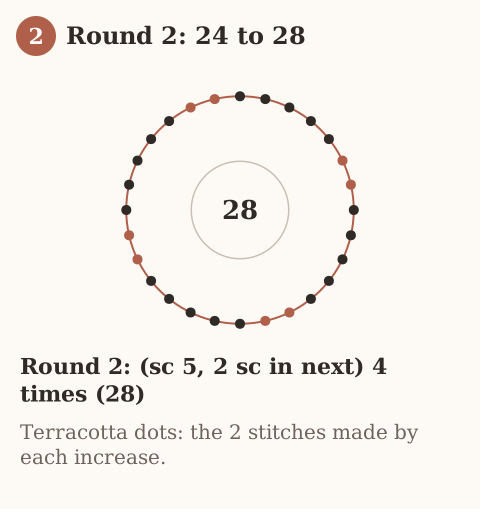
Round 2: Ch 1. (Sc in the next 5 stitches, 2 sc in the next) 4 times. Slip stitch to the first sc. (28)
Rounds 3–7: Ch 1, sc in each stitch, slip stitch to the first sc. (28)
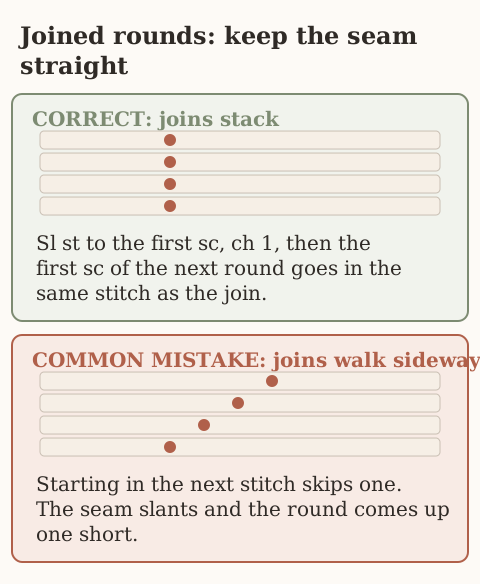
Put the marker in the first stitch of each round. The join of a joined round tends to drift a little to one side. That is normal. Count from the marker, not from where the seam seems to be.
Try it on after round 3. The tube should close around the palm without gaps and without straining. If it is tight, rework round 2 with six increases for 30 stitches. If it slides around, work round 2 with two increases for 26.
If you changed the hand count. Recalculate the thumb round rather than reusing 11 + 5 + 12. With a five-stitch gap, 26 stitches use sc 10, ch 5, skip 5, sc 11; 30 stitches use sc 12, ch 5, skip 5, sc 13. On the next round work one sc into every sc and each of the five chains. For a six-stitch gap at 28, use sc 11, ch 6, skip 6, sc 11, then restore all 28 stitch positions on the following round.
Stage 3: the thumb gap
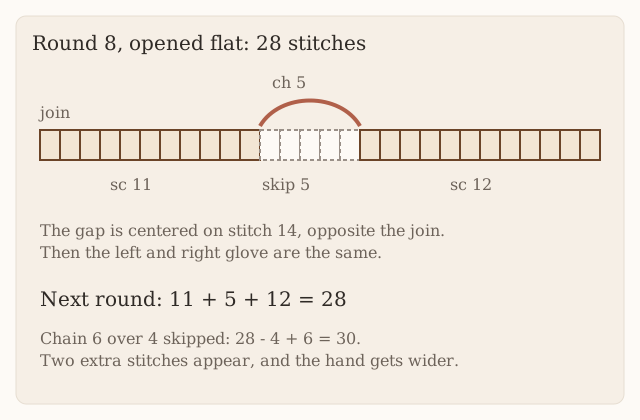
Round 8: Ch 1. Sc in the next 11 stitches, ch 5, skip the next 5 stitches, sc in the last 12. Slip stitch to the first sc. (23 sc and a ch-5)
Round 9: Ch 1. Sc in the next 11 stitches, sc in each of the 5 chains, sc in the last 12. Slip stitch to the first sc. (28)
Why skip half the thumb’s circumference: the hole is the 5 skipped stitches on one side and the 5 chains on the other, so its edge runs about 1.25 inches each way, about 2.5 inches around, plus the height of the round. That is an estimate. Try it on before you go further.
The gap sits directly opposite the seam, centered on stitch 14 of 28. With the seam on the little-finger side, the gap lands on the thumb side, and the left and right gloves are identical. Turn one over for the other hand. Two “right” gloves only happen when the gap is placed somewhere else.
If the edge of the hole cuts into the web of your thumb, pull out rounds 8 and 9 and skip 6 with a chain of 6. If you ever chain more than you skip, decrease the difference on the next round, or the hand gets wider from there up.
Stage 4: the upper hand and the edge
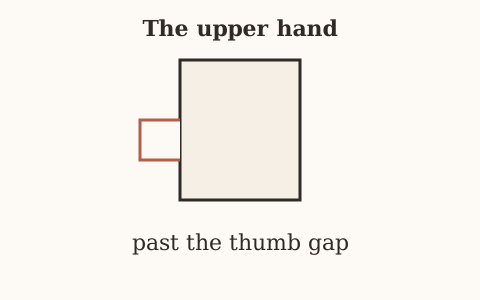
Rounds 10–17: Ch 1, sc in each stitch, slip stitch to the first sc. (28)
Try it on at round 14. Stop when the fabric reaches the base of the fingers and the fingers still bend freely. Seventeen rounds is the example’s 3.5 inches at 5 rounds per inch. Your round count is whatever reaches your knuckles.
Fasten off. If the top edge flips outward, work one loose round of slip stitch to firm it. For a neater thumb hole, join yarn at one side and work about 12 sc around it: 5 along the skipped stitches, 5 along the chain, and 1 at each side.
The second glove
Write down four numbers from the first glove: cuff rows, the round 1 count, the round with the thumb gap, and the total rounds. Work the second to the same numbers. Before you weave in ends, lay the two gloves side by side. The holes should be at the same height and the tops should line up.
Recenter the thumb gap after a fit adjustment
The example hand is twenty-eight stitches. Its gap row uses eleven sc, five skipped stitches and twelve sc: twenty-eight base positions, with five chains replacing the skipped span. If you altered the hand count, use the recalculated gap counts above. On the following round, insert into each chain link, not five sc all into one chain space, unless you deliberately choose that alternative and recount. Keep twenty-eight positions through the upper hand. Before making the second glove, record the final hand count and thumb span as well as the cuff rows and total rounds; a resized first glove needs a matching second.
Troubleshooting
The glove flares just above the cuff. Round 1 has too many stitches for the cuff edge. Rework it at 4 stitches for every 5 row ends, or whatever your gauge gives.
The fabric puckers just above the cuff. Too few stitches on round 1. Pick up more evenly.
The glove rotates until the hole is on the back of the hand. The tube is loose. Fewer stitches on round 2.
The thumb hole is on the palm, not the side. The gap was not opposite the join, or you counted from a drifting seam. Count from the marker.
The cuff stretches out over the day. The rib is loose, or the yarn has no spring. Work the cuff on a hook one size smaller, or use a yarn with some wool.
One glove is longer. Different round counts. Compare the notes before blaming gauge.
Double crochet for speed. The gaps let cold through and catch on zippers. Stay with single crochet.
Care
Wash the pair together so they wear the same way. Dry flat. Do not hang them by the thumb hole, because the chain stretches.
Frequently asked
Can I add a real thumb?
A thumb sleeve is a short tube worked in rounds around the opening. It is not specified on this page, and no thumb was tested.
What about a child?
Measure the child and redo the table. Do not scale the example by eye. A thumb gap that is too small matters more on a small hand.
Can I use the rib for the whole glove?
You can, but the hand stitch count then comes from the rib’s row gauge, and the pickup step disappears. That is a different pattern.
Next
The same back-loop rib, as a band around the head, is the ear warmer. Increases and decreases explains how to spread the round 2 increases evenly, and crochet in the round covers joined rounds versus spirals.
- gloves
- winter
- beginner
- fingerless
Read this next
- How to Crochet a Christmas Tree Garlic Holder A small mesh garlic holder with scalloped branches, a gold star, and an open top. US terms. Sizes are design targets.
- How to Crochet a Christmas Tree Plastic Bag Holder Crochet a hollow Christmas tree that holds grocery bags. Bags go in the open top and out the brown trunk. US terms. Sizes come from gauge.
- How to Crochet a Compact No-Slip Kitchen Towel Holder A compact cotton crochet towel holder with two wooden rings, one above the other. Assembly counts are still being checked. US terms.