
How to Crochet a Snowflake (and Make It Stay Flat)
Build a six-point crochet snowflake from a center ring, then stiffen and block it so it hangs flat instead of curling into a floppy spiral.
Crocheting a snowflake takes about fifteen minutes. Making it hang flat instead of curling into a limp spiral is the part nobody explains, and it is the entire difference between a decoration and a scrap of thread.
This page covers both: the construction, then the stiffening. If you have only ever crocheted with yarn, the shape will feel familiar — it is a circle worked in the round with the stitches deliberately spread apart instead of packed together.
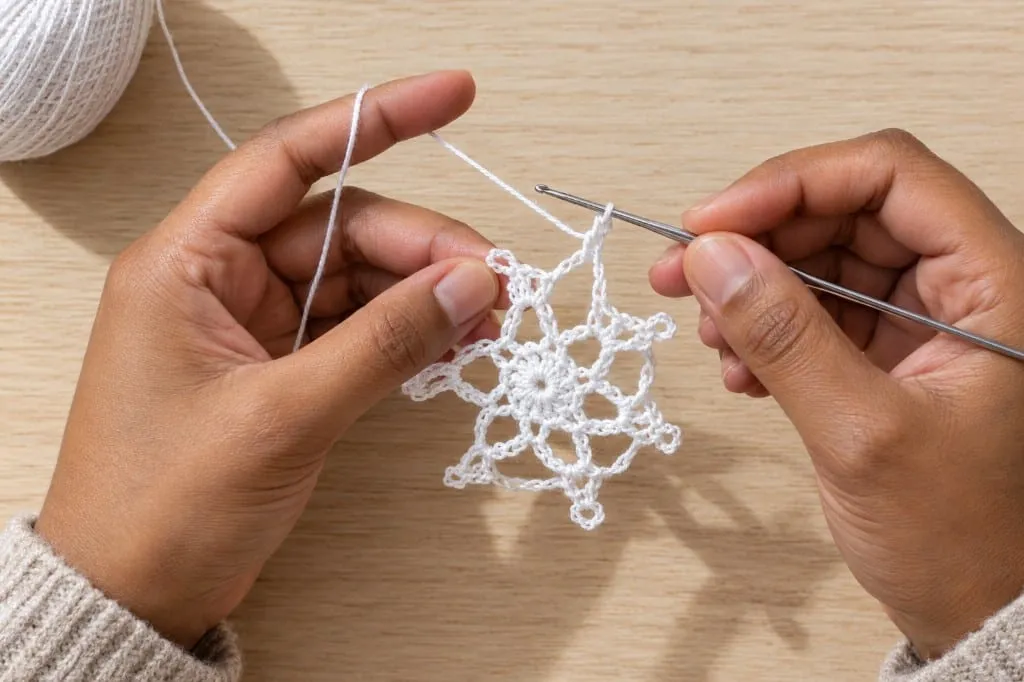
What you need
- Size 10 crochet thread in white, or worsted-weight yarn for a chunky version
- A steel hook around 1.65–1.75 mm for thread, or a 3.5–4 mm hook for yarn. Steel hook numbering runs backwards, so a higher number is a smaller hook — the hook size chart has the full table
- A yarn needle, and rustproof pins
- A foam board, cork board, or blocking mat you can push pins into
- Stiffener of some kind, covered further down
Abbreviations are US terms throughout. If any are unfamiliar, open the abbreviations chart.
Why six points
Real snowflakes have six-fold symmetry, because of the way water molecules lock together as ice crystals form. Eight-point crochet snowflakes exist and look perfectly nice, but six reads as a snowflake instantly and five reads as a flower or a starfish. Build in multiples of six and the shape does most of the work for you.
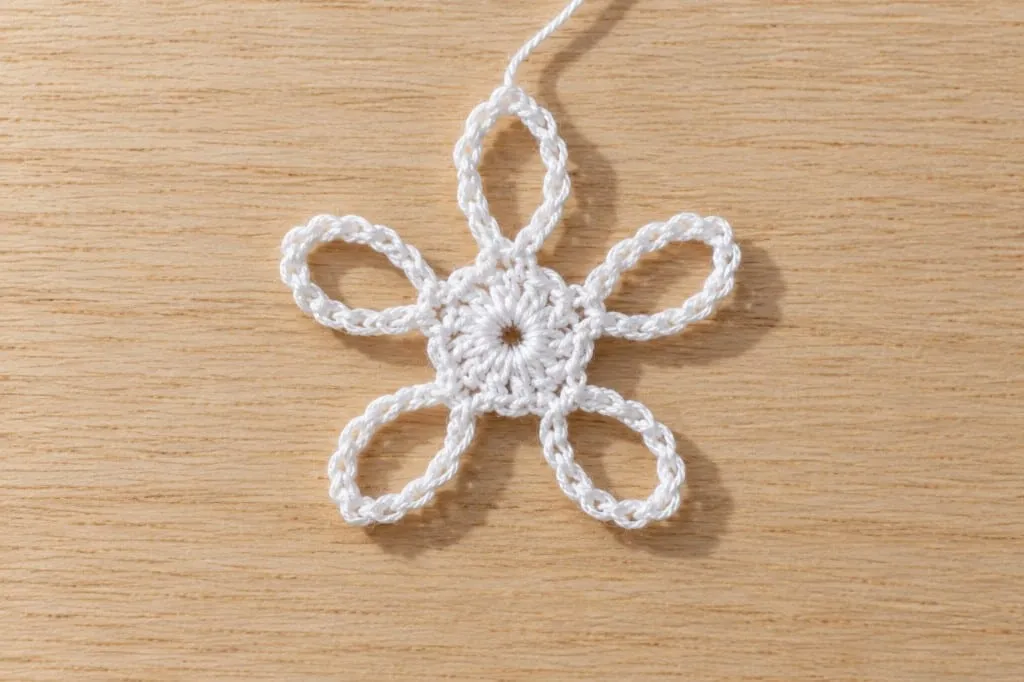
The construction, in three rounds
Every crochet snowflake, however elaborate, is the same three ideas stacked: a center ring, a round of spokes, and a round of points.
Round 1 — the center. Magic ring, then 12 dc into the ring. Join with a slip stitch to the top of the first dc. (12)
If the magic ring is not yet comfortable, chain 6 and slip stitch into the first chain to make a loop, then work the 12 dc into that loop instead. The magic ring closes tighter, which matters here because a gappy center is the first thing the eye lands on.
Round 2 — the spokes. Ch 5, skip one st, sc in next st. *Ch 5, skip one st, sc in next st; repeat from * around, ending with a slip stitch into the base of the first chain. (6 loops)
You now have six chain loops radiating out. This is the skeleton. Everything decorative in round 3 hangs off these six loops, and because there are six of them the symmetry is automatic.
Round 3 — the points. Into each ch-5 loop work: 3 sc, ch 3, slip stitch into the third chain from the hook to make a picot, 3 more sc. Slip stitch into the next sc between loops, then move on to the following loop. Repeat six times, fasten off.
That gives a plain six-point flake. To make it more ornate, replace each picot with a small cluster — ch 5, sc into the loop, ch 5, sc into the same loop, ch 5 — so each arm ends in three small spikes instead of one. The arm count stays at six either way, which is what keeps it reading as a snowflake rather than a doily.
Work a plain one first and stiffen it before you make six ornate ones. Stiffening changes how a flake looks more than any stitch choice does, and it is better to learn that on the fast version.
Fasten off leaving a tail long enough to weave in. Ends on an openwork piece have nowhere to hide, so run the tail back along the top of a few stitches rather than trying to bury it in fabric that is mostly holes. There is more on this in weaving in ends and blocking.
Stiffening: the part that actually matters
Straight off the hook a snowflake is soft, slightly cupped, and will not hang flat. Every method below solves the same problem — saturate the thread, pin it into shape, let it dry hard.
Commercial fabric stiffener is the reliable option and the one to use if the flake is going on a tree for years. It dries clear and hard, it does not attract insects, and it does not yellow the way some household fixes do. Follow the dilution on the bottle rather than a ratio from a blog, because products differ and the bottle is the only source that knows which one you bought.
Diluted white school glue (PVA) is the common household substitute — roughly equal parts glue and warm water, stirred until there are no streaks. It dries mostly clear and holds well. Test it on a spare flake first: some glues dry with a faint sheen that is obvious on white thread under a Christmas light.
Sugar solution is the traditional method, roughly equal parts sugar and water heated until the sugar dissolves completely, then cooled. It dries very hard and costs nothing. The catch is real though — sugar is food, so it can attract insects in storage, and it softens again in humid air. Good for one season, poor for a box in the attic.
Spray starch is the lightest hold. It is fine for flattening a flake that is only slightly cupped, and it will not survive a damp room. Expect to redo it each year.
I am not going to pretend there is a consensus best answer here. Crocheters argue about this constantly and all four methods genuinely work; they just fail in different ways. If the flake matters, use commercial stiffener. If you are making thirty of them for a garland, glue and water is what most people end up doing.
Blocking, step by step
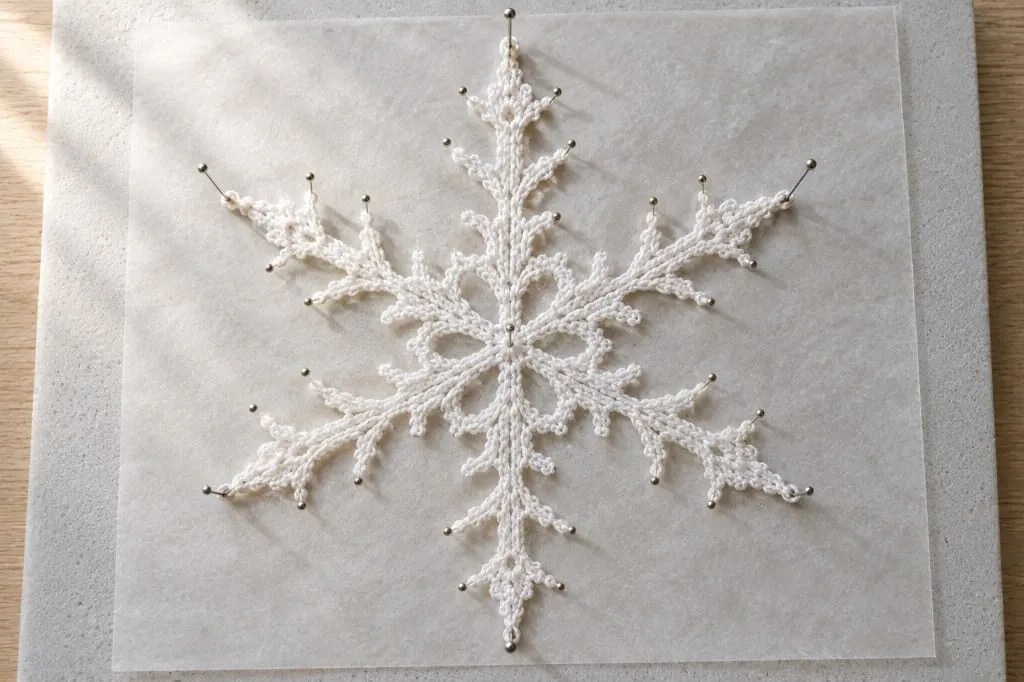
- Soak the flake in your chosen solution until it is saturated through, not just wet on the surface.
- Squeeze out the excess gently between your fingers. Do not wring it — the arms will twist and set twisted.
- Lay it on the foam board over a piece of wax paper or plastic wrap, so it does not glue itself to the board.
- Pin every point, pulling each arm out to its full length. Six arms means at least six pins, and pinning the picots as well gives crisper tips.
- Check that opposite arms are the same length by eye before you walk away. This is the last moment you can fix it.
- Leave it until it is bone dry. Overnight, or longer in a humid room. Unpinning early is how a flake ends up half-flat.
Use rustproof pins. Ordinary dressmaking pins sit in a wet solution for hours and can leave orange rust marks on white thread that will not wash out. Stainless steel or plastic-headed quilting pins are the safe choice.
Mistakes that ruin a snowflake
Uneven arms. Almost always a pinning problem, not a crochet problem. If one arm is short, it was pinned short. Re-wet the whole flake and block it again — you get unlimited attempts.
A tight, lumpy center. Too many stitches crammed into the ring, or the ring pulled closed before the stitches were evenly spread. Twelve dc is comfortable in a magic ring; sixteen is not.
Stiffening before weaving in the ends. Once the flake is hard, the tail is set at whatever angle it dried at and cannot be threaded anywhere. Weave first, stiffen second.
Working too tightly. Thread crochet punishes a tight tension more than yarn does, because the holes are the design. If the fabric is dense, the flake reads as a small white blob at three feet away. Loosen up, or go up a hook size.
Skipping the test flake. Stiffener behavior varies by brand, by thread, and by how humid your house is. The first one is a test, and treating it as one saves the other eleven.
Frequently asked
Can I use ordinary yarn instead of thread?
Yes, and for a first attempt it is easier to see what you are doing. A worsted flake comes out large and soft, more of a coaster than an ornament, and it needs proportionally more stiffener to hold its shape. Cotton holds a blocked shape better than acrylic, which has a springy memory that fights you.
How do I hang it?
A loop of clear fishing line through one picot disappears on a tree. Thread also works but is visible. Attach the hanger after stiffening, not before, or the loop dries flattened into the arm.
Will it stay stiff forever?
Commercial stiffener and glue will hold for years in a dry box. Sugar will not survive a humid summer. Store flakes flat between sheets of tissue rather than in a bag where they can bend and set bent.
Why does mine curl into a cup instead of lying flat?
Too many stitches in the outer round for the number in the round below, which forces a ruffle, or too few, which pulls it into a dome. Before blaming your blocking, lay the unstiffened flake down and see which way it wants to go. A cup means the outer round is too tight, a ruffle means it is too loose.
What should I make next?
If you want something with a bit more shaping, the gnome is the other Christmas piece worth learning, and it is built from cones rather than flat rounds. For the yarn side of seasonal work — including whether the sparkly stuff is worth the trouble — see yarn for Christmas crochet.
- christmas
- snowflake
- thread crochet
- blocking
- ornaments
- how to
Read this next
- Halloween Crochet Card Wallet with Ghost (Easy Flap + Button) Step-by-step Halloween card wallet: measure a real card, crochet one orange rectangle, fold a flap, add a black button, sew on a tiny ghost. Gift-ready and reel-friendly.
- Christmas Granny Square Variations Four color layouts for a classic granny square in Christmas colors, how to join them into a blanket or set, and why red and green so often turn muddy.
- Crochet Santa Amigurumi for Beginners Build a Santa from one continuous body, then add the hat, beard and belt. Includes safe eye choices for children and the fixes for a lopsided face.